


The MEAN (MongoDB, Express, Angular, Node.js) stack is a popular stack. It represents the opportunity to work with JavaScript on both sides of the application (Backend & Frontend).
MEAN(MongoDB,Express,Angular,Node.js)堆栈是一个流行的堆栈。 它代表了在应用程序的两侧(后端和前端)使用JavaScript的机会。
During this lecture I’ll show you how to initialize your environment and workspace (without the MongoDB database as a first step).
在本讲座中,我将向您展示如何初始化环境和工作区(第一步,不使用MongoDB数据库)。
1.一些定义: (1. Some definitions:)
Node.js: cross-platform open-source JavaScript runtime environment (executing JavaScript code) outside the browser. Used to build backend services (Application Programming Interface) and for other purposes. Great for prototyping and building super fast and highly scalable applications, it’s very easy to start a new application using Node.js especially for Frontend developers who don’t like the back side.
Node.js :浏览器外部的跨平台开源JavaScript运行时环境(执行JavaScript代码)。 用来构建后端服务(A pplication P AGC软件我覆盖整个院落)和其他用途 。 非常适合用于原型设计和构建超快速且高度可扩展的应用程序,使用Node.js轻松启动新应用程序非常容易,特别是对于不喜欢背面的Frontend开发人员而言。
Express: flexible web application framework for Node.js. Having a huge community of developers and supporters, it’s considered as a standard for building web applications and APIs with Node.js.
Express :Node.js的灵活Web应用程序框架。 它拥有庞大的开发人员和支持者社区,被视为使用Node.js构建Web应用程序和API的标准。
Angular: JavaScript Framework which allows you to create reactive Single Page Applications (SPA). Angular is open source and led by the Angular team at Google and several contributors and organizations.
角 :JavaScript框架 ,它允许你创建英格尔P 年龄 pplications(SPA)ReactS上 。 Angular是开源的,由Google的Angular团队以及一些贡献者和组织领导。
2.创建堆栈 (2. Create the stack)
🤓 Tools and workspace: Angular-Setting up the local environment and workspace
🤓工具和工作空间: 角度设置本地环境和工作空间
新的Angular应用 (New Angular application)
Using the Angular CLI:
使用Angular CLI:
ng new <application name>
ng new <application name>
Then go inside the created folder:
然后进入创建的文件夹:
cd <application name>
cd <application name>
Run your Angular application and check if everything goes well:
运行您的Angular应用程序并检查一切是否顺利:
ng server and check the link http:// localhost:4200
ng server 并检查链接http:// localhost:4200
服务器端 (The server side)
Under the same folder, we need to add our server properties.
在同一文件夹下,我们需要添加服务器属性。
First let’s install Express and body-parser:
首先让我们安装Express和body-parser :
npm install express body-parser --saveThen, we will create a server.js file in order to define all the server properties (the code will be commented for more details 😁):
然后,我们将创建一个server.js 文件以定义所有服务器属性(代码将被注释以获取更多详细信息😁):
// Use Express
var express = require("express");
// Use body-parser
var bodyParser = require("body-parser");


// Create new instance of the express server
var app = express();


// Define the JSON parser as a default way
// to consume and produce data through the
// exposed APIs
app.use(bodyParser.json());


// Create link to Angular build directory
// The `ng build` command will save the result
// under the `dist` folder.
var distDir = __dirname + "/dist/";
app.use(express.static(distDir));


// Init the server
var server = app.listen(process.env.PORT || 8080, function () {
    var port = server.address().port;
    console.log("App now running on port", port);
});


/*  "/api/status"
 *   GET: Get server status
 *   PS: it's just an example, not mandatory
 */
app.get("/api/status", function (req, res) {
    res.status(200).json({ status: "UP" });
});
向API服务器发出请求 (Make a request to the API server)
Let’s define the API target for the Angular application. As you know the Angular application is running on 4200 port and the server on the 8080 one.
让我们为Angular应用程序定义API目标。 如您所知,Angular应用程序在4200端口上运行,而服务器在8080端口上运行。
We must define that inside a
proxy.config.jsonfile:我们必须在
proxy.config.json文件中定义它:
{
    "/api/*": {
        "target": "http://localhost:8080",
        "secure": false,
        "logLevel": "debug"
    }
}- Using the Angular CLI, we will create an Angular service to call the server’s status exposed endpoint: 使用Angular CLI,我们将创建一个Angular服务来调用服务器的状态公开端点:
ng g s shared/status
ng gs shared/status
🤓 I put the service inside a shared folder, feel free to change that !
🤓我将服务放在shared 文件夹,随时更改!
Inside the generated status.service.js we will make a call to the server:
在生成的status.service.js我们将调用服务器:
import { Injectable } from '@angular/core';
import { Http } from '@angular/http';


@Injectable({
  providedIn: 'root'
})
export class StatusService {
  private statusUrl = '/api/status';


  constructor(private http: Http) { }


  // Get the status
  getStatus(): Promise<void | any> {
    return this.http.get(this.statusUrl)
               .toPromise()
               .then(response => response.json())
               .catch(this.error);
  }


  // Error handling
  private error (error: any) {
    let message = (error.message) ? error.message :
    error.status ? `${error.status} - ${error.statusText}` : 'Server error';
    console.error(message);
  }
}
We will use this service when we initialize our application (inside the app.component.ts file and using the OnInit lifecycle hook interface):
初始化应用程序时(在app.component.ts内部),我们将使用此服务。 文件并使用OnInit生命周期挂钩接口):
import { Component, OnInit } from '@angular/core';
import { StatusService } from './shared/status.service';


@Component({
  selector: 'app-root',
  templateUrl: './app.component.html',
  styleUrls: ['./app.component.css']
})
export class AppComponent implements OnInit {
  title = 'node-express-angular';
  status = 'DOWN';


  constructor(private statusService: StatusService) { }


  ngOnInit() {
    this.statusService
      .getStatus()
      .then((result: any) => {
        this.status = result.status;
      });
  }


}
测验 (Tests)
First let’s take a look to the final structure:
首先,让我们看一下最终结构:

😁 I removed some useless code from app.component.html , you can check that on the GitHub repository.
😁我从app.component.html删除了一些无用的代码 ,您可以在GitHub存储库上进行检查。
Inside the application folder, please run those two commands:
在应用程序文件夹中,请运行以下两个命令:
ng serve --proxy-config proxy.config.jsonto build and serve the Angular application and the npm start in order to run the server side.
构建和服务Angular应用程序,然后npm start 为了运行服务器端。
⚠️ The npm start command must be defined inside the package.json file:
The️npm npm start 命令必须在package.json定义 文件:
.
.
.
"scripts": {
    "ng": "ng",
    "start": "node server.js",
    "build": "ng build",
    "test": "ng test",
    "lint": "ng lint",
    "e2e": "ng e2e"
  }
.
.
.
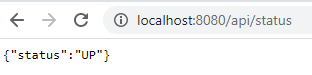
To check the use this link
http://localhost:8080/api/statuswith your favorite browser:要检查使用此链接
http://localhost:8080/api/status使用您喜欢的浏览器:
For the Angular application, check the
http://localhost:4200link:对于Angular应用程序,请检查
http://localhost:4200链接:


有用的链接 (Useful links)
GitHub repository: https://github.com/DjihadBengati/node-express-angular/tree/NODEJS_EXPRESS_ANGULAR
GitHub repository : https GitHub repository : //github.com/DjihadBengati/node-express-angular/tree/NODEJS_EXPRESS_ANGULAR
翻译自: https://medium.com/swlh/node-js-express-angular-stack-d6e328cffe6b


 2185
2185

 被折叠的 条评论
为什么被折叠?
被折叠的 条评论
为什么被折叠?
 到【灌水乐园】发言


