


In this article, we will see how to implement MVVM architecture with Hilt, RxJava, Retrofit, Room, Live Data, and View Binding.
在本文中,我们将看到如何使用Hilt,RxJava,Retrofit,Room,Live Data和View Binding来实现MVVM体系结构。
This article is for someone
本文是给某人的
- New to Dependency Injection using Hilt 使用Hilt进行依赖注入的新功能
- Migrating to Hilt from Dagger. 从Dagger迁移到Hilt。
In this project, we will fetch details form a REST API and then use Room to save it offline. Since a number of concepts are being used here we will look at each of them one by one.
在此项目中,我们将从REST API获取详细信息,然后使用Room离线保存它。 由于这里使用了许多概念,因此我们将逐一介绍它们。
If you want to learn about dagger first you can check out this article. It will be helpful for you to understand hilt more easily.
如果您想先学习匕首,可以阅读这篇文章 。 这将有助于您更轻松地理解刀柄。
项目结构: (Project structure:)
Let's dive into code.
让我们深入研究代码。
First, add all the required dependencies to your project.
首先,将所有必需的依赖项添加到您的项目中。
apply plugin: 'com.android.application'
apply plugin: 'dagger.hilt.android.plugin'


android {
    compileSdkVersion 29
    buildToolsVersion "29.0.2"


    defaultConfig {
        applicationId "com.example.pokemon"
        minSdkVersion 19
        targetSdkVersion 29
        versionCode 1
        versionName "1.0"
        multiDexEnabled true


        testInstrumentationRunner "androidx.test.runner.AndroidJUnitRunner"
    }


    buildTypes {
        release {
            minifyEnabled false
            proguardFiles getDefaultProguardFile('proguard-android-optimize.txt'), 'proguard-rules.pro'
        }
    }
    compileOptions {
        sourceCompatibility = 1.8
        targetCompatibility = 1.8
    }


    viewBinding {
        enabled = true
    }


}


dependencies {
    implementation fileTree(dir: 'libs', include: ['*.jar'])


    def room_version = "2.2.5"
    def nav_version = "2.3.0-beta01"


    implementation "androidx.recyclerview:recyclerview:1.1.0"
    implementation "androidx.cardview:cardview:1.0.0"
    implementation 'com.google.android.material:material:1.1.0'
    implementation 'com.android.support:multidex:1.0.3'


    // Hilt
    implementation "com.google.dagger:hilt-android:2.28-alpha"
    annotationProcessor 'com.google.dagger:hilt-android-compiler:2.28-alpha'
    implementation 'androidx.hilt:hilt-lifecycle-viewmodel:1.0.0-alpha01'
    annotationProcessor 'androidx.hilt:hilt-compiler:1.0.0-alpha01'


    //RxJava
    implementation 'io.reactivex.rxjava3:rxandroid:3.0.0'
    implementation 'io.reactivex.rxjava3:rxjava:3.0.0'


    // Retrofit
    implementation 'com.squareup.retrofit2:retrofit:2.9.0'
    implementation 'com.squareup.retrofit2:converter-gson:2.9.0'
    implementation "com.github.akarnokd:rxjava3-retrofit-adapter:3.0.0"


    // ViewModel
    implementation 'androidx.lifecycle:lifecycle-viewmodel:2.2.0'


    // LiveData
    implementation 'androidx.lifecycle:lifecycle-livedata:2.2.0'


    // Room
    implementation "androidx.room:room-runtime:$room_version"
    annotationProcessor "androidx.room:room-compiler:$room_version"
    implementation "androidx.room:room-rxjava2:$room_version"


    // Navigation
    implementation "androidx.navigation:navigation-fragment:$nav_version"
    implementation "androidx.navigation:navigation-ui:$nav_version"


    // Glide
    implementation 'com.github.bumptech.glide:glide:4.11.0'
    annotationProcessor 'com.github.bumptech.glide:compiler:4.11.0'


    implementation 'androidx.appcompat:appcompat:1.1.0'
    implementation 'androidx.constraintlayout:constraintlayout:1.1.3'
    testImplementation 'junit:junit:4.12'
    androidTestImplementation 'androidx.test.ext:junit:1.1.1'
    androidTestImplementation 'androidx.test.espresso:espresso-core:3.2.0'
}
To setup hilt, you can also find the instructions from here.
要设置刀柄,您还可以从此处找到说明。
设置API服务 (Setting up API service)
To fetch details we are using PokeApi here.
为了获取详细信息,我们在这里使用PokeApi 。
package com.example.pokemon.network;


import com.example.pokemon.model.PokemonResponse;


import javax.annotation.Generated;


import io.reactivex.rxjava3.core.Observable;
import retrofit2.http.GET;


public interface PokeApiService {


    @GET("pokemon")
    Observable<PokemonResponse> getPokemons();
}
As you can see the return type is Observable will see more about RxJava later in the article.
如您所见,返回类型为Observable,将在本文后面的内容中进一步了解RxJava。
Our Pokemon and PokemonResponse model class look like this:
我们的Pokemon和PokemonResponse模型类如下所示:
package com.example.pokemon.model;


import androidx.room.Entity;
import androidx.room.PrimaryKey;


import io.reactivex.rxjava3.schedulers.Schedulers;


/**
 * Created by Abhinav Singh on 17,June,2020
 */
public class Pokemon {


    private int id;
    private String name;


    private String url;


    public Pokemon(String name, String url) {
        this.name = name;
        this.url = url;
    }


    public String getName() {
        return name;
    }


    public void setName(String name) {
        this.name = name;
    }


    public String getUrl() {
        return url;
    }


    public void setUrl(String url) {
        this.url = url;
    }


    public int getId() {
        return id;
    }


    public void setId(int id) {
        this.id = id;
    }
}
package com.example.pokemon.model;
import java.util.ArrayList;
public class PokemonResponse {
private Integer count;
private String next,previous;
private ArrayList<Pokemon> results;
public PokemonResponse(Integer count, String next, String previous, ArrayList<Pokemon> results) {
this.count = count;
this.next = next;
this.previous = previous;
this.results = results;
}
public Integer getCount() {
return count;
}
public void setCount(Integer count) {
this.count = count;
}
public String getNext() {
return next;
}
public void setNext(String next) {
this.next = next;
}
public String getPrevious() {
return previous;
}
public void setPrevious(String previous) {
this.previous = previous;
}
public ArrayList<Pokemon> getResults() {
return results;
}
public void setResults(ArrayList<Pokemon> results) {
this.results = results;
}
}设置击剑 (Setting up Hilt)
Base Application class: This class is necessary for the hilt and you should annotate it with @HiltAndroidApp. Don't forget to add it to the manifest file in the application tag.
基础应用程序类 :该类对于hilt是必需的,您应该使用@HiltAndroidApp对其进行注释 。 不要忘记将其添加到application标签中的清单文件中。
<application
    android:name=".BaseApplication"
package com.example.pokemon;
import android.app.Application;
import dagger.hilt.android.HiltAndroidApp;
/**
* Created by Abhinav Singh on 17,June,2020
*/
@HiltAndroidApp
public class BaseApplication extends Application {
}Now we will create a Network module. Now, what is a module? A module is a class that provides information to the hilt about how to provide an instance of a class we don't own. For hilt to instantiate objects for us we use @Inject annotation above the constructor of the class but when where to put the @Inject annotation when we don't own a class or when we are dealing with an interface which doesn't have a constructor in these cases we use @Provide annotation inside the module class to tell hilt to instantiate these objects for us. To setup module create a class NetworkModule and annotate it with @Module annotation now in hilt we have to add one more annotation which is @InsatallIn annotation and we will pass ApplicationComponent here because we want the NetworkModule to be available for us for application scope.
现在,我们将创建一个网络模块。 现在,什么是模块? 模块是一个类,它提供有关如何提供我们不拥有的类的实例的信息。 为了为我们实例化对象,我们在类的构造函数上方使用@Inject批注,但是当我们不拥有类或正在处理没有构造函数的接口时,何时在何处放置@Inject批注在这些情况下,我们在模块类中使用@Provide注释来告诉hilt为我们实例化这些对象。 要设置模块,请创建一个类NetworkModule并立即使用@Module批注对其进行批注,我们必须再添加一个批注@InsatallIn批注,并在此处传递ApplicationComponent,因为我们希望NetworkModule可用于我们的应用程序范围。
In the module, we will provide a method to get the PokeApiService object. Create a method providePokeApiService of PokeApiService return type and annotate it with @Provide annotation.
在模块中,我们将提供一种获取PokeApiService对象的方法。 创建一个PokeApiService返回类型的方法ProvidePokeApiService,并使用@Provide注释对其进行注释。
package com.example.pokemon.di;
import androidx.core.content.PermissionChecker;
import com.example.pokemon.network.PokeApiService;
import javax.inject.Singleton;
import dagger.Module;
import dagger.Provides;
import dagger.hilt.InstallIn;
import dagger.hilt.android.components.ApplicationComponent;
import hu.akarnokd.rxjava3.retrofit.RxJava3CallAdapterFactory;
import retrofit2.Retrofit;
import retrofit2.converter.gson.GsonConverterFactory;
/**
* Created by Abhinav Singh on 17,June,2020
*/
@Module
@InstallIn(ApplicationComponent.class)
public class NetworkModule {
@Provides
@Singleton
public static PokeApiService providePokemonApiService(){
return new Retrofit.Builder()
.baseUrl(" https://pokeapi.co/api/v2/")
.addConverterFactory(GsonConverterFactory.create())
.addCallAdapterFactory(RxJava3CallAdapterFactory.create())
.build()
.create(PokeApiService.class);
}
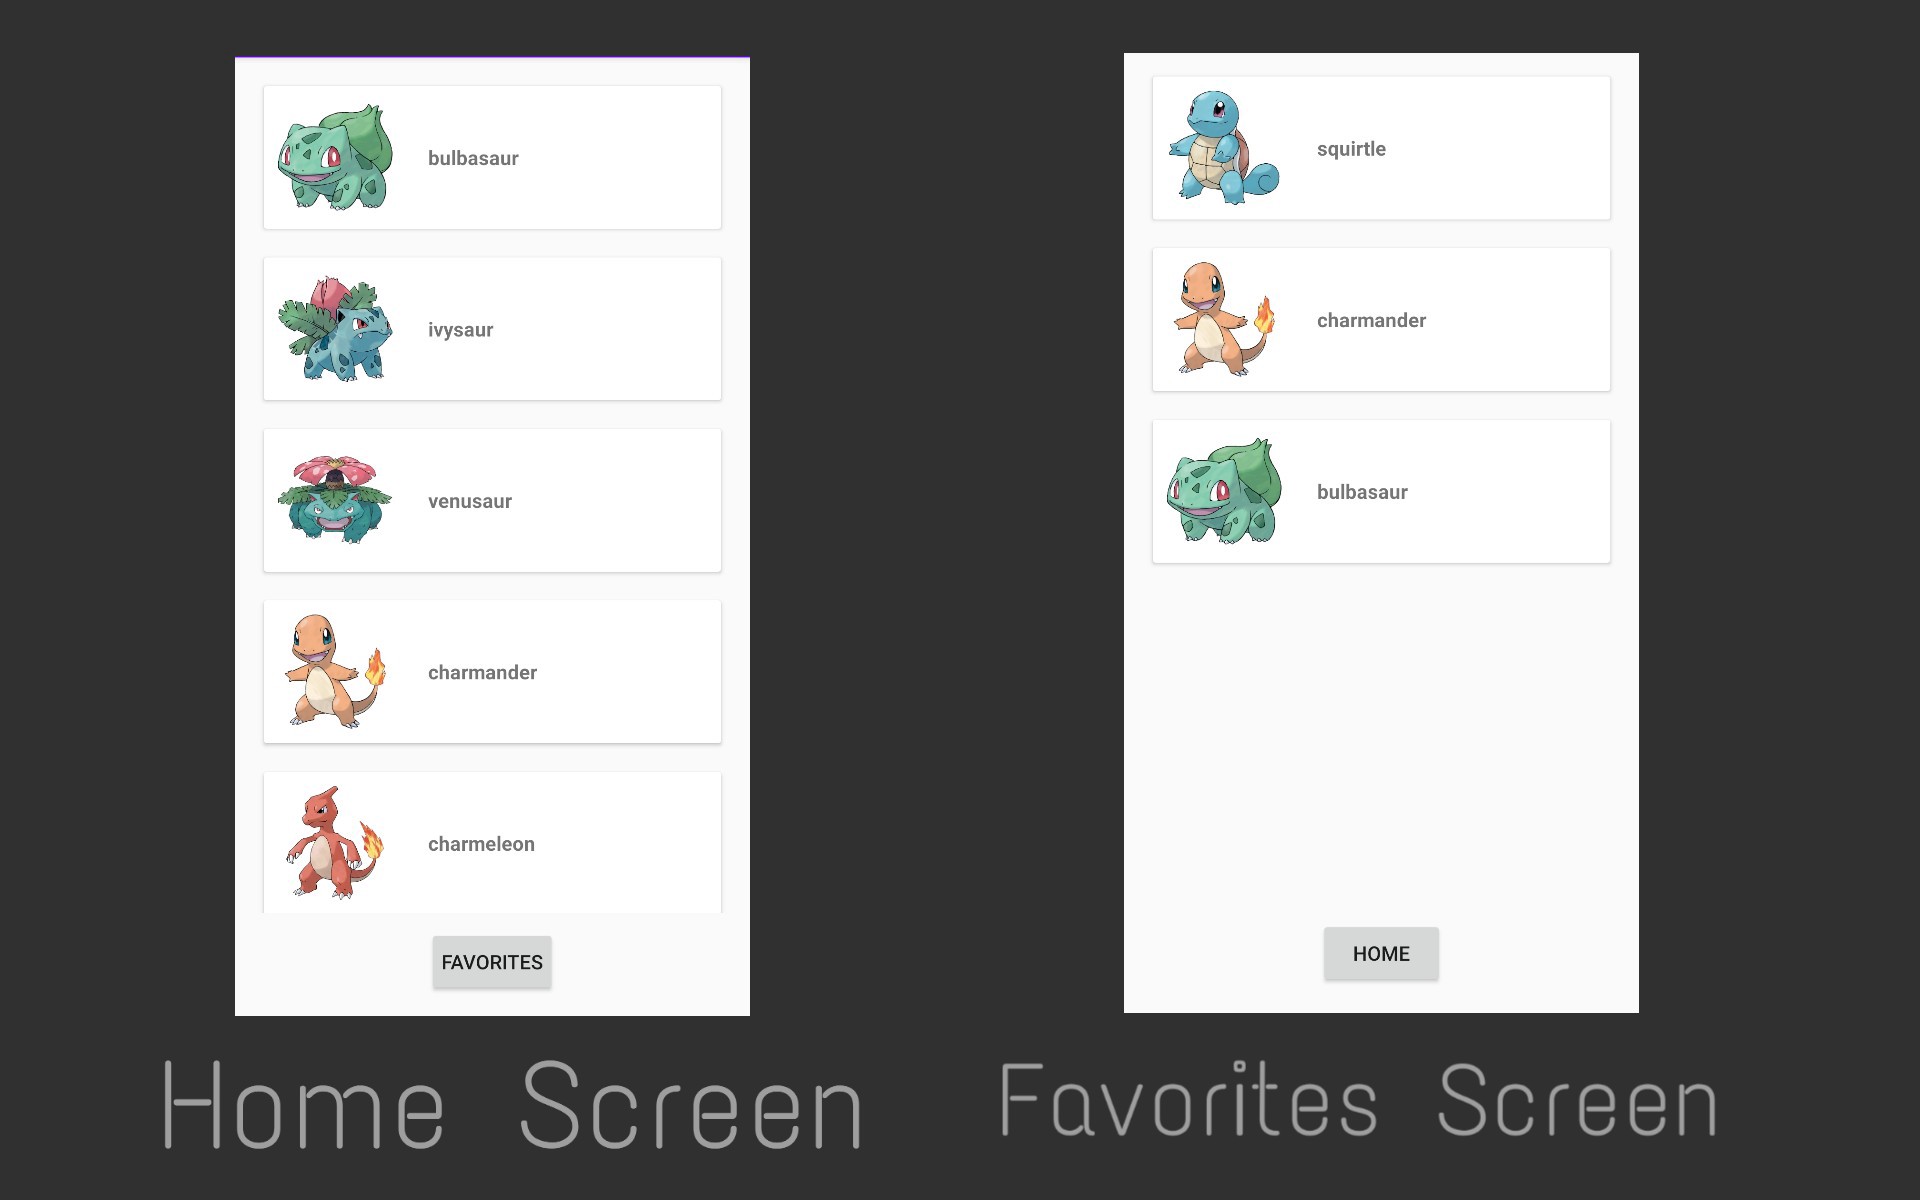
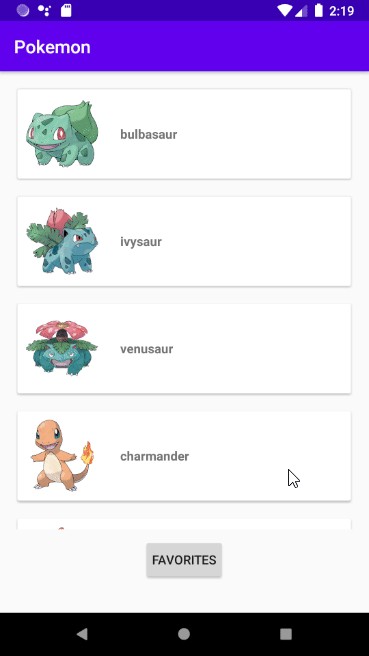
}Our app will have two fragments one to show the list of pokemon fetched from the API and the second fragment will show the favorites pokemon which we have saved using Room and we will use a button to switch between these fragments.
我们的应用程序将有两个片段,一个片段显示从API提取的宠物小精灵的列表,第二个片段将显示我们使用Room保存的最爱宠物小精灵,然后使用按钮在这些片段之间进行切换。
设置存储库 (Setting up Repository)
public class Repository {


    private PokeDao pokeDao;
    private PokeApiService apiService;


    @Inject
    public Repository(PokeDao pokeDao, PokeApiService apiService) {
        this.pokeDao = pokeDao;
        this.apiService = apiService;
    }


    public Observable<PokemonResponse> getPokemons(){
        return apiService.getPokemons();
    }
}
We have used @Inject above the Repository constructor so that whenever we need a Repository object hilt will provide us Repository Object. The Repository class has two dependencies PokeApiService and PokeDao. PokeDao is related to Room ignore it for now we will talk about it later in the article. The important point is if we want hilt to provide us Repository object we also have to tell hilt how to provide an instance of classes or interfaces on which our Repository class depends. We have already created NetworkModule which provides a method to get a PokeApiService object. So when providing us the Repository object hilt will automatically provide all the dependencies of the Repository class.
我们在Repository构造函数上方使用了@Inject ,以便每当需要Repository对象时,hilt将为我们提供Repository对象。 Repository类具有两个依赖项PokeApiService和PokeDao。 PokeDao与Room忽略它有关,现在我们将在本文后面讨论。 重要的一点是,如果我们希望提供我们的Repository对象,我们还必须告诉hilt如何提供我们的Repository类所依赖的类或接口的实例。 我们已经创建了NetworkModule,它提供了一种获取PokeApiService对象的方法。 因此,在向我们提供存储库对象时,hilt将自动提供存储库类的所有依赖项。
We have simply created a method getPokemons to return the Observable of PokemonResponse type.
我们仅创建了一个getPokemons方法来返回PokemonResponse类型的Observable。
设置ViewModel (Setting up ViewModel)
public class PokemonViewModel extends ViewModel {
    private static final String TAG = "PokemonViewModel";


    private Repository repository;
    private MutableLiveData<ArrayList<Pokemon>> pokemonList = new MutableLiveData<>();

    @ViewModelInject
    public PokemonViewModel(Repository repository) {
        this.repository = repository;
    }


    public MutableLiveData<ArrayList<Pokemon>> getPokemonList() {
        return pokemonList;
    }


    public void getPokemons(){
        repository.getPokemons()
                .subscribeOn(Schedulers.io())
                .map(new Function<PokemonResponse, ArrayList<Pokemon>>() {
                    @Override
                    public ArrayList<Pokemon> apply(PokemonResponse pokemonResponse) throws Throwable {
                        ArrayList<Pokemon> list = pokemonResponse.getResults();
                        for(Pokemon pokemon : list){
                            String url = pokemon.getUrl();
                            String[] pokemonIndex = url.split("/");
                            pokemon.setUrl("https://pokeres.bastionbot.org/images/pokemon/"+pokemonIndex[pokemonIndex.length-1] +".png");
                        }
                        Log.e(TAG, "apply: "+list.get(2).getUrl());
                        return list;
                    }
                })
                .observeOn(AndroidSchedulers.mainThread())
                .subscribe(result -> pokemonList.setValue(result),
                        error-> Log.e(TAG, "getPokemons: " + error.getMessage() ));
    }
}
Here we see a new annotation @ViewModelInject and trust me it is the best thing about using hilt. If you have been using dagger in your projects with MVVM you must have faced the problem of injecting viewmodels. The most famous workaround was to create your own ViewModelFactory class but that was a long and tedious work. But with the hilt, this annotation will do all the work and you can easily inject ViewModels.
在这里,我们看到一个新的注释@ViewModelInject ,请相信我,这是使用hilt的最好方法。 如果您在使用MVVM的项目中一直使用匕首,那么您一定会遇到注入视图模型的问题。 最著名的解决方法是创建自己的ViewModelFactory类,但这是一个漫长而乏味的工作。 但是,有了此刀柄,该注释将完成所有工作,您可以轻松注入ViewModels。
Here we have created a method getPokemons. As we know the repository.getPokemons() will return an Observable we will observe it here and then set the pokemonList(Mutable Live Data) to update the fragment of the changes.
在这里,我们创建了一个方法getPokemons。 众所周知, repository.getPokemons()将返回一个Observable,我们将在此处进行观察,然后设置pokemonList(Mutable Live Data)来更新更改片段。
RxJava has three basic concepts Observable, Observers, and Operators.
RxJava具有三个基本概念Observable,Observers和Operators。
Think of observable as some entity emitting data but what is the benefit of observable emitting data if no one is there to observe it so we have Observers which observes data emitted by the Observables. Operators are something that manipulates the data or transforms the data and passes it to the subscribers.
可以将可观察的对象看作是一些发出数据的实体,但是如果没有人观察可观察的数据,那么观察到的数据有什么好处,因此我们有观察者来观察可观察对象发出的数据。 运算符是操纵数据或转换数据并将其传递给订户的东西。
The subscribeOn(Schedulers.io()) means that we want to subscribe on the background thread and observeOn(AndroidSchedulers.mainThread()) means that we want to observe the data on the main thread. The map operator is used here because we want Pokemon List but we are getting an Observable of PokemonReosponse so we can get the list of pokemon from pokemonResponse.getResults() but we also want to change one more thing. The URL we get from Pokemon Object contains details about the pokemon but we just want the image of the pokemon so we will get the index of the pokemon from this URL and then concatenate it with different URL which will directly provide us the URL for the pokemon image.
subscriptionOn (Schedulers.io())意味着我们要在后台线程上订阅, observeOn(AndroidSchedulers.mainThread() )意味着我们要在主线程上观察数据。 在这里使用map运算符是因为我们想要Pokemon List,但是我们得到了Observable的PokemonReosponse,因此我们可以从pokemonResponse.getResults()中获取pokemon的列表,但是我们还想更改另一件事。 我们从Pokemon对象获取的URL包含有关Pokemon的详细信息,但我们只需要Pokemon的图像,因此我们将从该URL获取Pokemon的索引,然后将其与其他URL串联,这将直接为我们提供Pokemon的URL图片。
设置房间 (Setting up Room)
For room setup, we need three things Entity, Dao, and Database.
对于房间设置,我们需要三件事Entity , Dao和Database 。
For Entity, we will update our Pokemon Pojo class as below
对于Entity,我们将如下更新Pokemon Pojo类
package com.example.pokemon.model;


import androidx.room.Entity;
import androidx.room.PrimaryKey;


import io.reactivex.rxjava3.schedulers.Schedulers;


/**
 * Created by Abhinav Singh on 17,June,2020
 */
@Entity(tableName = "favorite_table")
public class Pokemon {


    @PrimaryKey(autoGenerate = true)
    private int id;
    private String name;


    private String url;


    public Pokemon(String name, String url) {
        this.name = name;
        this.url = url;
    }


    public String getName() {
        return name;
    }


    public void setName(String name) {
        this.name = name;
    }


    public String getUrl() {
        return url;
    }


    public void setUrl(String url) {
        this.url = url;
    }


    public int getId() {
        return id;
    }


    public void setId(int id) {
        this.id = id;
    }
}
For Dao, we will create an interface PokeDao as follows
对于Dao,我们将创建一个接口PokeDao ,如下所示
@Dao
public interface PokeDao {


    @Insert
    void insertPokemon(Pokemon pokemon);


    @Query("DELETE FROM favorite_table WHERE name = :pokemonName")
    void deletePokemon(String pokemonName);


    @Query("DELETE FROM favorite_table")
    void deleteAll();


    @Query("SELECT * FROM favorite_table")
    LiveData<List<Pokemon>> getFavoritePokemons();
}
We have created methods to insert Pokemon in our favorites list, delete pokemon from the list, and get all pokemons from the list.
我们创建了一些方法来将Pokemon插入到收藏夹列表中,从列表中删除Pokemon,并从列表中获取所有Pokemon。
Now we will create the abstract database class PokemonDB for storing our favorites pokemon.
现在,我们将创建抽象数据库类PokemonDB来存储我们喜欢的pokemon。
@Database(entities = {Pokemon.class},version = 2,exportSchema = false)
public abstract class PokemonDB extends RoomDatabase {
        public abstract PokeDao pokeDao();
}
We have added an abstract method of PokeDao return type.
我们添加了PokeDao返回类型的抽象方法。
Now we will create DatabaseModule which will help hilt to provide us with the instance if this database.
现在,我们将创建DatabaseModule ,它将帮助hilt向我们提供该数据库的实例。
@Module
@InstallIn(ApplicationComponent.class)
public class DataBaseModule {


    @Provides
    @Singleton
    public static PokemonDB providePokemonDB(Application application){
         return Room.databaseBuilder(application,PokemonDB.class,"Favorite Database")
                 .fallbackToDestructiveMigration()
                 .allowMainThreadQueries()
                 .build();
    }


    @Provides
    @Singleton
    public static PokeDao providePokeDao(PokemonDB pokemonDB){
        return pokemonDB.pokeDao();
    }
}
We have added the @Module and @InstallIn annotation above this class to tell hilt that this is a module and it is required for application cope.@Singleton is used to have a single instance of this database over the whole app.
我们在此类上方添加了@Module和@InstallIn注释,以告知hilt这是一个模块,对于应用程序来说是必需的。 @Singleton用于在整个应用程序中具有此数据库的单个实例。
Now we will modify our Repository class and PokemonViewModel class.
现在,我们将修改我们的Repository类和PokemonViewModel类。
public class Repository {


    private PokeDao pokeDao;
    private PokeApiService apiService;


    @Inject
    public Repository(PokeDao pokeDao, PokeApiService apiService) {
        this.pokeDao = pokeDao;
        this.apiService = apiService;
    }


    public Observable<PokemonResponse> getPokemons(){
        return apiService.getPokemons();
    }


    public void insertPokemon(Pokemon pokemon){
        pokeDao.insertPokemon(pokemon);
    }


    public void deletePokemon(String pokemonName){
        pokeDao.deletePokemon(pokemonName);
    }


    public void deleteAll(){
        pokeDao.deleteAll();
    }


    public LiveData<List<Pokemon>> getFavoritePokemon(){
        return pokeDao.getFavoritePokemons();
    }
}
public class PokemonViewModel extends ViewModel {
private static final String TAG = "PokemonViewModel";
private Repository repository;
private MutableLiveData<ArrayList<Pokemon>> pokemonList = new MutableLiveData<>();
private LiveData<List<Pokemon>> favoritePokemonList = null;
@ViewModelInject
public PokemonViewModel(Repository repository) {
this.repository = repository;
favoritePokemonList = repository.getFavoritePokemon();
}
public MutableLiveData<ArrayList<Pokemon>> getPokemonList() {
return pokemonList;
}
public void getPokemons(){
repository.getPokemons()
.subscribeOn(Schedulers.io())
.map(new Function<PokemonResponse, ArrayList<Pokemon>>() {
@Override
public ArrayList<Pokemon> apply(PokemonResponse pokemonResponse) throws Throwable {
ArrayList<Pokemon> list = pokemonResponse.getResults();
for(Pokemon pokemon : list){
String url = pokemon.getUrl();
String[] pokemonIndex = url.split("/");
pokemon.setUrl("https://pokeres.bastionbot.org/images/pokemon/"+pokemonIndex[pokemonIndex.length-1] +".png");
}
Log.e(TAG, "apply: "+list.get(2).getUrl());
return list;
}
})
.observeOn(AndroidSchedulers.mainThread())
.subscribe(result -> pokemonList.setValue(result),
error-> Log.e(TAG, "getPokemons: " + error.getMessage() ));
}
public void insertPokemon(Pokemon pokemon){
repository.insertPokemon(pokemon);
}
public void deletePokemon(String pokemonName){
repository.deletePokemon(pokemonName);
}
public LiveData<List<Pokemon>> getFavoritePokemonList() {
return favoritePokemonList;
}
public void getFavoritePokemon(){
favoritePokemonList = repository.getFavoritePokemon();
}
}Till now we have completed setting up Room, Hilt, and the ViewModel. Now we will set up the fragments and activity.
到目前为止,我们已经完成了Room,Hilt和ViewModel的设置。 现在,我们将设置片段和活动。
设置片段和活动 (Setting up Fragments and Activities)
Home Fragment
家庭片段
@AndroidEntryPoint
public class Home extends Fragment {
    private static final String TAG = "Home";
    private HomeBinding binding;
    private PokemonViewModel viewModel;
    private PokemonAdapter adapter;
    private ArrayList<Pokemon> pokemonList;


    @Nullable
    @Override
    public View onCreateView(@NonNull LayoutInflater inflater, @Nullable ViewGroup container, @Nullable Bundle savedInstanceState) {
        binding = HomeBinding.inflate(inflater,container,false);
        return binding.getRoot();
    }


    @Override
    public void onViewCreated(@NonNull View view, @Nullable Bundle savedInstanceState) {
        super.onViewCreated(view, savedInstanceState);


        viewModel = new ViewModelProvider(this).get(PokemonViewModel.class);


        initRecyclerView();
        observeData();
        setUpItemTouchHelper();
        viewModel.getPokemons();
    }


    private void setUpItemTouchHelper() {
        ItemTouchHelper.SimpleCallback simpleCallback = new ItemTouchHelper.SimpleCallback(0,ItemTouchHelper.RIGHT) {
            @Override
            public boolean onMove(@NonNull RecyclerView recyclerView, @NonNull RecyclerView.ViewHolder viewHolder, @NonNull RecyclerView.ViewHolder target) {
                return false;
            }


            @Override
            public void onSwiped(@NonNull RecyclerView.ViewHolder viewHolder, int direction) {
                int swipedPokemonPosition = viewHolder.getAdapterPosition();
                Pokemon pokemon = adapter.getPokemonAt(swipedPokemonPosition);
                viewModel.insertPokemon(pokemon);
                adapter.notifyDataSetChanged();
                Toast.makeText(getContext(),"Pokemon added to favorites.",Toast.LENGTH_SHORT).show();
            }
        };


        ItemTouchHelper itemTouchHelper = new ItemTouchHelper(simpleCallback);
        itemTouchHelper.attachToRecyclerView(binding.pokemonRecyclerView);
    }


    private void observeData() {
        viewModel.getPokemonList().observe(getViewLifecycleOwner(), new Observer<ArrayList<Pokemon>>() {
            @Override
            public void onChanged(ArrayList<Pokemon> pokemons) {
                Log.e(TAG, "onChanged: " + pokemons.size() );
                adapter.updateList(pokemons);
            }
        });
    }


    private void initRecyclerView() {
        binding.pokemonRecyclerView.setLayoutManager(new LinearLayoutManager(getContext()));
        adapter = new PokemonAdapter(getContext(),pokemonList);
        binding.pokemonRecyclerView.setAdapter(adapter);
    }
}
We have annotated the fragment with @AndroidEntryPoint which means that hilt should provide all the dependencies to this fragment that it asks for. One important point to be noted:-
我们用@AndroidEntryPoint注释了该片段,这意味着hilt应该提供它所要求的对该片段的所有依赖关系。 需要注意的重要一点:
If you annotate an Android class with @AndroidEntryPoint, then you also must annotate Android classes that depend on it. For example, if you annotate a fragment, then you must also annotate any activities where you use that fragment.
如果使用@AndroidEntryPoint注释Android类,则还必须注释依赖于它的Android类。 例如,如果注释一个片段,则还必须注释使用该片段的所有活动。
We have used ItemTouchHelper class for swiping function we will right swipe in the home fragment to add the pokemon to the favorites and left swipe the pokemon item in the favorites to delete them from the favorites list.
我们已经使用ItemTouchHelper类来实现滑动功能,我们将在主片段中向右滑动以将口袋妖怪添加到收藏夹中,然后向左滑动向收藏夹中的口袋妖怪项添加,以将它们从收藏夹列表中删除。
Favorites Fragment
收藏夹片段
@AndroidEntryPoint
public class Favorites extends Fragment {
    private FavoritesBinding binding;
    private PokemonViewModel viewModel;
    private PokemonAdapter adapter;
    private ArrayList<Pokemon> pokemonList;


    @Nullable
    @Override
    public View onCreateView(@NonNull LayoutInflater inflater, @Nullable ViewGroup container, @Nullable Bundle savedInstanceState) {
        binding = FavoritesBinding.inflate(inflater,container,false);
        return binding.getRoot();
    }


    @Override
    public void onViewCreated(@NonNull View view, @Nullable Bundle savedInstanceState) {
        super.onViewCreated(view, savedInstanceState);


        viewModel = new ViewModelProvider(this).get(PokemonViewModel.class);


        initRecyclerView();
        setUpItemTouchHelper();
        observeData();
        //viewModel.getFavoritePokemon();
    }


    private void observeData() {
        viewModel.getFavoritePokemonList().observe(getViewLifecycleOwner(), new Observer<List<Pokemon>>() {
            @Override
            public void onChanged(List<Pokemon> pokemons) {


                if(pokemons == null || pokemons.size() == 0)
                    binding.noFavoritesText.setVisibility(View.VISIBLE);
                else{
                    ArrayList<Pokemon> list = new ArrayList<>();
                    list.addAll(pokemons);
                    adapter.updateList(list);
                }
            }
        });
    }


    private void setUpItemTouchHelper() {
        ItemTouchHelper.SimpleCallback simpleCallback = new ItemTouchHelper.SimpleCallback(0,ItemTouchHelper.LEFT) {
            @Override
            public boolean onMove(@NonNull RecyclerView recyclerView, @NonNull RecyclerView.ViewHolder viewHolder, @NonNull RecyclerView.ViewHolder target) {
                return false;
            }


            @Override
            public void onSwiped(@NonNull RecyclerView.ViewHolder viewHolder, int direction) {
                int swipedPokemonPosition = viewHolder.getAdapterPosition();
                Pokemon pokemon = adapter.getPokemonAt(swipedPokemonPosition);
                viewModel.deletePokemon(pokemon.getName());
                Toast.makeText(getContext(),"Pokemon removed from favorites.",Toast.LENGTH_SHORT).show();
            }
        };


        ItemTouchHelper itemTouchHelper = new ItemTouchHelper(simpleCallback);
        itemTouchHelper.attachToRecyclerView(binding.favoritesRecyclerView);
    }


    private void initRecyclerView() {
        binding.favoritesRecyclerView.setLayoutManager(new LinearLayoutManager(getContext()));
        adapter = new PokemonAdapter(getContext(),pokemonList);
        binding.favoritesRecyclerView.setAdapter(adapter);
    }


}
We have done the same thing that we have done in the home fragment just change the swiping direction in ItemTouchHelper.
我们完成了与home片段相同的操作,只是在ItemTouchHelper中更改了滑动方向。
Main Activity
主要活动
@AndroidEntryPoint
public class MainActivity extends AppCompatActivity {
    private ActivityMainBinding binding;
    private boolean isFavoriteListVisible = false;


    @Override
    protected void onCreate(Bundle savedInstanceState) {
        super.onCreate(savedInstanceState);
        binding = ActivityMainBinding.inflate(getLayoutInflater());
        setContentView(binding.getRoot());


        getSupportFragmentManager().beginTransaction().replace(R.id.frameLayout,new Home())
                .commit();


        binding.changeFragment.setOnClickListener(new View.OnClickListener() {
            @Override
            public void onClick(View view) {
                if(isFavoriteListVisible){
                  isFavoriteListVisible = false;
                  binding.changeFragment.setText("Favorites");
                  getSupportFragmentManager().beginTransaction().replace(R.id.frameLayout,new Home())
                          .commit();
                }
                else {
                    isFavoriteListVisible = true;
                    binding.changeFragment.setText("Home");
                    getSupportFragmentManager().beginTransaction().replace(R.id.frameLayout,new Favorites())
                            .commit();
                }
            }
        });
    }
}
In the activity, we have used the button to change the fragments. As you can see we have used view binding here if you are not familiar with view binding check this it will help you to get your hands on view binding.
在活动中,我们使用了按钮来更改片段。 如您所见,如果您不熟悉视图绑定,我们将在这里使用视图绑定。请选中此选项 ,它将帮助您入门。
Finally, we will run the app now.
最后,我们将立即运行该应用程序。
You can find the whole code from here.
您可以从此处找到整个代码。
Now you are able to implement MVVM with Hilt, RxJava, Retrofit, Room LiveData, and View Binding.
现在,您可以使用Hilt,RxJava,Retrofit,Room LiveData和View Binding来实现MVVM。
If you find this article useful please share it with your friends.
如果您觉得这篇文章有用,请与您的朋友分享。


 596
596

 被折叠的 条评论
为什么被折叠?
被折叠的 条评论
为什么被折叠?
 到【灌水乐园】发言


