


livedata 应用
Among the wide range of tools that were released with Android Jetpack, Android Architecture Components, LiveData, and ViewModel are particularly useful. I’m creating this tutorial in response to Ashton Jones, who expressed that there are very few examples for integrating these Architecture Components with Google Firestore.
在与Android Jetpack一起发布的各种工具中,Android体系结构组件,LiveData和ViewModel特别有用。 我创建本教程是为了回应Ashton Jones ,他表示很少有将这些架构组件与Google Firestore集成的示例。
In this tutorial, you will learn how all these elements interact, creating a fully functional app with a back end (Firestore) and a front end (Android app) based on Google technologies.
在本教程中,您将学习所有这些元素如何相互作用,并基于Google技术创建具有后端(Firestore)和前端(Android应用)的功能齐全的应用。
In this first part, we will start by building the Android project. For illustrating the use of LiveData and ViewModel, we will create an app simulating a shopping grocery list.
在第一部分中,我们将从构建Android项目开始。 为了说明LiveData和ViewModel的用法,我们将创建一个模拟购物清单的应用程序。
Download the starter project from my website.
从我的网站下载入门项目。
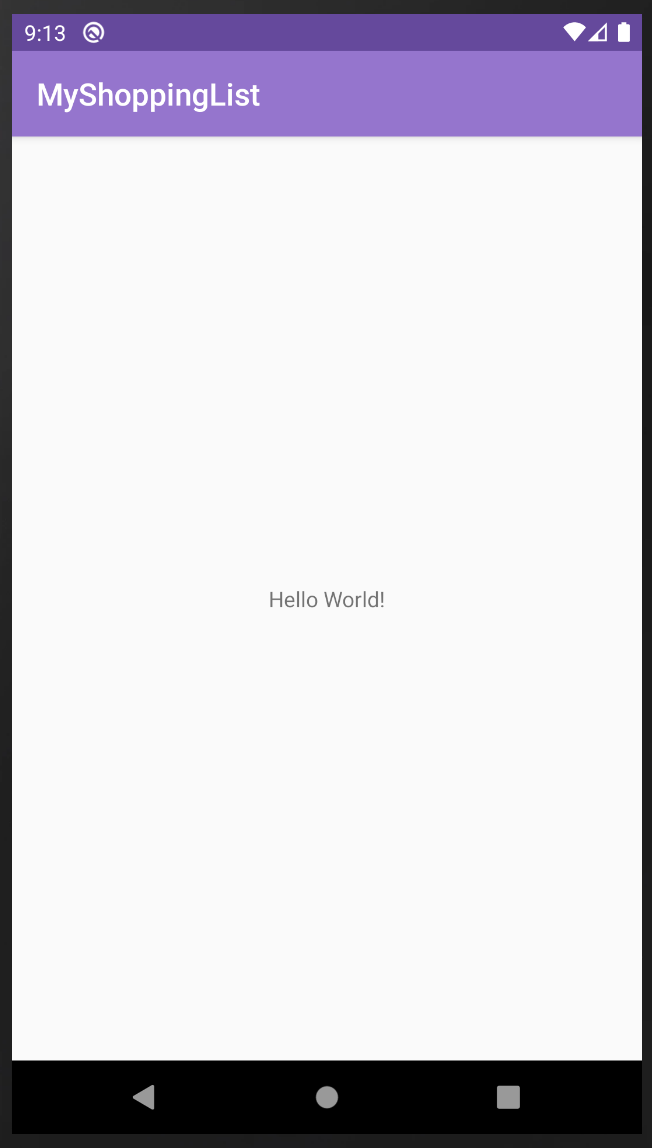
This is a simple Android Java project. It just contains a MainActivity.java file and the corresponding layout. Once the Gradle sync finishes, run the app and you should see a HelloWorld screen like in Image 1 below:
这是一个简单的Android Java项目。 它仅包含MainActivity.java文件和相应的布局。 Gradle同步完成后,运行应用程序,您应该会看到一个HelloWorld屏幕,如下图1所示:
建立项目的架构 (Setting Up the Project’s Architecture)
Once you get this working, you will create the folder structure of the app. Mobile architectures are widely discussed, but since Android introduced Architecture Components, they gave us a guideline pointing towards MVVM. In this first part of the project, you will focus on the View and ViewModel.
一旦工作成功,您将创建应用程序的文件夹结构。 移动架构已被广泛讨论,但是自从Android引入架构组件以来,它们为我们提供了指向MVVM的指南。 在项目的第一部分,您将专注于View和ViewModel。
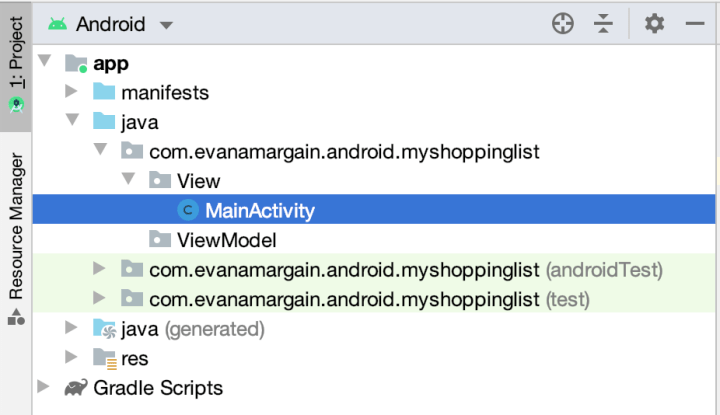
Under the Android project view in the left panel, create two new packages: one called “View” and another called “ViewModel.” Then drag MainActivity.java inside the View package. The resulting project structure should be similar to the one shown below in Image 2:
在左侧面板的Android项目视图下,创建两个新程序包:一个名为“ View”,另一个称为“ ViewModel”。 然后将MainActivity.java拖到View包中。 最终的项目结构应类似于下图2所示:
The next step is to create the ViewModel. Right-click on the ViewModel package and select New > Java Class. Give it a name, preferably with the suffix ViewModel — I will name it MainActivityViewModel.java. With these two files, we are able to work with both LiveData and ViewModel.
下一步是创建ViewModel。 右键单击ViewModel包,然后选择“新建”>“ Java类”。 给它起一个名字,最好加上后缀ViewModel-我将其命名为MainActivityViewModel.java 。 使用这两个文件,我们可以同时使用LiveData和ViewModel。

创建ViewModel (Creating the ViewModel)
Begin by creating your ViewModel. The first thing you need to do is extend the Android Architecture Components ViewModel library. Your class definition should look like this:
首先创建您的ViewModel。 您需要做的第一件事是扩展Android Architecture Components ViewModel库 。 您的类定义应如下所示:
public class MainActivityViewModel extends ViewModel {And if it is not imported automatically, also add the required dependency with the following line of code:
并且,如果它不是自动导入的,还可以通过以下代码行添加所需的依赖项:
import androidx.lifecycle.ViewModel;Then you will create an object to hold the shopping list. This object needs to be a MutableLiveData List of type String because your shopping list items are going to just be the names of the items.
然后,您将创建一个对象来保存购物清单。 该对象必须是String类型的MutableLiveData列表,因为您的购物清单商品将只是商品名称。
In a more realistic scenario, you would probably have a ShoppingItem object under your “model” package (which we didn’t create) and get the properties of this item, but I’m trying to create a minimal example. Create the list with this line of code inside the MainActivityViewModel class:
在更现实的情况下,您可能在“模型”包(我们未创建)下有一个ShoppingItem对象,并获取了该项目的属性,但是我试图创建一个最小的示例。 使用MainActivityViewModel类中的以下代码行创建列表:
private MutableLiveData<List<String>> shoppingList;The purpose of the variable above is to hold all the shopping list items in a LiveData object.
上面的变量的目的是将所有购物清单项目保存在LiveData对象中。
异步获取LiveData (Getting LiveData Asynchronously)
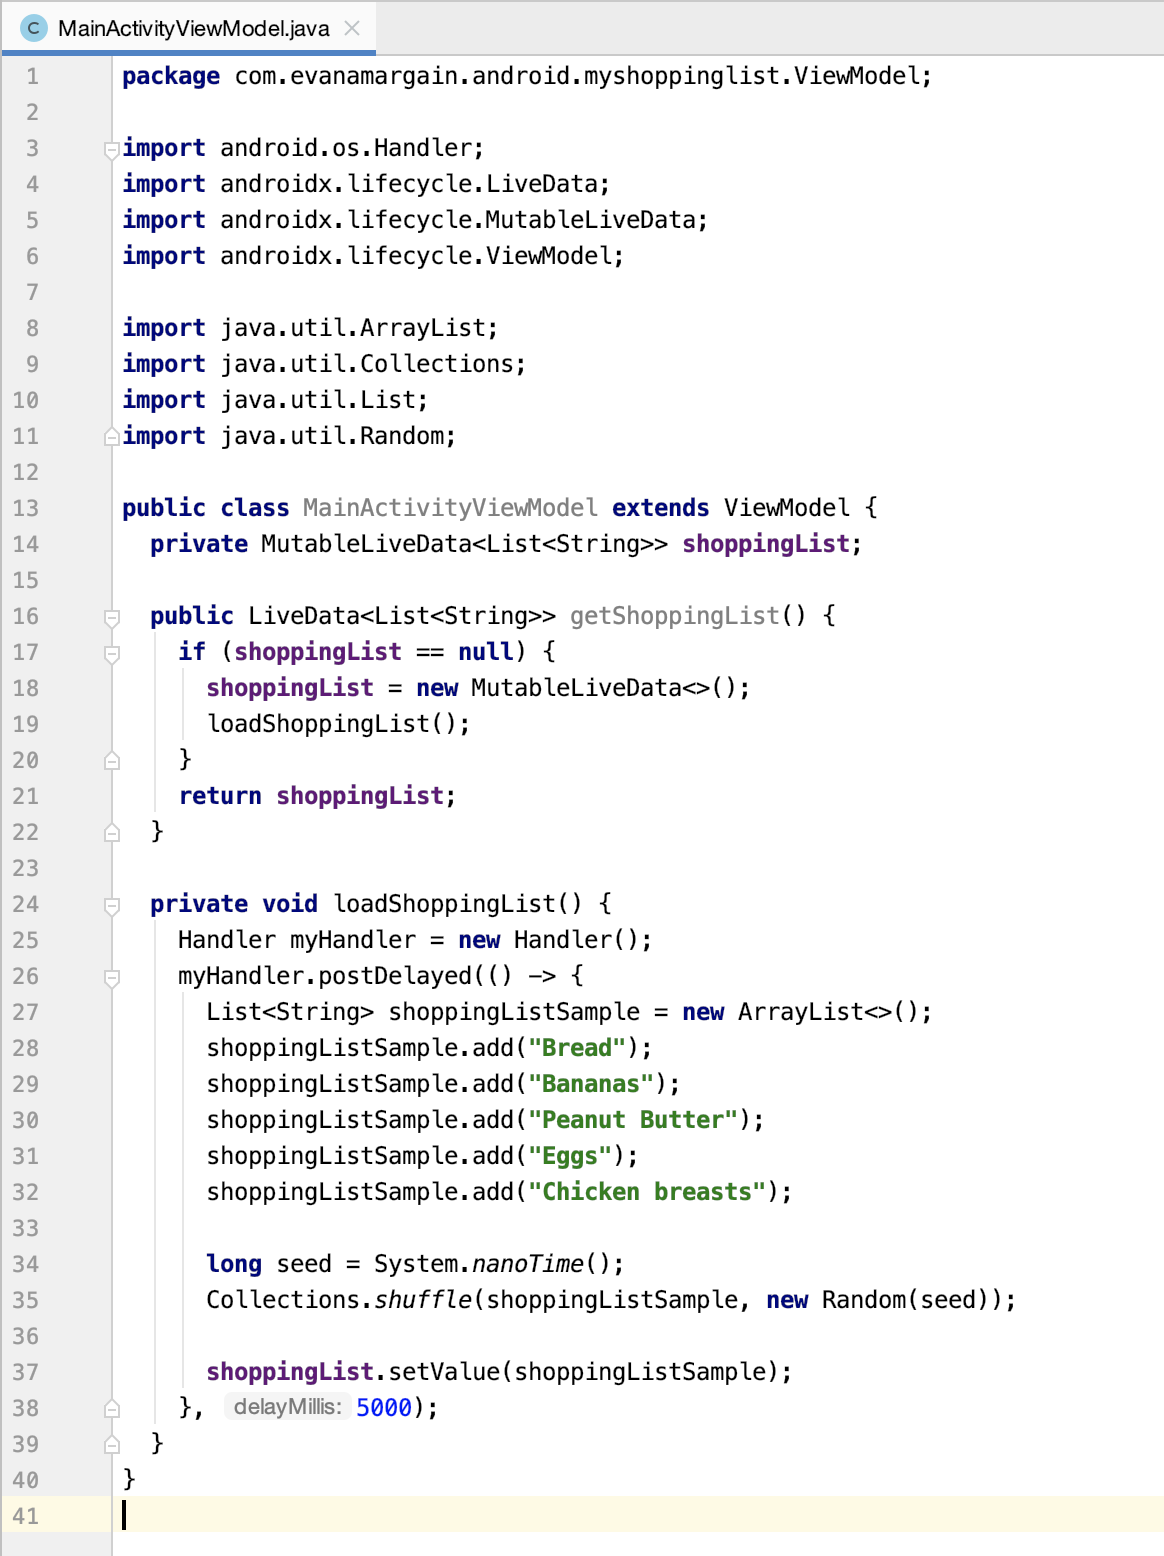
In this first part of the project, you will be simulating the asynchronous call of the data with a timer. The first thing you need to do is retrieve the list and then add it to the shoppingList variable created in the previous step. Add this function in the MainActivityViewModel.java class:
在项目的第一部分中,您将使用计时器模拟数据的异步调用。 您需要做的第一件事是检索列表,然后将其添加到上一步中创建的shoppingList变量中。 在MainActivityViewModel.java类中添加以下函数:
This code validates whether the shoppingList is empty, and if that’s the case, it creates a new object and loads the shopping list into it.
此代码验证shoppingList是否为空,如果是,它将创建一个新对象并将购物清单加载到其中。
You will need another function to load the list. Add it below getShoppingList() with the code below:
您将需要另一个函数来加载列表。 使用以下代码将其添加到getShoppingList()下面:
Let’s review the code above separately because it’s a bit long:
让我们分别回顾一下上面的代码,因为它有点长:
- You create a handler. The purpose of this handler is to hold the code in the function so that it executes after some time. 您创建一个处理程序。 该处理程序的目的是将代码保存在函数中,以便在一段时间后执行。
- You tell the handler to delay the execution by the number of seconds in its second parameter (line 6). 您告诉处理程序将执行延迟第二个参数(第6行)中的秒数。
- In these lines, you create a sample shopping list that will be populated by a third-party service: Firestore. 在这些行中,您将创建一个示例购物清单,该清单将由第三方服务Firestore填充。
- The purpose of the shuffle is to see whether the data is refreshed at any point. One important aspect of LiveData is that, unlike other types of data, it is not lost when certain actions take place (e.g. when an orientation change happens). 随机播放的目的是查看是否在任何时候刷新了数据。 LiveData的一个重要方面是,与其他类型的数据不同,LiveData不会在发生某些操作(例如发生方向更改)时丢失。
This line of code assigns the “downloaded” (simulated) data into the local object of
MutableLiveData.这行代码将“下载的”(模拟)数据分配给
MutableLiveData的本地对象。- As mentioned in point #2, this is setting a delay of 5k milliseconds for the data to “load.” 如第2点所述,这会将数据“加载”设置为5k毫秒的延迟。

故障排除 (Troubleshooting)
If you are getting errors in the project after following the steps above, read this part to troubleshoot. Otherwise, you can skip to the next section.
如果按照上述步骤操作后在项目中出现错误,请阅读此部分进行故障排除。 否则,您可以跳到下一部分。
These are the most common problems you may have.
这些是您可能遇到的最常见的问题。
该项目应设置为Java 8 (The project should be set to Java 8)
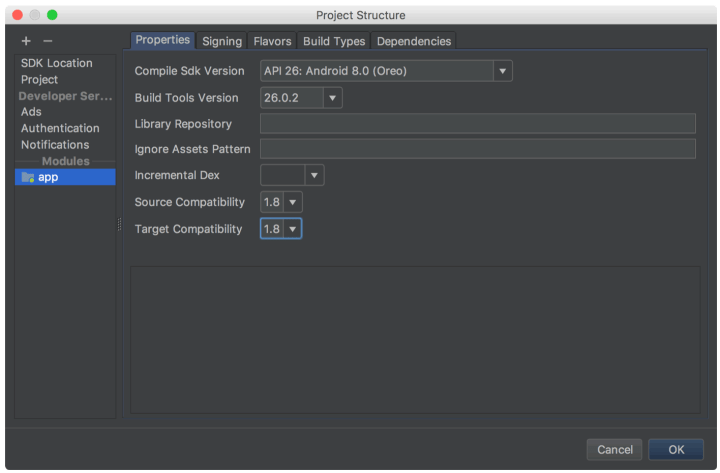
In the loadShoppingList() in point #2, you may notice we have an arrow (->). This is called a lambda expression and it is only supported in Java 8. To fix this, go into File > Project Structure and select Java 1.8 in the fields of Source Compatibility and Target Compatibility:
在第2点的loadShoppingList()中,您可能会注意到我们有一个箭头( -> )。 这称为lambda表达式,仅在Java 8中受支持。要解决此问题,请进入“文件”>“项目结构”,然后在“源兼容性”和“目标兼容性”字段中选择Java 1.8:
导入不正确的依赖项 (Importing the incorrect dependencies)
It is common in Android and Java to have similar dependencies with different functionalities. When Android Studio imports dependencies automatically, it sometimes gets the wrong one. Make sure your imports are like the ones below:
在Android和Java中,具有相似的依赖关系且具有不同的功能是很常见的。 当Android Studio自动导入依赖项时,有时会得到错误的依赖关系。 确保您的进口商品如下所示:
If you are still having trouble, take a look at the ViewModel code below:
如果仍然遇到问题,请查看下面的ViewModel代码:

测试应用 (Testing the App)
After adding the code above, the app should have no changes. It should compile and run successfully, but you will still be seeing the HelloWorld empty screen. This is because we only implemented the ViewModel, which is the communication between the Model and the View, but we still haven’t bound it to the View itself.
添加上面的代码后,该应用程序应该没有更改。 它应该可以编译并成功运行,但是您仍然会看到HelloWorld空屏。 这是因为我们仅实现了ViewModel,这是Model与View之间的通信,但我们仍未将其绑定到View本身。

将视图连接到ViewModel (Connecting the View to the ViewModel)
As mentioned above, now you are going to work with the View so that the data loaded from the ViewModel is displayed correctly.
如上所述,现在您将使用View,以便正确显示从ViewModel加载的数据。
配置视图的XML (Configuring the XML of the View)
Open activity_main.xml, which is located in app > res > layout. Remove the “Hello World” text view and add the code below:
打开activity_main.xml ,它位于app> res>布局中。 删除“ Hello World”文本视图,然后添加以下代码:
This code has two XML items:
此代码有两个XML项:
- The Progress Bar is what is commonly known as a “spinner,” which will be shown on the screen for as long as the info delays to load (5k milliseconds for what we already coded). 进度条是通常所说的“旋转程序”,只要加载信息延迟(在我们已编码的内容中为5000毫秒),它就会在屏幕上显示。
- The ListView, which will show the shopping list items once loaded. ListView,加载后将显示购物清单项目。
If you run the app at this point, you will see the Progress Bar (spinner) on the screen, but it will never show the list, as it is still not paired with the view code in MainActivity.java. Run it to see this and verify that your code is working. Your app should look like the screen below:
如果此时运行该应用程序,您将在屏幕上看到进度条(旋转器),但它永远不会显示该列表,因为它仍未与MainActivity.java的视图代码配对。 运行它以查看此内容并验证您的代码是否正常运行。 您的应用应如下图所示:
添加Android生命周期依赖项 (Adding Android lifecycle dependencies)
For the ViewModel to work, you will need to add the lifecycle extensions dependency to build.gradle(Module: app):
为了使ViewModel正常工作,您需要将生命周期扩展依赖项添加到build.gradle(Module: app) :
implementation 'androidx.lifecycle:lifecycle-extensions:2.0.0'Android Studio will request Gradle to sync. Do it and it should be successful.
Android Studio将请求Gradle进行同步。 做到这一点,应该会成功。
显示数据 (Displaying the data)
Now open MainActivity.java, which we moved to your View folder. In the onCreate method below the setContentView() line, add this code:
现在打开MainActivity.java ,我们将其移至您的View文件夹。 在setContentView()行下方的onCreate方法中,添加以下代码:
Again, let’s review each line:
再次,让我们回顾每一行:
- You initialize the ListView and get it from the XML. 您初始化ListView并从XML中获取它。
- The same for the progress bar: We initialize it and get the view from the XML. Then you set it to visible — to be shown while the data is loaded. 进度条也是如此:我们对其进行初始化,并从XML获取视图。 然后将其设置为“可见”-在加载数据时显示。
Next, you initialize your ViewModel, using the
ViewModelProviderprovided by Android Jetpack. In short,ViewModelProvideris a class that stores the ViewModel and makes it available throughout the app so all the classes that need it can access the information.接下来,使用Android Jetpack提供的
ViewModelProvider初始化ViewModel。 简而言之,ViewModelProvider是一个存储ViewModelProvider的类,并在整个应用程序中使用它,因此需要它的所有类都可以访问信息。Once you have the ViewModel, you call the
getShoppingList()method. As you may recall, that method is asynchronous. It will take five seconds and then return the data. That’s why you are observing the response.一旦有了ViewModel,就可以调用
getShoppingList()方法。 您可能还记得,该方法是异步的。 将花费五秒钟,然后返回数据。 这就是为什么您观察响应。Once the shopping list is received, you create an array adapter to create the list view. You will be using
layout.simple_list_item_1, which is a pre-provided XML for ListViews that are part of Android OS.收到购物清单后,您将创建一个阵列适配器来创建清单视图。 您将使用
layout.simple_list_item_1,这是Android OS一部分的ListView的预先提供的XML 。- Then you assign the adapter created in the previous step to the ListView. 然后,将上一步中创建的适配器分配给ListView。
- Finally, you hide the Progress View and show the data. 最后,您隐藏“进度视图”并显示数据。
所需进口 (Required imports)
Some imports are needed for this code to work. Some will be done by Android Studio automatically and you will need to add others manually. Here are all the imports that MainActivity.java should have:
要使此代码正常工作,需要一些导入。 其中一些操作将由Android Studio自动完成,而您需要手动添加其他操作。 这是MainActivity.java应该具有的所有导入:
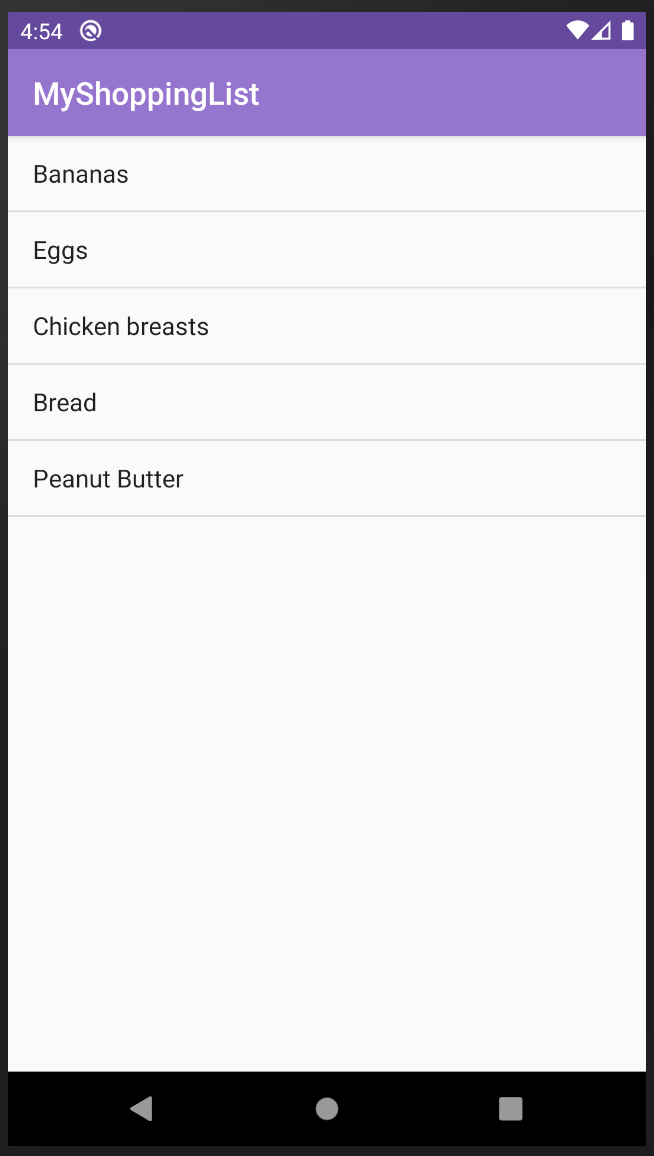
With all this working, you should be able to test the app and see your list appear after five seconds of waiting:
完成所有这些工作后,您应该能够测试该应用程序,并在等待五秒钟后看到列表出现:
结论 (Conclusion)
Great! We now have an app implementing LiveData and ViewModel. In the next part, we will integrate Firestore to this app so the data is loaded from a remote source. If you want to see how the project should work when complete, you can download the finished project from my website.
大! 现在,我们有一个实现LiveData和ViewModel的应用程序。 在下一部分中,我们将Firestore集成到此应用程序中,以便从远程源加载数据。 如果要查看完成后项目的工作方式,可以从我的网站下载完成的项目。
If you have any doubts, don’t hesitate to leave a comment and I will reply as soon as possible.
如有任何疑问,请随时发表评论,我会尽快答复。
Until next time, thanks for reading!
直到下一次,感谢您的阅读!
livedata 应用


 963
963


 被折叠的 条评论
为什么被折叠?
被折叠的 条评论
为什么被折叠?
 到【灌水乐园】发言


