


vanilla js
There’s so much hype these days around front-end frameworks (React, Angular, Vue) that I thought I would stop and think about what the problem is that these frameworks are solving and what they are useful for.
如今,围绕前端框架(React,Angular,Vue)的宣传太多了,我以为我会停下来思考这些框架正在解决的问题是什么以及它们的用途。
As an experiment, I’m going to create a simple component-based feature using nothing but jQuery (a small library of helper functions for working with the DOM) essentially Vanilla JS.
作为一个实验,我将创建一个简单的基于组件的功能,仅使用jQuery(一个用于DOM的辅助函数小库)实质上是Vanilla JS。
The feature is going to be a collapsible list of items. It must take a parameter that specifies the number of items to show on initial load. When you click ‘show more’ it will reveal all the items in the list, when you click ‘show less’ it will hide all except the previously selected # of items. It must be extensible enough to add multiple collapsible lists on the same page.
该功能将是可折叠的项目列表。 它必须带有一个参数,该参数指定在初始加载时要显示的项目数。 当您单击“显示更多”时,它将显示列表中的所有项目,当您单击“显示较少”时,它将隐藏除先前选择的项目数以外的所有项目。 它必须具有足够的可扩展性,才能在同一页面上添加多个可折叠列表。
After we build the feature we will step back and examine the experience to understand what advantages front end frameworks provide, and those that they don’t provide.
构建功能之后,我们将退后一步,回顾一下经验,以了解前端框架提供的优势以及它们没有提供的优势。
因此,让我们开始计划。 (So let’s start planning.)
Before we start there are a few things that we need to consider:
在开始之前,我们需要考虑一些事项:
Rendering HTML — how are we going to actually render the HTML for the page, when are we going to rerender it?
渲染HTML-我们将如何实际渲染页面HTML,何时重新渲染?
Modularity — how are we going to build this feature in such a way that it is able to be used by 2 or 5 collapsible lists on the same page?
模块化 -我们将如何以可以在同一页面上2个或5个可折叠列表使用它的方式构建此功能?
Destroying the element — how are we going to allow the components clickhandlers to be removed from the document if they are no longer needed?
破坏元素 -如果不再需要组件单击处理程序,我们将如何允许它们从文档中删除?
Then finally we can start actually building the feature in JS, adding the remaining features to the code.
最后,我们可以开始在JS中实际构建功能,然后将其余功能添加到代码中。
1.渲染HTML (1. Rendering The HTML)
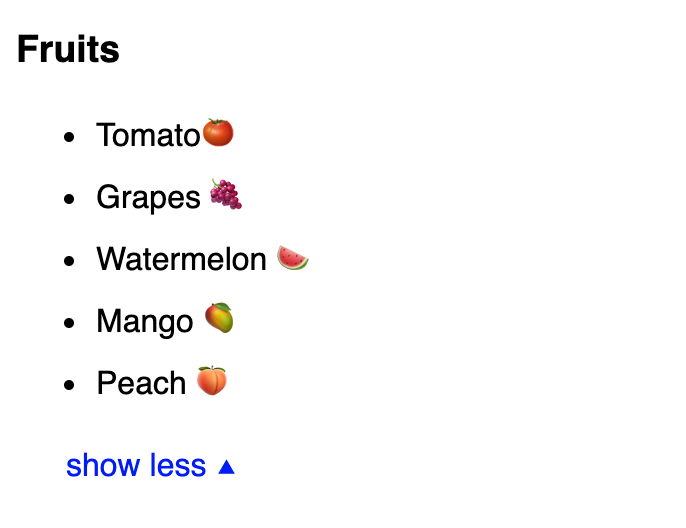
Starting with the markup, we know what we will want to produce the following output, and the requirements don’t require us to have the flexibility to change the data source, so it should be ok to just write out the whole list and NOT deal with re-rendering the component at any point. To get the desired functionality we will simply show/hide the already rendered html. So let’s write it out here:
从标记开始,我们知道我们将要产生以下输出,并且要求不要求我们具有更改数据源的灵活性,因此只需写出整个列表而不进行处理就可以了。在任何时候重新渲染组件。 为了获得所需的功能,我们将仅显示/隐藏已渲染的html。 所以我们在这里写出来:
<div class="show-hide-module">
    <h3>Fruits</h3>
    <ul class="collapse-list">
      <li>Tomato🍅</li>
      <li>Grapes 🍇</li>
      <li>Watermelon 🍉</li>
      <li>Mango 🥭</li>
      <li>Peach 🍑</li>
    </ul>
    <a class="collapse-link"> show more </a>
  </div>
That’s a good start, all we’ll need to do is to define the functionality in JS to add CSS to hide and show those items that we need to when the user clicks the link.
这是一个好的开始,我们要做的就是定义JS中的功能,以添加CSS来隐藏和显示用户单击链接时需要的项目。
2.模块 (2. The Module)
Now we need to think about how we are going to create this in such a way that it is reusible across many instances of the same list. The way that we do this in javascript is to create what is called a ‘module’, essentially a set of code that is encapsulated in a single execution context so that the variables inside of it are private. If you want to learn more about the javascript module pattern I’d recommend reading the chapter on modules in ‘Learning Javascript Design Patterns’ by Addy Osmani. In a very simplified form, it means that we are going to write our code with the following structure:
现在,我们需要考虑如何创建这种方法,以使其可以在同一列表的许多实例中重复使用。 我们在javascript中执行此操作的方式是创建所谓的“模块”,本质上是封装在单个执行上下文中的一组代码,以便其中的变量是私有的。 如果您想了解有关javascript模块模式的更多信息,建议您阅读Addy Osmani的“ 学习Javascript设计模式 ”中有关模块的章节。 以非常简化的形式,这意味着我们将使用以下结构编写代码:
// An object literal
var myFeature = {
    myProperty: "hello",

    myMethod: function() {
        console.log( myFeature.myProperty );
    },

    init: function( settings ) {
        myFeature.settings = settings;
    },

    readSettings: function() {
        console.log( myFeature.settings );
    }
};

myFeature.myProperty === "hello"; // true

myFeature.myMethod(); // "hello"

myFeature.init({
    foo: "bar"
});

myFeature.readSettings(); // { foo: "bar" }
We define the component in a block scope (either inside an object or inside a function that returns an object).
我们在块作用域中定义组件(在对象内部或在返回对象的函数内部)。
This structure will allow us to write a component whose variables are all scoped to only this instance of the list, and we will have to worry about the module extensibility in the future.
这种结构将使我们能够编写一个组件,其变量都只限于列表的此实例,并且我们将来将不得不担心模块的可扩展性。
1, 2, 5 lists on the same page will be no problem.
同一页上的1、2、5列表将没有问题。
3.破坏元素 (3. Destroying the element)
All JS developers know that when you no longer need the browser to be running your code, that you ‘unmount’ it from the DOM and remove all of the outstanding event handlers that is attached to that instance. For that we’ll stub out a destroy function that will remove clickhandlers and remove the element from the DOM.
所有JS开发人员都知道,当您不再需要浏览器来运行代码时,便从DOM中“卸载”该代码,并删除该实例附带的所有未完成的事件处理程序。 为此,我们将存入销毁函数,该函数将删除clickhandlers并从DOM中删除该元素。
function destroy () {
  $elem.off(); // removes all clickhandlers
  $elem.remove(elem); // unmounts the element and children
}
创建功能 (Creating the feature)
Finally we are ready to create the feature. First we need to define the JS function that will be the module for our component (again, the term module here really means a clump of JS code that will define the scope of the JS inside to ONLY apply to the target element). in the below code the line collapsible($module1, 2) is saying ‘create a new module of JS code that will apply the collapsible functionality only to the element called “module1”’.
最后,我们准备创建功能。 首先,我们需要定义JS函数,该函数将成为组件的模块(同样,术语“模块”在这里实际上意味着一堆JS代码,这些代码将定义内部JS的范围,仅适用于目标元素)。 在下面的代码中, collapsible($module1, 2)表示“创建一个新的JS代码模块,该模块仅将可折叠功能应用于名为“ module1”的元素。
Inside of that module we define a couple initializing variables, like the height of the list based on the items inside, as well as a few of the DOM elements that are important inside that module (the primary element, $elem, as well as the interior list).
在该模块内部,我们定义了几个初始化变量,例如基于内部项目的列表高度,以及该模块内部重要的一些DOM元素(主要元素$elem以及内部清单)。
Then we define an init handler that is attached to this instance. Inside of it we will take apply the clickhandler to the ‘button’ element attached to that instance. Obviously there is some flexibility here as to what functionality to put into the init function and what to put in the body of the module function collapsible(), as both of these functions are in some ways initializing the module. I chose to leave the computed properties of the instance in the body of the module function, and put the clickhandler methods in the init function.
然后,我们定义一个附加到此实例的init处理程序。 在其中,我们将clickhandler应用于附加到该实例的'button'元素。 显然,在哪些功能要放入init函数以及什么要放入模块函数collapsible()具有一定的灵活性,因为这两个函数都以某种方式初始化了模块。 我选择将实例的计算属性保留在模块函数的主体中,并将clickhandler方法放入init函数中。
var $module1 = $("#module1");
  var $module2 = $("#module2");


  var collapsible = function (elem, showXItems) {
    var $elem = elem;
    if ($elem.find("ul.collapse-list li").length < showXItems) {
      console.error('number items to show > total items')
      return;
    }
    // determine the starting height of the list
    var heightAtStart = 0;
    for (var i = 1; i <= showXItems; i++) {
      var heightOfLI = $elem
        .find("ul.collapse-list li:nth-child(" + (i) + ")")
        .outerHeight(true);
      heightAtStart += heightOfLI;
    }
    var $collapsibleList = $elem.find(".collapse-list");
    $collapsibleList.css("height", heightAtStart + "px");

    // define external functions
    var init = function () {
        var $showMoreLink = $elem.children("a.collapse-link");
        $showMoreLink.click(function () {
          if ($collapsibleList.hasClass("expanded")) {
            $collapsibleList
              .toggleClass("expanded")
              .css("height", heightAtStart + "px");
            $showMoreLink
              .text("show more")
              .toggleClass("flipped");
          } else {

            $collapsibleList
              .addClass("expanded")
              .css("height", "");
            $showMoreLink
              .text("show less")
              .toggleClass("flipped")
          }
          return false;
        });
    }

    var destroy = function () {
        $elem.off(); // removes all clickhandlers
        $elem.remove(elem);
      }

    return {
      init: init,
      destroy: destroy
    };
  };


  collapsible($module1, 3).init();
  collapsible($module2, 2).init();
Looking at this, you can see the advantages of using a front end framework to create even a small component like this.
看到这一点,您将看到使用前端框架创建一个甚至很小的组件的好处。
Modularity is included by default. I am a huge fan of the programming paradigm ‘convention over configuration’ ESPECIALLY in the realm of front end development. Using a front end framework blends the JS and HTML in such a way that all of the functionality you write in JS is already attached seamlessly to the DOM element that you are working with. Not so in vanilla JS.
默认情况下包括模块化 。 我是前端开发领域中的编程范例“ 约定优于配置 ”的忠实拥护者。 使用前端框架将JS和HTML混合在一起,使您在JS中编写的所有功能都已经无缝地附加到您正在使用的DOM元素上。 在香草JS中并非如此。
Lifecycle methods. It is annoying to need to think about mounting and unmounting your components in every possible component use case. This functionality is included Out of the box (OOTB) in all of the major JS frameworks. The framework will likely handle basic mounting and unmounting for you, and allows you to add ‘hooks’ or functions that will run at a particular stage in the component lifecycle.
生命周期方法 。 在每个可能的组件用例中都需要考虑安装和卸载组件,这很烦人。 所有主要的JS框架都包含此功能,即装即用(OOTB)。 该框架可能会为您处理基本的安装和卸载,并允许您添加将在组件生命周期的特定阶段运行的“挂钩”或功能。
Rendering. Based on my made-up requirements, I chose to actually ignore rendering my component in JS. This would have added a lot of complexity to even this simple component. Even still, the show/hide solution that I came up with in CSS is STILL a bit confusing and harder to reason than a simple render method in react.js or vue.js.
渲染 。 根据我的要求,我选择实际上忽略在JS中渲染组件。 即使是这个简单的组件,也将增加很多复杂性。 甚至,与React.js或vue.js中的简单渲染方法相比,我在CSS中提出的显示/隐藏解决方案仍然有点混乱并且难以推理。
All things considered, I am a huge fan of FE frameworks, and I think it is a helpful exercise to develop without them so that you can really see the awesome functionality that these tools are giving you access to.
考虑到所有因素,我是FE框架的忠实拥护者,并且我认为在没有它们的情况下进行开发对他们很有帮助,这样您才能真正看到这些工具为您提供的强大功能。
Thanks for reading!
谢谢阅读!
See all the code for the example here:
在此处查看示例的所有代码:
翻译自: https://medium.com/swlh/writing-a-front-end-component-with-vanilla-js-8a8fbff56299
vanilla js


 1637
1637


 被折叠的 条评论
为什么被折叠?
被折叠的 条评论
为什么被折叠?
 到【灌水乐园】发言


