


Over time, and through various programming languages, I’ve have always tried to achieve visibility on the following continuous integration (CI) activities on source repository pushes:
随着时间的推移,通过各种编程语言,我一直试图在源存储库推送中的以下持续集成(CI)活动中获得可见性:
- Tests pass 测试通过
- Linting 林亭
- Code coverage statistics 代码覆盖率统计
I’ve employed different tools to achieve these based on the languages and repositories. Having recently begun working in Go, I wanted to share the tools I use for it.
我使用了不同的工具来基于语言和存储库来实现这些目标。 最近开始在Go中工作,我想分享我使用的工具。
CI工具链 (CI Tool Chain For Go)
For my personal code I use GitHub as a repository, so assuming that the tools I’ll employ are:
对于我的个人代码,我使用GitHub作为存储库,因此假设我将使用的工具是:
- GitHub Actions: Automate the workflow GitHub Actions:自动化工作流程
- Codecov.io: A coverage dashboard Codecov.io:覆盖范围仪表板
- Readme badges: Easy visibility dashboard on CI status 自述徽章:易于查看的CI状态仪表板
Codecov设置 (Codecov Setup)
In preparation, setup a Codecov.io account and link the repository from GitHub.com there. The actions to follow will push the data to it.
在准备中,设置一个Codecov.io帐户并从GitHub.com链接存储库。 要执行的操作将把数据推送到其中。
GitHub行动版 (GitHub Actions For Go)
GitHub actions are easy to get started with, simply create a .github/workflows folder in your repository, and drop YAML files in there to describe workflows. So let’s discuss a .github/workflows/ci.yml file in stages, and glue it all together at the end. First we want our workflow to be kicked off on pushes to the master branch:
GitHub操作很容易上手,只需在存储库中创建一个.github/workflows文件夹,然后在其中放置YAML文件来描述工作流程。 因此,让我们.github/workflows/ci.yml讨论.github/workflows/ci.yml文件,并在最后将它们粘合在一起。 首先,我们希望在推送到master分支时启动工作流程:
on:
  push:
    branches: [ master ]
When that happens we going to run jobs in steps. So let’s first get the environment set up:
发生这种情况时,我们将逐步运行作业。 因此,让我们首先设置环境:
jobs:
  build:
    runs-on: ubuntu-latest
    steps:
    - uses: actions/checkout@v2
    - uses: actions/setup-go@v2
      with:
        go-version: '1.15.1'
    - name: Install dependencies
      run: |
        go version
        go get -u golang.org/x/lint/golint
So we’re:
所以我们是:
- Running on Ubuntu 在Ubuntu上运行
Indicated we’ll be using actions to check out code and do Go setup
表明我们将使用操作来检出代码并进行Go设置
- Picked Go version 1.15.1 选择Go版本1.15.1
- Pulled in a Go dependency to help with the linting later 引入Go依赖关系以帮助以后的棉绒
Let’s get to work:
让我们开始工作:
- name: Build
  run: go build .
- name: Test With Coverage
  run: go test -v  -coverprofile=coverage.txt -covermode=atomic ./...
- name: Upload coverage to Codecov
  uses: codecov/codecov-action@v1
- name: Run Vet & Lint
  run: |
    go vet .
    golint -set_exit_status=1 .
Here we:
在这里,我们:
- Build our code 建立我们的代码
- Run the tests with coverage data generation 使用覆盖率数据生成运行测试
Upload the coverage data to Codecov.io
将覆盖率数据上传到Codecov.io
Run vet and golint to make sure the code is clean
运行vet和golint以确保代码干净
So the complete workflow would look like ci.yml.
因此,完整的工作流程应类似于ci.yml 。
这一切都做什么 (What This All Does)
With this in place, after your next push to master, you’ll be able to see the status of the actions:
有了这个,在您下一次掌握时,您将能够看到动作的状态:

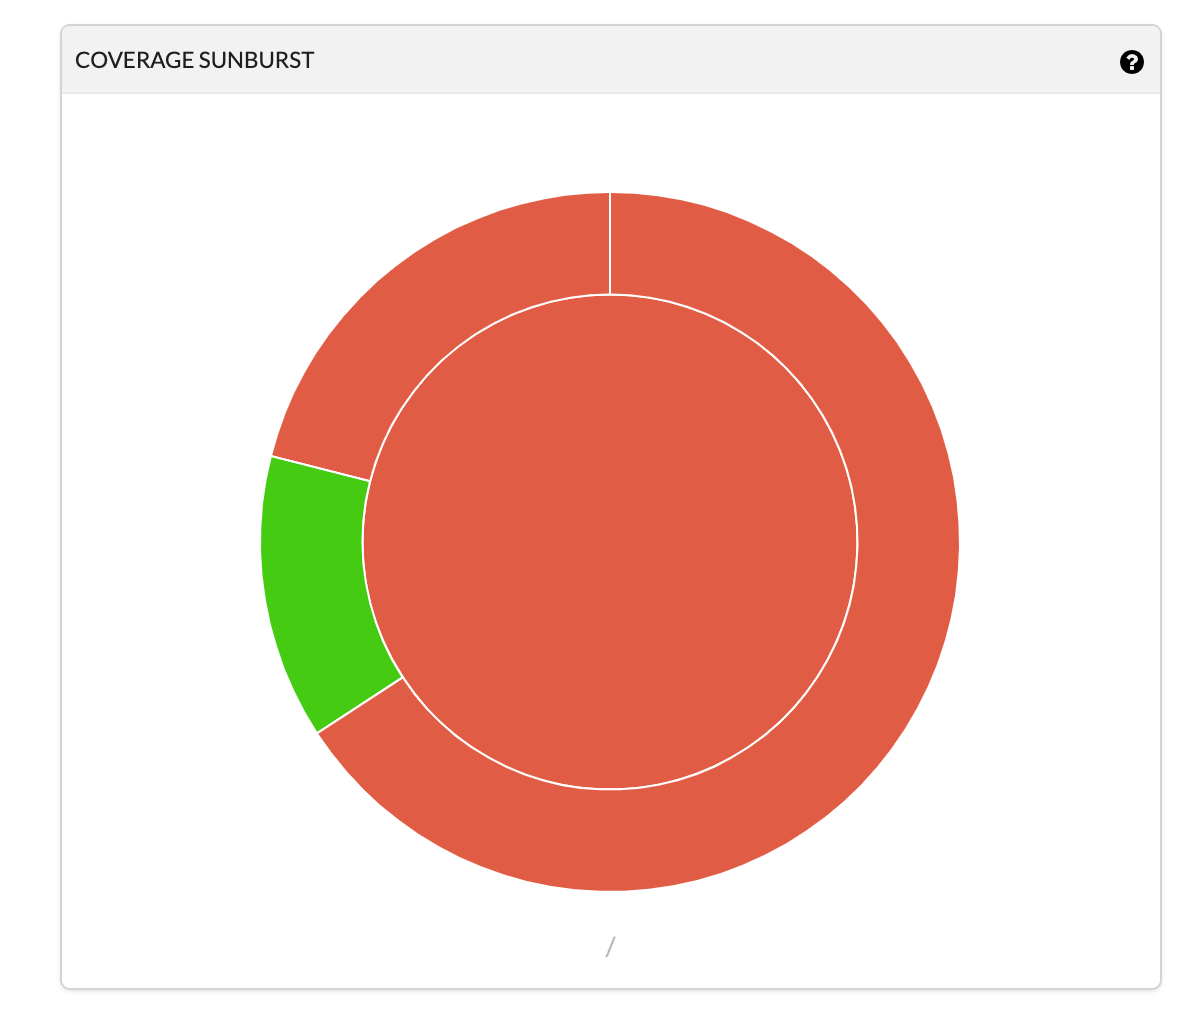
And the coverage on Codecov:
以及Codecov的内容:
通过自述徽章可见 (Visibility Through Readme Badges)
So the info is now out there, but since both GitHub Actions and Codecov.io offer badges a simple way to offer single dashboard is to put the markdown links to the badges in your README.md and then it will show up in the repositories home in GitHub:
因此信息已经存在,但是因为GitHub Actions和Codecov.io都提供徽章 ,所以提供单个仪表板的一种简单方法是将指向徽章的markdown链接放在README.md ,然后将其显示在存储库主页中在GitHub中:

得到点点滴滴 (Getting The Bits)
If you want to see the details of the .github/workflows or the README.md markdown you can head over to my snipgo repository.
如果您想查看.github/workflows或README.md降价的详细信息,可以转到我的snipgo存储库 。
翻译自: https://medium.com/@nwillc/github-actions-for-go-b9830441e70d


 528
528

 被折叠的 条评论
为什么被折叠?
被折叠的 条评论
为什么被折叠?
 到【灌水乐园】发言


