


 本文翻译自《Custom JavaScript Cursor in React》,探讨如何在React应用中实现一个交互式的JavaScript光标,提升用户体验。"
122412764,11050997,Java线性结构与数据结构实现详解,"['数据结构', '算法', 'Java', 'ArrayList', '栈', '队列', 'LinkedList']
本文翻译自《Custom JavaScript Cursor in React》,探讨如何在React应用中实现一个交互式的JavaScript光标,提升用户体验。"
122412764,11050997,Java线性结构与数据结构实现详解,"['数据结构', '算法', 'Java', 'ArrayList', '栈', '队列', 'LinkedList']
react 光标
This is a tutorial for building an interactive javascript cursor using the React Context API and React hooks. It assumes the reader is generally familiar with these topics. If written tutorials aren’t your thing, skip to the end for a CodePen (and link to Github gist).
这是一个使用React Context API和React钩子构建交互式javascript光标的教程。 假定读者通常熟悉这些主题。 如果您不喜欢编写教程,请跳至最后获得CodePen(并链接到Github gist)。
这是我们要构建的: (Here’s what we’re going to build:)
A custom hook named
useMousePositionthat provides the position of the mouse.一个自定义的挂钩,名为
useMousePosition,它提供鼠标的位置。A component named
Cursorthat renders the custom cursor using the values fromuseMousePosition.一个名为
Cursor的组件,它使用useMousePosition的值呈现自定义光标。A React Context API wrapper named
CursorContextProviderthat allows other components to talk toCursorand tell it to do something when they are hovered.一个名为
CursorContextProviderReact Context API包装器,该包装器允许其他组件与Cursor对话并告诉它们在悬停时执行某些操作。A custom hook named
useCursorHandlersthat DRYs out the process of attaching mouse event handlers to components that interact withCursor.一个自定义的钩子,名为
useCursorHandlers,该钩子useCursorHandlers将鼠标事件处理程序附加到与Cursor交互的组件上的过程。- To wrap up, we’ll hammer out some implementation details to get this custom cursor ready for real-world use. 最后,我们将敲定一些实现细节,以使该自定义光标可以在实际环境中使用。
1. useMousePosition钩子 (1. The useMousePosition hook)
import { useState, useEffect } from "react";
const useMousePosition = () => {
  const [position, setPosition] = useState({
    clientX: 0,
    clientY: 0,
  });
  const updatePosition = event => {
    const { pageX, pageY, clientX, clientY } = event;
    setPosition({
      clientX,
      clientY,
    });
  };
  useEffect(() => {
    document.addEventListener("mousemove", updatePosition, false);
    document.addEventListener("mouseenter", updatePosition, false);
    return () => {
      document.removeEventListener("mousemove", updatePosition);
      document.removeEventListener("mouseenter", updatePosition);
    };
  }, []);
  return position;
};
export default useMousePosition;
We’re registering an event listener on mousemove that gets the current mouse position and sets it to state. This state value is the thing that gets returned by the hook. And since it gets updated every time the mouse moves, every component that calls useMousePosition() will re-render with the updated values when the mouse position changes.
我们正在mousemove上注册一个事件侦听器,该事件侦听器获取当前鼠标位置并将其设置为state。 这个状态值是钩子返回的东西。 并且由于每次鼠标移动时都会更新,因此,当鼠标位置更改时,调用useMousePosition()每个组件都将使用更新后的值重新呈现。
2.初始光标组件 (2. The Initial Cursor Component)
import React from "react";
import useMousePosition from "./useMousePosition";const Cursor = () => {
  const { clientX, clientY } = useMousePosition();

  return (
    <div
      style={{
        position: "fixed",
        top: 0,
        bottom: 0,
        left: 0,
        right: 0,
        zIndex: 9999,
        pointerEvents: "none"
      }}
    >
      <svg
        width={50}
        height={50}
        viewBox="0 0 50 50"
        style={{
          position: "absolute",
          left: clientX,
          top: clientY,
          transform: "translate(-50%, -50%)",
        }}
      >
        <circle
          cx="25"
          cy="25"
          r="8"
        />
      </svg>
    </div>
  );
};
We have a fixed-positioned div that always fills the entire viewport even as the user scrolls up and down. Inside that element we have an absolute-positioned svg that is dynamically positioned with the useMousePosition hook. So the fixed-position div handles the scroll position, and the svg handles the mouse position.
我们有一个固定位置的div ,即使用户上下滚动,该div也会始终填充整个视口。 在该元素内部,我们有一个绝对定位的svg ,它可以通过useMousePosition挂钩动态定位。 因此,固定位置div处理滚动位置,而svg处理鼠标位置。
Since we want the mouse position relative to the viewport,
useMousePositionreturns values forclientXandclientY. Other mouse position values, i.e.,pageXandpageYinclude the scroll position.由于我们想要鼠标相对于视口的位置,因此
useMousePosition返回clientX和clientY值。 其他鼠标位置值,即pageX和pageY包括滚动位置。
We give the containing div a very large zIndex because we always want our cursor to be the top-most element. Moreover, we need to give it pointerEvents: none so that it doesn’t interfere with any elements underneath. Without this, it would seem as though an invisible screen was blocking users from clicking anything in the app.
我们给包含的div一个非常大的zIndex因为我们总是希望光标成为最上面的元素。 而且,我们需要给它pointerEvents: none这样它就不会干扰下面的任何元素。 没有此功能,似乎看不见的屏幕将阻止用户单击应用程序中的任何内容。
At this point, our custom cursor looks like this:
此时,我们的自定义光标如下所示:
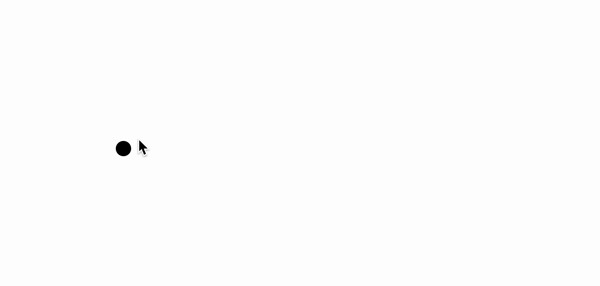
Not bad, but to hide the default browser cursor, we’ll need to add a snippet of CSS:
不错,但是要隐藏默认的浏览器光标,我们需要添加一段CSS:
* {
  cursor: none !important;
}
3.设置游标上下文 (3. Setting up the Cursor Context)
import React, { createContext, useState } from "react";
export const CursorContext = createContext();
const CursorContextProvider = () => {
  const [cursor, setCursor] = useState({ active: false });
  return (
    <CursorContext.Provider value={[cursor, setCursor]}>
      {children}
    </CursorContext.Provider>
  );
};
export default CursorContextProvider;
First we create a context object named CursorContext using React’s createContext method. Note that we’re exporting CursorContext because we’ll need it later to access the cursor context in other components.
首先,我们使用React的createContext方法创建一个名为CursorContext的上下文对象。 请注意,我们正在导出CursorContext因为稍后将需要它来访问其他组件中的游标上下文。
Then, we create a component named CursorContextProvider that returns the Provider component of the cursor context we just created. In React, the context Provider grants any of its children access to whatever is defined in its value prop. In our case, we pass a state variable cursor and the function that updates that variable setCursor. We set the initial state of cursor to be an object with a single property active, which we’ll use later to give our cursor an “active” style.
然后,我们创建一个名为CursorContextProvider的组件,该组件返回刚刚创建的游标上下文的Provider组件。 在React中,上下文提供者授予其任何子级访问其value属性中定义的内容的权限。 在我们的例子中,我们传递一个状态变量cursor和更新该变量setCursor的函数。 我们将cursor的初始状态设置为具有单个属性active的对象,稍后将使用该属性为游标赋予“活动”样式。
We don’t have to pass
cursorandsetCursorinside an array, but it’s common for a state variable and its updater function to be paired this way in React, so other devs will be familiar with this pattern.我们不必在数组内传递
cursor和setCursor,但是在React中以这种方式将状态变量及其更新程序函数配对是很常见的,因此其他开发人员将对此模式熟悉。
在CursorContextProvider中包装应用程序 (Wrapping the app in the CursorContextProvider)
import CursorContextProvider from "./CursorContextProvider";
import Cursor from "./Cursor";const App = ({ children }) => {
  return (
    <CursorContextProvider>
      <Cursor />
      {children}
    </CursorContextProvider>
  );
};export default App;
Since Cursor is a global element used everywhere, we add it and CursorContextProvider to the top-level component of our app, which in this example is named App. With this implementation, Cursor and all of the children of App have access to the cursor context.
由于Cursor是在各处使用的全局元素,因此我们将其和CursorContextProvider添加到应用程序的顶级组件中,在本示例中,该组件名为App 。 通过此实现, Cursor和App所有children都可以访问游标上下文。
使用CursorContext设置Cursor的样式 (Using CursorContext to style Cursor)
The following is an update to theCursor component we defined above.
以下是对我们上面定义的Cursor组件的更新。
import React, { useContext } from "react";import useMousePosition from "./useMousePosition";import { CursorContext } from "./CursorContextProvider";const Cursor = () => {
  const { clientX, clientY } = useMousePosition();
  const [cursor] = useContext(CursorContext);

  return (
    <div
      style={{
        position: "fixed",
        top: 0,
        bottom: 0,
        left: 0,
        right: 0,
        zIndex: 9999,
        pointerEvents: "none"
      }}
    >
      <svg
        width={50}
        height={50}
        viewBox="0 0 50 50"
        style={{
          position: "absolute",
          left: clientX,
          top: clientY,
          transform: `translate(-50%, -50%) scale(${cursor.active ? 2.5 : 1})`,
          stroke: cursor.active ? "black" : "white",
          strokeWidth: 1,
          fill: cursor.active ? "rgba(255,255,255,.5)" : "black",
          transition: "transform .2s ease-in-out",
        }}
      >
        <circle
          cx="25"
          cy="25"
          r="8"
        />
      </svg>
    </div>
  );
};
The bolded sections indicate changes from the previous version of Cursor.
粗体字部分表示对 Cursor 先前版本的更改 。
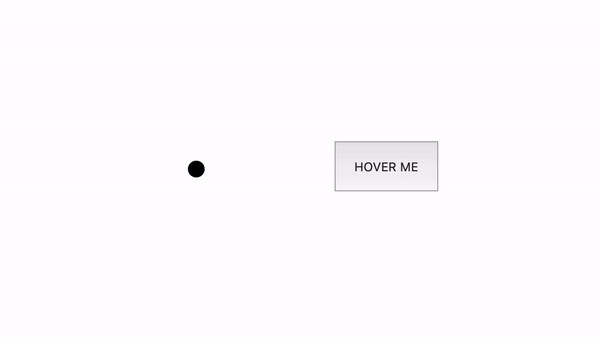
We pass CursorContext to the useContext React hook, which returns the state pair [cursor, setCursor]. In Cursor we only need the state variable and not the updater function, so we just define cursor. Then we use cursor.active to conditionally style the svg. To see this in action, we’ll add another component that uses setCursor to update the active state.
我们将CursorContext传递给useContext React钩子,该钩子返回状态对[cursor, setCursor] 。 在Cursor我们只需要状态变量,而不需要updater函数,因此我们只定义cursor 。 然后,我们使用cursor.active有条件地设置svg样式。 为了了解这一点,我们将添加另一个使用setCursor来更新活动状态的组件。
使用CursorContext触发活动状态 (Using CursorContext to trigger the active state)
Here is a simple button component for illustrative purposes:
这是一个简单的按钮组件,用于说明目的:
import React, { useContext, useCallback } from "react";
import { CursorContext } from "./CursorContextProvider";const Button = () => {
  const [, setCursor] = useContext(CursorContext);  const toggleCursor = useCallback(() => {
    setCursor(({ active }) => ({ active: !active }));
  });  return (
    <button
      type="button"
      style={{ padding: "1rem" }}
      onMouseEnter={toggleCursor}
      onMouseLeave={toggleCursor}
    >
      HOVER ME
    </button>
  );
};
Once again, we import CursorContext and pass it to useContext to get the state value pair. In Button we only need the state updater function so only setCursor is defined.
再次,我们导入CursorContext并将其传递给useContext以获取状态值对。 在Button我们仅需要状态更新器功能,因此仅定义了setCursor 。
Then we set up a basic function to toggle cursor.active and pass it to the button’s onMouseEnter and onMouseLeave props.
然后,我们设置一个基本功能来切换cursor.active并将其传递给按钮的onMouseEnter和onMouseLeave道具。
4.使用useCursorHandlers干燥鼠标事件 (4. DRYing mouse events with useCursorHandlers)
In the above Button component, we attached two mouse event handlers without too much fuss, but this could get tedious if we want to attach handlers to other components, or if we want to change or extend those handlers. To remedy this, we can move the event handlers into a custom hook.
在上面的Button组件中,我们附加了两个鼠标事件处理程序,没有太多麻烦,但是如果要将处理程序附加到其他组件上,或者如果要更改或扩展这些处理程序,这可能会变得很乏味。 为了解决这个问题,我们可以将事件处理程序移到自定义钩子中。
import { useContext, useCallback } from "react";
import { CursorContext } from "./CursorContextProvider";const useCursorHandlers = (options = {}) => {
  const [, setCursor] = useContext(CursorContext);  const toggleCursor = () => {
    setCursor(({ active }) => ({ active: !active }));
  };  const onMouseEnter = useCallback(event => {
    if (options.onMouseEnter) {
      options.onMouseEnter(event);
    }    toggleCursor();
  });  const onMouseLeave = useCallback(event => {
    if (options.onMouseLeave) {
      options.onMouseLeave(event);
    }    toggleCursor();
  });  return { onMouseEnter, onMouseLeave };
};
The hook returns the two mouse event handlers onMouseEnter and onMouseLeave that are used to update the cursor. As some components may already be using these mouse events, useCursorHandlers receives an argument where this additional handling can be passed.
该钩子返回用于更新光标的两个鼠标事件处理程序onMouseEnter和onMouseLeave 。 由于某些组件可能已经在使用这些鼠标事件,因此useCursorHandlers会收到一个参数,可以在其中传递此附加处理。
Now we can updateButton with the hook:
现在我们可以使用钩子更新Button了:
import React from "react";import useCursorHandlers from "./useCursorHandlers";const Button = () => {
  const cursorHandlers = useCursorHandlers();

  return (
    <button
      type="button"
      style={{ padding: "1rem" }}
      {...cursorHandlers}
    >
      HOVER ME
    </button>
  );
};
The bolded sections indicate changes from the previous version of Button.
粗体部分表示对 Button 先前版本的更改 。
5.解决一些问题 (5. Addressing a Few Issues)
Issue: The cursor remains visible at the edge of the viewport when moving the mouse out of the browser window.
问题:将鼠标移出浏览器窗口时,光标在视口边缘仍然可见。
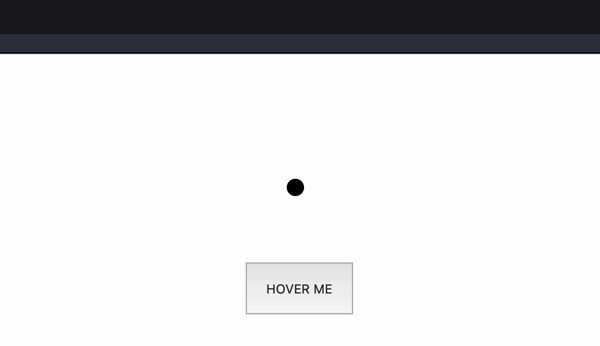
To remedy, we will add additional mouse event listeners that show/hide Cursor when the mouse enters/leaves the browser.
为了解决这个问题,我们将添加其他鼠标事件侦听器,它们在鼠标进入/离开浏览器时显示/隐藏Cursor 。
import React, { useContext, useState } from "react";import useMousePosition from "./useMousePosition";
import { CursorContext } from "./CursorContextProvider";const Cursor = () => {
  const { clientX, clientY } = useMousePosition();
  const [cursor] = useContext(CursorContext);
  const [isVisible, setIsVisible] = useState(false);

  useEffect(() => {
    const handleMouseEnter = () => setIsVisible(true);
    const handleMouseLeave = () => setIsVisible(false);
    document.body.addEventListener("mouseenter", handleMouseEnter);
    document.body.addEventListener("mouseleave", handleMouseLeave);
    return () => {
      document.body.removeEventListener("mouseenter",   handleMouseEnter);
      document.body.removeEventListener("mouseleave", handleMouseLeave);
    };
  }, []);  return (
    <div
      style={{
        position: "fixed",
        top: 0,
        bottom: 0,
        left: 0,
        right: 0,
        zIndex: 9999,
        pointerEvents: "none"
      }}
    >
      <svg
        width={50}
        height={50}
        viewBox="0 0 50 50"
        style={{
          position: "absolute",
          pointerEvents: "none",
          left: clientX,
          top: clientY,
          transform: `translate(-50%, -50%) scale(${cursor.active ? 2.5 : 1})`,
          stroke: cursor.active ? "black" : "white",
          strokeWidth: 1,
          fill: cursor.active ? "rgba(255,255,255,.5)" : "black",
          transition: "transform .2s ease-in-out",
          // TODO: extra check on clientX needed here
          // because mouseleave event not always firing
          // when slowly exiting left side of browser
          opacity: isVisible && clientX > 1 ? 1 : 0,
        }}
      >
        <circle
          cx="25"
          cy="25"
          r="8"
        />
      </svg>
    </div>
  );
};
The bolded sections indicate changes from the previous version of Cursor.
粗体字部分表示对 Cursor 先前版本的更改 。
Inside a React useEffect we set up event listeners that update a new isVisible state variable on mouseenter and mouseleave. Then in the svg we change the opacity based on the isVisible state. The new mouse events theoretically trigger whenever the mouse enters or exits the body element. However, in practice I found that sometimes when scrolling slowly off the left side of the browser window, the mouseleave event would not fire and the cursor would remain visible. To fix, I added another check to only show the svg if the clientX value of the mouse position is greater than 1. I also added a TODO comment regarding this hack as it could be confusing to other devs, and eventually I might like to find a different approach that doesn’t require the hack.
在React useEffect内部,我们设置了事件侦听器,该事件侦听器在mouseenter和mouseleave上更新了一个新的isVisible状态变量。 然后在svg我们基于isVisible状态更改opacity 。 理论上,每当鼠标进入或退出body元素时,都会触发新的鼠标事件。 但是,实际上,我发现有时在浏览器窗口左侧缓慢滚动时,不会触发mouseleave事件,并且光标仍然可见。 为了解决此问题,我添加了另一项检查,仅在鼠标位置的clientX值大于1时才显示svg 。 我还添加了关于此hack的TODO评论,因为它可能会使其他开发人员感到困惑,最终我可能想找到一种不需要该hack的不同方法。
问题:光标隐藏 在Chrome中的 HTML select 选项 下方 。 (Issue: The cursor is hidden beneath HTML select options in Chrome.)
The options of an HTML select display above the content in the DOM, including Cursor no matter how high we make its z-index.
HTML select的选项显示在DOM内容的上方,包括Cursor无论我们将其z-index高度如何。
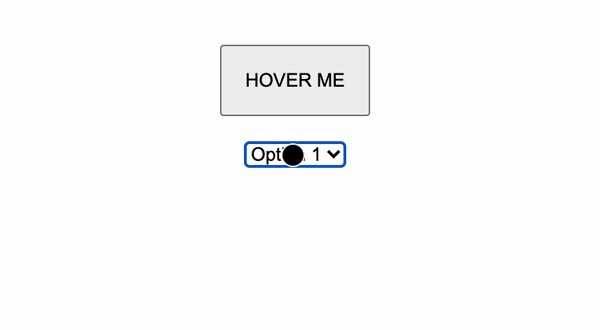
The above screencast was taken in Chrome. In Safari, the browser automatically takes control and shows the default cursor when the options are open. It’s not terribly elegant, but it’s better than the ghost cursor experience we have in Chrome, so we’ll try to implement something similar.
上面的截屏视频是在Chrome中拍摄的。 在Safari中,打开选项后,浏览器会自动控制并显示默认光标。 它并不十分优雅,但比我们在Chrome中的幻影光标体验要好,因此我们将尝试实现类似的功能。
To remedy, we’ll add a utility CSS class named show-cursor that we can apply to any elements that we want to display the default cursor.
为了解决这个问题,我们将添加一个名为show-cursor的实用CSS类,可以将其应用于要显示默认光标的任何元素。
* {
  cursor: none !important;
}.show-cursor {
  cursor: auto !important;
}
The bolded sections indicate changes from the previous CSS snippet.
粗体部分表示对先前CSS代码段的更改。
问题:我们在触摸设备上不需要它。 (Issue: We don’t need this on touch devices.)
First, we’ll add a utility to detect touch devices. Detecting touch devices is a somewhat contentious topic, and I don’t intend to wade into the debate about the best way to do so, but here’s one:
首先,我们将添加一个实用程序来检测触摸设备。 检测触摸设备是一个颇有争议的话题,我无意介入有关最佳方法的争论,但这里有一个:
const isTouchDevice =
  "ontouchstart" in window
  || navigator.MaxTouchPoints > 0
  || navigator.msMaxTouchPoints > 0;
Then, we’ll use the utility in Cursor.
然后,我们将在Cursor使用该实用程序。
import React, { useContext, useState } from "react";import useMousePosition from "./useMousePosition";
import { CursorContext } from "./CursorContextProvider";import isTouchDevice from "./isTouchDevice";const Cursor = () => {
  if (isTouchDevice) {
    return null;
  }

  ...
};
Some bits redacted for brevity; bold sections indicate changes from the last version of Cursor.
为简洁起见,对某些位进行了编辑; 粗体部分表示对 Cursor 的最新版本的更改 。
And finally, we’ll also use the utility in useCursorHandlers.
最后,我们还将在useCursorHandlers使用该实用程序。
import { useContext, useCallback } from "react";
import { CursorContext } from "./CursorContextProvider";import isTouchDevice from "./isTouchDevice";const useCursorHandlers = (options = {}) => {
  if (isTouchDevice) {
    return options;
  }

  ...
};
Some bits redacted for brevity; bold sections indicate changes from the last version of useCursorHandlers.
为简洁起见,对某些位进行了编辑; 粗体部分表示对 useCursorHandlers 的最新版本的 useCursorHandlers 。
On touch devices, we simply return the options object that was passed as an argument.
在触摸设备上,我们只返回作为参数传递的options对象。
6.最后是一个CodePen (6. And finally, a CodePen)
Code also available as a github gist.
代码也可以作为github gist获得 。
翻译自: https://medium.com/@jaredloson/custom-javascript-cursor-in-react-d7ffefb2db38
react 光标


 1785
1785

 被折叠的 条评论
为什么被折叠?
被折叠的 条评论
为什么被折叠?
 到【灌水乐园】发言


