


Before going to code, we need to know about OpenCV and NumPy Python libraries.
在编写代码之前,我们需要了解OpenCV和NumPy Python库。
Let’s start with the OpenCV library:
让我们从OpenCV库开始:
OpenCV: (OpenCV:)
OpenCV is an image processing library created by Intel. It provides simple and useful ways to read and write images. The OpenCV library allows you to run Computer Vision algorithms efficiently in real-time. OpenCV is a popular Computer Vision library that has many built-in tools for image analysis. One of the main advantages of OpenCV is that it is highly optimized and available on almost all platforms. OpenCV reads images in BGR format.
OpenCV是英特尔创建的图像处理库。 它提供了读取图像和写入图像的简单而有用的方法。 OpenCV库使您可以实时高效地运行计算机视觉算法。 OpenCV是流行的计算机视觉库,其中包含许多用于图像分析的内置工具。 OpenCV主要优点之一是它经过高度优化,并且可以在几乎所有平台上使用。 OpenCV读取BGR格式的图像。
NumPy: (NumPy:)
Numpy is a library for scientific computing in Python. It provides a high-performance multidimensional array object and tools for working with these arrays. A NumPy array is similar to the list. We can cast a list to a NumPy array by first importing it. Numpy arrays contain data of the same type, we can use attribute “dtype” to obtain the data type of the array’s elements.
Numpy是使用Python进行科学计算的库。 它提供了高性能的多维数组对象和用于处理这些数组的工具。 NumPy数组与列表相似。 我们可以通过首先导入列表将其转换为NumPy数组。 numpy数组包含相同类型的数据,我们可以使用属性“ dtype”来获取数组元素的数据类型。
项目所需的内置功能: (Built-in functions required for the project:)
— Bilateral Filtering
—双边过滤
— Edge Detection
—边缘检测
双边过滤: (Bilateral Filtering:)
Bilateral Filtering is a technique for image smoothening while preserving edges. It depends only on two parameters that indicate the size and contrast of the features to preserve. Image smoothening is used to reduce the sharpness of edges and detail in an image.
双边滤波是一种在保留边缘的同时使图像平滑的技术。 它仅取决于两个参数,这些参数指示要保留的特征的大小和对比度。 图像平滑用于降低图像边缘和细节的清晰度。
边缘检测: (Edge Detection:)
Edge Detection is an image processing technique to find the boundaries or edges of objects within the image, by determining where the brightness of the image changes fastly.
边缘检测是一种图像处理技术,可通过确定图像的亮度快速变化的位置来找到图像内对象的边界或边缘。
Coming to the coding part, let's start with importing the required resources:
进入编码部分,让我们开始导入所需的资源:
Next, Let’s start reading and displaying the dimensions of an image. The prescribed code is given below:
接下来,让我们开始阅读和显示图像的尺寸。 规定的代码如下:

— Downsampling is used to reduce the size of an image and bilateral filtering is for smoothening of image.
—下采样用于减小图像大小,而双边滤波则用于平滑图像。
— cv2.imread(“image.jpg”) loads the image and shape defines the dimensions of the image.
— cv2.imread(“ image.jpg”)加载图像,并且形状定义图像的尺寸。
To resize the image, we can use cv2.resize() function as follows:
要调整图像的大小,我们可以使用cv2.resize()函数,如下所示:
— cv2.resize() helps in reducing the number of pixels from the image.
— cv2.resize()有助于减少图像中的像素数量。
The next step is to perform downsampling using the gaussian pyramid:
下一步是使用高斯金字塔进行下采样:

— The Gaussian pyramid is used to downsample images. cv2.pyrDown() is used to reduce spatial resolution in the image. Typically used to zoom out from the image.
—使用高斯金字塔对图像进行下采样。 cv2.pyrDown()用于降低图像中的空间分辨率。 通常用于缩小图像。
Next, we will apply small bilateral filters repeatedly instead of one large filter as shown below:
接下来,我们将反复应用小型双边过滤器,而不是一个大型过滤器,如下所示:

— img_color is the input image
— img_color是输入图像
— d = diameter of each pixel neighborhood which is used during filtering
— d =滤波期间使用的每个像素邻域的直径
— sigmaColor filters the sigma in color space. The greater the value is, the farther colors within the pixel neighborhood will be mixed together
— sigmaColor过滤色彩空间中的sigma。 值越大,像素邻域内的颜色越远混合在一起
— sigmaSpace filters the sigma in the coordinate space. If the value of the parameter is larger then the farther pixels will influence each other as long as their colors are similar.
— sigmaSpace过滤坐标空间中的sigma。 如果参数值较大,则较远的像素将彼此影响,只要它们的颜色相似即可。
Note: Large filters are very slow, so it is recommended to use d=5 for real-time applications and d=9 for offline applications that need heavy noise filtering.
注意:大型滤波器非常慢,因此对于实时应用程序建议使用d = 5,对于需要重噪声过滤的离线应用程序建议使用d = 9。
Next, we need to perform upsampling as follows:
接下来,我们需要执行以下升采样:
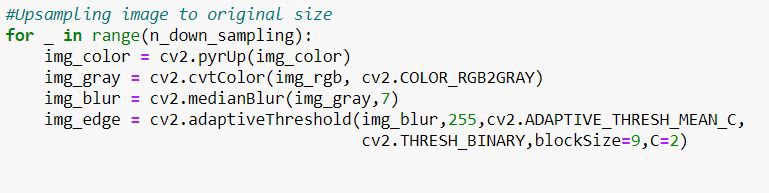
— Upsampling is used to increase spatial resolution that is to increase the size of an image. It is typically used to zoom in on a small region of an image and for eliminating the pixelation effect that arises when a low resolution is displayed on a relatively large frame.
—上采样用于增加空间分辨率,即增加图像的大小。 它通常用于放大图像的一小部分,并消除在相对较大的帧上显示低分辨率时出现的像素化效果。
— cvtColor() is used to convert an image from one color space to another. Here img_rgb is the image whose color space has to be changed.
— cvtColor()用于将图像从一种颜色空间转换为另一种颜色空间。 这里img_rgb是必须更改其色彩空间的图像。
— medianBlur() takes the median of all pixels in the kernel area and the central element is replaced with this median value. Here img_gray is the input image and 7 is the kernel size.
— meanBlur()取内核区域中所有像素的中值,并将中心元素替换为该中值。 这里img_gray是输入图像,7是内核大小。
— adaptiveThreshold() calculates threshold value for smaller regions. Here img_blur is the input image, 255 is the maximum value assigned to a pixel.
—AdaptiveThreshold()计算较小区域的阈值。 这里img_blur是输入图像,255是分配给像素的最大值。
— ADAPTIVE_THRESH_MEAN_C tells about the mean of the neighborhood values minus constant value.
— ADAPTIVE_THRESH_MEAN_C表示邻域值减去常数后的平均值。
— blockSize decides the size of the neighborhood area.
— blockSize决定附近区域的大小。
— C is just a constant value that is subtracted from the mean.
— C只是从平均值中减去的恒定值。
The final step is to convert back the image to color image using bitwise and to display the stacked images:
最后一步是使用按位将图像转换回彩色图像并显示堆叠的图像:

— cv2.bitwise_and() used to perform image masking. Here img_color is the first input image and img_edge is the second input image.
— cv2.bitwise_and()用于执行图像遮罩。 img_color是第一个输入图像,img_edge是第二个输入图像。
— np.hstack() is used to display multiple images in one window.
— np.hstack()用于在一个窗口中显示多个图像。
— cv2.imshow() displays the specified image.
— cv2.imshow()显示指定的图像。
— cv2.waitkey(0) will display the window infinitely until any key is pressed.
— cv2.waitkey(0)将无限显示该窗口,直到按任意键为止。
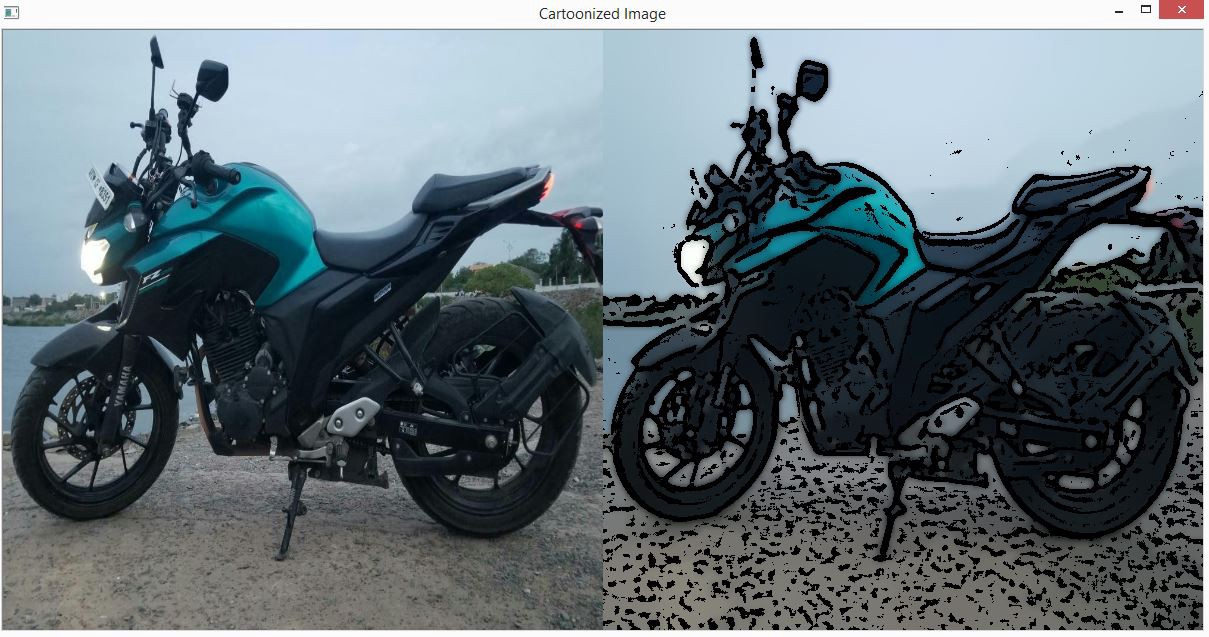
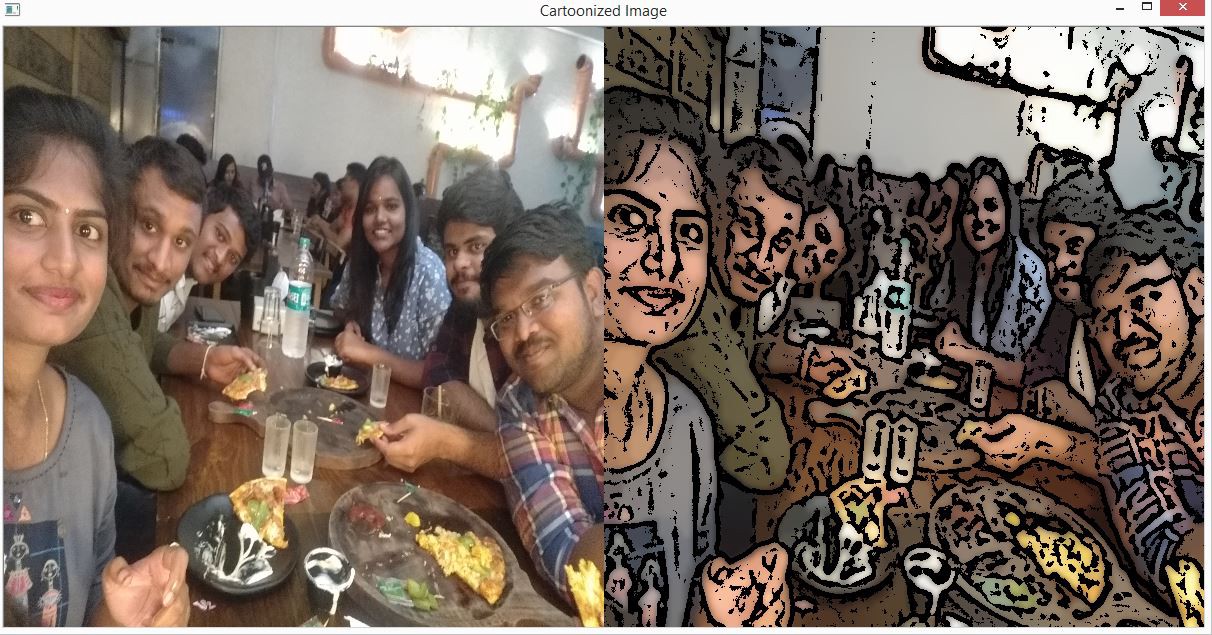
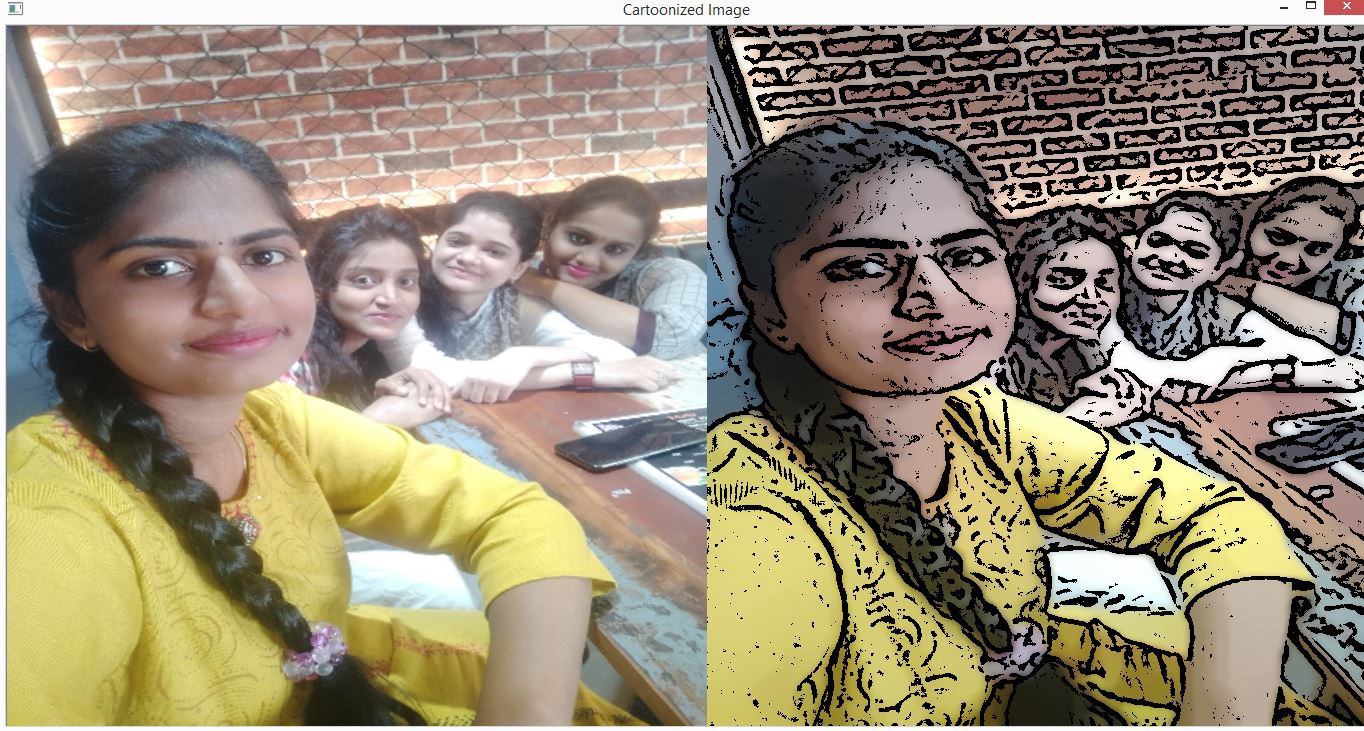
The few output images for the prescribed code are as shown below:
规定代码的一些输出图像如下所示:

To know more about NumPy and other Python libraries you can refer to this link:
要了解有关NumPy和其他Python库的更多信息,请参考以下链接:


 2520
2520

 被折叠的 条评论
为什么被折叠?
被折叠的 条评论
为什么被折叠?
 到【灌水乐园】发言


