


MSE(Mobility Services Engine)
Cisco MSE可以配合无线实现很多功能,MSE的功能简单概括有:
1、基本位置服务捕获并聚合关键网络信息,例如设备位置,RF频谱详细信息和RF干扰源。它还允许支持丰富的实时位置服务(RTLS,Real-Time Location Services)
2、使用基于位置的服务自定义移动体验,例如可以通过现场,在线和社交分析提供个性化的移动体验并更好地了解用户。
3、确保无线用户和网络安全,思科MSE自适应无线入侵防御系统(wIPS)有助于保护网络免受恶意无线设备,拒绝服务(DoS)攻击和其他无线威胁的侵害。它提供了加强安全性和提高合规性所需的工具。
各功能的license
1、Base Location license
2、Connected Mobile Experiences (CMX) license
3、wIPS license
使用的平台
物理应用:Cisco MSE3355 & MSE 3356
虚拟应用:VMware ESX/ESXi (Version 4.1/5.0/5.1/5.5 or later)、Xen Server version 6.1 or higher、Hyper-V version 2008/2012 or higher (Note: Hyper-V version 2012R2, RS3 and future not supported.)
初始化MSE
这里简单截取了MSE在VMware VSphere中初始化的信息,在思科官网下载对应的MSE ova文件,直接在VMware打开虚拟机,这个过程会比较久。

下面的信息是MSE初始化需要配置的信息:
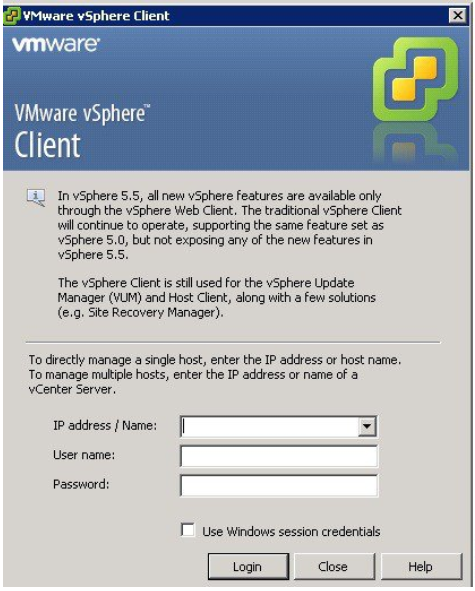
1、打开VSphere客户端。
2、登录到VSphere客户端或者VCenter Server
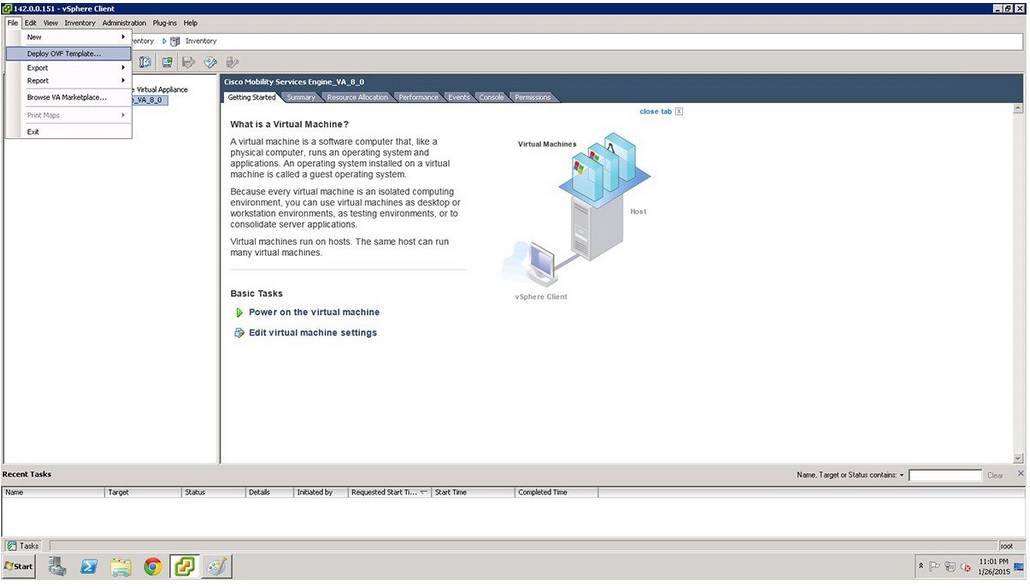
3、使用VSphere客户端打开OVF/OVA文件
3.1、选择Home>Inventory>Hosts and Clusters
3.2、选择将要部署的问题
3.3、从VSPhere工具栏选择File>Deploy OVF Template
4、选择一个Source location
4.1、点击Browse
4.2、从“打开”对话框中,找到下载到计算机的相应.ova文件,然后单击“打开”。
5、点击Next
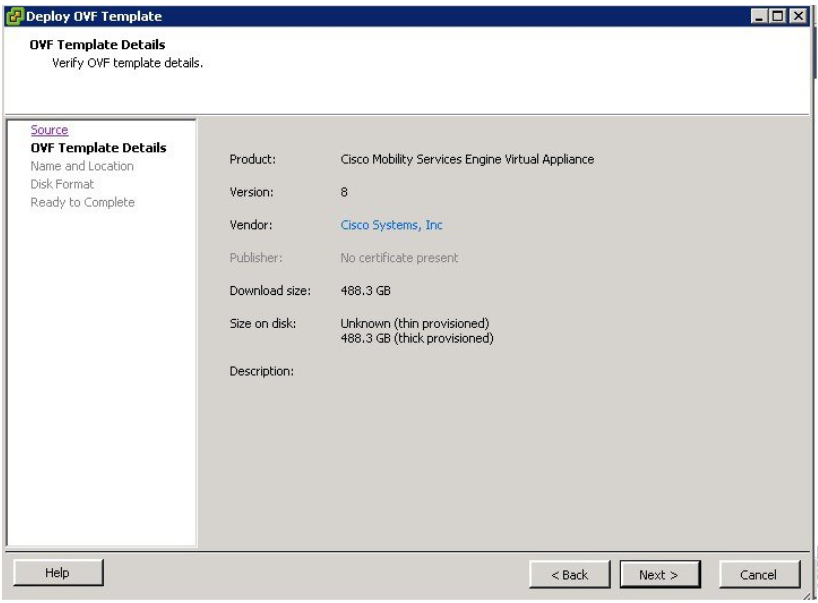
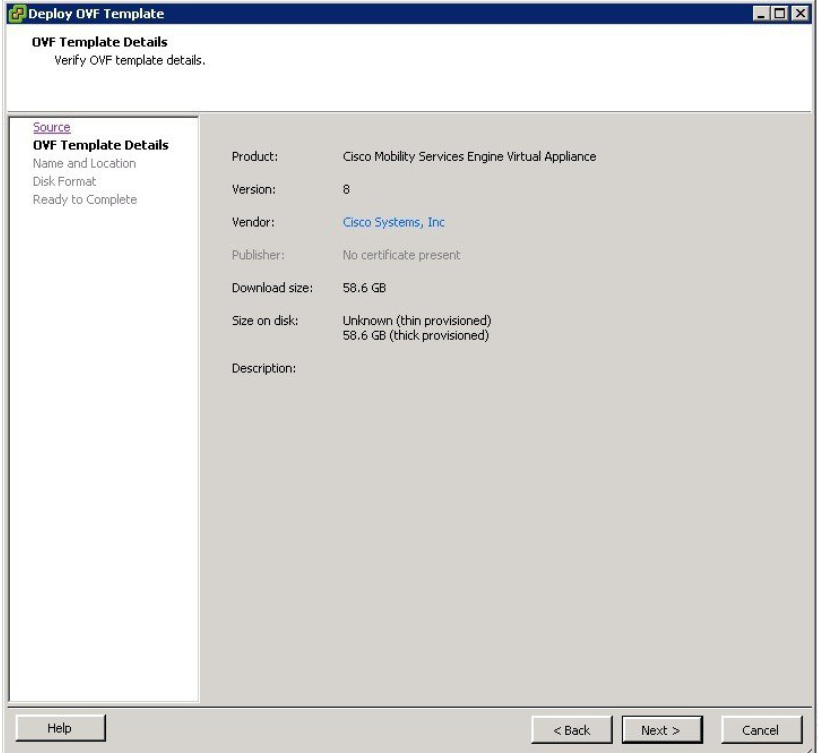
6、查看OVF模板详细信息,然后单击Next 。 有关Cisco MSE虚拟设备的一些详细信息包括:
Version number ——版本号
Download size
Size on disk ——磁盘大小
7、点击Next,名字和位置窗口出现。

8、在Name那一框中输入对应的虚拟机的名字 。
9、Next,磁盘格式出现窗口出现。
10、选择磁盘格式。
如果磁盘空间足够,可以选择如下的方式:
- Thick Provision Lazy Zeroed-创建虚拟磁盘时分配虚拟磁盘所需的空间。 创建虚拟磁盘时,物理设备上保留的数据不会被删除,但在第一次从虚拟磁盘写入时会根据需要将其清零。
- Thick Provision Eager Zeroed-创建虚拟磁盘时分配虚拟磁盘所需的空间。 与Lazy Zeroed选项不同,创建虚拟磁盘时会删除物理设备上保留的数据。
如果磁盘空间资源相对欠缺,可以选择Thin Provision(精简配置):
精简配置 - 虚拟磁盘所需的空间在创建期间不会分配,而是在以后按需提供,归零。
11、点击Next,Network Mapping窗口出现。
12、对于OVF模板中指定的Network,右键单击基础结构中的“Destination Network”列以选择网络以设置Network Mapping,然后单击“Next”。
13、到达Complete界面,检查之前的设置。
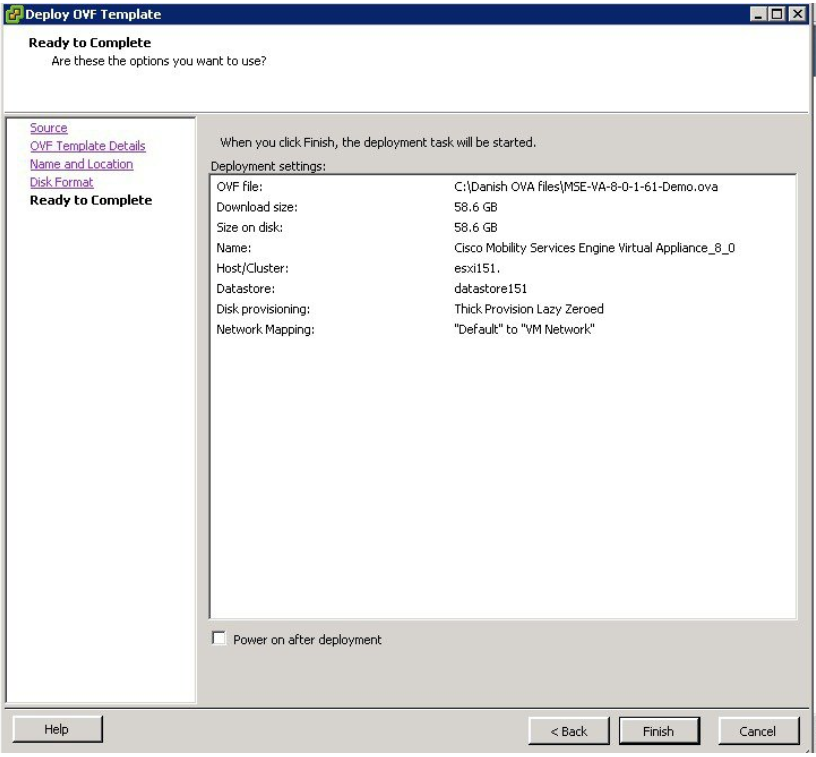
14、点击Back可以返回修改,点击Finish就完成部署,开始下一步操作。
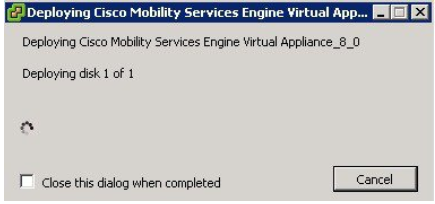
15、进度条与Cisco MSE虚拟设备部署保持同步,根据网络延迟,可能需要5到10分钟才能完成。 部署完成后,将打开“Deployment Completed Successfully”对话框。
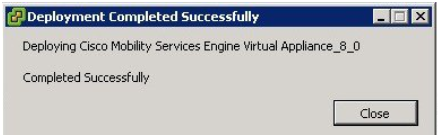
成功,点击Close
下一步操作,将是对MSE的一些基本设置:
Power on MSE VM,然后接入console控制台。按Enter键以显示登录提示以启动MSE安装向导。 并将显示以下内容(如下安装进程大概需要花费40-50 min):
------------------------------------------------------------------
Cisco Mobility Service Engine
mse login: root
Password: password
Running the Cisco Mobility Services Engine installer. It may take several minutes to complete.
CISCO-MSE-L-K9-8-0-x-x-64bit.bin
MSE_PUB.pem
signhash.bin
Preparing to install...
Extracting the JRE from the installer archive...
Unpacking the JRE...
Extracting the installation resources from the installer archive...
Configuring the installer for this system’s environment...
Launching installer...
Preparing SILENT Mode Installation...
================================================================
Cisco Mobility Services Engine (created with InstallAnywhere by Macrovision)
----------------------------------------------------------------
Auto Startup
------------
The Cisco MSE is configured to startup automatically at system boot up. You can modify this setting using setup.shafter installation is completed.
================================================================
Installing...
-------------
[==================|==================|==================|=============]
[------------------|------------------|------------------|-------------]
========================================================================
Database Installation
---------------------
The installer will now install the database. This may take a long time (up to 30 minutes). Do not cancel the installer during this setup.
Installing Database files
Step 1/3 - Installing Database files
Step 1/3 Completed
Step 2/3 - Configuring Database
Step 2/3 Completed
Step 3/3 - Updating patches
Step 3/3 Completed
Installation of database completed
=======================================================================
-------------------------------------------------------------------]
Starting Health Monitor, Waiting to check the status
Health Monitor successfully started
Starting Admin process...
Started Admin process...
Starting database.....
Database started successfully. Starting framework and services........
安装完成后,你需要重新登录到MSE。
GRUB Loading stage2...
Press any key to continue.
Press any key to continue.
使用之前配置的root账户登录。
[Login as root and password]
-----------------------------------------------------------
Cisco Mobility Services Engine
mse login: root
password: password
Last login: Mon Apr 7 04:11:50 on tty1
[Configuration starts as soon as you log in]
Would you like to setup initial parameters using menu options (yes/no) [yes]:
[Press Enter to use the default values (yes) to use the Menu options]
Please select a configuration option below and enter the
requested information. You may exit setup at any time by
typing <Ctrl+C>.
You will be prompted to choose whether you wish to configure a
parameter, skip it, or reset it to its initial default value.
Skipping a parameter will leave it unchanged from its current
value.
Please note that the following parameters are mandatory and must be configured at lease once.
-> Hostname
-> Network interface eth0
-> Timezone settings
-> Root password
-> NTP settings
-> Prime Infrastructure password
You must select option 24 to verify and apply any changes made during this session.
--------------------------------------------------------------
PRESS <ENTER> TO CONTIBNUE:
--------------------------------------------------------------
Configure MSE:
1) Hostname * 13) Remote syslog setting
2) Network Interface eth0 settings * 14) Host access control settings
3) Timezone settings * 15) Audit rules
4) Root password * 16) Login banner
5) NTP settings * 17) System console restrictions
6) Prime Infrastructure configuration 18) SSH root access
7) Display current configuration 19) Single user password check
8) Domain 20) Login and password settings
9) High availability role 21) GRUB password
10) Network interface eth1 settings 22) Root access control
11) DNS settings 23) Auto start MSE on system boot up
12) Future restart time 24) ## Verify and apply changes ##
强烈建议在初始设置期间配置所有相关项目,以确保MSE的最佳运行。 必须始终在自动安装期间配置主机名以及Ethernet-0(eth0)或Ethernet-1(eth1)端口。
如果我们需要修改之前设置的参数,可通过如下命令随时重新运行自动安装脚本以添加或更改参数:
[root @ mse] #/opt/mse/setup/setup.sh
无需重新输入您在其中一个更新期间不想更改的值。修改你想要修改的参数即可。
如果你不想配置的,输入skip,系统将提示您进行下一个配置步骤。 跳过的任何设置都会保留,不会被修改。
使用Console控制器安装的部署,只是完成了MSE的最小配置,除此之外的所有配置,都由PI来完成。
如下配置主机名hostname:
Please enter your choice [1 - 24]: 1
Current Hostname=[mse]
Configure Hostname? (Y)es/(S)kip/(U)se default [Skip]: y
The host name should be a unique name that can identify
the device on the network. The hostname should start with
a letter, end with a letter or number, and contain only
letters, numbers, and dashes.
Enter a Host name [mse]:
如下配置eth0网络设置:
Please enter your choice [1 - 24]: 2
Current eth0 interface IP address=[10.0.0.1]
Current eth0 interface netmask=[255.0.0.0]
Current IPv4 gateway address=[172.20.104.123]
Configure eth0 interface parameters? (Y)es/(S)kip/(U)se default [Skip]:y
Enter an IP address for first ethernet interface of this machine.
Enter eth0 IP address [10.0.0.2]:
Enter the network mask for IP address 172.21.105.126
Enter network mask [255.255.255.224]:
Enter the default gateway address for this machine.
Note that the default gateway must be reachable from
the first ethernet interface.
Enter default gateway address [172.20.104.123]:
如下配置DNS:
Please enter your choice [1 - 24]: 11
Domain Name Service (DNS) Setup
Enable DNS (yes/no) [no]: y
Default DNS server 1=[8.8.8.8]
Enter primary DNS server IP address:
DNS server address must be in the form #.#.#.#, where # is 0 to 255 or hexadecimal : separated v6 address
Enter primary DNS server IP address [8.8.8.8]:
Enter backup DNS server IP address (or none) [none]:
如下配置时区(配置wIPS时必须使用UTC。 对于其他服务,您必须使用与控制器相同的时区):
Please enter your choice [1 - 24]: 3
Current Timezone=[America/New_York]
Configure Timezone? (Y)es/(S)kip/(U)se default [Skip]: y
Enter the current date and time.
Please identify a location so that time zone rules can be set correctly.
Please select a continent or ocean.
1) Africa
2) Americas
3) Antarctica
4) Arctic Ocean
5) Asia
6) Atlantic Ocean
7) Australia
8) Europe
9) Indian Ocean
10) Pacific Ocean
11) UTC - I want to use Coordinated Universal Time.
#? 2
Please select a country.
1) Anguilla 27) Honduras
2) Antigua & Barbuda 28) Jamaica
3) Argentina 29) Martinique
4) Aruba 30) Mexico
5) Bahamas 31) Montserrat
6) Barbados 32) Netherlands Antilles
7) Belize 33) Nicaragua
8) Bolivia 34) Panama
9) Brazil 35) Paraguay
10) Canada 36) Peru
11) Cayman Islands 37) Puerto Rico
12) Chile 38) St Barthelemy
13) Colombia 39) St Kitts & Nevis
14) Costa Rica 40) St Lucia
15) Cuba 41) St Martin (French part)
16) Dominica 42) St Pierre & Miquelon
17) Dominican Republic 43) St Vincent
18) Ecuador 44) Suriname
19) El Salvador 45) Trinidad & Tobago
20) French Guiana 46) Turks & Caicos Is
21) Greenland 47) United States
22) Grenada 48) Uruguay
23) Guadeloupe 49) Venezuela
24) Guatemala 50) Virgin Islands (UK)
25) Guyana 51) Virgin Islands (US)
26) Haiti
#? 47
Please select one of the following time zone regions.
1) Eastern Time
2) Eastern Time - Michigan - most locations
3) Eastern Time - Kentucky - Louisville area
4) Eastern Time - Kentucky - Wayne County
5) Eastern Time - Indiana - most locations
6) Eastern Time - Indiana - Daviess, Dubois, Knox & Martin Counties
7) Eastern Time - Indiana - Pulaski County
8) Eastern Time - Indiana - Crawford County
9) Eastern Time - Indiana - Pike County
10) Eastern Time - Indiana - Switzerland County
11) Central Time
12) Central Time - Indiana - Perry County
13) Central Time - Indiana - Starke County
14) Central Time - Michigan - Dickinson, Gogebic, Iron & Menominee Counties
15) Central Time - North Dakota - Oliver County
16) Central Time - North Dakota - Morton County (except Mandan area)
17) Mountain Time
18) Mountain Time - south Idaho & east Oregon
19) Mountain Time - Navajo
20) Mountain Standard Time - Arizona
21) Pacific Time
22) Alaska Time
23) Alaska Time - Alaska panhandle
24) Alaska Time - Alaska panhandle neck
25) Alaska Time - west Alaska
26) Aleutian Islands
27) Hawaii
#? 21
The following information has been given:
United States
Pacific Time
Therefore TZ='America/Los_Angeles' will be used.
Local time is now: Sun Apr 6 18:45:27 PDT 2014.
Universal Time is now: Mon Apr 7 01:45:27 UTC 2014.
Is the above information OK?
1) Yes
2) No
#? 1
如下配置Root密码:
Please enter your choice [1 - 24]: 4
Root password has not been configured
Configure root password? (Y)es/(S)kip/(U)se default [Skip]:
Changing password for user root.
You can now choose the new password.
A valid password should be a mix of upper and lower case letters, digits, and other characters. You can use an 8 character long password with characters from all of these classes. An upper case letter that begins the password and a digit that ends it do not count towards the number of character classes used.
Enter new password:
如下配置NTP:
Please enter your choice [1 - 24]: 5
Network Time Protocol (NTP) Setup.
If you choose to enable NTP, the system time will be
configured from NTP servers that you select. Otherwise,
you will be prompted to enter the current date and time.
NTP is currently disabled.
Configure NTP related parameters? (Y)es/(S)kip/(U)se default [Skip]: y
Enter whether or not you would like to set up the
Network Time Protocol (NTP) for this machine.
If you choose to enable NTP, the system time will be
configured from NTP servers that you select. Otherwise,
you will be prompted to enter the current date and time.
Enable NTP (yes/no) [no]: y
Default NTP server 1=[time.nist.gov]
Enter NTP server name or address:
NTP server address must be in the form #.#.#.3, where # is 0 to 255 hexadecimal : separated v6 address.
Enter NTP server name or [time.nist.gov]:
Enter another NTP server IP address (or none) [none]:
Configure NTP Authentication ? (Y)es/(S)kip/(U)se default [Skip]: y
Enter NTP Auth key Number [1]:
Enter NTP Auth key Value (String) [Secret]:
Do you want to continue (yes/no) [no]: y
如下配置PI的密码(默认PI的密码时admin,如你不设置,提交的时候会报错):
Please enter your choice [1 - 24]: 6
Cisco Prime Infrastructure communication password has not been configured.
Configure Prime Infrastructure password? (Y)es/(S)kip/(U)se default [Yes]:
Enter a password for the admin user.
The admin user is used by the Prime Infrastructure and other northbound systems to authenticate their SOAP/XML session with the server. Once this password is updated, it must correspondingly be updated on the NCS page for MSE General Parameters so that the Prime Infrastructure can communicate with the MSE.
Enter Prime Infrastructure password:
如下验证设置的信息并应用:
Please enter your choice [1 - 24]: 24
Please verify the following setup information.
-----------------------------BEGIN----------------------------
Hostname=mse8-0
Eth0 IP address=, Eth0 network mask=255.255.254.0
Time zone=America/Los_Angeles
Enable DNS=yes, DNS servers=8.8.8.8
Enable NTP=yes, NTP servers=time.nist.gov
Time zone=America/Los_Angeles
Root password is changed.
Cisco Prime Infrastructure password is changed.
------------------------------END-----------------------------
You may enter "yes" to proceed with configuration, "no" to make
more changes.
Configuration Changed
Is the above information correct (yes or no): yes
--------------------------------------------------------------
------------
Checking mandatory configuration information...
Setup will now attempt to apply the configuration.
Restarting network services with new settings.
Shutting down interface eth0:
The system is minimally configured right now. It is strongly recommended that you run the setup script under /opt/mse/setup/setup.sh command to configure all appliance related parameters immediately after installation is complete.
PRESS <ENTER> TO EXIT THE INSTALLER:
[root@mse8-0 installers]# reboot
Stopping MSE Platform
Flushing firewall rules: [OK]
Setting chains to policy ACCEPT: nat filter [OK]
Unloading iptables modules: [ok]
Broadcast message from root (pts/0) (Tue Apr29 14:15:27:2014):
The system is going down for reboot NOW:
如下显示重启后登陆(使用root):
Cisco Mobility Service Engine
mse8-0 login:
Passsword:
其他操作:
如果需要将MSE配置为启动后自动launch,使用如下命令:
[root@mse8-0]# chkconfig msed on
重启MSE,可以输入reboot:
[root@mse8-0]# reboot
手动开启MSE service,输入如下命令:
[root@mse8-0]# service msed start
可以随时重新运行安装脚本,以root身份登录并运行/opt/mse/setup/setup.sh来更改设置。
[root@mse8-0]#/opt/mse/setup/setup.sh
安装脚本生成一个日志文件,可以在/opt/mse/setup/setup.log中找到。


 510
510


 被折叠的 条评论
为什么被折叠?
被折叠的 条评论
为什么被折叠?
 到【灌水乐园】发言


