


文件结构

一、interface、bean等代码
package com.yiibai.core;
public interface IHelloWorld {
public void printHello();
void printHelloWorld(String msg);
}
package com.yiibai.core;
public class HelloWorldImpl implements IHelloWorld {
private String name;
@Override
public void printHello() {
// TODO 自动生成的方法存根
System.out.println("Spring 3 : Hello ! " + name);
}
public void setName(String name) {
this.name = name;
}
@Override
public void printHelloWorld(String msg) {
// TODO 自动生成的方法存根
System.out.println("Hello : " + msg);
}
}
package com.yiibai.core;
public class CustomerBo {
public void printMsg(String msg) {
System.out.println("CustomerBo : " + msg);
}
}
package com.yiibai.core;
public class SchedulerBo {
public void printMsg(String msg) {
System.out.println("SchedulerBo : " + msg);
}
}
二、AppConfig(相当于配置文件)
package com.yiibai.config;
import org.springframework.context.annotation.Bean;
import org.springframework.context.annotation.Configuration;
import com.yiibai.core.CustomerBo;
@Configuration
public class CustomerConfig {
@Bean(name="customer")
public CustomerBo customerBo(){
return new CustomerBo();
}
}
package com.yiibai.config;
import org.springframework.context.annotation.Bean;
import org.springframework.context.annotation.Configuration;
import com.yiibai.core.SchedulerBo;
@Configuration
public class SchedulerConfig {
@Bean(name="scheduler")
public SchedulerBo suchedulerBo(){
return new SchedulerBo();
}
}
package com.yiibai.config;
import org.springframework.context.annotation.Bean;
import org.springframework.context.annotation.Configuration;
import org.springframework.context.annotation.Import;
import com.yiibai.core.HelloWorldImpl;
import com.yiibai.core.IHelloWorld;
@Configuration
@Import({ CustomerConfig.class, SchedulerConfig.class })
public class AppConfig {
@Bean(name="helloBean")
public IHelloWorld helloWorld() {
return new HelloWorldImpl();
}
}
三、测试(主类)
package com.yiibai.config;
import org.springframework.context.ApplicationContext;
import org.springframework.context.annotation.AnnotationConfigApplicationContext;
import com.yiibai.core.CustomerBo;
import com.yiibai.core.IHelloWorld;
import com.yiibai.core.SchedulerBo;
public class App {
private static ApplicationContext context;
public static void main(String[] args) {
context = new AnnotationConfigApplicationContext(AppConfig.class);
IHelloWorld obj = (IHelloWorld) context.getBean("helloBean");
obj.printHelloWorld("Spring Java Config");
CustomerBo customer = (CustomerBo) context.getBean("customer");
customer.printMsg("Hello 11");
SchedulerBo scheduler = (SchedulerBo) context.getBean("scheduler");
scheduler.printMsg("Hello 22");
}
}
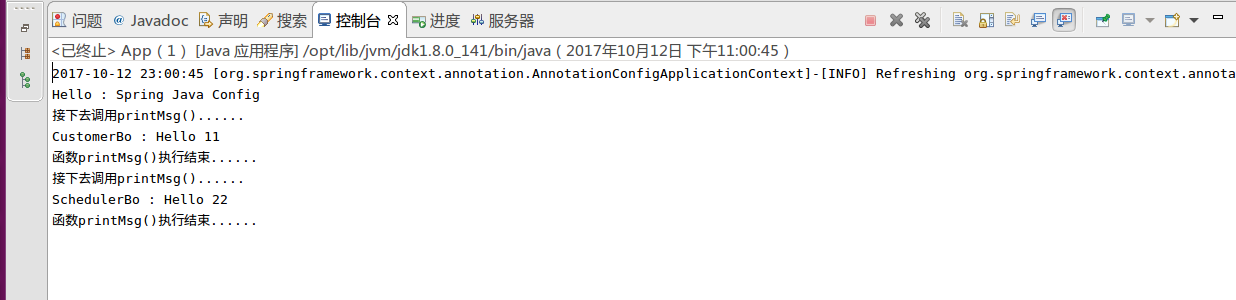
四、运行

五、set函数注入bean属性的情况:
AppConfig类内增加下面的代码:
@Bean(name="helloBean1")
public IHelloWorld helloWorld1() {
HelloWorldImpl myhello= new HelloWorldImpl();
myhello.setName("Yiibai");
return myhello;
}
等价于以下的XML配置:
六、无xml配置AOP
两点:
1、AOP类加上下面的注释
@Component
@Aspect
增加AOP类---AopConfig内容如下:
package com.yiibai.config;
import org.aspectj.lang.annotation.AfterReturning;
import org.aspectj.lang.annotation.Aspect;
import org.aspectj.lang.annotation.Before;
import org.aspectj.lang.annotation.Pointcut;
import org.springframework.stereotype.Component;
@Component
@Aspect
public class AopConfig {
/*Pointcut for printMsg*/
@Pointcut("execution(* *.printMsg(*))")
public void printpoint() {
}
@Before("printpoint()")
public void beforepoint() {
System.out.println("接下去调用printMsg()......");
}
@AfterReturning("printpoint()")
public void afterprint() {
System.out.println("函数printMsg()执行结束......");
}
}
2、JavaConfig类加上:
@ComponentScan
@EnableAspectJAutoProxy
修改后的JavaConfig类---AppConfig代码如下:
package com.yiibai.config;
import org.springframework.context.annotation.Bean;
import org.springframework.context.annotation.ComponentScan;
import org.springframework.context.annotation.Configuration;
import org.springframework.context.annotation.EnableAspectJAutoProxy;
import org.springframework.context.annotation.Import;
import com.yiibai.core.HelloWorldImpl;
import com.yiibai.core.IHelloWorld;
@Configuration
@ComponentScan
@EnableAspectJAutoProxy
@Import({ CustomerConfig.class, SchedulerConfig.class })
public class AppConfig {
@Bean(name="helloBean")
public IHelloWorld helloWorld() {
return new HelloWorldImpl();
}
}
运行:
七、混用XML与Java装配方式
包com.yiibai.config下创建配置文件applicationContext.xml(本人习惯把配置文件放在包里,这样便于随包整体转移到其他项目而不必修改代码):
xmlns:xsi="http://www.w3.org/2001/XMLSchema-instance"
xsi:schemaLocation="http://www.springframework.org/schema/beans
http://www.springframework.org/schema/beans/spring-beans-4.0.xsd">
用来注册helloBean。
对AppConfig如下修改:
1)@Configuration前加上@ImportResource("classpath:com/yiibai/core/applicationContext.xml")
2)注释helloBean的内容。
修改好的内容:
package com.yiibai.config;
import org.springframework.context.annotation.Configuration;
import org.springframework.context.annotation.Import;
import org.springframework.context.annotation.ImportResource;
@ImportResource("classpath:com/yiibai/core/applicationContext.xml")
@Configuration
@Import({ CustomerConfig.class, SchedulerConfig.class })
public class AppConfig {
}
测试代码和运行结果都不变
(也不是完全不变,会多出一条类似如下的消息
2017-10-10 22:45:49 [org.springframework.beans.factory.xml.XmlBeanDefinitionReader]-[INFO] Loading XML bean definitions from class path resource [com/yiibai/core/applicationContext.xml]
)
如需要在xml配置AOP,则applicationContext.xml内容如下:
xmlns:xsi="http://www.w3.org/2001/XMLSchema-instance" xmlns:context="http://www.springframework.org/schema/context"
xmlns:aop="http://www.springframework.org/schema/aop" xmlns:tx="http://www.springframework.org/schema/tx"
xsi:schemaLocation="http://www.springframework.org/schema/beans
http://www.springframework.org/schema/beans/spring-beans-4.3.xsd
http://www.springframework.org/schema/context
http://www.springframework.org/schema/context/spring-context-4.3.xsd
http://www.springframework.org/schema/tx
http://www.springframework.org/schema/tx/spring-tx-4.3.xsd
http://www.springframework.org/schema/aop
http://www.springframework.org/schema/aop/spring-aop-4.3.xsd ">
类方式注入使用aop需将 改为 或 ,否则会出现cannot be cast to .......错误.
七、注意:Web环境中使用JavaConfig,需要在web.xml中加入如下代码:
contextClass
org.springframework.web.context.support.AnnotationConfigWebApplicationContext
contextConfigLocation
com.packtpub.learnvaadin.springintegration.SpringIntegrationConfiguration
参考:


 413
413


 被折叠的 条评论
为什么被折叠?
被折叠的 条评论
为什么被折叠?
 到【灌水乐园】发言


