


>>> from PIL import Image
>>> test_image = Image.open('data/test_image.jpg')
# The image is an RGB image with a size of 8x8 pixels.
>>> print 'Image Mode: %s' % test_image.mode
Image Mode: RGB
>>> print 'Width: %s px, Height: %s px' % (test_image.size[0], test_image.size[1])
Width: 4 px, Height: 4 px
# Get the pixel values from the image and print them into rows based on
# the image's width.
>>> width, height = test_image.size
>>> pixels = list(test_image.get
Test image1
2
3
4
5
6
7
8
9
10
11
12
13
14
15
16
17
18
19
20>>> from PIL import Image
>>> test_image = Image.open('data/test_image.jpg')
# The image is an RGB image with a size of 8x8 pixels.
>>> print 'Image Mode: %s' % test_image.mode
Image Mode: RGB
>>> print 'Width: %s px, Height: %s px' % (test_image.size[0], test_image.size[1])
Width: 4 px, Height: 4 px
# Get the pixel values from the image and print them into rows based on
# the image's width.
>>> width, height = test_image.size
>>> pixels = list(test_image.get
用Python实现通过哈希算法检测图片重复的教程
2.将图像缩小到一个常见大小
将图像缩减到一个常见基础尺寸,比如宽度大高度一个像素值的9*8像素大小(到第三步你就能明白为什么是这个尺寸)。通过这个方法将图像中的高频和细节部分移除,从而获得一个有72个强度值的样本。由于调整或者拉伸图像并不会改变它的哈希值,所以将所有图像归一化到该大小。
3.比较邻域像素
前两步实现后得到一个强度值列表,比较该二进制值数组的每一行的相邻像素。1
2
3
4
5
6
7
8
9
10
11
12
13
14
15>>> from PIL import Image
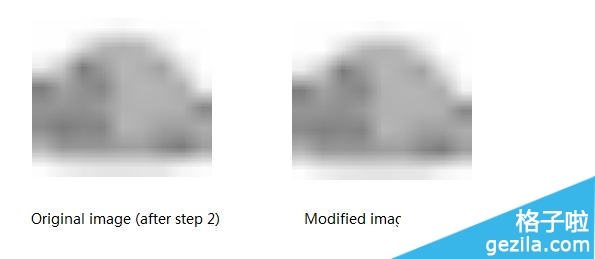
>>> img = Image.open('data/cat_grumpy_orig_after_step_2.png')
>>> width, height = img.size
>>> pixels = list(img.get
2.将图像缩小到一个常见大小
将图像缩减到一个常见基础尺寸,比如宽度大高度一个像素值的9*8像素大小(到第三步你就能明白为什么是这个尺寸)。通过这个方法将图像中的高频和细节部分移除,从而获得一个有72个强度值的样本。由于调整或者拉伸图像并不会改变它的哈希值,所以将所有图像归一化到该大小。
3.比较邻域像素
前两步实现后得到一个强度值列表,比较该二进制值数组的每一行的相邻像素。


 50
50


 被折叠的 条评论
为什么被折叠?
被折叠的 条评论
为什么被折叠?
 到【灌水乐园】发言


