Things we are gonna need are
- Blender 2.7x www.blender.org/
- XPS tools addon for Blender
- A model made with materials for Blender internal
For Mac Users
Safari automatically unzips downloaded files and deletes the original ZIP file.
Try disabling this function (I don't know how, I never used a Mac) or download using another browser like Firefox.
Preparation
First thing we have to do is to installing the addon.Go to the provided link and download the latest version of the addon. DO NOT UNZIP IT.
Open Blender and go to File > User Preferences
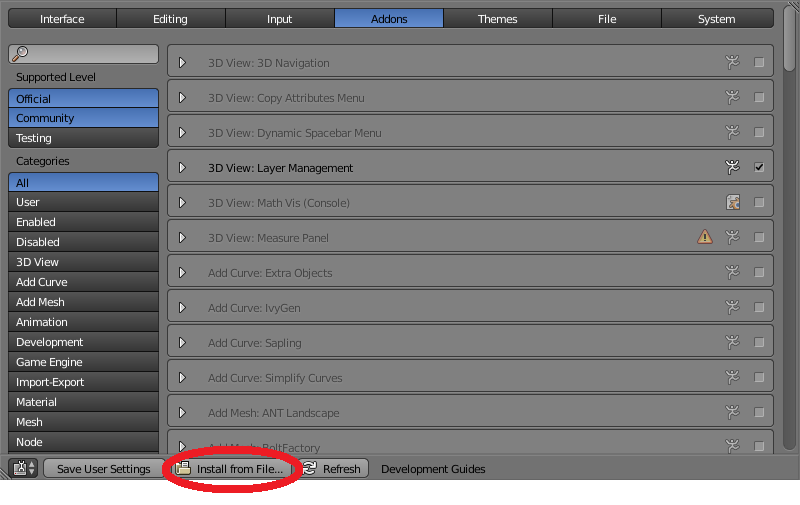
Select the Addons tab and click the "Install fom File..." button

Find the downloaded addon zip file and click the "Install fom File..." button
The XPS tools addon should be de only addon diplayed on the list, if not type "XPS" in the search dialog.
Now Check the checkbox to the right to enable the addon.
Click the "Save User Settings" button and close the window.

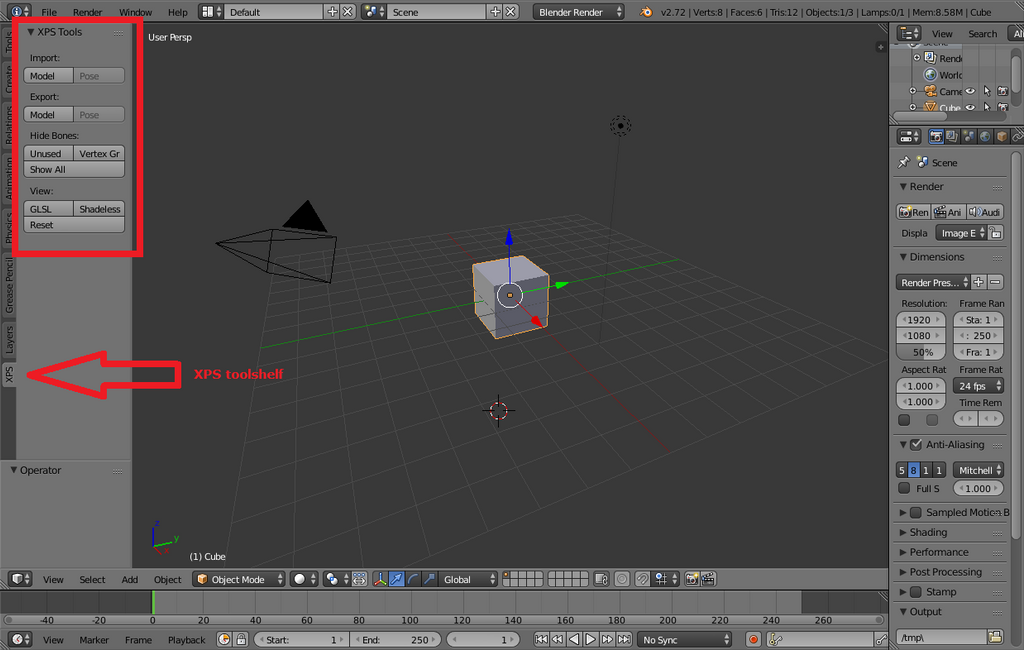
A new tab called XPS should have appeared in the toolshelf

Necessary knowledge
First we need to know how XPS manages material. XPS suppports only one material per MeshFor XPS to properly displa


 这篇博客介绍了将使用Blender 2.7x内置材料制作的模型导出到XPS的步骤。内容包括准备工作、必要的知识,以及模型准备阶段的注意事项,如每个网格仅使用一个材料,遵循特定命名规则,调整纹理顺序,并避免使用纯白色纹理等。最后,详细说明了导出过程。
 最低0.47元/天 解锁文章


 3775
3775

 被折叠的 条评论
为什么被折叠?


