


、简介:
Tomcat在高并发环境下处理动态请求时性能很低,而在处理静态页面更加脆弱。虽然Tomcat的最新版本支持epoll,但是通过Nginx来处理静态页面要比通过Tomcat处理在性能方面好很多。
二、下载安装:
下载nginx
http://nginx.org/en/download.html
下载解压后放到C:\nginx-1.0.4(官网这样要求的,不知道放其它盘有没有问题)
启动nginx.exe,然后在浏览器输入127.0.0.1即可
配置自己的项目测试
第二环节我们使用了默认的nginx.conf 。Nginx的配置文件都存于目录conf文件下,其中nginx.conf是它的主配置文件。
以下为我加上注释并配置的新的虚拟server]

- #运行用户
- #user nobody;
- #开启进程数 <=CPU数
- worker_processes 1;
- #错误日志保存位置
- #error_log logs/error.log;
- #error_log logs/error.log notice;
- #error_log logs/error.log info;
- #进程号保存文件
- #pid logs/nginx.pid;
- #等待事件
- events {
- #Linux下打开提高性能
- #use epoll;
- #每个进程最大连接数(最大连接=连接数x进程数)
- worker_connections 1024;
- }
- http {
- #文件扩展名与文件类型映射表
- include mime.types;
- #默认文件类型
- default_type application/octet-stream;
- #日志文件输出格式 这个位置相于全局设置
- #log_format main '$remote_addr - $remote_user [$time_local] "$request" '
- # '$status $body_bytes_sent "$http_referer" '
- # '"$http_user_agent" "$http_x_forwarded_for"';
- #请求日志保存位置
- #access_log logs/access.log main;
- #设定请求缓冲
- client_header_buffer_size 1k;
- large_client_header_buffers 4 4k;
- #打开发送文件
- sendfile on;
- #tcp_nopush on;
- #keepalive_timeout 0;
- keepalive_timeout 65;
- #客户端上传文件大小控制
- client_max_body_size 8m;
- #打开gzip压缩
- #gzip on;
- #设定负载均衡的服务器列表
- #upstream mysvr {
- # #weigth参数表示权值,权值越高被分配到的几率越大
- # #本机上的Squid开启3128端口
- # #server 192.168.8.1:3128 weight=5;
- # #server 192.168.8.2:80 weight=1;
- # #server 192.168.8.3:80 weight=6;
- #}
- #第一个虚拟主机
- server {
- #监听IP端口
- listen 80;
- #主机名
- server_name localhost;
- #root
- #设置字符集
- #charset koi8-r;
- #本虚拟server的访问日志 相当于局部变量
- #access_log logs/host.access.log main;
- #日志文件输出格式
- #log_format main '$remote_addr - $remote_user [$time_local] "$request" '
- # '$status $body_bytes_sent "$http_referer" '
- # '"$http_user_agent" "$http_x_forwarded_for"';
- location / {
- root html;
- index index.html index.htm;
- }
- #静态文件缓存时间设置
- #location ~ .*\.(gif|jpg|jpeg|png|bmp|swf)${
- # expires 30d;
- #}
- #静态文件缓存时间设置
- #location ~ .*\.(js|css)?${
- # expires 1h;
- #}
- #对本server"/"启用负载均衡
- #location / {
- # proxy_pass http://mysvr;
- # proxy_redirect off;
- # proxy_set_header Host $host;
- # proxy_set_header X-Real-IP $remote_addr;
- # proxy_set_header X-Forwarded-For $proxy_add_x_forwarded_for;
- # client_max_body_size 10m;
- # client_body_buffer_size 128k;
- # proxy_connect_timeout 90;
- # proxy_send_timeout 90;
- # proxy_read_timeout 90;
- # proxy_buffer_size 4k;
- # proxy_buffers 4 32k;
- # proxy_busy_buffers_size 64k;
- # proxy_temp_file_write_size 64k;
- #}
- #设定查看Nginx状态的地址
- #location /NginxStatus {
- # stub_status on;
- # access_log on;
- # auth_basic “NginxStatus”;
- # auth_basic_user_file conf/htpasswd;
- #}
- #error_page 404 /404.html;
- # redirect server error pages to the static page /50x.html
- #
- error_page 500 502 503 504 /50x.html;
- location = /50x.html {
- root html;
- }
- # proxy the PHP scripts to Apache listening on 127.0.0.1:80
- #
- #location ~ \.php$ {
- # proxy_pass http://127.0.0.1;
- #}
- # pass the PHP scripts to FastCGI server listening on 127.0.0.1:9000
- #
- #location ~ \.php$ {
- # root html;
- # fastcgi_pass 127.0.0.1:9000;
- # fastcgi_index index.php;
- # fastcgi_param SCRIPT_FILENAME /scripts$fastcgi_script_name;
- # include fastcgi_params;
- #}
- # deny access to .htaccess files, if Apache's document root
- # concurs with nginx's one
- #
- #location ~ /\.ht {
- # deny all;
- #}
- }
- # another virtual host using mix of IP-, name-, and port-based configuration
- server {
- #多监听
- listen localhost:8666;
- #主机名
- server_name LIULJ2576;
- #WEB文件路径
- root E:/Portal;
- #默认首页
- index HomePage.html;
- #location / {
- # #这里相当于局部变量
- # root E:/Portal;
- # index HomePage.html;
- #}
- }
- # HTTPS server HTTPS SSL加密服务器
- #
- #server {
- # listen 443;
- # server_name localhost;
- # ssl on;
- # ssl_certificate cert.pem;
- # ssl_certificate_key cert.key;
- # ssl_session_timeout 5m;
- # ssl_protocols SSLv2 SSLv3 TLSv1;
- # ssl_ciphers ALL:!ADH:!EXPORT56:RC4+RSA:+HIGH:+MEDIUM:+LOW:+SSLv2:+EXP;
- # ssl_prefer_server_ciphers on;
- # location / {
- # root html;
- # index index.html index.htm;
- # }
- #}
- }
#号为注释内容,我们在cmd下运行nginx
启动成功,出错的话,可以查询日志(日志路径是配置文件指定的,你可以修改存到其它位置)
访问一下第二个server 配置的localhost:8666地址,结果出现
三、Nginx可以通过以下两种方式来实现与Tomcat的耦合:
将静态页面请求交给Nginx,动态请求交给后端Tomcat处理。
将所有请求都交给后端的Tomcat服务器处理,同时利用Nginx自身的负载均衡功能进行多台Tomcat服务器的负载均衡。
下面通过两个配置实例分别讲述这两种实现
一、动态页面和静态页面分离的实例
这里假定Tomcat服务器的IP地址为192.168.12.130,同时Tomcat服务器开放的服务器端口为8080。Nginx相关配置代码如下:
- server {
- listen 80;
- server_name www.ixdba.net;
- root /web/www/html;
- location /img/ {
- alias /web/www/html/img/;
- }
- location ~ (\.jsp)|(\.do)$ {
- proxy_pass http://192.168.12.130:8080;
- proxy_redirect off;
- proxy_set_header Host $host;
- proxy_set_header X-Real-IP $remote_addr;
- proxy_set_header X-Forwarded-For $proxy_add_x_forwarded_for;
- client_max_body_size 10m;
- client_body_buffer_size 128k;
- proxy_connect_timeout 90;
- proxy_send_timeout 90;
- proxy_read_timeout 90;
- proxy_buffer_size 4k;
- proxy_buffers 4 32k;
- proxy_busy_buffers_size 64k;
- proxy_temp_file_write_size 64k;
- }
- }
在这个实例中,首先定义了一个虚拟主机www.ixdba.net,然后通过location指令将/web/www/html/img/目录下的静态文件交给Nginx来完成。最后一个location指令将所有以.jsp、.do结尾的文件都交给Tomcat服务器的8080端口来处理,即http://192.168.12.130:8080。
需要特别注意的是,在location指令中使用正则表达式后,proxy_pass后面的代理路径不能含有地址链接,也就是不能写成http://192.168.12.130:8080/,或者类似http://192.168.12.130:8080/jsp的形式。在location指令不使用正则表达式时,没有此限制。
2、多个tomcat负载均衡的实例
这里假定有3台Tomcat服务器,分别开放不同的端口,地址如下:
|
1
2
3
|
192.168
.
12.131
:
8000
192.168
.
12.132
:
8080
192.168
.
12.133
:
8090
|
Nginx的相关配置代码如下:
|
1
2
3
4
5
6
7
8
9
10
11
12
13
14
15
16
17
18
19
20
21
22
23
24
25
26
27
28
29
30
31
32
|
upstream mytomcats {
server
192.168
.
12.131
:
8000
;
server
192.168
.
12.132
:
8080
;
server
192.168
.
12.133
:
8090
;
}
server {
listen
80
;
server_name www.ixdba.net;
location ~* \.(jpg|gif|png|swf|flv|wma|wmv|asf|mp3|mmf|zip|rar)$ {
root /web/www/html/;
}
location / {
proxy_pass http:
//mytomcats;
proxy_redirect off;
proxy_set_header Host $host;
proxy_set_header X-Real-IP $remote_addr;
proxy_set_header X-Forwarded-For $proxy_add_x_forwarded_for;
client_max_body_size 10m;
client_body_buffer_size 128k;
proxy_connect_timeout
90
;
proxy_send_timeout
90
;
proxy_read_timeout
90
;
proxy_buffer_size 4k;
proxy_buffers
4
32k;
proxy_busy_buffers_size 64k;
proxy_temp_file_write_size 64k;
|
Ubuntu 下 nginx , php , mysql 和 golang 的简单安装
我是搞php出身,自然安装lnmp是常规技能。以前的手段还是lnmp安装包,比如军哥的lnmp1.0。随着php和mysql的更新,大多数一键安装都开始版本老化,更新困难的问题。因此,重新研究了一下Ubuntu下lnmp的安装,发现现在简单的多,记录一下。
另外最近在学习golang,Ubuntu下安装自然也是必须的过程。不过golang的安装也有一些奥妙。当然,不是源码安装的啦。
Nginx Stable/Development
Ubuntu下的包管理器是apt-get或者说dpkg。常规的安装命令apt-get install(注意权限sudo apt-get install)。Nginx是这几个软件里最友好的,直接可以添加stable源:
add-apt-repository ppa:nginx/stable
或者development源:
add-apt-repository ppa:nginx/development
如果没有安装命令add-apt-repository,安装:
apt-get install python-software-properties
之后常规的操作:
apt-get update
apt-get install nginx
service nginx start
PHP 5.4+
PHP的ppa源有个老兄专门在做,Ondrej Sury。有php5.4,php5.5和php5.6的源,具体的可以看官方页面。 为什么没有5.3?你落伍啦!5.4+性能提高很多,5.5还有内置的ZendOpCache。安装php5.5:
add-apt-repository ppa:ondrej/php5
apt-get update
apt-get install php5 php5-fpm
service php5-fpm start
还有些必要的包,安装一下,记得重启php5-fpm:
apt-get install php5-gd php5-curl php5-sqlite php5-mysqlnd php5-mcrypt
service php5-fpm restart
至于nginx怎么配置php-fpm,一搜一大把,不多说。
MySQL 5.5+ & MariaDB
还是这个老兄,维护着mysql5.5, mysql5.6 和 MariaDB5.5。所以,很简单,比如安装MariaDB(不喜欢mysql,被oracle摧残了):
add-apt-repository ppa:ondrej/mariadb-5.5
apt-get update
apt-get install mariadb-server-5.5
service mysql start 这里注意,安装会提示InnoDB Plugin Disabled。不要紧,MariaDB把InnoDB内置进去了,其实是已经启动的。具体的可以:
mysql SHOW ENGINE INNODB STATUS;
Golang
重头戏是golang啦。我搜寻了半天ppa源,只找到一个可以安装golang1.1.1的源,很不爽。其实可以golang官方下载已经编译好的linux.tar.gz。但是需要自己手动设置GOROOT,有点麻烦啊。
终于还是发现了个好工具Godeb。实际上这就是一个deb包构建器。先把官方编译好的tar.gz下载,打包成deb然后执行安装。
以64位安装为例:
wget https://godeb.s3.amazonaws.com/godeb-amd64.tar.gz
tar -zxvf godeb-amd64.tar.gz
./godeb install
就开始安装最新版本。还可查看支持的版本,并安装特定版本:
./godeb list
1.2
1.2rc5
1.2rc4
1.2rc3 1.2rc2 1.2rc1 1.1.2 1.1.1 1.1 (...) ./godeb install 1.1 安装好后,可以用go env查看,是否安装完成。
剩下的设置GOPATH,GOBIN就不赘述了。我是修改在/etc/profile里面的。
写在最后
Ubuntu下很多东西都有源,容易安装,也是好事啊。
第一步,安装nginx
apt-get update
apt-get install nginx
即可完成安装
启动nginx:
/etc/init.d/nginx start
然后就可以访问了,http://localhost/ , 一切正常!如果不能访问,先不要继续,看看是什么原因,解决之后再继续。
第二步,安装Php和mysql
安装php和MySQL:
apt-get install php5-cli php5-cgi mysql-server-5.0 php5-mysql
第三步,安装FastCgi和配置
我们需要/usr/bin/spawn-fcgi这个文件,而它是属于lighttpd这个包里面的,所以我们安装lighttpd然后把它设置为开机不启动:
apt-get install lighttpd #我们只要/usr/bin/spawn-fcgi
rcconf #去掉lighttpd开机自启动--------------------------------------------强烈推荐
修改nginx的配置文件:/etc/nginx/sites-available/default
修改 server_name 192.168.200.100;
修改index的一行修改为:
index index.php index.html index.htm;
去掉下面部分的注释并修改为:
location ~ \.php$ {
fastcgi_pass 127.0.0.1:9000;
fastcgi_index index.php;
fastcgi_param SCRIPT_FILENAME /var/www/nginx-default$fastcgi_script_name;
include /etc/nginx/fastcgi_params;
}
在server{}内定义日志文件的位置和相应的格式:
access_log /var/log/nginx/localhost_access.log combined;
access_log off;//表示关闭
重新启动nginx:
/etc/init.d/nginx stop
/etc/init.d/nginx start
启动fastcgi php:
spawn-fcgi -a 127.0.0.1 -p 9000 -C 10 -u www-data -f /usr/bin/php-cgi
以下步骤我直接运行rcconf设置php-cgi为开机自启动即可,所以跳过
---------------------------------------为了让php-cgi开机自启动:
cd /etc/init.d
cp nginx php-cgi
vim php-cgi
替换nginx为php-cgi
并修改相应部分为:
DAEMON=/usr/bin/spawn-fcgi
DAEMON_OPTS="-a 127.0.0.1 -p 9000 -C 10 -u www-data -f /usr/bin/php-cgi"
...
stop)
echo -n "Stopping $DESC: "
pkill -9 php-cgi
echo "$NAME."
-------------------------------------------------
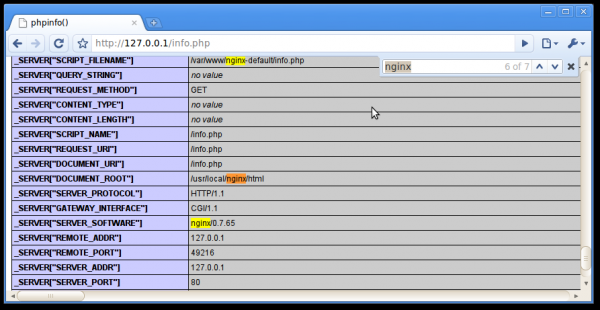
在/var/www/nginx-default/目录下创建一个文件: /var/www/nginx-default/index.php
文件内容是:
< ?php phpinfo();?>
然后浏览器访问nginx就可以看到一切正常了
------------------------------------------------------------END 安装成功
配置文件目录 /etc/nginx/ nginx.conf /sites-available/default
www目录 /var/www/nginx-default/
启动fastcgi php:
spawn-fcgi -a 127.0.0.1 -p 9000 -C 10 -u www-data -f /usr/bin/php-cgi
日志文件:
localhost.access.log /var/log/nginx/localhost.access.log
access.log /var/log/nginx/access.log
error.log /var/log/nginx/error.log
---------------重定向nginx错误页面的方法
error_page 404 /404.html;
这个404.html保证在nginx主目录下的html目录中即可,如果需要在出现404错误后直接跳转到另外一个地址,可以直接设置如下:
error_page 404 http://www.***.net ;
同样的方式可以定义常见的403、500等错误。
特别注意的是404.html文件页面大小要超过512k,不然会被ie浏览器替换为ie默认的错误页面。
------------------------------虚拟主机配置
server {
listen 80;
server_name localhost;
access_log /var/log/nginx/localhost.access.log;
location / {
root /var/www/nginx-default;
index index.php index.html index.htm;
}
location /doc {
root /usr/share;
autoindex on;
allow 127.0.0.1;
deny all;
}
location /images {
root /usr/share;
autoindex on;
}
location ~ \.php$ {
fastcgi_pass 127.0.0.1:9000;
fastcgi_index index.php;
fastcgi_param SCRIPT_FILENAME /var/www/nginx-default$fastcgi_script_name;
include /etc/nginx/fastcgi_params;
}
}
server {
listen 80;
server_name sdsssdf.localhost.com;
access_log /var/log/nginx/localhost.access.log;
location / {
root /var/www/nginx-default/console;
index index.php index.html index.htm;
}
location /doc {
root /usr/share;
autoindex on;
allow 127.0.0.1;
deny all;
}
location /images {
root /usr/share;
autoindex on;
}
location ~ \.php$ {
fastcgi_pass 127.0.0.1:9000;
fastcgi_index index.php;
fastcgi_param SCRIPT_FILENAME /var/www/nginx-default$fastcgi_script_name;
include /etc/nginx/fastcgi_params;
}
}
----------------------监控
location ~ ^/NginxStatus/ {
stub_status on; #Nginx 状态监控配置
}
这样通过 http://localhost/NginxStatus/(最后的/不能掉) 监控到 Nginx 的运行信息:
Active connections: 1
server accepts handled requests
1 1 5
Reading: 0 Writing: 1 Waiting: 0
NginxStatus 显示的内容意思如下:
- active connections – 当前 Nginx 正处理的活动连接数。
- server accepts handled requests -- 总共处理了 14553819 个连接 , 成功创建 14553819 次握手 ( 证明中间没有失败的 ), 总共处理了 19239266 个请求 ( 平均每次握手处理了 1.3 个数据请求 )。
- reading -- nginx 读取到客户端的 Header 信息数。
- writing -- nginx 返回给客户端的 Header 信息数。
- waiting -- 开启 keep-alive 的情况下,这个值等于 active - (reading + writing),意思就是 Nginx 已经处理完正在等候下一次请求指令的驻留连接。
-------------------------------静态文件处理
通过正则表达式,我们可让 Nginx 识别出各种静态文件
location ~ \.(htm|html|gif|jpg|jpeg|png|bmp|ico|css|js|txt)$ {
root /var/www/nginx-default/html;
expires 24h;
}
对于例如图片、静态 HTML 文件、js 脚本文件和 css 样式文件等,我们希望 Nginx 直接处理并返回给浏览器,这样可以大大的加快网页浏览时的速度。因此对于这类文件我们需要通过 root 指令来指定文件的存放路径,同时因为这类文件并不常修改,通过 expires 指令来控制其在浏览器的缓存,以减少不必要的请求。 expires 指令可以控制 HTTP 应答中的“ Expires ”和“ Cache-Control ”的头标(起到控制页面缓存的作用)。您可以使用例如以下的格式来书写 Expires:
expires 1 January, 1970, 00:00:01 GMT;
expires 60s;
expires 30m;
expires 24h;
expires 1d;
expires max;
expires off;
这样当你输入http://192.168.200.100/1.html的时候会自动跳转到var/www/nginx-default/html/1.html
例如 images 路径下的所有请求可以写为:
location ~ ^/images/ {
root /opt/webapp/images;
}
------------------------动态页面请求处理[集群]
Nginx 本身并不支持现在流行的 JSP、ASP、PHP、PERL 等动态页面,但是它可以通过反向代理将请求发送到后端的服务器,例如 Tomcat、Apache、IIS 等来完成动态页面的请求处理。前面的配置示例中,我们首先定义了由 Nginx 直接处理的一些静态文件请求后,其他所有的请求通过 proxy_pass 指令传送给后端的服务器 (在上述例子中是 Tomcat)。最简单的 proxy_pass 用法如下:
location / {
proxy_pass http://localhost:8080;
proxy_set_header X-Real-IP $remote_addr;
}
这里我们没有使用到集群,而是将请求直接送到运行在 8080 端口的 Tomcat 服务上来完成类似 JSP 和 Servlet 的请求处理。
当页面的访问量非常大的时候,往往需要多个应用服务器来共同承担动态页面的执行操作,这时我们就需要使用集群的架构。 Nginx 通过 upstream 指令来定义一个服务器的集群,最前面那个完整的例子中我们定义了一个名为 tomcats 的集群,这个集群中包括了三台服务器共 6 个 Tomcat 服务。而 proxy_pass 指令的写法变成了:
# 集群中的所有后台服务器的配置信息
upstream tomcats {
server 192.168.0.11:8080 weight=10;
server 192.168.0.11:8081 weight=10;
server 192.168.0.12:8080 weight=10;
server 192.168.0.12:8081 weight=10;
server 192.168.0.13:8080 weight=10;
server 192.168.0.13:8081 weight=10;
}
location / {
proxy_pass http://tomcats;# 反向代理
include proxy.conf;
}
----------------------压力测试
wget http://blog.s135.com/soft/linux/webbench/webbench-1.5.tar.gz
tar zxvf webbench-1.5.tar.gz
cd webbench-1.5
make && make install
#webbench -c 100 -t 10 http://192.168.200.100/info.php
参数说明:-c表示并发数,-t表示持续时间(秒)
root@ubuntu-desktop:/etc/nginx/sites-available# webbench -c 100 -t 10 http://192.168.200.100/info.php
Webbench - Simple Web Benchmark 1.5
Copyright (c) Radim Kolar 1997-2004, GPL Open Source Software.
Benchmarking: GET http://192.168.200.100/info.php
100 clients, running 10 sec.
Speed=19032 pages/min, 18074373 bytes/sec.
Requests: 3172 susceed, 0 failed.
曾经配置过nginx比较高版本的安装方法及流程,这次也是在阿里云服务器ubuntu14.04.1版本安装nginx+php+mysql的方法及流程。
原文地址:http://adminsir.net/Home/Content/index/id/7.html
1、先更新ubuntu系统
更新命令
sudo apt-get update
sudo apt-get upgrade
2、更新和安装update and install
sudo apt-get update
sudo apt-get install nginx
3、启动nginx
sudo /etc/init.d/nginx start
4、check version(说明安装成功)
nginx -v
5、配置php+mysql
sudo apt-get install php5-cli php5-cgi mysql-server php5-mysql
6、安装FastCgi
sudo apt-get install spawn-fcgi
7、配置nginx
7.1、修改nginx的配置文件:/etc/nginx/sites-available/default 修改主机名
server_name localhost;
7.2、修改index的一行,添加index.php
index index.php index.html index.htm;
7.3、去掉下面部分的注释用于支持 php 脚本:
location ~ .php$ {
                fastcgi_split_path_info ^(.+.php)(/.+)$;
        #       # NOTE: You should have "cgi.fix_pathinfo = 0;" in php.ini
        #
        #       # With php5-cgi alone:
                fastcgi_pass 127.0.0.1:9000;
        #       # With php5-fpm:
        #       fastcgi_pass unix:/var/run/php5-fpm.sock;
                fastcgi_index index.php;
                fastcgi_param SCRIPT_FILENAME $document_root$fastcgi_script_name;
        include fastcgi_params;
        }
8、 重新启动nginx
sudo /etc/init.d/nginx restart
sudo /etc/init.d/nginx stop
sudo /etc/init.d/nginx start
9、启动fastcgi php
spawn-fcgi -a 127.0.0.1 -p 9000 -C 10 -u www-data -f /usr/bin/php-cgi
10、nginx提示502 Bad Gateway错误
nginx 502 Bad Gateway错误之一:Fastcgi没有启动,启动命令是:
spawn-fcgi -a 127.0.0.1 -p 9000 -C 10 -u www-data -f /usr/bin/php-cgi
11、设置php-cgi开机自启动
为了让php-cgi开机自启动:Ubuntu开机之后会执行/etc/rc.local文件中的脚本
所以我们可以直接在/etc/rc.local中添加启动脚本。
spawn-fcgi -a 127.0.0.1 -p 9000 -C 10 -u www-data -f /usr/bin/php-cgi
添加到语句:
exit 0
前面才行
12、no input file specified错误
sudo vi /etc/nginx/sites-available/default
location ~ .php$ {
 root html;
 fastcgi_pass 127.0.0.1:9000;
 fastcgi_index index.php;
fastcgi_param SCRIPT_FILENAME /var/www/nginx-default$fastcgi_script_name;
 include fastcgi_params;
 }
location ~ .php$ {
                fastcgi_split_path_info ^(.+.php)(/.+)$;
        #       # NOTE: You should have "cgi.fix_pathinfo = 0;" in php.ini
        #
        #       # With php5-cgi alone:
                fastcgi_pass 127.0.0.1:9000;
        #       # With php5-fpm:
        #       fastcgi_pass unix:/var/run/php5-fpm.sock;
                fastcgi_index index.php;
                fastcgi_param SCRIPT_FILENAME $document_root$fastcgi_script_name;
                include fastcgi_params;
        }
注意
fastcgi_param SCRIPT_FILENAME /var/www/nginx-default$fastcgi_script_name;
/var/www/nginx-default 改为你的网站根目录,一般就是改成这个。 server 字段下root 目录和网站根目录保持一致
Ubuntu下安装nginx
sudo apt-get install nginx
Ubuntu安装之后的文件结构大致为:
所有的配置文件都在/etc/nginx下,并且每个虚拟主机已经安排在了/etc/nginx/sites-available下
程序文件在/usr/sbin/nginx
日志放在了/var/log/nginx中
并已经在/etc/init.d/下创建了启动脚本nginx
默认的虚拟主机的目录设置在了/var/www/nginx-default
启动nginx
sudo /etc/init.d/nginx start
然后就可以访问了,http://localhost/ , 一切正常!如果不能访问,先不要继续,看看是什么原因,解决之后再继续。
nginx默认页面
配置php和mysql
安装Php和mysql
安装php和MySQL:
sudo apt-get install php5-cli php5-cgi mysql-server php5-mysql
安装FastCgi
/usr/bin/spawn-fcgi这个文件来管理 FastCgi,它原属于lighttpd这个包里面,但 9.10 后,spawn-fcgi 被分离出来单独成包:
sudo apt-get install spawn-fcgi
配置 nginx
修改nginx的配置文件:/etc/nginx/sites-available/default 修改主机名:
server_name localhost;
修改index的一行修改为:
index index.php index.html index.htm;
去掉下面部分的注释用于支持 php 脚本:
location ~ \.php$ {
fastcgi_pass 127.0.0.1:9000;
fastcgi_index index.php;
fastcgi_param SCRIPT_FILENAME /var/www/nginx-default$fastcgi_script_name;
include /etc/nginx/fastcgi_params;
}
重新启动nginx:
/etc/init.d/nginx stop
/etc/init.d/nginx start
启动fastcgi php:
spawn-fcgi -a 127.0.0.1 -p 9000 -C 10 -u www-data -f /usr/bin/php-cgi
为了让php-cgi开机自启动:
cd /etc/init.d
cp nginx php-cgi
vim php-cgi
替换nginx为php-cgi
并修改相应部分为:
DAEMON=/usr/bin/spawn-fcgi
DAEMON_OPTS="-a 127.0.0.1 -p 9000 -C 10 -u www-data -f /usr/bin/php-cgi"
...
stop)
echo -n "Stopping $DESC: "
pkill -9 php-cgi
echo "$NAME."
然后运行rcconf设置php-cgi为开机自启动
创建、测试phpinfo:
sudo vi /var/www/nginx-default/info.php
打开 http://localhost/info.php 。


 453
453

 被折叠的 条评论
为什么被折叠?
被折叠的 条评论
为什么被折叠?
 到【灌水乐园】发言


