


说明:
父工程文件如下:
spring boot 版本:2.6.8
spring cloud 版本:3.1.3
hystrix,停更以后没有最新版,所以用的:2.2.10.RELEASE
父工程 pom.xml 如下:所有子项目使用的依赖版本都在这里面
<?xml version="1.0" encoding="UTF-8"?>
<project xmlns="http://maven.apache.org/POM/4.0.0"
         xmlns:xsi="http://www.w3.org/2001/XMLSchema-instance"
         xsi:schemaLocation="http://maven.apache.org/POM/4.0.0 http://maven.apache.org/xsd/maven-4.0.0.xsd">
    <modelVersion>4.0.0</modelVersion>

    <groupId>com.lomi.sc</groupId>
    <artifactId>sc</artifactId>
    <version>1.0-SNAPSHOT</version>
    <packaging>pom</packaging>

    <!--子模块-->
    <modules>
        <module>eureka-server</module>
        <module>user</module>
        <module>order</module>
        <module>goods</module>
        <module>api</module>
        <module>gateway</module>
        <module>config</module>
    </modules>


    <dependencyManagement>
        <dependencies>
            <!--spring部分-->
            <!--spring-boot-->
            <dependency>
                <groupId>org.springframework.boot</groupId>
                <artifactId>spring-boot-starter-web</artifactId>
                <version>2.6.8</version>
            </dependency>
            <dependency>
                <groupId>org.springframework.boot</groupId>
                <artifactId>spring-boot-starter-actuator</artifactId>
                <version>2.6.8</version>
            </dependency>


            <!--服务注册和发现部分组件-->
            <!--eureka-server-->
            <dependency>
                <groupId>org.springframework.cloud</groupId>
                <artifactId>spring-cloud-starter-netflix-eureka-server</artifactId>
                <version>3.1.3</version>
            </dependency>
            <!--eureka-client-->
            <dependency>
                <groupId>org.springframework.cloud</groupId>
                <artifactId>spring-cloud-starter-netflix-eureka-client</artifactId>
                <version>3.1.3</version>
            </dependency>


            <!--cloud部分-->
            <!--spring-cloud-->
            <dependency>
                <groupId>org.springframework.cloud</groupId>
                <artifactId>spring-cloud-context</artifactId>
                <version>3.1.3</version>
            </dependency>
            <!--feign-->
            <dependency>
                <groupId>org.springframework.cloud</groupId>
                <artifactId>spring-cloud-starter-openfeign</artifactId>
                <version>3.1.3</version>
            </dependency>
            <!--hystrix-->
            <dependency>
                <groupId>org.springframework.cloud</groupId>
                <artifactId>spring-cloud-starter-netflix-hystrix</artifactId>
                <version>2.2.10.RELEASE</version>
            </dependency>
            <!--gateway-->
            <dependency>
                <groupId>org.springframework.cloud</groupId>
                <artifactId>spring-cloud-starter-gateway</artifactId>
                <version>3.1.3</version>
            </dependency>
            <!--config-->
            <dependency>
                <groupId>org.springframework.cloud</groupId>
                <artifactId>spring-cloud-config-server</artifactId>
                <version>3.1.3</version>
            </dependency>
            <!--config 客户端需要的两个依赖-->
            <dependency>
                <groupId>org.springframework.cloud</groupId>
                <artifactId>spring-cloud-starter-config</artifactId>
                <version>3.1.3</version>
            </dependency>
            <dependency>
                <groupId>org.springframework.cloud</groupId>
                <artifactId>spring-cloud-starter-bootstrap</artifactId>
                <version>3.1.3</version>
            </dependency>
            <!--bus-->
            <dependency>
                <groupId>org.springframework.cloud</groupId>
                <artifactId>spring-cloud-starter-bus-amqp</artifactId>
                <version>3.1.2</version>
            </dependency>

            <!--sleuth和zipkin  -->
            <dependency>
                <groupId>org.springframework.cloud</groupId>
                <artifactId>spring-cloud-starter-sleuth</artifactId>
                <version>3.1.3</version>
            </dependency>
            <dependency>
                <groupId>org.springframework.cloud</groupId>
                <artifactId>spring-cloud-sleuth-zipkin</artifactId>
                <version>3.1.3</version>
            </dependency>

            <!--spring cloud stream -->
            <dependency>
                <groupId>org.springframework.cloud</groupId>
                <artifactId>spring-cloud-starter-stream-rabbit</artifactId>
                <version>3.2.4</version>
            </dependency>

            <!--日志-->
            <!--<dependency>
                <groupId>org.springframework.boot</groupId>
                <artifactId>spring-boot-starter-logging</artifactId>
                <version>2.7.1</version>
            </dependency>-->


        </dependencies>
    </dependencyManagement>


    <build>
        <plugins>
            <!-- 指定项目jdk版本 -->
            <plugin>
                <groupId>org.apache.maven.plugins</groupId>
                <artifactId>maven-compiler-plugin</artifactId>
                <version>3.1</version>
                <configuration>
                    <source>1.8</source>
                    <target>1.8</target>
                </configuration>
            </plugin>

            <!-- 打包 -->
            <plugin>
                <groupId>org.springframework.boot</groupId>
                <artifactId>spring-boot-maven-plugin</artifactId>
                <executions>
                    <execution>
                        <goals>
                            <!--可以把依赖的包都打包到生成的Jar包中 -->
                            <goal>repackage</goal>
                        </goals>
                        <configuration>
                            <attach>false</attach>
                        </configuration>
                    </execution>
                </executions>
            </plugin>

        </plugins>
    </build>

    <!-- 跳过测试 -->
    <properties>
        <skipTests>true</skipTests>
    </properties>

</project>- 1.
- 2.
- 3.
- 4.
- 5.
- 6.
- 7.
- 8.
- 9.
- 10.
- 11.
- 12.
- 13.
- 14.
- 15.
- 16.
- 17.
- 18.
- 19.
- 20.
- 21.
- 22.
- 23.
- 24.
- 25.
- 26.
- 27.
- 28.
- 29.
- 30.
- 31.
- 32.
- 33.
- 34.
- 35.
- 36.
- 37.
- 38.
- 39.
- 40.
- 41.
- 42.
- 43.
- 44.
- 45.
- 46.
- 47.
- 48.
- 49.
- 50.
- 51.
- 52.
- 53.
- 54.
- 55.
- 56.
- 57.
- 58.
- 59.
- 60.
- 61.
- 62.
- 63.
- 64.
- 65.
- 66.
- 67.
- 68.
- 69.
- 70.
- 71.
- 72.
- 73.
- 74.
- 75.
- 76.
- 77.
- 78.
- 79.
- 80.
- 81.
- 82.
- 83.
- 84.
- 85.
- 86.
- 87.
- 88.
- 89.
- 90.
- 91.
- 92.
- 93.
- 94.
- 95.
- 96.
- 97.
- 98.
- 99.
- 100.
- 101.
- 102.
- 103.
- 104.
- 105.
- 106.
- 107.
- 108.
- 109.
- 110.
- 111.
- 112.
- 113.
- 114.
- 115.
- 116.
- 117.
- 118.
- 119.
- 120.
- 121.
- 122.
- 123.
- 124.
- 125.
- 126.
- 127.
- 128.
- 129.
- 130.
- 131.
- 132.
- 133.
- 134.
- 135.
- 136.
- 137.
- 138.
- 139.
- 140.
- 141.
- 142.
- 143.
- 144.
- 145.
- 146.
- 147.
- 148.
- 149.
- 150.
- 151.
- 152.
- 153.
- 154.
- 155.
- 156.
- 157.
- 158.
- 159.
- 160.
- 161.
- 162.
- 163.
- 164.
- 165.
- 166.
- 167.
- 168.
- 169.
- 170.
- 171.
- 172.
- 173.
- 174.
- 175.
- 176.
- 177.
1 注册中心 Eureka 的集成和使用
分布式架构注册中心必不可少,dubbo 一般使用 的 zookeeper,spring cloud alibaba 使用 nacos
1 创建 项目 eureka-server
2 修改pom.xml 文件
<?xml version="1.0" encoding="UTF-8"?>
<project xmlns="http://maven.apache.org/POM/4.0.0"
         xmlns:xsi="http://www.w3.org/2001/XMLSchema-instance"
         xsi:schemaLocation="http://maven.apache.org/POM/4.0.0 http://maven.apache.org/xsd/maven-4.0.0.xsd">
    <parent>
        <artifactId>sc</artifactId>
        <groupId>com.lomi.sc</groupId>
        <version>1.0-SNAPSHOT</version>
    </parent>

    <modelVersion>4.0.0</modelVersion>
    <artifactId>eureka-server</artifactId>

    <dependencies>
        <dependency>
            <groupId>org.springframework.boot</groupId>
            <artifactId>spring-boot-starter-web</artifactId>
        </dependency>

        <dependency>
            <groupId>org.springframework.cloud</groupId>
            <artifactId>spring-cloud-starter-netflix-eureka-server</artifactId>
        </dependency>

        <!--gson 版本过低的问题也许需要这个-->
        <!--<dependency>
            <groupId>com.google.code.gson</groupId>
            <artifactId>gson</artifactId>
            <version>2.6.2</version>
        </dependency>-->


    </dependencies>

</project>- 1.
- 2.
- 3.
- 4.
- 5.
- 6.
- 7.
- 8.
- 9.
- 10.
- 11.
- 12.
- 13.
- 14.
- 15.
- 16.
- 17.
- 18.
- 19.
- 20.
- 21.
- 22.
- 23.
- 24.
- 25.
- 26.
- 27.
- 28.
- 29.
- 30.
- 31.
- 32.
- 33.
- 34.
- 35.
3 创建启动类
package com.lomi.eureka;

import org.springframework.boot.SpringApplication;
import org.springframework.boot.autoconfigure.SpringBootApplication;
import org.springframework.boot.autoconfigure.gson.GsonAutoConfiguration;
import org.springframework.cloud.netflix.eureka.server.EnableEurekaServer;

import java.io.IOException;


/**
 *
 * 1 eureka 里面使用gson 版本太低,需要替换成版本或者使用 ,缺少 com.google.gson.GsonBuilder.setLenient 方法
 * 2 可以用 @SpringBootApplication(exclude = {GsonAutoConfiguration.class}) 修饰,或者 引入高版本的 gson
 *
 */

/**
 *
 *
 * @author ZHANGYUKUN
 */
@EnableEurekaServer
@SpringBootApplication(exclude = {GsonAutoConfiguration.class})
public class Application {

    public static void main(String[] args) throws IOException {
        SpringApplication.run(Application.class, args);
        System.out.println("*****************************");
        System.out.println("********* eureka server 启动................... ***********");
        System.out.println("*****************************");
        System.in.read();

    }

}- 1.
- 2.
- 3.
- 4.
- 5.
- 6.
- 7.
- 8.
- 9.
- 10.
- 11.
- 12.
- 13.
- 14.
- 15.
- 16.
- 17.
- 18.
- 19.
- 20.
- 21.
- 22.
- 23.
- 24.
- 25.
- 26.
- 27.
- 28.
- 29.
- 30.
- 31.
- 32.
- 33.
- 34.
- 35.
- 36.
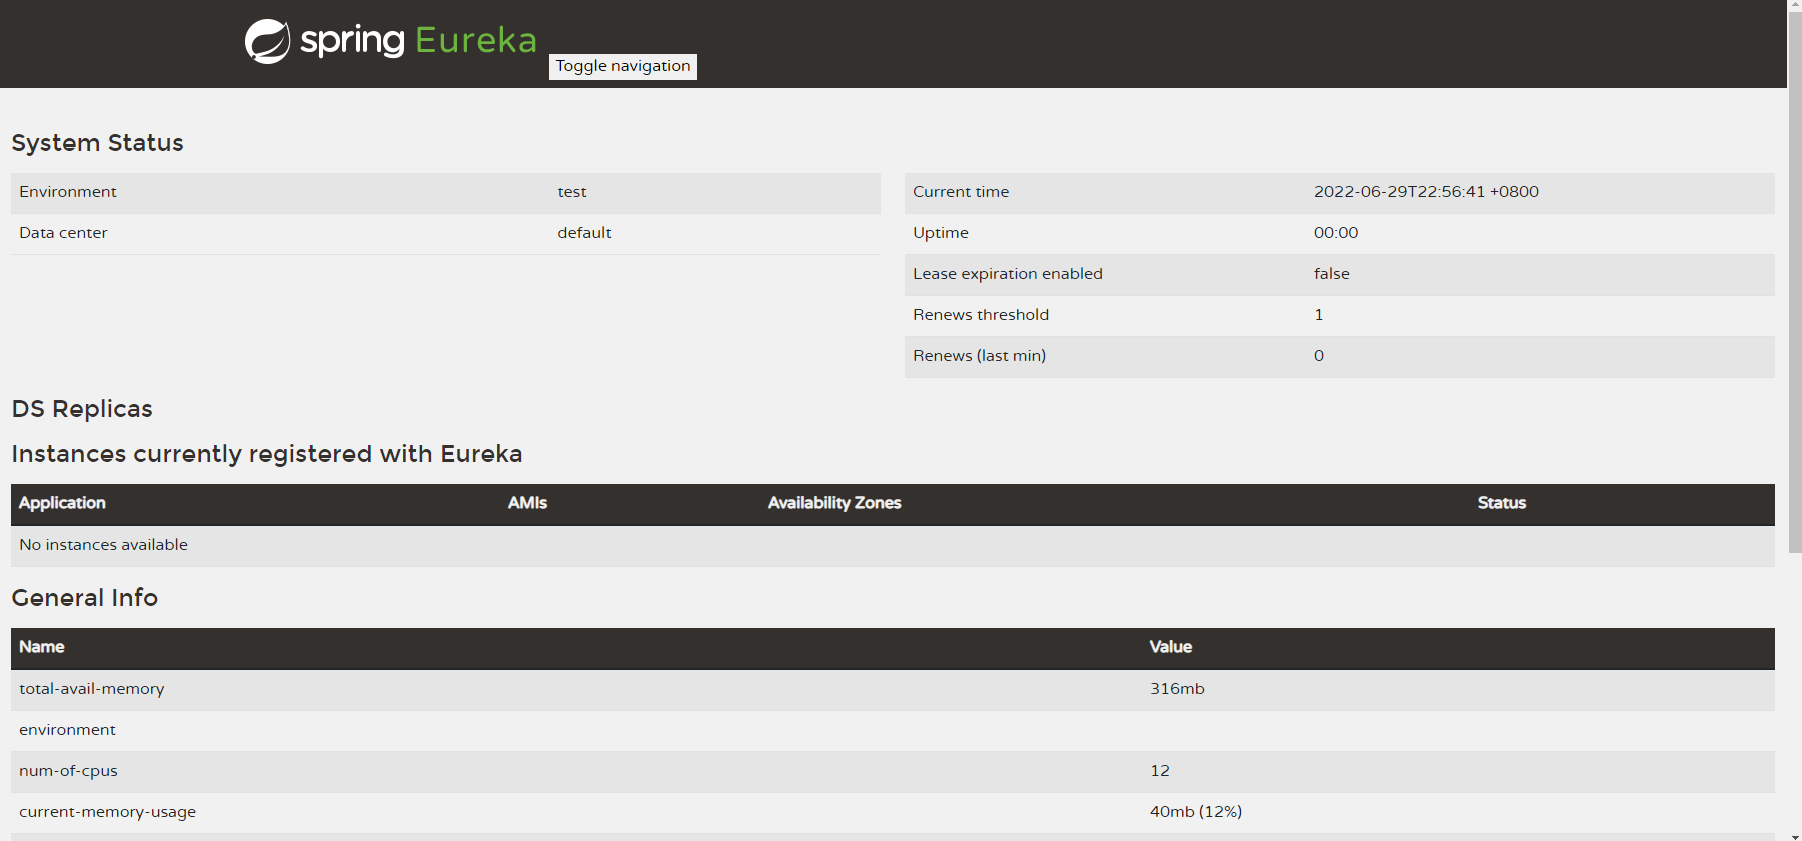
4 访问 http://127.0.0.1:9001/
2 spring cloud 集成 和 restemple 的使用
1 创建项目goods,order
2 pow.xml 文件,导入依赖,eureke 和 cloud(goods 和 order一样)
<!--eurake-->
        <dependency>
            <groupId>org.springframework.cloud</groupId>
            <artifactId>spring-cloud-starter-netflix-eureka-client</artifactId>
        </dependency>

        <!--cloud-->
        <dependency>
            <groupId>org.springframework.cloud</groupId>
            <artifactId>spring-cloud-context</artifactId>
</dependency>- 1.
- 2.
- 3.
- 4.
- 5.
- 6.
- 7.
- 8.
- 9.
- 10.
- 11.
3 启动类(goods 和 order 样)
/**
 *
 *
 * @author ZHANGYUKUN
 */
@SpringBootApplication
@EnableEurekaClient
public class Application {

    public static void main(String[] args) throws IOException {
        SpringApplication.run(Application.class, args);
        System.out.println("*****************************");
        System.out.println("********* goodsServer 启动................... ***********");
        System.out.println("*****************************");
        System.in.read();

    }


}- 1.
- 2.
- 3.
- 4.
- 5.
- 6.
- 7.
- 8.
- 9.
- 10.
- 11.
- 12.
- 13.
- 14.
- 15.
- 16.
- 17.
- 18.
- 19.
- 20.
- 21.
4 goods 创建 restTemplate(写在任意spring boot 可以扫描到的地方),使用了 @LoadBalanced 注解以后,获使用负载均衡的方式调用消费者端,这时候 请求url 必须要是服务名,而不是能是ip
5 goods 调用 order controller
package com.lomi.goods.controller;

import com.lomi.api.order.OrderService;
import com.netflix.hystrix.contrib.javanica.annotation.HystrixCommand;
import org.slf4j.Logger;
import org.slf4j.LoggerFactory;
import org.springframework.beans.factory.annotation.Autowired;
import org.springframework.beans.factory.annotation.Value;
import org.springframework.cloud.client.discovery.EnableDiscoveryClient;
import org.springframework.web.bind.annotation.PostMapping;
import org.springframework.web.bind.annotation.RequestMapping;
import org.springframework.web.bind.annotation.RestController;
import org.springframework.web.client.RestTemplate;

import javax.annotation.Resource;
import java.time.LocalDateTime;
import java.time.format.DateTimeFormatter;
import java.util.Arrays;
import java.util.List;

/**
 * @author ZHANGYUKUN
 * @date 2022/6/24
 */
@RestController
@RequestMapping("shoppingCart")
@EnableDiscoveryClient
public class ShoppingCartController {

    Logger log = LoggerFactory.getLogger(ShoppingCartController.class);

    //引用配置文件里面写入的服务地址
    @Value("${system.serverUrl.order}")
    String orderServerUrl;

    @Autowired
    RestTemplate restTemplate;

    /**
     * 使用 restTemplate 调用 远程服务
     *
     * @return
     */
    @PostMapping("generateOrder")
    public String generateOrder() {
        System.out.println("generateOrder" + ":" + LocalDateTime.now().format(DateTimeFormatter.ofPattern("yyyy-MM-dd HH:mm:ss")));
        //查询购物车
        List<String> goodsNames = Arrays.asList("商品1", "商品2", "商品2");

        //调用order服务生成订单
        String rt = restTemplate.postForObject(orderServerUrl +"orderServer/"+ "order/generate", goodsNames, String.class);
        System.out.println(rt);

        //清空购物车
        return "OK";
    }


}- 1.
- 2.
- 3.
- 4.
- 5.
- 6.
- 7.
- 8.
- 9.
- 10.
- 11.
- 12.
- 13.
- 14.
- 15.
- 16.
- 17.
- 18.
- 19.
- 20.
- 21.
- 22.
- 23.
- 24.
- 25.
- 26.
- 27.
- 28.
- 29.
- 30.
- 31.
- 32.
- 33.
- 34.
- 35.
- 36.
- 37.
- 38.
- 39.
- 40.
- 41.
- 42.
- 43.
- 44.
- 45.
- 46.
- 47.
- 48.
- 49.
- 50.
- 51.
- 52.
- 53.
- 54.
- 55.
- 56.
- 57.
- 58.
- 59.
- 60.
- 61.
- 62.
6 goods application.yml 主要配置
## web ##
server:
  port: 8001
  servlet:
    context-path: /goodsServer

system:
  serverUrl:
    order: "http://order-server/"
    goods: "http://goods-server/"
feign:
  httpclient:  #配置http连接池
    enabled: true
    max-connection: 200
    max-connections-per-route: 50
connection-timeout: 2000- 1.
- 2.
- 3.
- 4.
- 5.
- 6.
- 7.
- 8.
- 9.
- 10.
- 11.
- 12.
- 13.
- 14.
- 15.
- 16.
7 order 端controller类似
package com.lomi.order.controller;

import com.netflix.hystrix.contrib.javanica.annotation.HystrixCommand;
import org.slf4j.Logger;
import org.slf4j.LoggerFactory;
import org.springframework.beans.factory.annotation.Value;
import org.springframework.context.annotation.Bean;
import org.springframework.web.bind.annotation.*;

import java.time.LocalDateTime;
import java.time.format.DateTimeFormatter;
import java.util.List;
import java.util.concurrent.TimeUnit;
import java.util.function.Consumer;

/**
 * @author ZHANGYUKUN
 * @date 2022/6/24
 */
@RestController
@RequestMapping("order")
public class OrderController {
    Logger log = LoggerFactory.getLogger(OrderController.class);

    @Value("${server.port}")
    String port;


    @PostMapping("generate")
    public String generate(@RequestBody List<String> goodsInfo) throws InterruptedException {
        System.out.println( "创建订单中:" + port +":"+ LocalDateTime.now().format(DateTimeFormatter.ofPattern("yyyy-MM-dd HH:mm:ss")));

       //TimeUnit.SECONDS.sleep(5);

       /* int i = 0;
        if( i==0 ){
            throw new RuntimeException("主动抛出异常");
        }*/


        System.out.println( "创建订单完成:" + port +":"+ LocalDateTime.now().format(DateTimeFormatter.ofPattern("yyyy-MM-dd HH:mm:ss")));

        log.debug("创建订单完成");
        return "orderGenerateOK";
    }

    public String generateFB(@RequestBody List<String> goodsInfo) throws InterruptedException {
        return "服务器端FB";
    }


}- 1.
- 2.
- 3.
- 4.
- 5.
- 6.
- 7.
- 8.
- 9.
- 10.
- 11.
- 12.
- 13.
- 14.
- 15.
- 16.
- 17.
- 18.
- 19.
- 20.
- 21.
- 22.
- 23.
- 24.
- 25.
- 26.
- 27.
- 28.
- 29.
- 30.
- 31.
- 32.
- 33.
- 34.
- 35.
- 36.
- 37.
- 38.
- 39.
- 40.
- 41.
- 42.
- 43.
- 44.
- 45.
- 46.
- 47.
- 48.
- 49.
- 50.
- 51.
- 52.
- 53.
- 54.
3 feign 的集成和使用
feign 是 springcloud 对接口和远程 服务的封装,spring cloud 最基本的核心。现在用的一般都是 openfeign,基本使用的是 springcloud alibaba 也依旧会使用 feign
1 goods 和 order 引入依赖
2 goods和order 启动类上添加 @EnableFeignClients启用 feign ,feign 默认使用负载均衡的方式调用消费者
/**
 *
 *
 * @author ZHANGYUKUN
 */
@SpringBootApplication
@EnableEurekaClient
@EnableFeignClients
public class Application {

    public static void main(String[] args) throws IOException {
        SpringApplication.run(Application.class, args);
        System.out.println("*****************************");
        System.out.println("********* goodsServer 启动................... ***********");
        System.out.println("*****************************");
        System.in.read();

}- 1.
- 2.
- 3.
- 4.
- 5.
- 6.
- 7.
- 8.
- 9.
- 10.
- 11.
- 12.
- 13.
- 14.
- 15.
- 16.
- 17.
- 18.
3 goods 端或者创建一个工程用来定义 远程 api OrderService.java
package com.lomi.api.order;

import com.lomi.api.order.fallback.OrderServiceFallback;
import com.netflix.hystrix.contrib.javanica.annotation.HystrixCommand;
import org.springframework.cloud.openfeign.FeignClient;
import org.springframework.web.bind.annotation.PostMapping;
import org.springframework.web.bind.annotation.RequestBody;

import java.util.List;

/**
 * @author ZHANGYUKUN
 * @date 2022/6/24
 */
@FeignClient(value="order-server/orderServer")
public interface OrderService {

    @PostMapping("order/generate")
    String generate(@RequestBody List<String> goodsInfo);


}- 1.
- 2.
- 3.
- 4.
- 5.
- 6.
- 7.
- 8.
- 9.
- 10.
- 11.
- 12.
- 13.
- 14.
- 15.
- 16.
- 17.
- 18.
- 19.
- 20.
- 21.
- 22.
- 23.
4 goods 使用 fengn 接口调用远程服务
@Resource
    OrderService orderService;

    /**
     * 使用 feign 调用 远程服务
     *
     * @return
     */
    @PostMapping("generateOrderByFeign")
    public String generateOrderByFeign() {
        System.out.println("generateOrderByFeign" + ":" + LocalDateTime.now().format(DateTimeFormatter.ofPattern("yyyy-MM-dd HH:mm:ss")));
        //查询购物车
        List<String> goodsNames = Arrays.asList("商品1", "商品2", "商品2");

        //调用order服务生成订单
        String rt = orderService.generate(goodsNames);
        System.out.println(rt);


        log.debug("调用完成。。。。。。。。。。。。。。。");

        //清空购物车
        return rt;
}- 1.
- 2.
- 3.
- 4.
- 5.
- 6.
- 7.
- 8.
- 9.
- 10.
- 11.
- 12.
- 13.
- 14.
- 15.
- 16.
- 17.
- 18.
- 19.
- 20.
- 21.
- 22.
- 23.
- 24.
4 hystrix 的集成和使用
服务降级和熔断是保护分布式集群可用的重要方式,hystrix 是spring cloud 早期核心的组件,但是现在缺乏维护,一般信项目部建议使用了,可以考虑 spring cloud alibaba 的 sentinel
1 order 和 goods pom 文件添加依赖
2 配置启动类上开启 hystrix
..............
}
3 hystrix 可以使用 生产者或者消费者的 实现方法上(默认在这个方法抛出异常或者超时的时候返回,调用另外一个降级方法来返回一个默认值)
备注服务出现异常或者超时返回默认值, 这就是spring cloud 的服务降级,如果多次触发返回默认值,就会触发熔断机制,一定实践类直接返回默认值,不会调用实现方法,然后等这段时间窗口过期,获尝试放几个请求过来,如果请求成功者断路器关闭,否者当前时间窗口内继续熔断。熔断是服务降级的升级版。
/**
     * 使用 feign 调用 远程服务
     *
     * @return
     */
    @PostMapping("generateOrderByFeign")
    @HystrixCommand(fallbackMethod = "generateOrderByFeignFB" )
    public String generateOrderByFeign() {
        System.out.println("generateOrderByFeign" + ":" + LocalDateTime.now().format(DateTimeFormatter.ofPattern("yyyy-MM-dd HH:mm:ss")));
        //查询购物车
        List<String> goodsNames = Arrays.asList("商品1", "商品2", "商品2");

        //调用order服务生成订单
        String rt = orderService.generate(goodsNames);
        System.out.println(rt);


        log.debug("调用完成。。。。。。。。。。。。。。。");

        //清空购物车
        return rt;
    }

    public String generateOrderByFeignFB() {
        return "客户端FB";
}- 1.
- 2.
- 3.
- 4.
- 5.
- 6.
- 7.
- 8.
- 9.
- 10.
- 11.
- 12.
- 13.
- 14.
- 15.
- 16.
- 17.
- 18.
- 19.
- 20.
- 21.
- 22.
- 23.
- 24.
- 25.
- 26.
4 也可以在 feign 接口上配置服务降级默认值
5 由于hystrix 不怎么更新了,和springcloud 新版本有兼容问题,实测 超时时间和 feign 接口的服务降级默认方法 冲突,结果就是打开了 circuitbreaker=rtue(开启 feign 断路器) 以后,超时时间就无效了。
部分yml 文件配置
feign:
  httpclient:  #配置http连接池
    enabled: true
    max-connection: 200
    max-connections-per-route: 50
    connection-timeout: 2000
  client: #配置超时间
    config:
      default:
        connectTimeout: 4000
        readTimeOut: 4000
#  circuitbreaker: #设置了开了feign断路器以后,超时时间就不生效了不知道为什么(hystrix 已经停更了,版本比较老了,适配有问题)
# enabled: true- 1.
- 2.
- 3.
- 4.
- 5.
- 6.
- 7.
- 8.
- 9.
- 10.
- 11.
- 12.
- 13.
5 服务网关 gateway 的集成和使用
正常权限检查,请求过滤之类的东西分布式业务节点可以不处理,这些事情都可以交给 服务网关去做。并且 所有服务节点不会对外暴露,只有服务网关对外暴露,可以把 gateway 理解成一个 cloud 微服务专用的 服务器端代理兼路由器兼过滤器 ,之前是zuul效率比较低,现在的 gateway 使用netty 引入了非阻塞io,效率高了50%以上
1 创建项目gateway
2 引入pom.xml依赖文件
<!--gateway-->
        <dependency>
            <groupId>org.springframework.cloud</groupId>
            <artifactId>spring-cloud-starter-gateway</artifactId>
        </dependency>

        <!--eureka-->
        <dependency>
            <groupId>org.springframework.cloud</groupId>
            <artifactId>spring-cloud-starter-netflix-eureka-client</artifactId>
        </dependency>

        <!--gson-->
        <dependency>
            <groupId>com.google.code.gson</groupId>
            <artifactId>gson</artifactId>
            <version>2.6.2</version>
</dependency>- 1.
- 2.
- 3.
- 4.
- 5.
- 6.
- 7.
- 8.
- 9.
- 10.
- 11.
- 12.
- 13.
- 14.
- 15.
- 16.
- 17.
- 18.
3 application.yml配置文件
## web ##
server:
  port: 7001

#spring
spring:
  application:
    name: gateway-server
  cloud:
    gateway:
      routes:
        - id: shoppingCart_route          #指定一个路由配置的拼命
          uri: lb://goods-server/goods       #路由地址,lb开头的是 负载均衡地址
          predicates:
            - Path=/goods/**            # goods 开头的的地址会被转发到 上面的url 对应的地址
        - id: order_route
          uri: lb://order-server/orderServer
          predicates:
            - Path=/orderServer/**
          filters:                  #为一个路由配置指定局部过滤器
            - name: OrderFilter          #这个局部过滤器使用实现类的名字死 OrderFilter+ GatewayFilterFactroy
              args:                 #下面是指定的局部过滤器的构造参数
                message: My Custom Message
                preLogger: true
                postLogger: true

      discovery:
        locator:
          enabled: true  #启用注册中心额定位器

#注册中心
eureka:
  instance:
    hostname: localhost
    prefer-ip-address: true
  client:
    register-with-eureka: true
    fetch-registry: true
    service-url:
defaultZone: http://localhost:9001/eureka/- 1.
- 2.
- 3.
- 4.
- 5.
- 6.
- 7.
- 8.
- 9.
- 10.
- 11.
- 12.
- 13.
- 14.
- 15.
- 16.
- 17.
- 18.
- 19.
- 20.
- 21.
- 22.
- 23.
- 24.
- 25.
- 26.
- 27.
- 28.
- 29.
- 30.
- 31.
- 32.
- 33.
- 34.
- 35.
- 36.
- 37.
- 38.
- 39.
- 40.
4 启动类
@SpringBootApplication
@EnableEurekaClient
public class Application {

    public static void main(String[] args) throws IOException {
        SpringApplication.run(Application.class, args);
        System.out.println("*****************************");
        System.out.println("********* gateway 启动................... ***********");
        System.out.println("*****************************");
        System.in.read();

    }

}- 1.
- 2.
- 3.
- 4.
- 5.
- 6.
- 7.
- 8.
- 9.
- 10.
- 11.
- 12.
- 13.
- 14.
5 上面配置指定的局部过滤器(id=order_route的过滤器指定的这个过滤器),需要实现AbstractGatewayFilterFactory接口
/**
 *
 * filters:名字是这个类名的前缀 OrderFilter_GatewayFilterFactory
 *
 * @Author ZHANGYUKUN
 * @Date 2022/6/28
 **/
@Component
public class OrderFilterGatewayFilterFactory extends AbstractGatewayFilterFactory<OrderFilterGatewayFilterFactory.Config> {

    public OrderFilterGatewayFilterFactory() {
        super(Config.class);
    }

    @Override
    public GatewayFilter apply(Config config) {


        return new GatewayFilter() {
            @Override
            public Mono<Void> filter(ServerWebExchange exchange, GatewayFilterChain chain) {
                System.out.println( "orderServer的局部过滤器..............." );
                return chain.filter(exchange).then(Mono.fromRunnable(() -> {
                    if (config.isPostLogger()) {
                        System.out.println( "orderServer的局部过滤器 回链做点事..............." );
                    }
                }));
            }
        };


    }

    public static class Config {
        private String message;
        private boolean preLogger;
        private boolean postLogger;

        public Config() {
        }
        public Config(String message, boolean preLogger, boolean postLogger) {
            this.message = message;
            this.preLogger = preLogger;
            this.postLogger = postLogger;
        }

        public String getMessage() {
            return message;
        }

        public void setMessage(String message) {
            this.message = message;
        }

        public boolean isPreLogger() {
            return preLogger;
        }

        public void setPreLogger(boolean preLogger) {
            this.preLogger = preLogger;
        }

        public boolean isPostLogger() {
            return postLogger;
        }

        public void setPostLogger(boolean postLogger) {
            this.postLogger = postLogger;
        }
    }
}- 1.
- 2.
- 3.
- 4.
- 5.
- 6.
- 7.
- 8.
- 9.
- 10.
- 11.
- 12.
- 13.
- 14.
- 15.
- 16.
- 17.
- 18.
- 19.
- 20.
- 21.
- 22.
- 23.
- 24.
- 25.
- 26.
- 27.
- 28.
- 29.
- 30.
- 31.
- 32.
- 33.
- 34.
- 35.
- 36.
- 37.
- 38.
- 39.
- 40.
- 41.
- 42.
- 43.
- 44.
- 45.
- 46.
- 47.
- 48.
- 49.
- 50.
- 51.
- 52.
- 53.
- 54.
- 55.
- 56.
- 57.
- 58.
- 59.
- 60.
- 61.
- 62.
- 63.
- 64.
- 65.
- 66.
- 67.
- 68.
- 69.
- 70.
- 71.
6 配置一个全局过滤器,对所有路由的请求都有效(需要实现GlobalFilter接口)
@Component
public class TokenFilter implements GlobalFilter, Ordered {

    @Override
    public Mono<Void> filter(ServerWebExchange exchange, GatewayFilterChain chain) {
        System.out.println("----token 过滤器 ----");
        System.out.println("请求路径是:" +  exchange.getRequest().getPath()  );
        //有些路径不需要过滤,可以在这里处理


        //检查token
        String token  = exchange.getRequest().getHeaders().getFirst("token");

        //如果没有token直接返回失败
        if ( token == null || token.trim().length() == 0 ){
            exchange.getResponse().setStatusCode(HttpStatus.UNAUTHORIZED);
            ServerHttpResponse response = exchange.getResponse();
            return  response.setComplete();
        }


        //检查token是否合法
        System.out.println("请求的token是:" + token );
        if( token.equals("123") ){
            exchange.getResponse().setStatusCode(HttpStatus.OK);
            ServerHttpResponse response = exchange.getResponse();

            byte[] bits = "全局过滤器直接返回的数据".getBytes(StandardCharsets.UTF_8);
            DataBuffer buffer = response.bufferFactory().wrap(bits);

            return response.writeWith(Mono.just(buffer));
        }


        return chain.filter(exchange).then(Mono.fromRunnable(
                () -> System.out.println("回链响应也可以做点事..")
        ));
    }


    @Override
    public int getOrder() {
        return 1;
    }
}- 1.
- 2.
- 3.
- 4.
- 5.
- 6.
- 7.
- 8.
- 9.
- 10.
- 11.
- 12.
- 13.
- 14.
- 15.
- 16.
- 17.
- 18.
- 19.
- 20.
- 21.
- 22.
- 23.
- 24.
- 25.
- 26.
- 27.
- 28.
- 29.
- 30.
- 31.
- 32.
- 33.
- 34.
- 35.
- 36.
- 37.
- 38.
- 39.
- 40.
- 41.
- 42.
- 43.
- 44.
- 45.
6 配置中心spring config 的集成和使用
spring config 作为分布式配置中心,集中的管理分布式配置文件(类似 dubbo 框架使用 百度 disconf 最为配置管理中心 )
注意关于启动配置类的配置需要配置到bootstrap.xml里面去
1 创建 config 服务工程
2 config 工程引入 poxm 文件
<!--actuator-->
        <dependency>
            <groupId>org.springframework.boot</groupId>
            <artifactId>spring-boot-starter-actuator</artifactId>
        </dependency>


        <!--config-->
        <dependency>
            <groupId>org.springframework.cloud</groupId>
            <artifactId>spring-cloud-config-server</artifactId>
        </dependency>
        <dependency>
            <groupId>com.google.code.gson</groupId>
            <artifactId>gson</artifactId>
            <version>2.6.2</version>
        </dependency>

        <!--eurake cilent-->
        <dependency>
            <groupId>org.springframework.cloud</groupId>
            <artifactId>spring-cloud-starter-netflix-eureka-client</artifactId>
</dependency>- 1.
- 2.
- 3.
- 4.
- 5.
- 6.
- 7.
- 8.
- 9.
- 10.
- 11.
- 12.
- 13.
- 14.
- 15.
- 16.
- 17.
- 18.
- 19.
- 20.
- 21.
- 22.
- 23.
3 config工程 yml,下面
## web ##
server:
  port: 6001


#spring
spring:
  application:
    name: config-server
  cloud:
    config:
      server:
        git:
          uri: https://gitee.com/octupus/config.git   #git地址
          username: XXXX
          password: XXX
          default-label: master                 #git分支

#注册中心
eureka:
  instance:
    hostname: localhost
    prefer-ip-address: true
  client:
    register-with-eureka: true
    fetch-registry: true
    service-url:
defaultZone: http://localhost:9001/eureka/- 1.
- 2.
- 3.
- 4.
- 5.
- 6.
- 7.
- 8.
- 9.
- 10.
- 11.
- 12.
- 13.
- 14.
- 15.
- 16.
- 17.
- 18.
- 19.
- 20.
- 21.
- 22.
- 23.
- 24.
- 25.
- 26.
- 27.
- 28.
4 config 项目启动类
@SpringBootApplication
@EnableEurekaClient
@EnableConfigServer
public class Application {

    public static void main(String[] args) throws IOException {
        SpringApplication.run(Application.class, args);
        System.out.println("*****************************");
        System.out.println("********* configServer 启动................... ***********");
        System.out.println("*****************************");
        System.in.read();

    }

}- 1.
- 2.
- 3.
- 4.
- 5.
- 6.
- 7.
- 8.
- 9.
- 10.
- 11.
- 12.
- 13.
- 14.
- 15.
5 goods 引用 config 项目的配置 pom文件引入依赖
创建 bootstrap.yml 配置文件,和application.yml同位置,但是bootstrap.yml 加载顺序比 application.yml高,把关于 配置中心的配置都移动过去
spring:
  profiles:
    active: dev
  main:
    allow-circular-references: true
  application:
    name: goods-server
  cloud:
    config:
      discovery:
        enabled: true
        service-id: config-server
      #uri: http://localhost:6001/configServer   #配置中心地址
      label: master                  #git分支
      profile: dev                   #项目使用profiles
name: goodsServer #配置文件的名字- 1.
- 2.
- 3.
- 4.
- 5.
- 6.
- 7.
- 8.
- 9.
- 10.
- 11.
- 12.
- 13.
- 14.
- 15.
- 16.
7 goods 获取配置文件(@RefreshScope,标注的类,里面的配置文件可以在在指定情况下事实刷新)
/**
 * 获取配置文件
 */
@RestController
@RequestMapping("config")
@RefreshScope
public class ConfigController {

    //引用config的 远程文件地址
    @Value("${abc:000}")
    String version;

    /**
     * 获取配置文件
     * @return
     */
    @PostMapping("showConfig")
    public String showConfig() {

        System.out.println( "我取到的配置文件是:"  + version  );

        return version;
    }

}- 1.
- 2.
- 3.
- 4.
- 5.
- 6.
- 7.
- 8.
- 9.
- 10.
- 11.
- 12.
- 13.
- 14.
- 15.
- 16.
- 17.
- 18.
- 19.
- 20.
- 21.
- 22.
- 23.
- 24.
- 25.
8 默认情况下,goods 只会在启动的时候获取一个 config 的配置,如果要需要手动刷新,可以开放 good是刷新暴露点,然后手动刷新(需要和@RefreshScope配合使用)
加在 application.yml或者 bootstrap.yml都可以
调用刷新地址:post http://服务地址/程序访问前缀/actuator/refresh(这样适合当个引用的刷新)
7 消息总线spring bus 的使用
作用就一个,动态的推送分布式配置到各个分布式节点,而不是各个节点重启来拉取
注意刷新点改名字了
如果需要全局配置刷新需要配置 spring bus
1 config 导入 bus 的依赖
2 config 项目 application.yml 导入 mq 的配置
#spring
spring:
  application:
    name: config-server
  cloud:
    config:
      server:
        git:
          uri: https://gitee.com/octupus/config.git
          username: 451740146@qq.com
          password: a5464459480
          default-label: master
  rabbitmq:
    host: 127.0.0.1
    port: 5672
    username: guest
password: guest- 1.
- 2.
- 3.
- 4.
- 5.
- 6.
- 7.
- 8.
- 9.
- 10.
- 11.
- 12.
- 13.
- 14.
- 15.
- 16.
- 17.
3 config项目 application.yml配置 暴露刷新点
4 goods 在 pom 中 导入消息中线依赖
5 goods 在 yml 文件中配置 mq 地址(此配置 和 cloud属性配置缩进的同级别 )
#spring
spring:
  profiles:
    active: dev
  main:
    allow-circular-references: true
  application:
    name: goods-server
  cloud:
    config:
      discovery:
        enabled: true
        service-id: config-server
      #uri: http://localhost:6001/configServer
      label: master
      profile: dev
      name: goodsServer
  rabbitmq:
    host: 127.0.0.1
    port: 5672
    username: guest
password: guest- 1.
- 2.
- 3.
- 4.
- 5.
- 6.
- 7.
- 8.
- 9.
- 10.
- 11.
- 12.
- 13.
- 14.
- 15.
- 16.
- 17.
- 18.
- 19.
- 20.
- 21.
- 22.
6 调用config刷新点就能刷新指定项目的配置
调用config刷新地址:post http://服务地址/程序访问前缀/actuator/busrefresh (可以刷新所有使用config 项目配置的其它项目,原理就是通过 mq 发送一个 所有子项目订阅的广播消息 )
调用config刷新地址:post http://服务地址/程序访问前缀/actuator/busrefresh/服务名字:端口 可以指定刷新的子项目
8 spring stream 消息中间件的 代理
spring cloud stream ,可把它当做是所有消息中间键的抽象接口(l类似 slf4j 和各种 日志实现的关系),使用它一定程度上不用在关心 mq的具体api(个人觉得没啥用,初级接口可以通用,特性接口依旧需要学习各种mq 的特性)
在 goods 中使用 cloud stream 接受 rabbit mq 的消息
1 导入依赖
2 配置文件 修改
spring:
  profiles:
    active: dev
  main:
    allow-circular-references: true
  application:
    name: goods-server
  cloud:
    config:
      discovery:
        enabled: true
        service-id: config-server
      #uri: http://localhost:6001/configServer
      label: master
      profile: dev
      name: goodsServer
    stream:                #stream 和上面的  cloud 属性同级别
      function:
        definition: myChannel     #这里定义那些Spring 托管的bean 是消息监听者(这个非常重要,必不可少,不然spring不知道哪些bean 是消费监听者)
      binders:              # 一个 bingder 就是一个mq地址
        myRabbitMQ:           #这个名字自己取得,指定mq 的名字
          type: rabbit         #指定mq 的类型
          environment:
            spring:           #下面是mq 的一下具体参数
              rabbitmq:
                addresses: localhost:5672
                username: guest
                password: guest
                virtual-host: /

      bindings:
        myChannel-out-0:       #指定一个输出渠道的名字,格式:渠道名字-out-N
          destination: myExchange #目的地,在rabbitmq 中赌赢 交换机的名字
        myChannel-in-0:           #输出渠道的名字
          destination: myExchange #交换机的名字,需要额输入渠道交换机名字一样
          group: myTestQueue    #交换机绑定的队列名字
          binder: myRabbitMQ      #使用的那个binder(binders里面的指定的名字)
          consumer:
            concurrency: 1     #并行数
      rabbit:
        bindings:
          myChannel-in-0:     #如果要指定一些特定参数,比如手动确认,这里给指定 输入渠道 配置参数
            consumer:
acknowledgeMode: manual #设置位手动确认- 1.
- 2.
- 3.
- 4.
- 5.
- 6.
- 7.
- 8.
- 9.
- 10.
- 11.
- 12.
- 13.
- 14.
- 15.
- 16.
- 17.
- 18.
- 19.
- 20.
- 21.
- 22.
- 23.
- 24.
- 25.
- 26.
- 27.
- 28.
- 29.
- 30.
- 31.
- 32.
- 33.
- 34.
- 35.
- 36.
- 37.
- 38.
- 39.
- 40.
- 41.
- 42.
- 43.
- 44.
3 消息生产者
4 消息消费者 Consumer<Message<String>> , 这里的 Consumer<T> 里面的 T可以是我们消息对象的类型,也可以是org.springframework.messaging.Message<T> 里面装着我么你的消息
备注:默认是自动确认,手动确认需要配置文件里面 acknowledgeMode: manual 配合
/**
     * 消息接受者,并且手动确认  方法名字 myChannel1 是  myChannel1-in-0 的前缀,在cloud.stream.function 里面申明过。
     * @return
     */
    @Bean
    public Consumer<Message<String>> myChannel() {
        return  message -> {
            System.out.println("******************");
            System.out.println("At Sink1");
            System.out.println("******************");
            System.out.println("Received message " + message.getPayload());

            Channel channel = message.getHeaders().get(AmqpHeaders.CHANNEL, Channel.class);
            Long deliveryTag = message.getHeaders().get(AmqpHeaders.DELIVERY_TAG, Long.class);

            try {
                channel.basicAck(deliveryTag, false);
            } catch (IOException e) {
                e.printStackTrace();
            }

        };
}- 1.
- 2.
- 3.
- 4.
- 5.
- 6.
- 7.
- 8.
- 9.
- 10.
- 11.
- 12.
- 13.
- 14.
- 15.
- 16.
- 17.
- 18.
- 19.
- 20.
- 21.
- 22.
- 23.
9 分布式链路追踪 zipink 集成和使用
提供一个可视化的,可控采样率的分布式调用链路追踪工具,效率影响比较大,不建议生产使用,基本是用mq 代替http请求
1 引入配置,所有需要链路最终的都需要
<!--sleuth 和 zipkin client -->
        <!-- zipkin 默认使用的 http连接,可以改成 mq方式,存储zipkin 信息可以选择 es 或者 msql  -->
        <dependency>
            <groupId>org.springframework.cloud</groupId>
            <artifactId>spring-cloud-starter-sleuth</artifactId>
        </dependency>
        <dependency>
            <groupId>org.springframework.cloud</groupId>
            <artifactId>spring-cloud-sleuth-zipkin</artifactId>
</dependency>- 1.
- 2.
- 3.
- 4.
- 5.
- 6.
- 7.
- 8.
- 9.
- 10.
2 修改配置yml
5 所有调追踪记录都会出现在 zipkin 服务中。默认是不存盘的,需要存盘可以选择mysql es 之类的存储工具
浏览器访问:http://127.0.0.1:9411 可以查看最终信息。或者日志里面的最终ID 也可以参考
相关例子代理记录于:https://gitee.com/octupus/sc


 1102
1102

 被折叠的 条评论
为什么被折叠?
被折叠的 条评论
为什么被折叠?
 到【灌水乐园】发言


