


开发板型号s5pv210
操作系统win7和ubuntu
一、linux驱动开发之交叉开发环境搭建
1,先用下面的Linux内核镜像在zImage和文件系统在开发板中搭建交叉开发环境
1》 将Linux内核镜像:zImage拷贝到/tftpboot(zImage下载路径是链接:https://pan.baidu.com/s/1jJBKXQe 密码:dfv4)
2》 将文件系统:rootfs_fs210.tgz拷贝到/opt。并解压tar -xvf rootfs_fs210.tgz
(rootfs_fs210.tgz下载路径是链接:https://pan.baidu.com/s/1eSZZzfc 密码:cjfq)
并配置:
1) 打开配置文件
sudo vim /etc/exports
2) 添加下面一行
/opt/rootfs *(subtree_check,rw,no_root_squash,async)
3) 重启nfs服务
sudo /etc/init.d/nfs-kernel-server restart
sudo exportfs -a
3》打开开发板-配置uboot参数
FS210 # set serverip 192.168.7.115 //服务器(ubuntu)的IP
FS210 # set ipaddr 192.168.7.175 //开发板IP
FS210 # set gatewayip 192.168.7.1
FS210 # set netmask 255.255.255.0
FS210 # set ethaddr 11:22:33:44:5e:aa
FS210 # set bootcmd tftp 0x40008000 zImage308 \; bootm 0x40008000 //设置uboot下载的内核:zImage
//设置uboot引导内核启动后,传给内核的参数:bootargs
FS210 # set bootargs console=ttySAC0,115200 init=/linuxrc root=/dev/nfs nfsroot=192.168.7.115:/opt/rootfs ip=192.168.7.175
FS210 # save //保存设置
Saving Environment to SMDK bootable device…
Erasing Nand…
Writing to Nand…
Saved enviroment variables
4》重启开发板电源
VFP support v0.3: implementor 41 architecture 3 part 30 variant c rev 2
dm9000 dm9000: eth0: link down
IP-Config: Guessing netmask 255.255.255.0
dm9000 dm9000: eth0: link up, 100Mbps, full-duplex, lpa 0x45E1
IP-Config: Complete:
device=eth0, addr=192.168.7.5, mask=255.255.255.0, gw=255.255.255.255,
host=192.168.7.5, domain=, nis-domain=(none),
bootserver=255.255.255.255, rootserver=192.168.7.8, rootpath=
VFS: Mounted root (nfs filesystem) on device 0:11.
Freeing init memory: 136K
===========^_^ fs start==========
===========@_@ fs end==========
    Please press Enter to activate this console.
    [root@ubuntu /]#
5》交叉编译器配置
2,编译Linux内核源码,生成镜像zImage —– Linux内核的移植
1》获取Linux内核源码
1) 从官网下载
www.kernel.org
2) 这里直接给出
linux-3.0.8.tar.bz2下载路径是链接:https://pan.baidu.com/s/1snuRXe9 密码:5ltg
2》在ubuntu中创建相应的目录:
ubuntu@ubuntu:~
mkdirs5pv210ubuntu@ubuntu:
m
k
d
i
r
s
5
p
v
210
u
b
u
n
t
u
@
u
b
u
n
t
u
:
mkdir s5pv210/kernel //放内核源码
ubuntu@ubuntu:~$ mkdir s5pv210/driver //放驱动程序
3》将内核源码拷贝到ubuntu中:/home/ubuntu/s5pv210/kernel ,并解压
tar -xvf linux-3.0.8.tar.bz2
4》配置交叉编译器:
cd linux-3.0.8/
vim Makefile +195
修改:
195 ARCH ?= arm
196 CROSS_COMPILE ?= arm-none-linux-gnueabi-
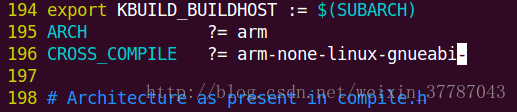
这里注意: ?= arm-none-linux-gnueabi-后面不能有空格
5》选择(指定)平台-SOC : s5pv210
方法一:
cp arch/arm/configs/s5pv210_defconfig .config
方法二: 推荐方法
make s5pv210_defconfig
(检测 ls -a .config
显示出.config表示make成功)
6》与平台(开发板)无关的配置
make menuconfig
1) 选择串口:COM1(固定,不需要修改,我曾以为修改而出错)
System Type —>
(0) S3C UART to use for low-level messages
2) 选择支持基本的网络协议
[*] Networking support —>
Networking options —>
<*> Packet socket
<*> Unix domain sockets
[*] TCP/IP networking
[*] IP: kernel level autoconfiguration
3) 选择支持网络文件系统:nfs
File systems —>
[*] Network File Systems (NEW) —>
<*> NFS client support
[*] NFS client support for NFS version 3
[*] NFS client support for the NFSv3 ACL protocol extension
[*] Root file system on NFS
注意:
如果图形界面无法打开,则下载库ncurses5:sudo apt-get install libncurses5-dev
7》编译内核:
make -j2(双线程,增加编译速度)
8》将编译好的内核镜像zImage拷贝到/tftpboot
cp arch/arm/boot/zImage /tftpboot/
9》修改uboot,重启开发板
FS210 # set bootcmd tftp 0x40008000 zImage \; bootm 0x40008000
FS210 # sa
重启开发板之后,会出现下面的错误:
TCP cubic registered
NET: Registered protocol family 17
VFP support v0.3: implementor 41 architecture 3 part 30 variant c rev 2
VFS: Unable to mount root fs via NFS, trying floppy.
VFS: Cannot open root device “nfs” or unknown-block(2,0)
Please append a correct “root=” boot option; here are the available partitions:
Kernel panic - not syncing: VFS: Unable to mount root fs on unknown-block(2,0)
[<80032564>] (unwind_backtrace+0x0/0xf0) from [<8024c978>] (panic+0x70/0x19c)
[<8024c978>] (panic+0x70/0x19c) from [<80008de4>] (mount_block_root+0x15c/0x210)
[<80008de4>] (mount_block_root+0x15c/0x210) from [<80009030>] (mount_root+0xa8/0xc4)
[<80009030>] (mount_root+0xa8/0xc4) from [<800091b0>] (prepare_namespace+0x164/0x1bc)
[<800091b0>] (prepare_namespace+0x164/0x1bc) from [<80008aa0>] (kernel_init+0xe4/0x118)
[<80008aa0>] (kernel_init+0xe4/0x118) from [<8002dee0>] (kernel_thread_exit+0x0/0x8)
在挂载根文件系统时,出错,原因是编译内核时,没有将网络驱动编译到zImage中
10》重新编译内核,将网卡驱动编译进去
1) 修改源码:arch/arm/mach-s5pv210/mach-smdkv210.c (以下是与平台相关):
vi arch/arm/mach-s5pv210/mach-smdkv210.c
        修改结构体数组smdkv210_dm9000_resources为:

            static struct resource smdkv210_dm9000_resources[] = {
                    [0] = {
                            .start = 0x88000000,
                            .end = 0x88000000 + 0x3,
                            .flags = IORESOURCE_MEM,   //地址端口
                    },
                    [1] = {
                            .start = 0x88000000 + 0x4,
                            .end = 0x88000000 + 0x4 + 0x3,
                            .flags = IORESOURCE_MEM,   //数据端口
                    },
                    [2] = {
                            .start = IRQ_EINT(10),
                            .end = IRQ_EINT(10),
                            .flags = IORESOURCE_IRQ | IORESOURCE_IRQ_HIGHLEVEL,
                    },
            };
            static struct dm9000_plat_data smdkv210_dm9000_platdata = {
                    .flags          = DM9000_PLATF_16BITONLY | DM9000_PLATF_NO_EEPROM,
                    .dev_addr       = { 0x00, 0x09, 0xc0, 0xff, 0xec, 0xYY}, /* YY为座位号,如果座位号小于10, 则在前面添加0, 比如座位号为6,则可以填06 */
            };

        修改函数smdkv210_dm9000_init为:

            static void __init smdkv210_dm9000_init(void)
            {
                unsigned int tmp;
                gpio_request(S5PV210_MP01(1), "nCS1");
                s3c_gpio_cfgpin(S5PV210_MP01(1), S3C_GPIO_SFN(2));
                gpio_free(S5PV210_MP01(1));
                    tmp = (5 << S5P_SROM_BCX__TACC__SHIFT);
                __raw_writel(tmp, S5P_SROM_BC1);
                tmp = __raw_readl(S5P_SROM_BW);
                tmp &= (S5P_SROM_BW__CS_MASK << S5P_SROM_BW__NCS1__SHIFT);
                tmp |= (1 << S5P_SROM_BW__NCS1__SHIFT);
                __raw_writel(tmp, S5P_SROM_BW);
                }
    2) make menuconfig
            Device Drivers  --->
                    [*] Network device support  --->
                            [*]   Ethernet (10 or 100Mbit)  --->
                                    <*>   DM9000 support
                                    (4)     DM9000 maximum debug level (NEW)
    3)重新编译内核
         make -j2
    4) 将编译好的内核镜像zImage拷贝到/tftpboot
        cp arch/arm/boot/zImage /tftpboot/
    5) 重启开发板:
        dm9000 Ethernet Driver, V1.31
        eth0: dm9000b at c0818000,c081a004 IRQ 42 MAC: 00:09:c0:ff:ec:aa (platform data)
        mousedev: PS/2 mouse device common for all mice
        TCP cubic registered
        NET: Registered protocol family 17
        VFP support v0.3: implementor 41 architecture 3 part 30 variant c rev 2
        dm9000 dm9000: eth0: link down
        dm9000 dm9000: eth0: link up, 100Mbps, full-duplex, lpa 0x41E1
        IP-Config: Guessing netmask 255.255.255.0
        IP-Config: Complete:
             device=eth0, addr=192.168.7.5, mask=255.255.255.0, gw=255.255.255.255,
             host=192.168.7.5, domain=, nis-domain=(none),
             bootserver=255.255.255.255, rootserver=192.168.7.8, rootpath=
        VFS: Mounted root (nfs filesystem) on device 0:10.
        Freeing init memory: 124K
        ===========^_^ fs start==========
        ===========@_@ fs end==========

        Please press Enter to activate this console.
        [root@ubuntu /]#
出现以上界面说明网卡驱动移植成功。
此时基本配置成功。
备注:ubuntu中开发板的路径是/opt/rootfs/
ubuntu和window共享文件夹路径是/tftpboot


 192
192


 被折叠的 条评论
为什么被折叠?
被折叠的 条评论
为什么被折叠?
 到【灌水乐园】发言


