


1.工程目录简介
由于需要训练自己的数据集,所以需要对这个工程各个目录的作用有所了解
- caffe-fast-rcnn:caffe框架目录
- data:用来存放pretrained模型以及读取文件的cache缓存,还有一些下载模型的脚本
- experiments:存放配置文件以及运行的log文件,另外这个目录下有scripts,里面存放end2end和alt_opt两种训练方式的脚本
- lib:用来存放一些python接口文件,如其下的datasets主要负责数据库读取,config负责一些训练的配置选项
- models:里面存放了三个模型文件,小型网络ZF,中型网络VGG_CNN_M_1024以及大型网络VGG16,根据你的硬件条件来选择使用哪种网络,ZF和VGG_CNN_M_1024需要至少3G内存,VGG16需要更多的内存,但不会超过11G。
- output:这里存放的是训练完成后的输出目录,这是运行了训练后才会出现的目录
- tools:里面存放的是训练和测试的Python文件
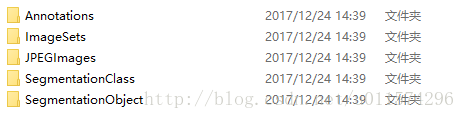
一、数据集文件夹
新建一个文件夹,用来存放整个数据集,或者和voc2007一样的名字:VOC2007
然后像voc2007一样,在文件夹里面新建如下文件夹:
二、将训练图片放到JPEGImages
将所有的训练图片放到该文件夹里,然后将图片重命名为VOC2007的“000005.jpg”形式
三、标注图片,标注文件保存到Annotations
使用labelIImg 标注自己的图片
1、在git上下载源码:https://github.com/tzutalin/labelImg
2、按照网页上的使用方法使用
(1)安装PyQt4和Lxml
(2)在labelImage 的目录下 shift+右键打开cmd 运行一下命令:
pyrcc4 -o resources.py resources.qrc
python labelImg.py
注:这个时候,就会出现labelimage的窗口
(3)labelimg窗口的使用方法:
• 修改默认的XML文件保存位置,可以用“Ctrl+R”,改为自定义位置,这里的路径不能包含中文,否则无法保存。
• 源码文件夹中使用notepad++打开data/predefined_classes.txt,可以修改默认类别,比如改成bus、car、building三个类别。
•“Open Dir”打开需要标注的样本图片文件夹,会自动打开第一张图片,开始进行标注
• 使用“Create RectBox”开始画框
• 完成一张图片后点击“Save”,此时XML文件已经保存到本地了。
• 点击“Next Image”转到下一张图片。
• 标注过程中可随时返回进行修改,后保存的文件会覆盖之前的。
• 完成标注后打开XML文件,发现确实和PASCAL VOC所用格式一样。
标注自己的图片的时候,类别名称请用小写字母,比如汽车使用car,不要用Car
pascal.py中读取.xml文件的类别标签的代码,写的只识别小写字母,如果你的标签含有大写字母,可能会出现KeyError的错误:
cls = self._class_to_ind[obj.find('name').text.lower().strip()]
四、ImageSets\Main里的四个txt文件
在ImageSets里再新建文件夹,命名为Main,在Main文件夹中生成四个txt文件,即: 
test.txt是测试集
train.txt是训练集
val.txt是验证集
trainval.txt是训练和验证集
VOC2007中,trainval大概是整个数据集的50%,test也大概是整个数据集的50%;train大概是trainval的50%,val大概是trainval的50%。
txt文件中的内容为样本图片的名字(不带后缀),格式如下:
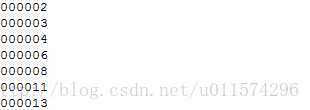
根据已生成的xml,制作VOC2007数据集中的trainval.txt ; train.txt ; test.txt ; val.txt
trainval占总数据集的50%,test占总数据集的50%;train占trainval的50%,val占trainval的50%;
上面所占百分比可根据自己的数据集修改,如果数据集比较少,test和val可少一些
代码如下:
%注意修改下面四个值
xmlfilepath='E:\Annotations';
txtsavepath='E:\ImageSets\Main\';
trainval_percent=0.5; #trainval占整个数据集的百分比,剩下部分就是test所占百分比
train_percent=0.5; #train占trainval的百分比,剩下部分就是val所占百分比

xmlfile=dir(xmlfilepath);
numOfxml=length(xmlfile)-2;#减去.和..  总的数据集大小

trainval=sort(randperm(numOfxml,floor(numOfxml*trainval_percent)));
test=sort(setdiff(1:numOfxml,trainval));

trainvalsize=length(trainval); #trainval的大小
train=sort(trainval(randperm(trainvalsize,floor(trainvalsize*train_percent))));
val=sort(setdiff(trainval,train));

ftrainval=fopen([txtsavepath 'trainval.txt'],'w');
ftest=fopen([txtsavepath 'test.txt'],'w');
ftrain=fopen([txtsavepath 'train.txt'],'w');
fval=fopen([txtsavepath 'val.txt'],'w');

for i=1:numOfxml
    if ismember(i,trainval)
        fprintf(ftrainval,'%s\n',xmlfile(i+2).name(1:end-4));
        if ismember(i,train)
            fprintf(ftrain,'%s\n',xmlfile(i+2).name(1:end-4));
        else
            fprintf(fval,'%s\n',xmlfile(i+2).name(1:end-4));
        end
    else
        fprintf(ftest,'%s\n',xmlfile(i+2).name(1:end-4));
    end
end
fclose(ftrainval);
fclose(ftrain);
fclose(fval);
fclose(ftest);
1. 修改prototxt配置文件
这些配置文件都在models下的pascal_voc下。里面有三种网络结构:ZF、VGG16、VGG_CNN_M_1024,本文选择的是VGG_CNN_M_1024 ,每个网络结构中都有三个文件夹,分别是faster_rcnn_end2end、faster_rcnn_alt_opt、faster_rcnn
最佳策略:VGG+aster_rcnn_end2end(近似联合训练)
更改faster_rcnn_end2end文件夹下的train.prototxt和test.prototxt,train中需要更改的地方有三处,
第一处是input-data层,将原先的21改成:你的实际类别数+1(背景),我目标检测一共有46类,所以加上背景这一类,一共47类。
第二处是cls_score层
第三处是bbox_pred,这里需将原来的84改成(你的类别数+1)4,即(46+1)4=188
test.prototxt中没有input-data层,所以只需按照train中的修改cls_score层以及bbox_pred层即可
2. 修改lib/datasets/pascal_voc.py,将类别改成自己的类别
这里有一个注意点就是,这里的类别以及你之前的类别名称最好是全部小写,假如是大写的话,则会报keyError的错误,这时只需要在pascal_voc。py中第218行的lower去掉即可
datasets目录下主要有三个文件,分别是
(1) factory.py:这是一个工厂类,用类生成imdb类并且返回数据库供网络训练和测试使用;
(2) imdb.py:是数据库读写类的基类,封装了许多db的操作;
(3) pascl_voc.pyRoss用这个类来操作
3. 修改py-faster-rcnn/lib/datasets/imdb.py
在使用自己的数据进行训练时,假如你的数据集中的图片没有统一整理过就会报 assert(boxes[:,2] >= boxes[:,0]).all() 这个错误,故需在imdb.py中加入如下几行
若是使用faster_rcnn_alt_opt,则修改如下:
-
py-faster-rcnn/models/pascal_voc/VGG16/faster_rcnn_alt_opt/stage1_fast_rcnn_train.pt
1
2
3
4
5
6
7
8
9
10
11
12
13
14
15
layer {
name: 'data'
type: 'Python'
top: 'data'
top: 'rois'
top: 'labels'
top: 'bbox_targets'
top: 'bbox_inside_weights'
top: 'bbox_outside_weights'
python_param {
module: 'roi_data_layer.layer'
layer: 'RoIDataLayer'
param_str: "'num_classes': 2" #按训练集类别改,该值为类别数+1
}
}
1
2
3
4
5
6
7
8
9
10
11
12
13
14
15
16
17
18
19
20
21
22
23
layer {
name: "cls_score"
type: "InnerProduct"
bottom: "fc7"
top: "cls_score"
param {
lr_mult: 1.0
}
param {
lr_mult: 2.0
}
inner_product_param {
num_output: 2 #按训练集类别改,该值为类别数+1
weight_filler {
type: "gaussian"
std: 0.01
}
bias_filler {
type: "constant"
value: 0
}
}
}
1
2
3
4
5
6
7
8
9
10
11
12
13
14
15
16
17
18
19
20
21
22
23
layer {
name: "bbox_pred"
type: "InnerProduct"
bottom: "fc7"
top: "bbox_pred"
param {
lr_mult: 1.0
}
param {
lr_mult: 2.0
}
inner_product_param {
num_output: 8 #按训练集类别改,该值为(类别数+1)*4,四个顶点坐标
weight_filler {
type: "gaussian"
std: 0.001
}
bias_filler {
type: "constant"
value: 0
}
}
}
-
py-faster-rcnn/models/pascal_voc/VGG16/faster_rcnn_alt_opt/stage1_rpn_train.pt
1
2
3
4
5
6
7
8
9
10
11
12
layer {
name: 'input-data'
type: 'Python'
top: 'data'
top: 'im_info'
top: 'gt_boxes'
python_param {
module: 'roi_data_layer.layer'
layer: 'RoIDataLayer'
param_str: "'num_classes': 2" #按训练集类别改,该值为类别数+1
}
}
-
py-faster-rcnn/models/pascal_voc/VGG16/faster_rcnn_alt_opt/stage2_fast_rcnn_train.pt
1
2
3
4
5
6
7
8
9
10
11
12
13
14
15
layer {
name: 'data'
type: 'Python'
top: 'data'
top: 'rois'
top: 'labels'
top: 'bbox_targets'
top: 'bbox_inside_weights'
top: 'bbox_outside_weights'
python_param {
module: 'roi_data_layer.layer'
layer: 'RoIDataLayer'
param_str: "'num_classes': 2" #按训练集类别改,该值为类别数+1
}
}
1
2
3
4
5
6
7
8
9
10
11
12
13
14
15
16
17
18
19
20
21
22
23
layer {
name: "cls_score"
type: "InnerProduct"
bottom: "fc7"
top: "cls_score"
param {
lr_mult: 1.0
}
param {
lr_mult: 2.0
}
inner_product_param {
num_output: 2 #按训练集类别改,该值为类别数+1
weight_filler {
type: "gaussian"
std: 0.01
}
bias_filler {
type: "constant"
value: 0
}
}
}
1
2
3
4
5
6
7
8
9
10
11
12
13
14
15
16
17
18
19
20
21
22
23
layer {
name: "bbox_pred"
type: "InnerProduct"
bottom: "fc7"
top: "bbox_pred"
param {
lr_mult: 1.0
}
param {
lr_mult: 2.0
}
inner_product_param {
num_output: 8 #按训练集类别改,该值为(类别数+1)*4,四个顶点坐标
weight_filler {
type: "gaussian"
std: 0.001
}
bias_filler {
type: "constant"
value: 0
}
}
}
-
py-faster-rcnn/models/pascal_voc/VGG16/faster_rcnn_alt_opt/stage2_rpn_train.pt
1
2
3
4
5
6
7
8
9
10
11
12
layer {
name: 'input-data'
type: 'Python'
top: 'data'
top: 'im_info'
top: 'gt_boxes'
python_param {
module: 'roi_data_layer.layer'
layer: 'RoIDataLayer'
param_str: "'num_classes': 2" #按训练集类别改,该值为类别数+1
}
}
-
py-faster-rcnn/models/pascal_voc/VGG16/faster_rcnn_alt_opt/faster_rcnn_test.pt
1
2
3
4
5
6
7
8
9
10
11
12
13
14
15
16
17
18
19
layer {
name: "cls_score"
type: "InnerProduct"
bottom: "fc7"
top: "cls_score"
inner_product_param {
num_output: 2 #按训练集类别改,该值为类别数+1
}
}
layer {
name: "bbox_pred"
type: "InnerProduct"
bottom: "fc7"
top: "bbox_pred"
inner_product_param {
num_output: 84 #按训练集类别改,该值为(类别数+1)*4,四个顶点坐标
}
}
训练测试
训练前还需要注意几个地方:
-
cache问题:
假如你之前训练了官方的VOC2007的数据集或其他的数据集,是会产生cache的问题的,建议在重新训练新的数据之前将其删除。
py-faster-rcnn/outputpy-faster-rcnn/data/cache
4. 开始训练
-
cd py-faster-rcnn -
./experiments/scripts/faster_rcnn_end2end.sh 0 VGG_CNN_M_1024 pascal_voc
由于训练过程太长,可以将训练过程产生的输出定向输入到log文件中,这样可方便查看。只需在上述命令中加入定向输入的命令即可,如下:
./experiments/scripts/faster_rcnn_end2end.sh 0 VGG_CNN_M_1024 pascal_voc > /home/lby/log/clothdirector.log 2>&1
来源:
http://jacobkong.github.io/posts/464905881/
https://blog.csdn.net/CV_adventurer/article/details/72805852


 1万+
1万+


 被折叠的 条评论
为什么被折叠?
被折叠的 条评论
为什么被折叠?
 到【灌水乐园】发言


