


 本文主要探讨了SpringBoot中如何进行注销登录的配置,通过HttpSecurity进行设置,并通过Postman进行了实际的测试验证。
注销登录配置
package org.akk.security.config;
import com.fasterxml.jackson.databind.ObjectMapper;
import org.springframework.context.annotation.Bean;
import org.springframework.context.annotation.Configuration;
import org.springframework.security.authentication.AccountExpiredException;
import org.springframework.security.authentication.BadCredentialsException;
import org.springframework.security.authentication.DisabledException;
import org.springframework.security.authentication.LockedException;
import org.springframework.security.config.annotation.authentication.builders.AuthenticationManagerBuilder;
import org.springframework.security.config.annotation.web.builders.HttpSecurity;
import org.springframework.security.config.annotation.web.configuration.WebSecurityConfigurerAdapter;
import org.springframework.security.core.Authentication;
import org.springframework.security.core.AuthenticationException;
import org.springframework.security.core.CredentialsContainer;
import org.springframework.security.crypto.password.NoOpPasswordEncoder;
import org.springframework.security.crypto.password.PasswordEncoder;
import org.springframework.security.web.authentication.AuthenticationFailureHandler;
import org.springframework.security.web.authentication.AuthenticationSuccessHandler;
import org.springframework.security.web.authentication.logout.LogoutSuccessHandler;
import javax.servlet.ServletException;
import javax.servlet.http.HttpServletRequest;
import javax.servlet.http.HttpServletResponse;
import java.io.IOException;
import java.io.PrintWriter;
import java.util.HashMap;
import java.util.Map;
@Configuration
public class SecurityConfig extends WebSecurityConfigurerAdapter {
@Bean
PasswordEncoder passwordEncoder() {
return NoOpPasswordEncoder.getInstance();
}
@Override
protected void configure(AuthenticationManagerBuilder auth) throws Exception {
auth.inMemoryAuthentication()
.withUser("uuc").password("123").roles("admin")
.and()
.withUser("akk").password("123").roles("user");
}
@Override
protected void configure(HttpSecurity http) throws Exception {
http.authorizeRequests()
.antMatchers("/admin/**").hasRole("admin")
.antMatchers("user/**").hasAnyRole("admin", "user")
.anyRequest().authenticated()
.and()
.formLogin()
//这里就是处理登录的url,
.loginProcessingUrl("/doLogin")
//跳转的登录界面
.loginPage("/login")
.usernameParameter("name")
.passwordParameter("passwd")
.successHandler(new AuthenticationSuccessHandler() {
//authentication中保存了登陆成功的用户信息
@Override
public void onAuthenticationSuccess(HttpServletRequest httpServletRequest, HttpServletResponse httpServletResponse, Authentication authentication) throws IOException, ServletException {
httpServletResponse.setContentType("application/json;charset = utf-8");
PrintWriter out = httpServletResponse.getWriter();
Map<String, Object> map = new HashMap<>();
map.put("status", 200);
map.put("msg", authentication.getPrincipal());
out.write(new ObjectMapper().writeValueAsString(map));
out.flush();
out.close();
}
})
.failureHandler(new AuthenticationFailureHandler() {
@Override
public void onAuthenticationFailure(HttpServletRequest httpServletRequest, HttpServletResponse httpServletResponse, AuthenticationException e) throws IOException, ServletException {
httpServletResponse.setContentType("application/json;charset = utf-8");
PrintWriter out = httpServletResponse.getWriter();
Map<String, Object> map = new HashMap<>();
map.put("status", 401);
if (e instanceof LockedException) {
map.put("msg", "账户被锁定,登陆失败");
} else if (e instanceof BadCredentialsException) {
map.put("msg", "用户名或者密码输入错误,登陆失败");
} else if (e instanceof DisabledException) {
map.put("msg", "账户被禁用,登陆失败");
} else if (e instanceof AccountExpiredException) {
map.put("msg", "账户过期,登陆失败");
} else if (e instanceof CredentialsContainer) {
map.put("msg", "密码过期,登陆失败");
}else{
map.put("msg","登陆失败");
}
out.write(new ObjectMapper().writeValueAsString(map));
out.flush();
out.close();
}
})
.permitAll()
.and()
//配置logout进行注销
.logout()
//请求地址
.logoutUrl("/logout")
.logoutSuccessHandler(new LogoutSuccessHandler() {
@Override
public void onLogoutSuccess(HttpServletRequest httpServletRequest, HttpServletResponse httpServletResponse, Authentication authentication) throws IOException, ServletException {
httpServletResponse.setContentType("application/json;charset = utf-8");
PrintWriter out = httpServletResponse.getWriter();
Map<String, Object> map = new HashMap<>();
map.put("status", 200);
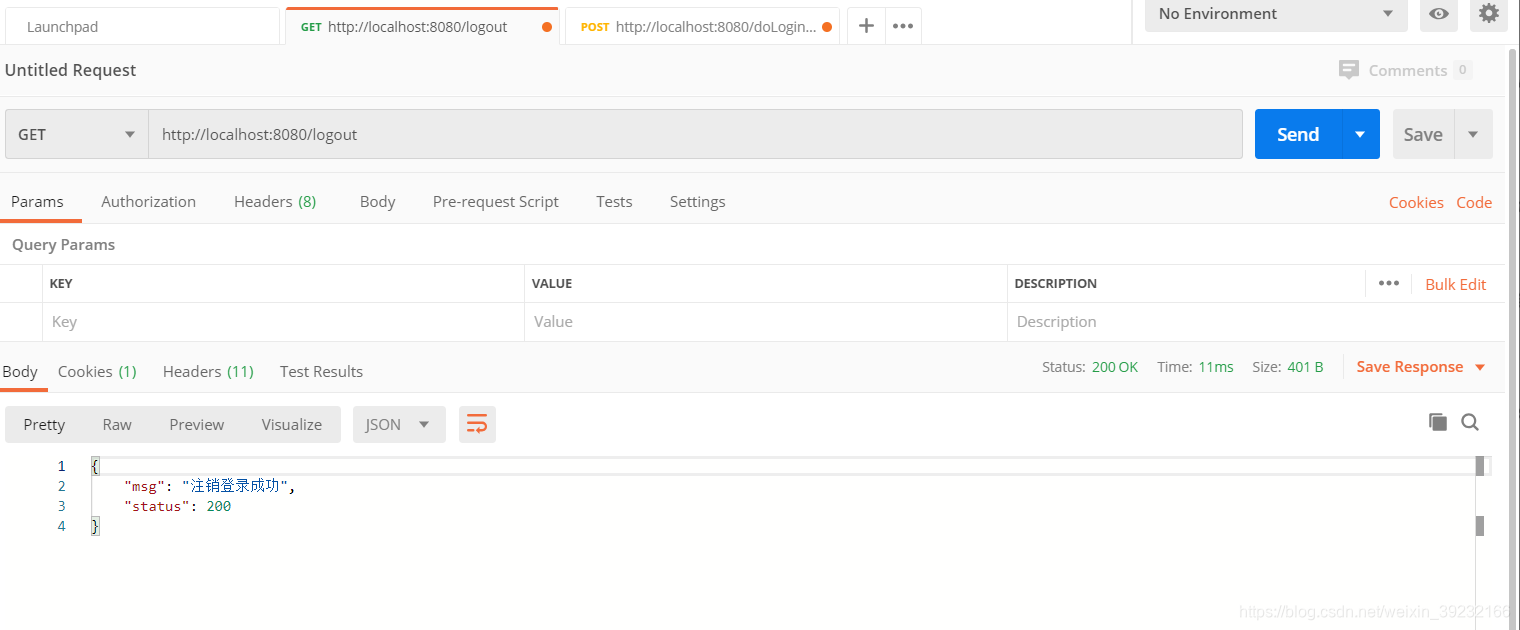
map.put("msg", "注销登录成功");
out.write(new ObjectMapper().writeValueAsString(map));
out.flush();
out.close();
}
})
.and()
.csrf().disable();
}
}
postman测试:


 751
751

 被折叠的 条评论
为什么被折叠?
被折叠的 条评论
为什么被折叠?
 到【灌水乐园】发言


