
Vite + Vue3 + OpenLayers 同步两个地图基础操作

Vite + Vue3 + OpenLayers 同步两个地图基础操作

一、本文简介
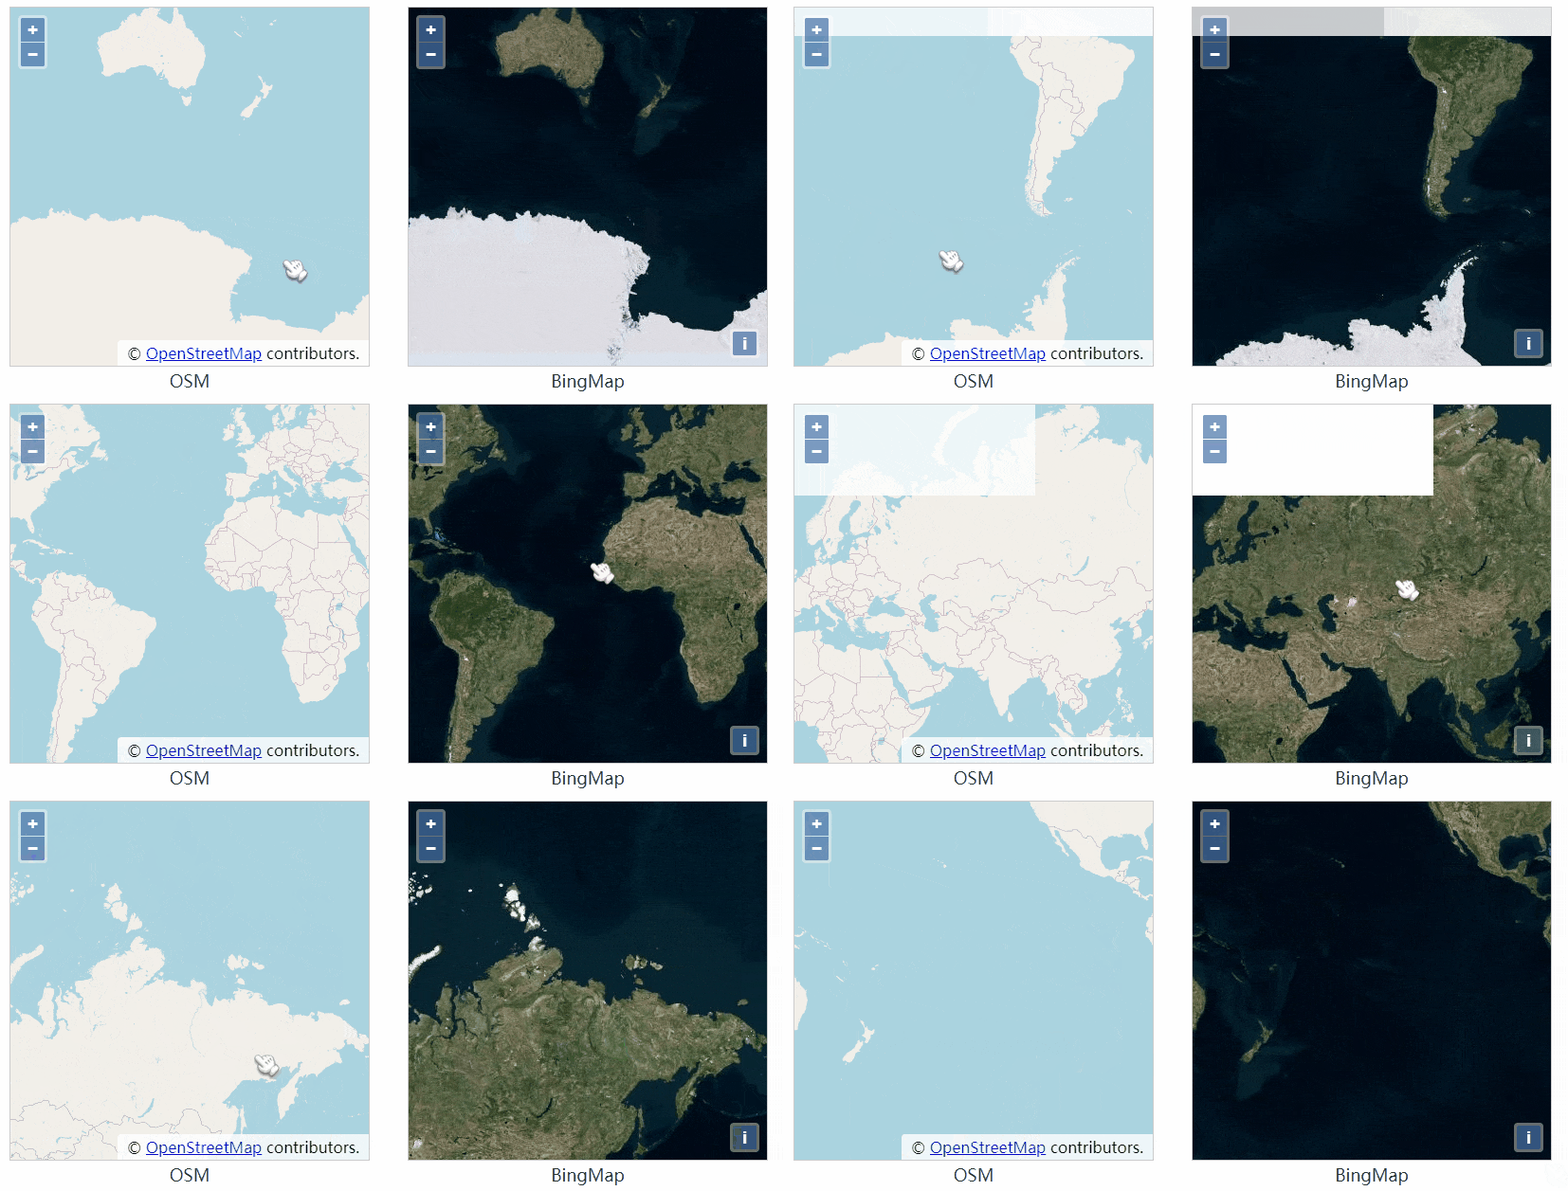
Vite + Vue3 + OpenLayers 同步两个地图基础操作

两个独立的容器,使用了不同的图源。但不管操作哪个容器的地图,另一个也会跟着变化。

二、开发环境

Vite + Vue3 + ol6

# 1、使用 Vite 创建项目;取个好听的项目名;拉取 vue 的代码模板
npm init vite@latest

# 2、初始化项目
cd you-project
npm install

# 3、安装 ol
npm i ol -S

# 4、启动项目
npm run dev

使用 Vite 初始化项目并安装 ol ,更详细做法可以查看 『Vite + Vue3 + OpenLayers 起步』

思路

  1. 两个地图容器,分别使用不同的图源
  2. 绑定同一个视图层

两个地图使用同一个view,所以在移动、缩放、旋转等操作都是同步的。

编码

<!-- ol - 同步两个地图 -->
<template>
  <div class="map__container">
    <!-- OSM地图容器 -->
    <div id="OSM" class="map__x"></div>
    <!-- bing地图容器 -->
    <div id="BingMaps" class="map__x"></div>
  </div>
</template>

<script setup>
import { ref, onMounted } from 'vue'
import { Map, View } from 'ol'
import Tile from 'ol/layer/Tile'
import OSM from 'ol/source/OSM'
import BingMaps from 'ol/source/BingMaps'
import 'ol/ol.css'

const mapO = ref(null) // 绑定OSM地图实例的变量
const mapB = ref(null) // 绑定Bing地图实例的变量

// 公共的视图
const mapView = new View({
  center: [0, 0],
  zoom: 2
})

// OSM图层
const layerO = new Tile({
  source: new OSM()
})

// Bing图层
const layerB = new Tile({
  source: new BingMaps({
    key: 'AiZrfxUNMRpOOlCpcMkBPxMUSKOEzqGeJTcVKUrXBsUdQDXutUBFN3-GnMNSlso-',
    imagerySet: 'Aerial'
  })
})

// 初始化2个地图
function initMap () {
  mapO.value = new Map({
    target: 'OSM',
    layers: [layerO], // 使用OSM图层
    view: mapView // 使用了同一个视图层
  })

  mapB.value = new Map({
    target: 'BingMaps',
    layers: [layerB], // 使用Bing图层
    view: mapView  // 使用了同一个视图层
  })
}

onMounted(() => {
  // 在元素加载完之后再执行地图初始化
  initMap()
})
</script>

<style lang="scss" scoped>
.map__container {
  width: 800px;
  height: 380px;
  margin-bottom: 60px;
  display: flex;
  justify-content: space-between;

  .map__x {
    width: 380px;
    height: 380px;
    box-sizing: border-box;
    border: 1px solid #ccc;
    position: relative;
  }

  #OSM::after,
  #BingMaps::after {
    position: absolute;
    display: block;
    font-size: 18px;
    left: 50%;
    bottom: -28px;
    transform: translateX(-50%);
  }

  #OSM::after {
    content: 'OSM'
  }

  #BingMaps::after {
    content: 'BingMap'
  }
}
</style>

更多推荐

本例展示地址(vite+vue3+ol)

本例仓库(vite+vue3+ol)

ol在vue2中使用(预览)

ol在vue2中使用(仓库)

OpenLayers 官网

《WebGIS之OpenLayers全面解析(第2版)》

如果不清楚 OpenLayers 是什么,可以阅读: 『Vite + Vue3 + OpenLayers 起步』

  • 0
    点赞
  • 2
    收藏
    觉得还不错? 一键收藏
  • 0
    评论
当然,我可以为您提供一个使用 Vite + Vue 3 创建项目,并使用 OpenLayers 封装一个 `MapView` 组件实现高德地图的加载的示例代码。 首先,确保您已经安装了最新版本的 Node.js。然后,按照以下步骤创建项目: 1. 打开终端并创建一个新的项目文件夹: ``` mkdir vite-vue3-openlayers cd vite-vue3-openlayers ``` 2. 初始化一个新的 npm 项目: ``` npm init -y ``` 3. 使用以下命令安装 Vite: ``` npm install create-vite@latest -g ``` 4. 使用 Vite 创建一个新的 Vue 3 项目: ``` create-vite ``` 在提示中选择 `vue-ts` 作为项目模板,并输入项目名称。 5. 进入项目文件夹: ``` cd your-project-name ``` 6. 安装 OpenLayers: ``` npm install ol --save ``` 7. 在 `src/components` 文件夹中创建一个名为 `MapView.vue` 的组件文件,并添加以下代码: ```vue <template> <div ref="mapContainer" class="map-container"></div> </template> <script> import { ref, onMounted } from 'vue' import { Map, View } from 'ol' import { Tile as TileLayer } from 'ol/layer' import { XYZ as XYZSource } from 'ol/source' export default { name: 'MapView', setup() { const mapContainer = ref(null) onMounted(() => { const map = new Map({ target: mapContainer.value, layers: [ new TileLayer({ source: new XYZSource({ url: 'https://webst02.is.autonavi.com/appmaptile?style=6&x={x}&y={y}&z={z}' }) }) ], view: new View({ center: [0, 0], zoom: 2 }) }) }) return { mapContainer } } } </script> <style scoped> .map-container { width: 100%; height: 100%; } </style> ``` 8. 在 `src/App.vue` 文件中引入并使用 `MapView` 组件: ```vue <template> <div id="app"> <h1>Hello Vite + Vue 3</h1> <MapView /> </div> </template> <script> import MapView from './components/MapView.vue' export default { components: { MapView } } </script> <style> #app { text-align: center; } </style> ``` 9. 启动开发服务器: ``` npm run dev ``` 现在,您可以在浏览器中访问 `http://localhost:3000` 查看使用 OpenLayers 封装的 `MapView` 组件加载高德地图Vue 3 应用程序。 请注意,这只是一个简单的示例,您可以根据自己的需求进一步调整地图的样式和行为。 祝您使用 Vite + Vue 3 和 OpenLayers 进行开发成功!如有其他问题,请随时提问。

“相关推荐”对你有帮助么?

  • 非常没帮助
  • 没帮助
  • 一般
  • 有帮助
  • 非常有帮助
提交
评论
添加红包

请填写红包祝福语或标题

红包个数最小为10个

红包金额最低5元

当前余额3.43前往充值 >
需支付:10.00
成就一亿技术人!
领取后你会自动成为博主和红包主的粉丝 规则
hope_wisdom
发出的红包
实付
使用余额支付
点击重新获取
扫码支付
钱包余额 0

抵扣说明:

1.余额是钱包充值的虚拟货币,按照1:1的比例进行支付金额的抵扣。
2.余额无法直接购买下载,可以购买VIP、付费专栏及课程。

余额充值