


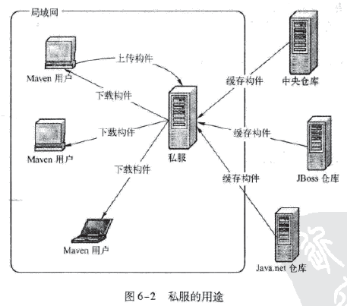
为何用到Maven私服?
在实际开发中,项目中可能会用到第三方的jar、内部通讯的服务接口都会打入到公司的私服中。
我们从项目实际开发来看:
一些无法从外部仓库下载的构件,例如内部的项目还能部署到私服上,以便供其他依赖项目使用。
为了节省带宽和时间,在局域网内架设一个私有的仓库服务器,用其代理所有外部的远程仓库。当本地Maven项目需要下载构件时,先去私服请求,如果私服没有,则再去远程仓库请求,从远程仓库下载构件后,把构件缓存在私服上。这样,及时暂时没有Internet链接,由于私服已经缓存了大量构件,整个项目还是可以正常使用的。同时,也降低了中央仓库的符合。
如上摘抄自私服服务器架设,如下为详细步骤:
1、下载一个nexus3的镜像
docker pull sonatype/nexus3

2、将容器内部/var/nexus-data挂载到主机/root/nexus-data目录
docker run -d -p 8081:8081 --name nexus -v /root/nexus-data:/var/nexus-data --restart=always sonatype/nexus3
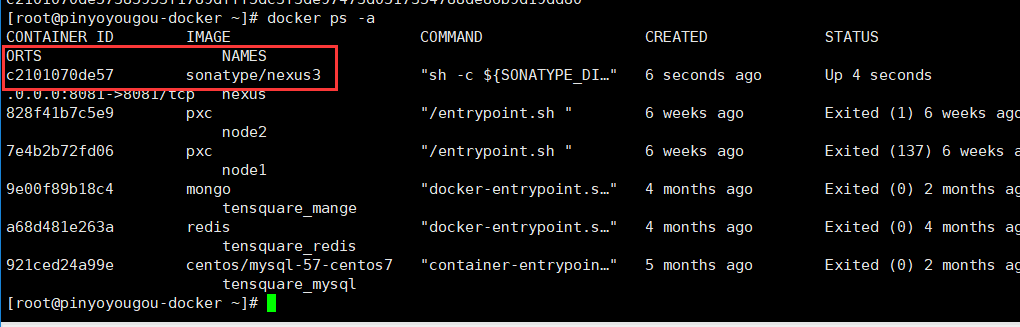
通过 docker ps -a 查看容器启动情况
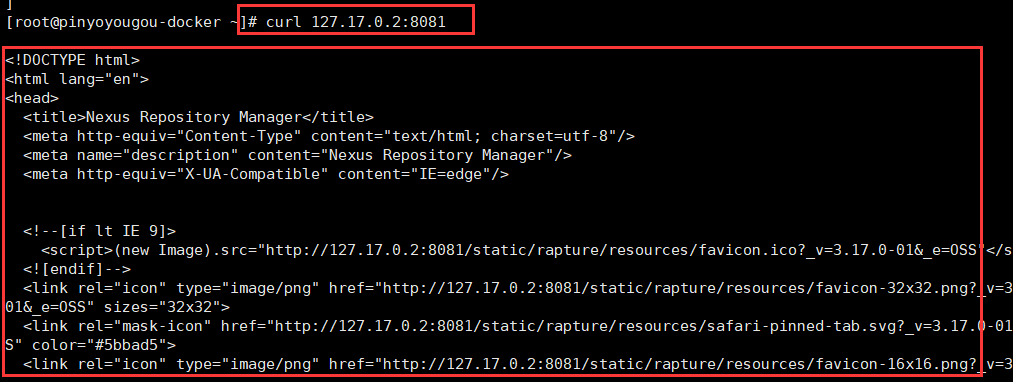
验证,通过id查看容器的详细信息,输出如下ip地址。
docker inspect 容器id

紧接着访问以下这个地址试一下:curl 127.17.0.2:8081
如果启动失败,可关闭防火墙再试一下:
systemctl stop firewalld.service
ok,启动后浏览器访问一下 http://ip:8081
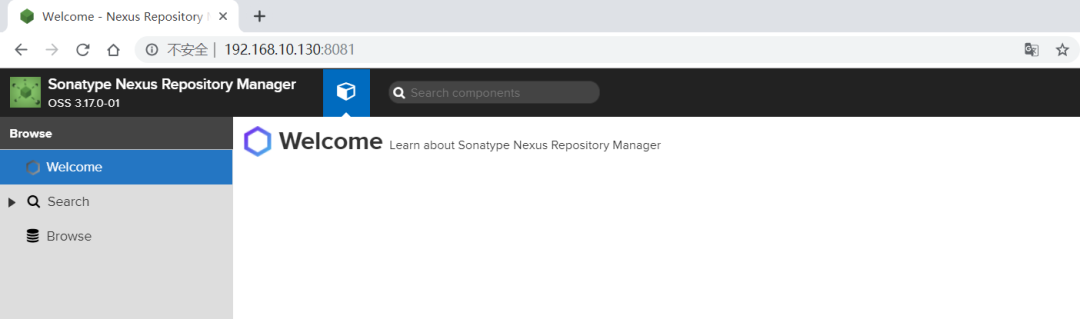
至此,私服搭建成功。
默认登陆账号 admin admin123
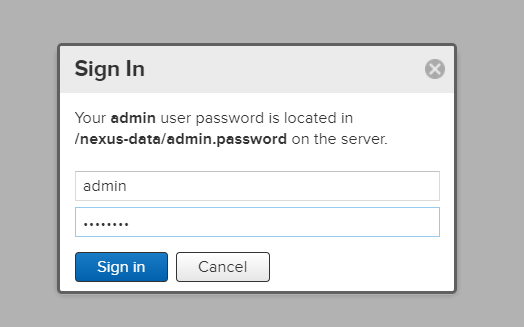
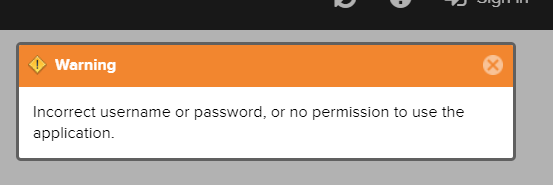
注意,这个时候你可能会遇到如下这个错误:
Incorrect username or password, or no permission to use the application.
maven私服登录的时候默认是不能使用明文密码,要使用密文密码,一般在你创建容器的目录下,比如 root/nexus-data/admin.password ,注意,需要进入容器中找,见下方指令与图:

docker exec -it c2101070de57 bash
bash-4.2$ cd /nexus-data/
bash-4.2$ cat admin.password
d62fa667-a22b-41db-a14a-6aa6f793f4fbbash-4.2$
去掉后面的 bash-4.2$,d62fa667-a22b-41db-a14a-6aa6f793f4fb 即为密码。
重新登陆后,会提示你重设密码:

3、创建maven仓库
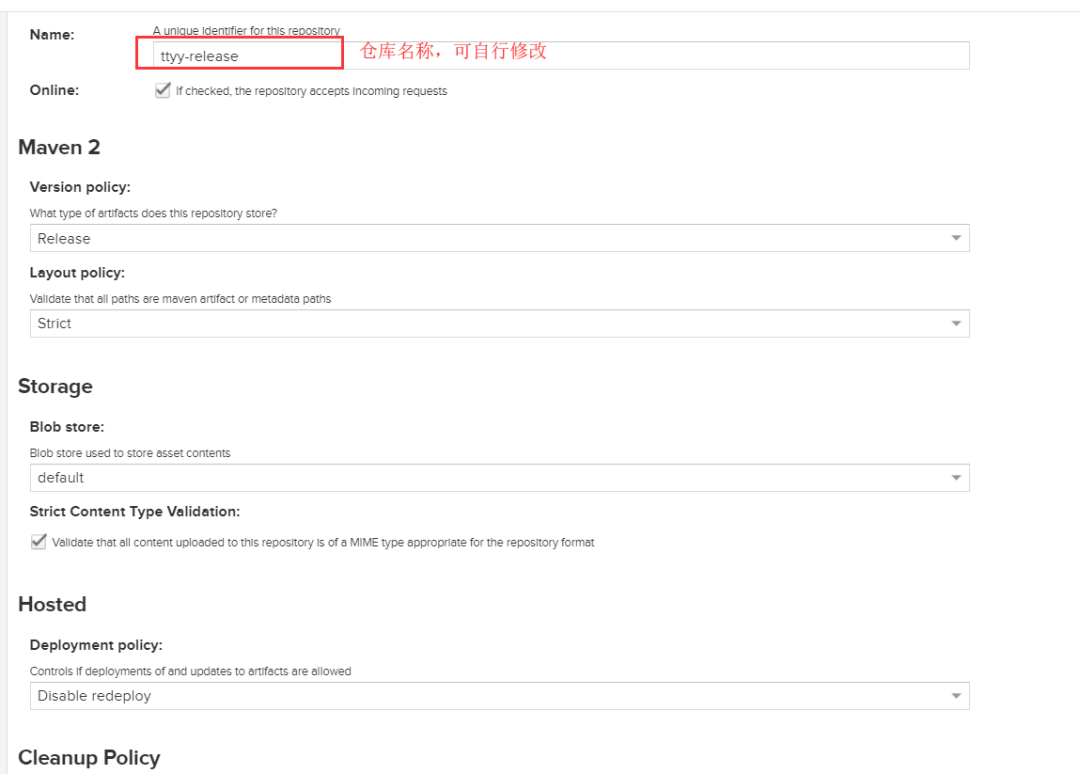
上传maven私服之前我们先,创建个仓库
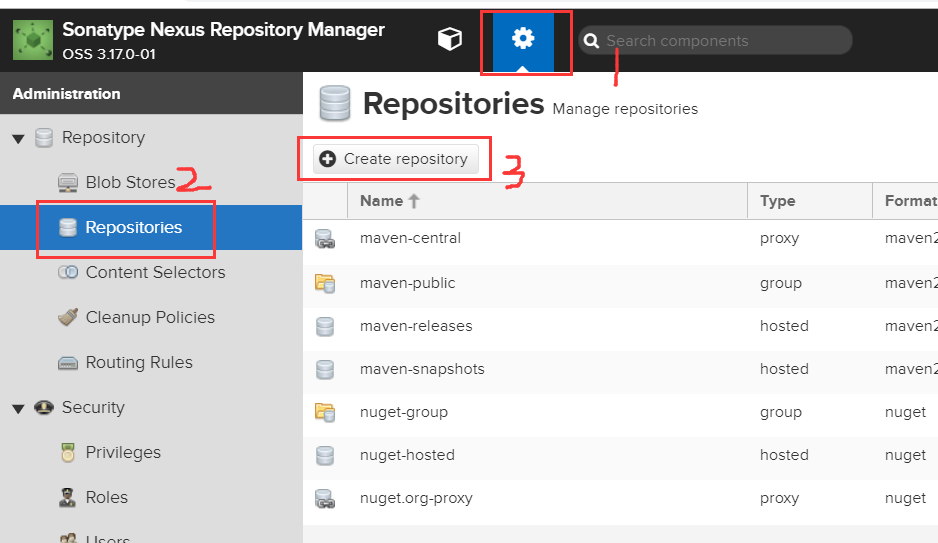
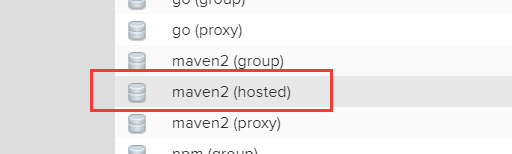
选择maven2(hosted)
填写仓库信息:
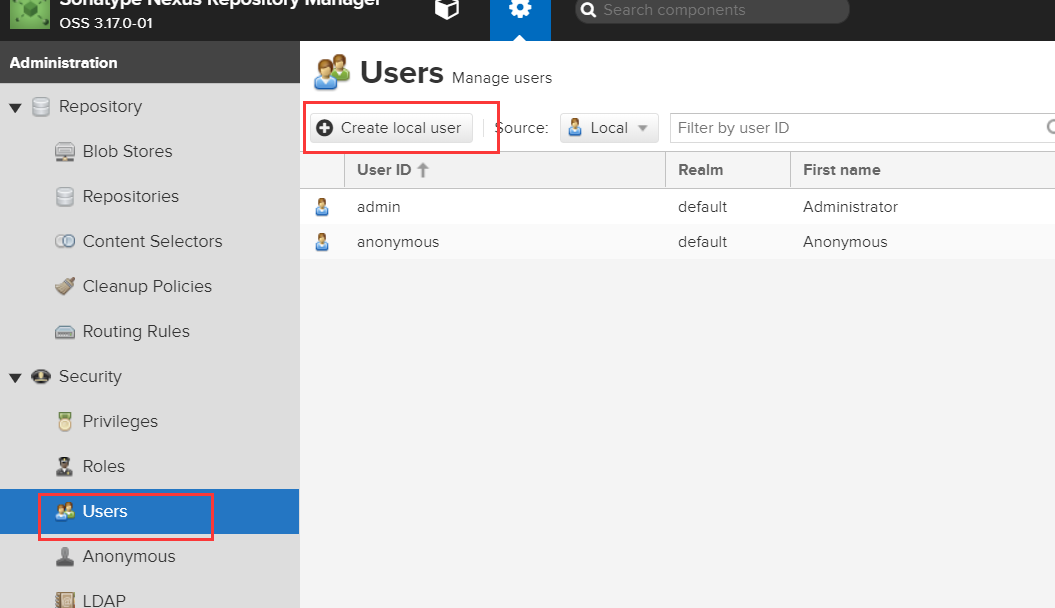
创建用户:
填写基本信息
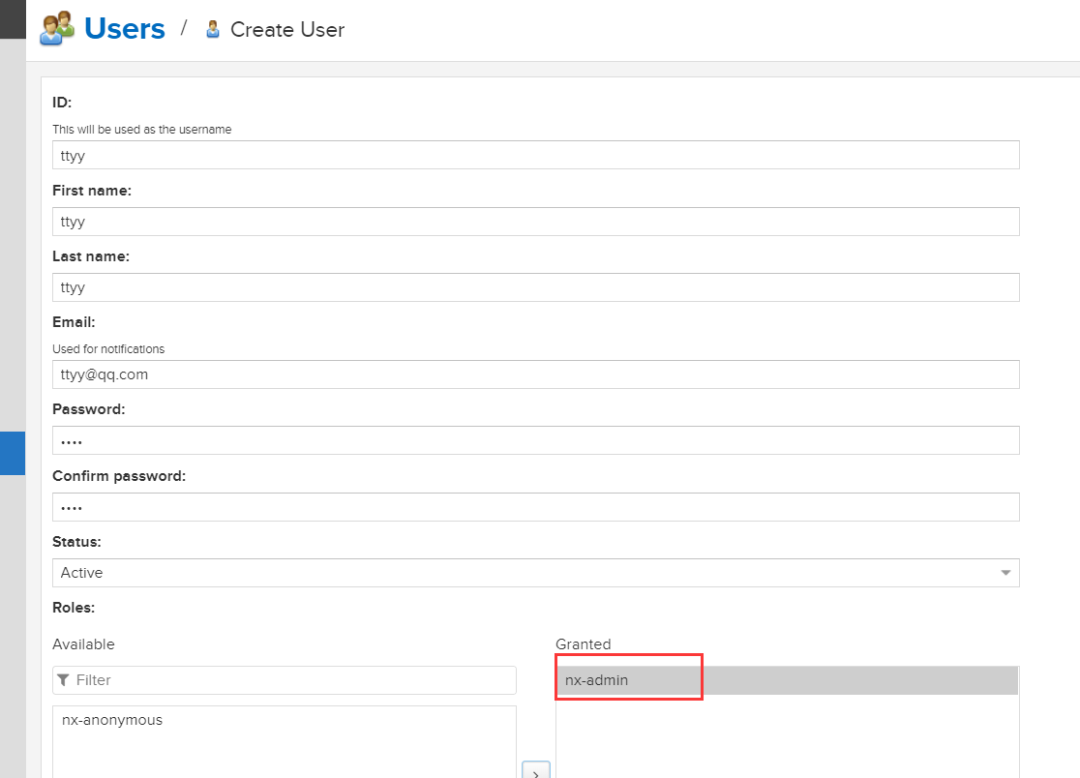
创建好账户后就可以在右上角切换账户了。
接着就是配置本地 maven > conf 了,找到自己本机的 maven conf 下的 setting.xml 文件,添加如下信息:
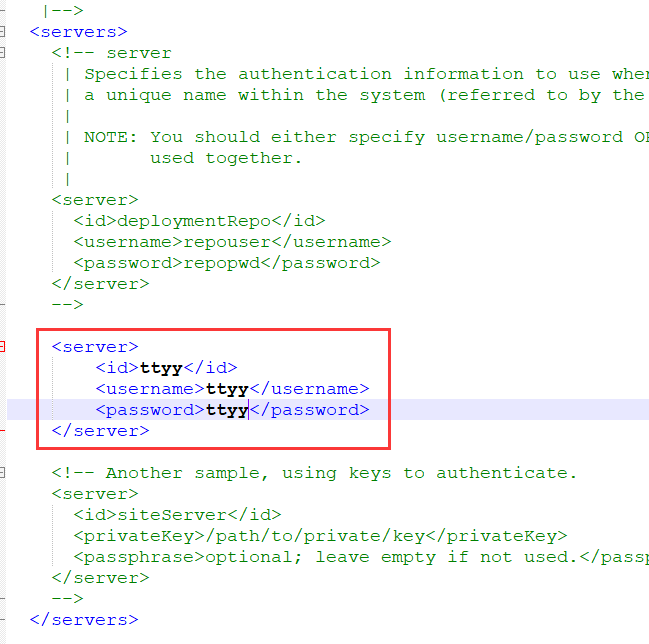
注意是 services 节点下:
<services>
    <server>
        <id>ttyyid>
        <username>ttyyusername>
        <password>ttyypassword>
    server>
 services>
4、如何将架包上传到maven私服
创建一个普通的 maven 项目,配置 pom.xml 如下:
<distributionManagement>
 <repository>

  <id>ttyyid>
  <url>http://192.168.10.130:8081/repository/ttyy-release/url>
 repository>
distributionManagement>

<build>
 <plugins>

  <plugin>
   <groupId>org.apache.maven.pluginsgroupId>
   <artifactId>maven-deploy-pluginartifactId>
   <version>2.7version>
  plugin>

  <plugin>
   <groupId>org.apache.maven.pluginsgroupId>
   <artifactId>maven-source-pluginartifactId>
   <version>2.2.1version>
   <executions>
    <execution>
     <phase>packagephase>
     <goals>
      <goal>jargoal>
     goals>
    execution>
   executions>
  plugin>
 plugins>
build>
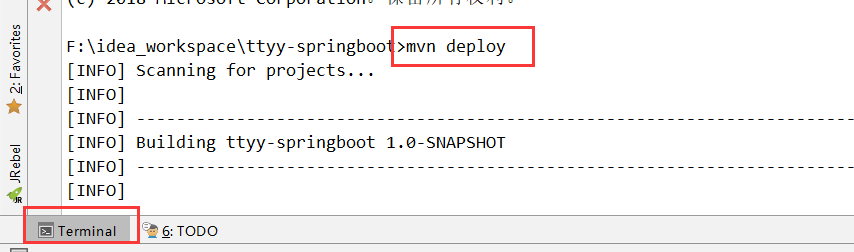
项目命令行中执行如下指令:
mvn deploy
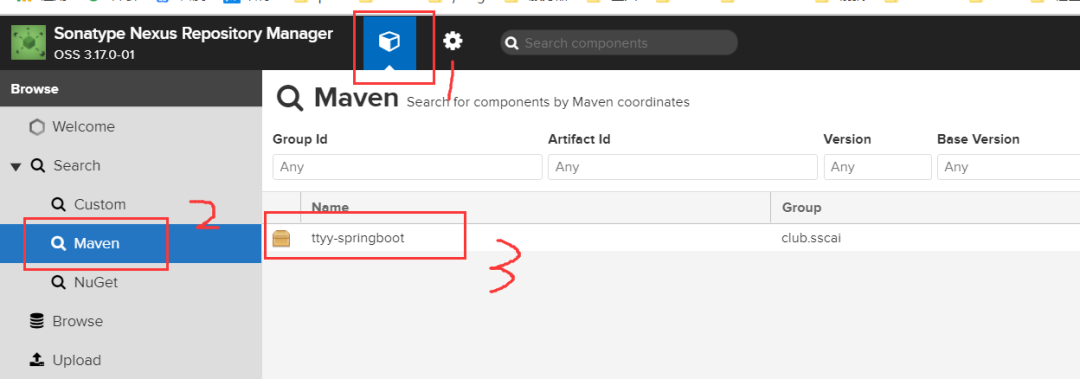
发布成功后,如何搜索呢?如下图:
发布后如何使用呢,相信很多小伙伴肯定用过阿里云的私服,一样的道理啦:
<dependencies>
 <dependency>
   <groupId>club.sscaigroupId>
   <artifactId>ttyy-springbootartifactId>
   <version>1.0-RELEASEversion>
 dependency>
dependencies>

<repositories>
 <repository>
  <id>ttyyid>
  <url>http://192.168.10.130:8081/repository/ttyy-release/url>
 repository>
repositories>
至此,基于Docker的Maven私服就简单介绍完了~
今天本来计划发一篇基于Docker的MySQL集群搭建,整理过程遇到点小问题,所以这篇算临时来凑数的啦~

推荐阅读:
基于Docker方式实现Elasticsearch集群搭建
基于Docker的Redis集群简单搭建
点击写留言


 511
511


 被折叠的 条评论
为什么被折叠?
被折叠的 条评论
为什么被折叠?
 到【灌水乐园】发言


