目录:
 文件已上传分享
2、day02-设计模式
 文件已上传分享
3、day03-在Spring中注入Bean属性的值
 文件已上传分享
4、day04-基于注解的Spring MVC
 文件已上传分享
5、day05-案例目标:注册
 文件已上传分享
6、day06-案例目标:注册
 文件已上传分享
7、day07-图
 文件已上传分享
1、day01-框架
课程主题:SSM
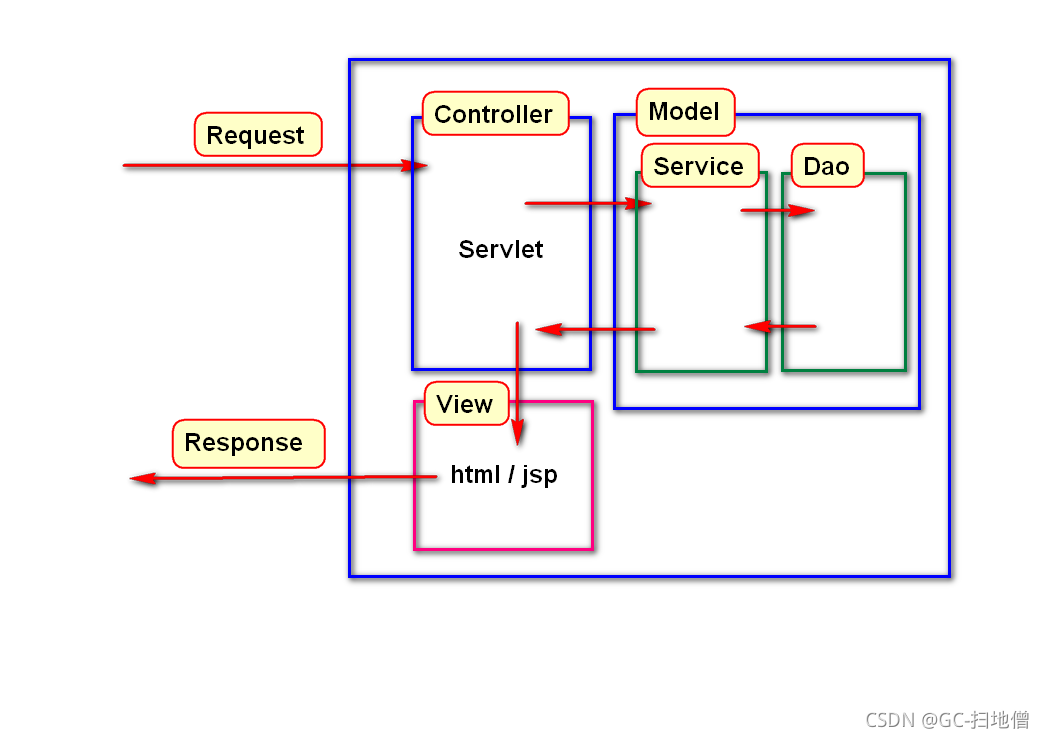
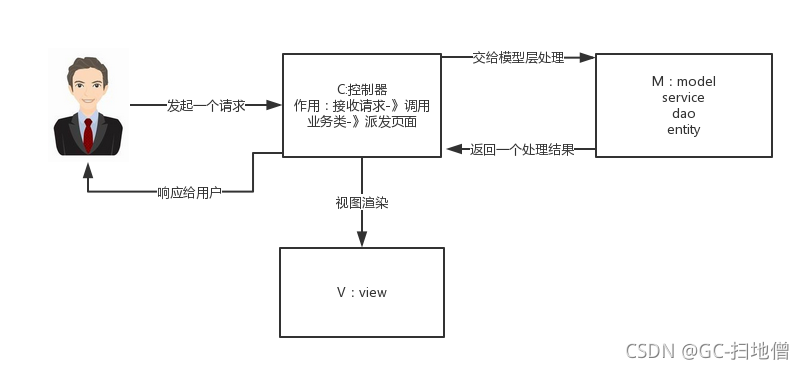
回顾:MVC
设计模式
public class User {
}User u1 = new User();
User u2 = new User();即开发者可以创建任意多个User类的对象!要实现单例模式,则应该先:
public class User {
private User() {}
}
一旦私有化构造方法,则不可以随意创建该类的对象,然后:
public class User {
private static User user = new User();
private User() {}
}
接下来:
public class User {
private static User user = new User();
private User() {}
public static User getInstance() {
return user;
}
}
工厂模式
public interface IUserDao {
void insert(User user);
}
然后,设计接口的实现类:
public class UserDaoImpl implements IUserDao {
public void insert(User user) {}
}
再接下来,设计工厂类:
public class UserDaoFactory {
public static IUserDao newInstance() {
return new UserDaoImpl();
}
}
以上完成后,当需要对象时:
IUserDao dao = UserDaoFactory.newInstance();
dao.insert(...);Spring框架
注意事项
-------------------------------------------------------------------------------------------------------------------------
关于getBean()的类型
关于ApplicationContext的close()
版本与教学版本不同时的注意事项
使用Spring获取对象的方式
通过无参数的构造方法
通过静态的工厂方法


-------------------------------------------------------------------------------------------------------------------
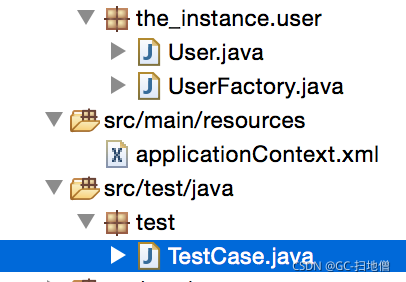
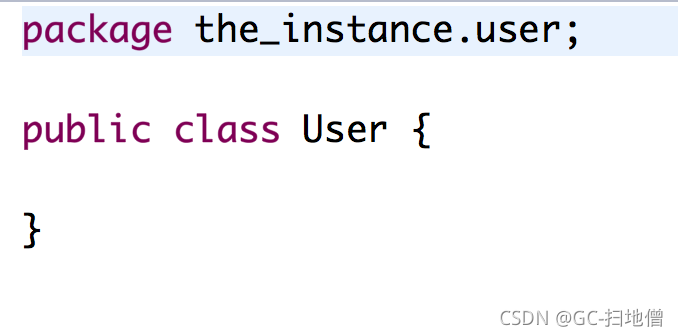
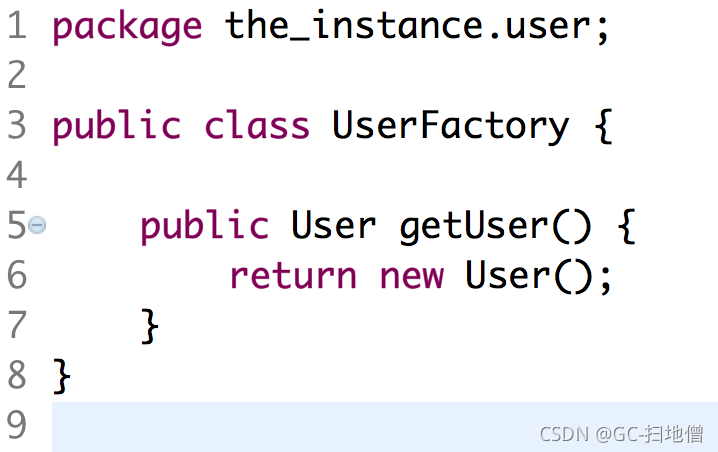
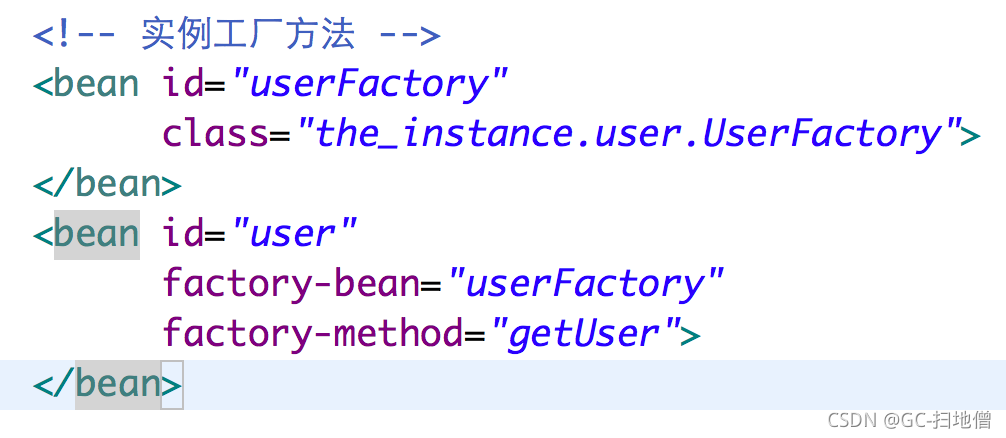
通过实例工厂方法
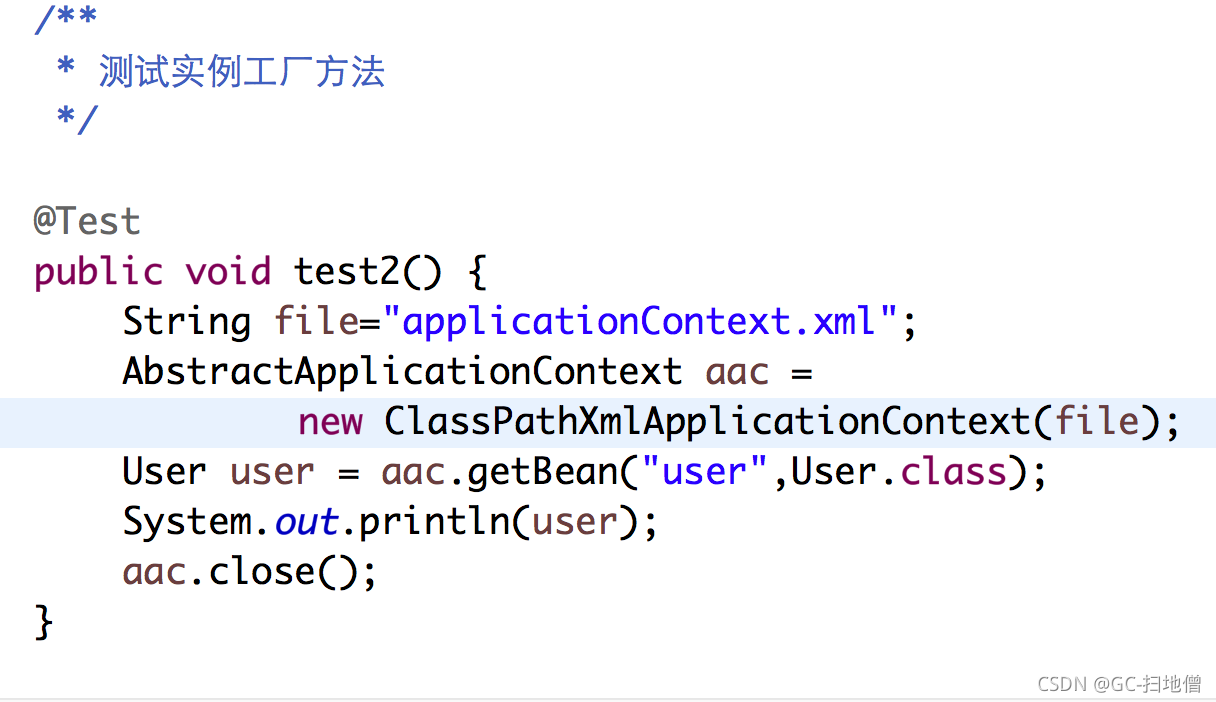
通过Spring管理的Bean的作用域
通过Spring管理的Bean的生命周期
开发步骤:
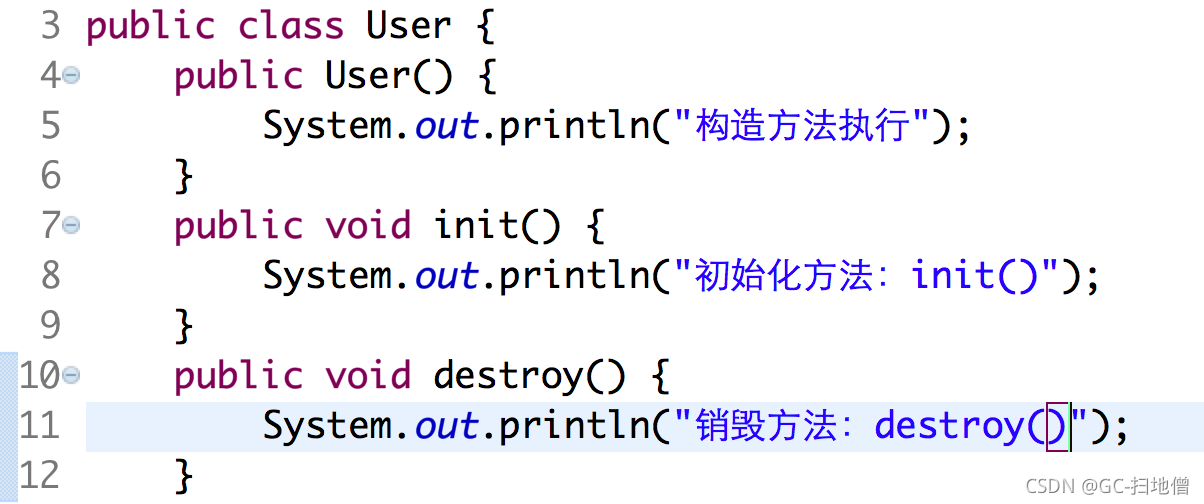
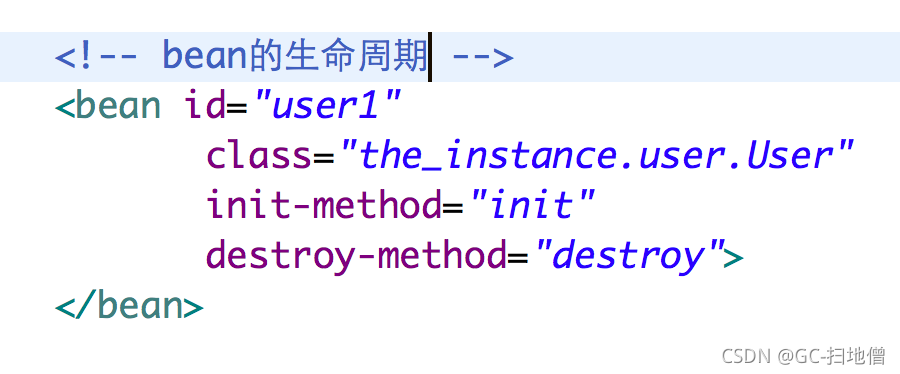
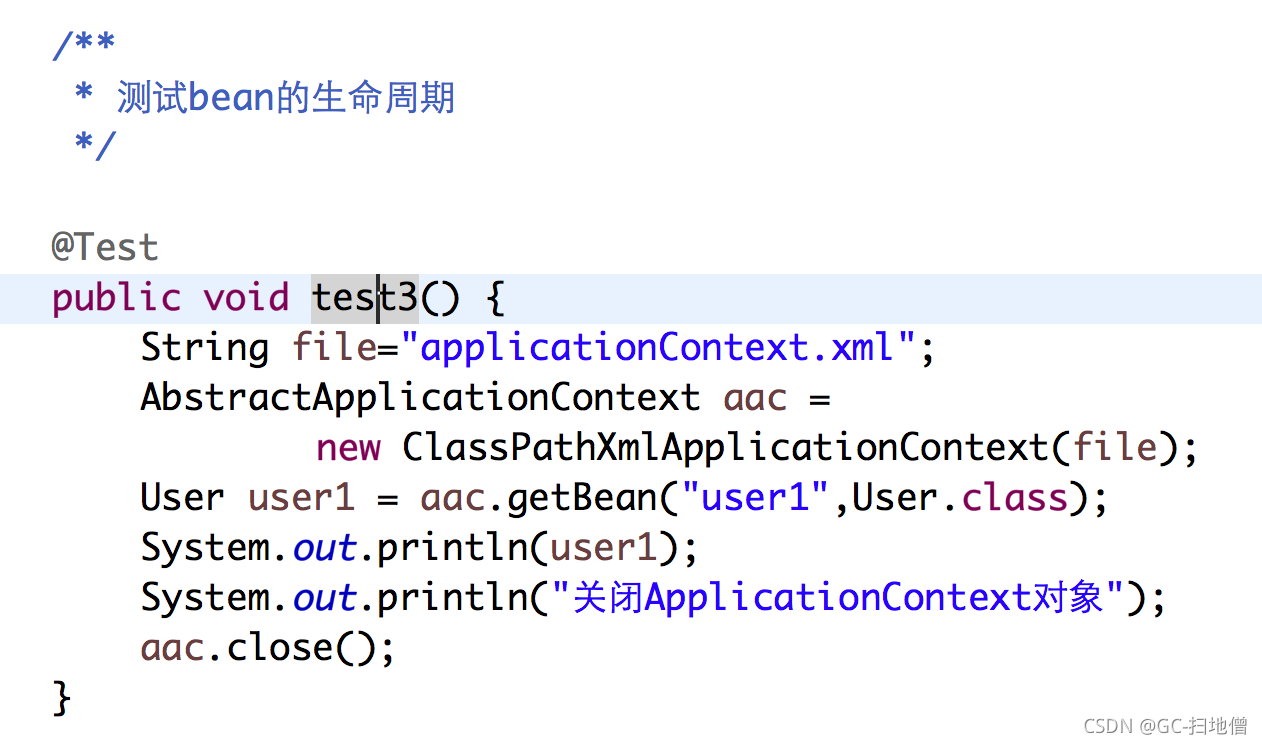
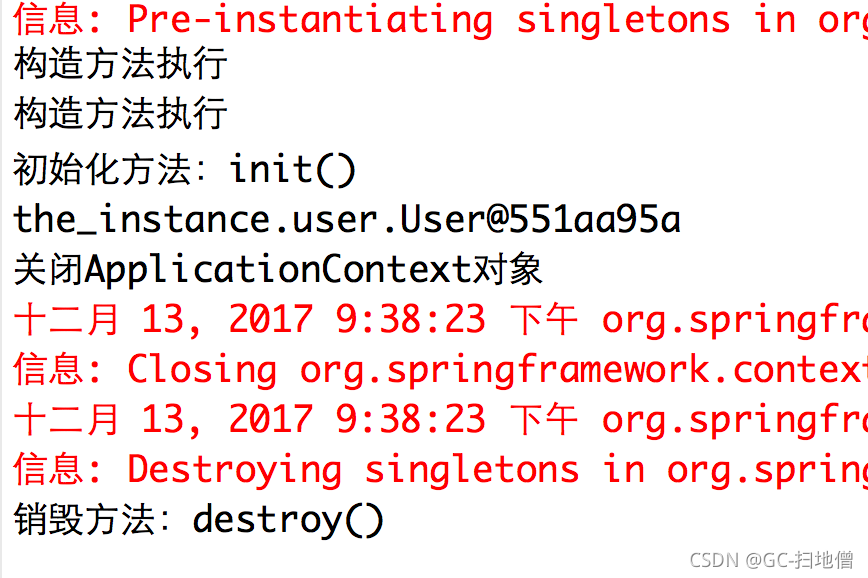
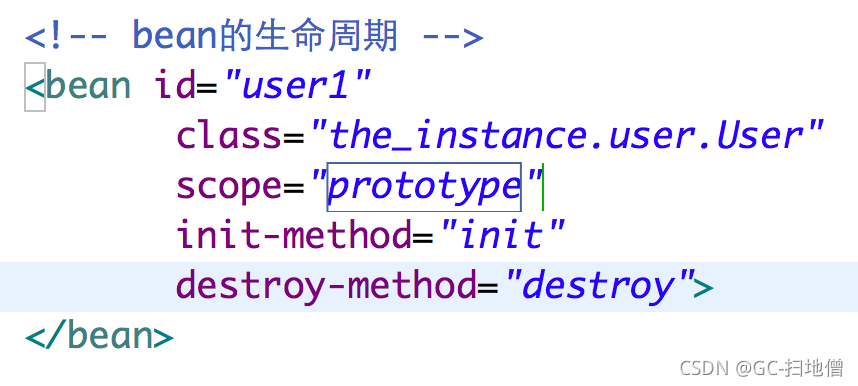
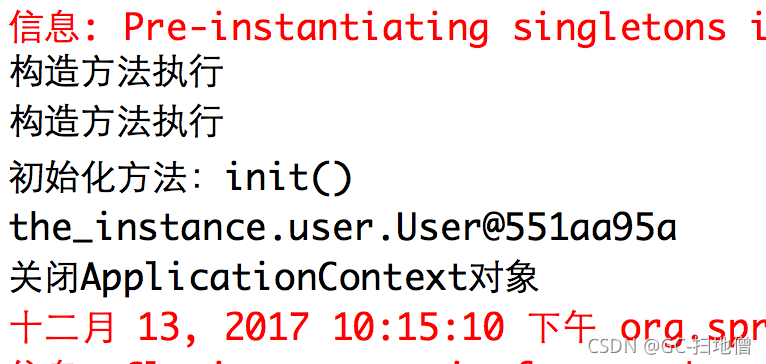
在编写XML文件时没有提示
[回顾] 内存泄漏与内存溢出
[回顾] 异常的体系结构
Throwable
-- Error
-- Exception
-- -- IOException
-- -- -- FileNotFoundException
-- -- RuntimeException
-- -- -- ClassCastException (??) ???
-- -- -- ArithmeticException  x / 0
-- -- -- NullPointerException null.getxxx  null.xxx
-- -- -- IndexOutOfBoundsException  list.get(-1)
-- -- -- -- ArrayIndexOutOfBoundsException  arr[-1]
2、day02-设计模式
单例模式 - 饿汉式(Eager Singleton)
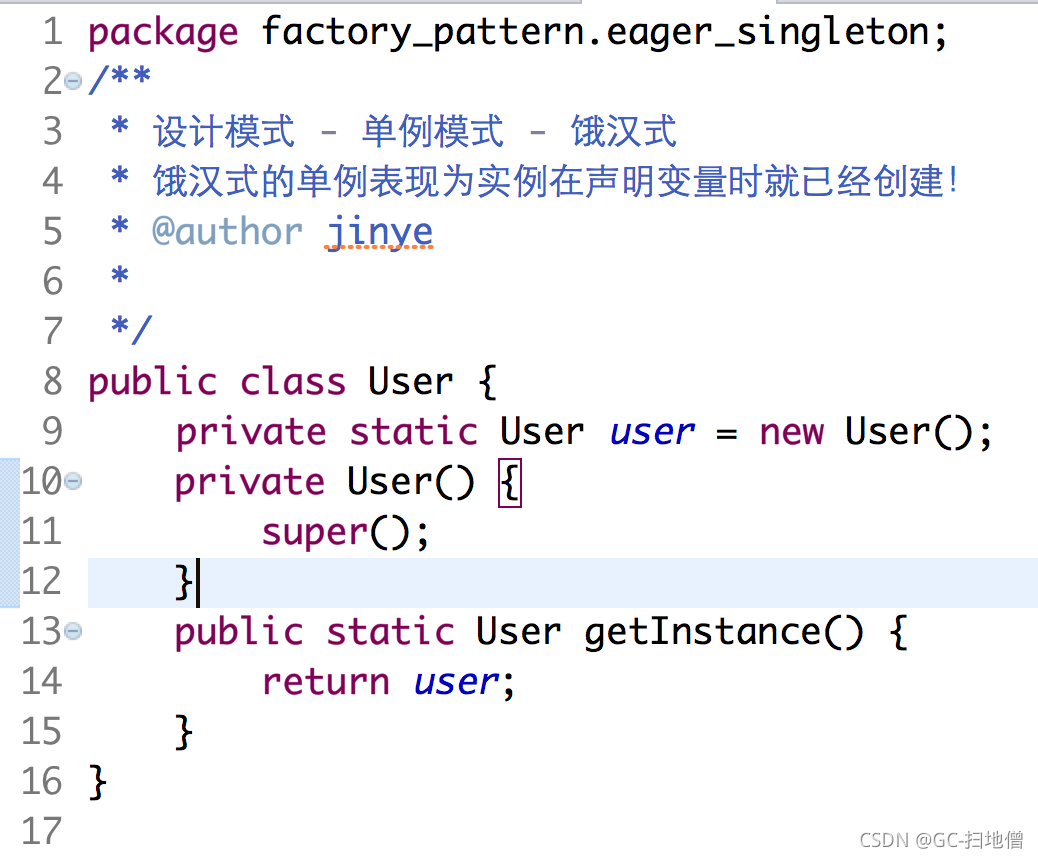

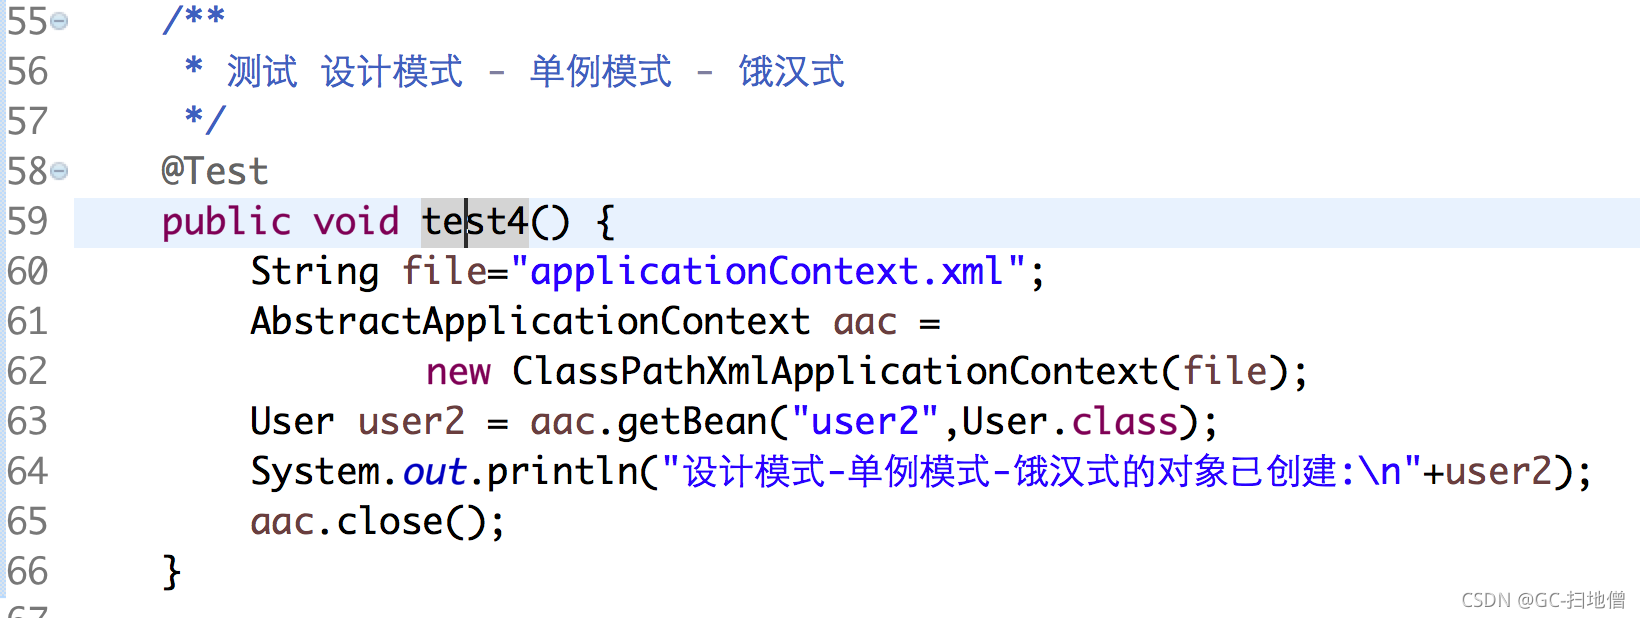

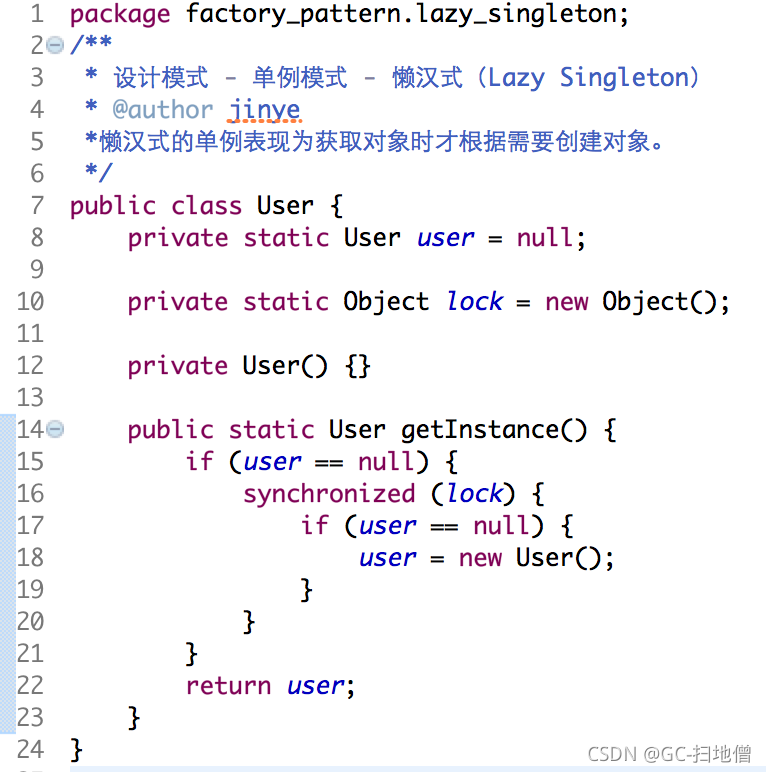
设计模式 - 单例模式 - 懒汉式(Lazy Singleton)
懒汉式的单例表现为获取对象时才根据需要创建对象。
public class User {
private static User user = null;
private static Object lock = new Object();
private User() {}
public static User getInstance() {
if (user == null) {
synchronized (lock) {
if (user == null) {
user = new User();
}
}
}
return user;
}
}
1.在项目中创建User类:
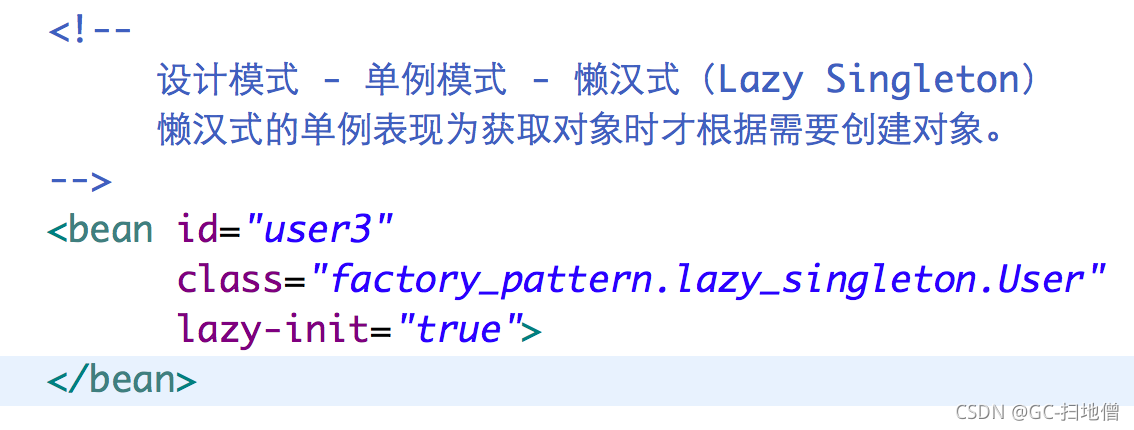
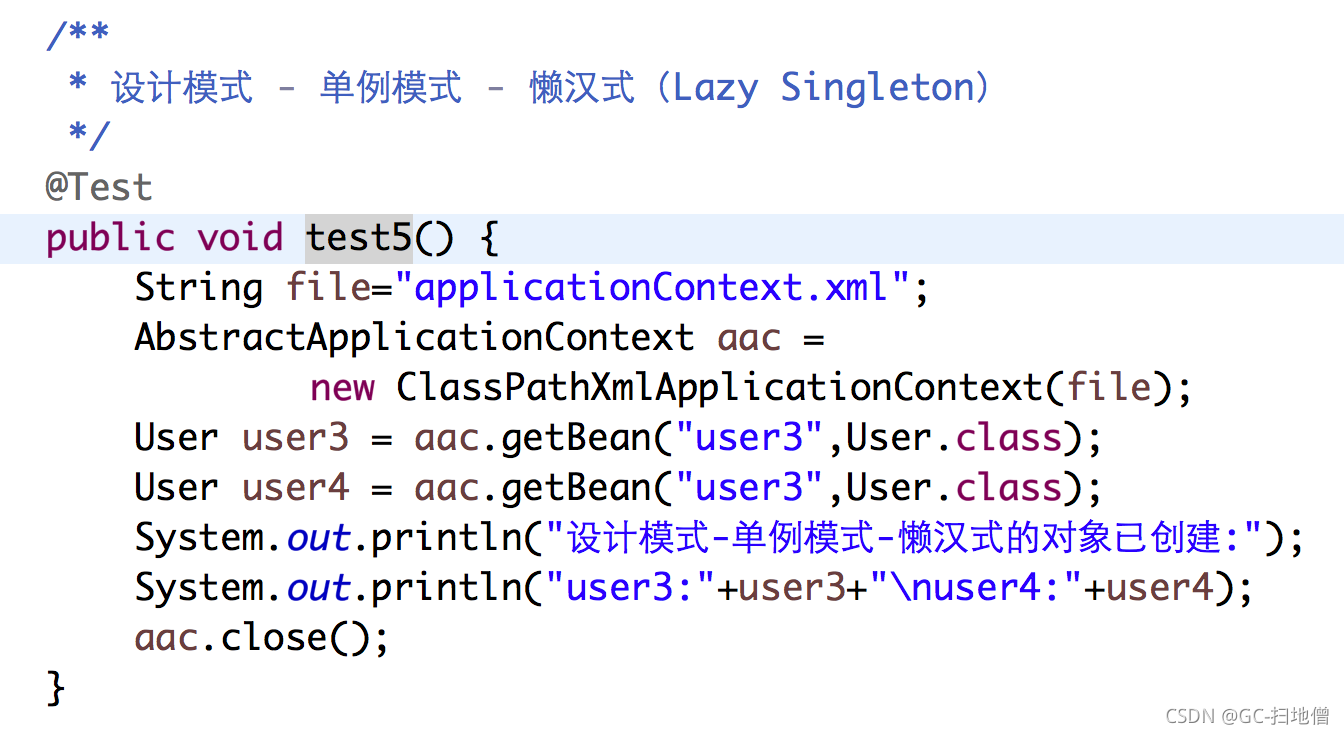

Spring管理Bean时使用懒汉式加载(延迟加载)
MVC的用户注册
大致流程
View:username, password
Controller -> Model(Service -> Dao)
Model中的代码的模拟实现
public class UserService {
private UserDao userDao;
public void reg(User user) {
dao.insert(user);
}
}
public class UserDao {
public void insert(User user) {
// 访问数据库,添加数据
}
}
在Spring管理的Bean中通过属性的Set方法直接注入属性的值
应用场景
开发步骤
public void setDao(UserDao arg0) {
dao = arg0;
}
}
3 在Spring的配置文件,配置UserService和UserDao的
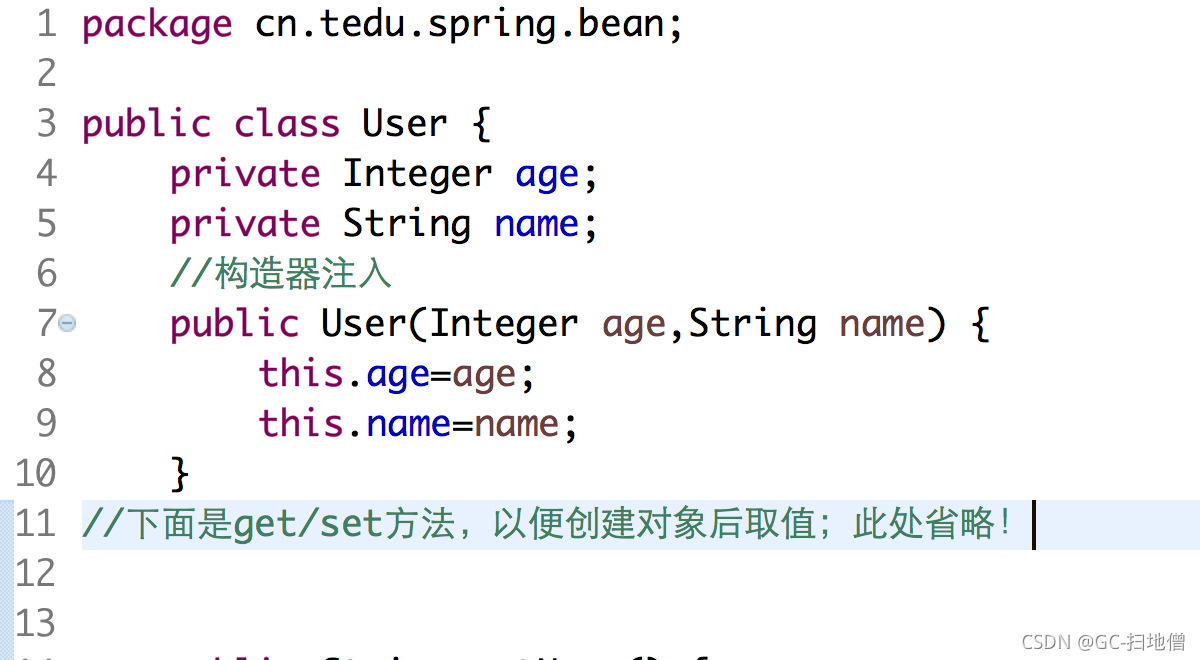
在Spring管理的Bean中通过构造方法注入属性的值
开发步骤
public UserService(UserDao dao) {
this.dao = dao;
}
}向Spring管理的Bean中直接注入基本值
哪些是基本值
怎么设置基本值

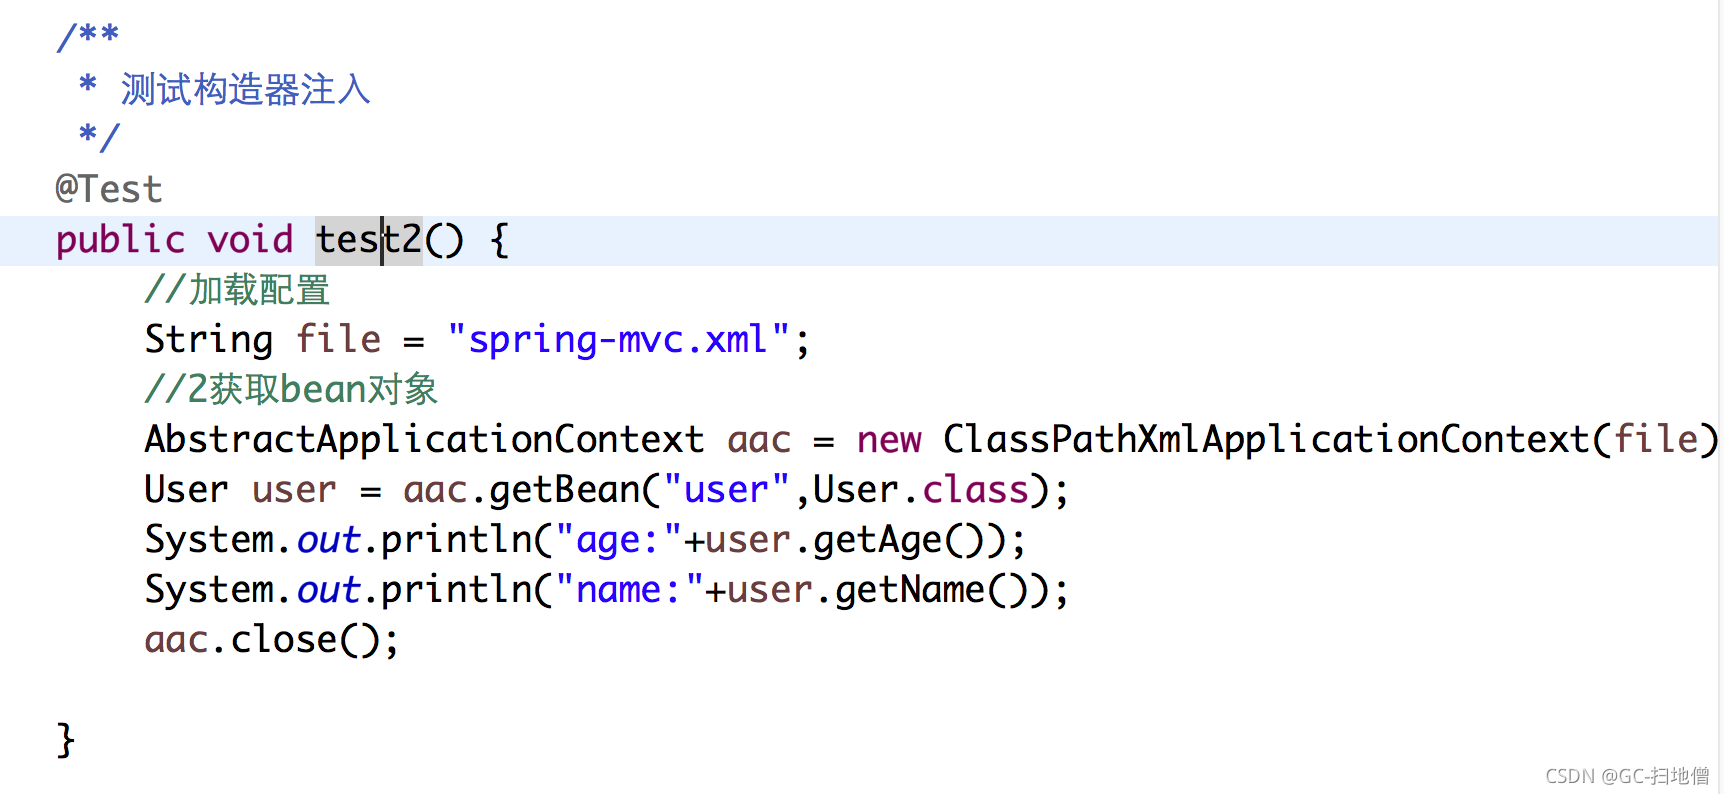
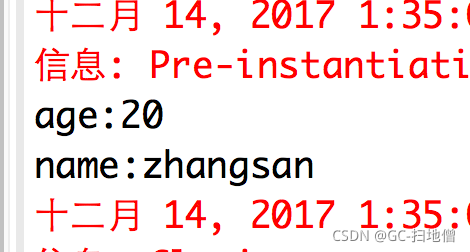
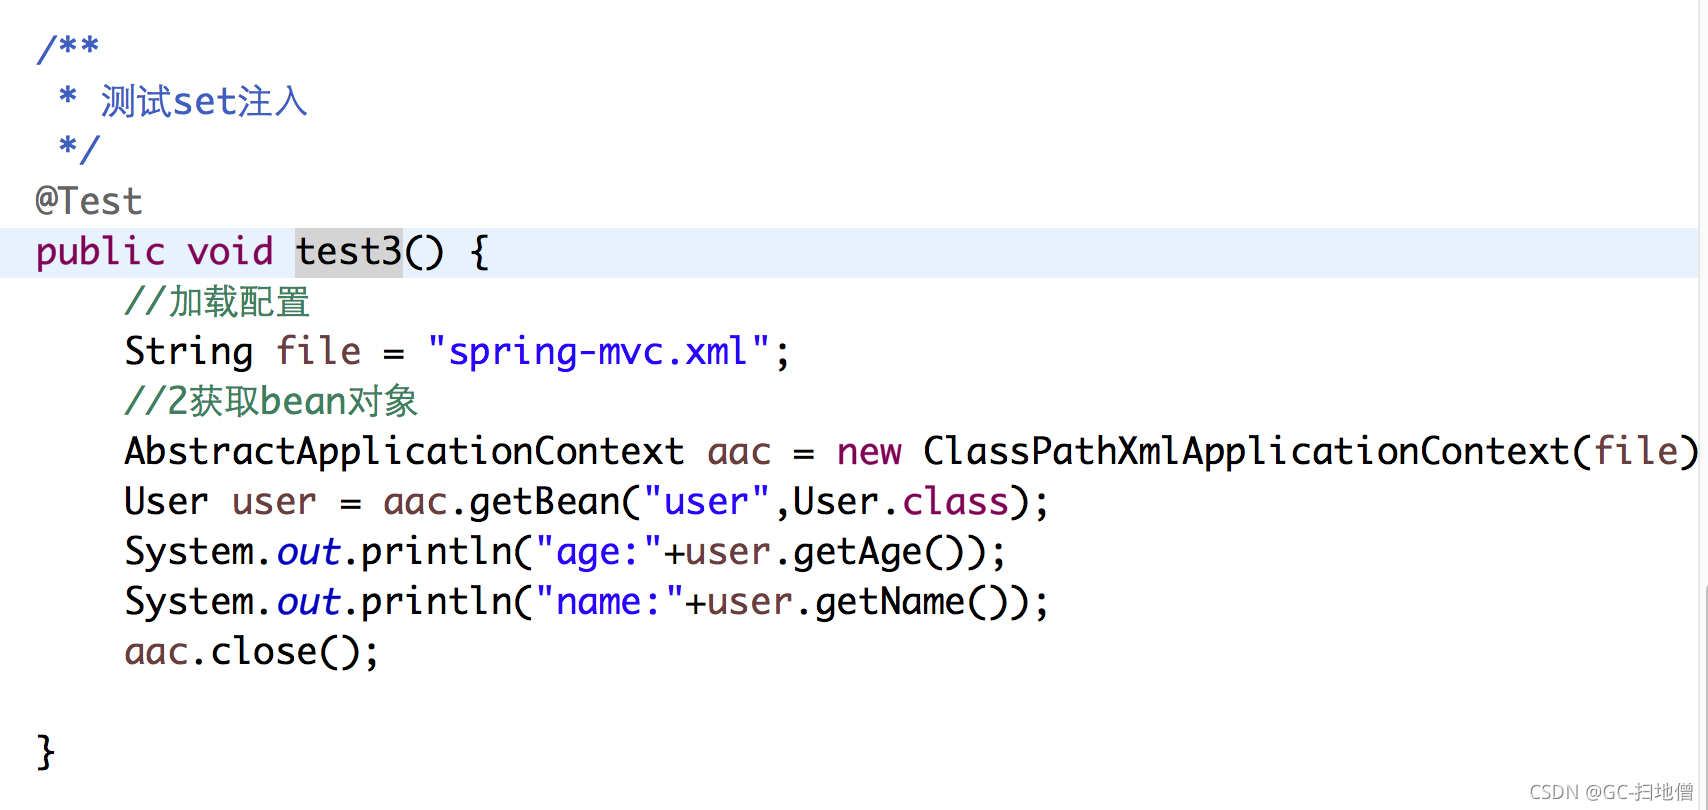
向Spring管理的Bean中直接注入集合类型的值


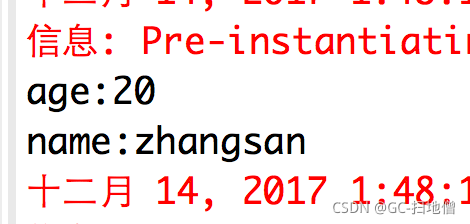
<!-- 配置List集合的数据 -->
<property name="listData">
<list>
<value>list-data-1</value>
<value>list-data-2</value>
<value>list-data-3</value>
<value>list-data-4</value>
<value>list-data-5</value>
</list>
</property>
<!-- 配置Set集合的数据 -->
<property name="unorderedData">
<set>
<value>set-data-1</value>
<value>set-data-2</value>
<value>set-data-3</value>
<value>set-data-4</value>
<value>set-data-5</value>
</set>
</property>
<!-- 配置Map集合的数据 -->
<property name="mapData">
<map>
<entry key="K-1" value="V-1"></entry>
<entry key="K-2" value="V-2"></entry>
<entry key="K-3" value="V-3"></entry>
<entry key="K-4" value="V-4"></entry>
<entry key="K-5" value="V-5"></entry>
</map>
</property>向Spring管理的Bean中直接注入Properties类型的值
开发步骤
<util:properties id="dbConfig"
location="classpath:db-config.properties" /><property name="Bean中的属性名称" ref="dbConfig" />[回顾] List与Set
共同点
-
都是Collection的子级接口
区别
-
List集合是有序的/序列的,Set集合是无序的/散列的
-
List集合中的数据是允许重复的,而Set集合中的数据是唯一的
Set集合中判断数据是否相同/唯一的标准
[回顾] ArrayList与LinkedList
[回顾] HashSet与TreeSet
3、day03-在Spring中注入Bean属性的值
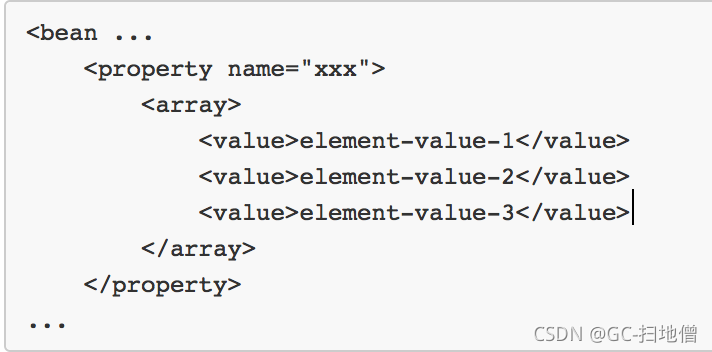
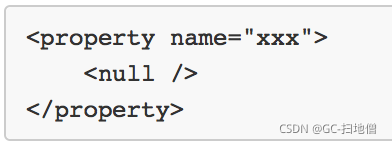

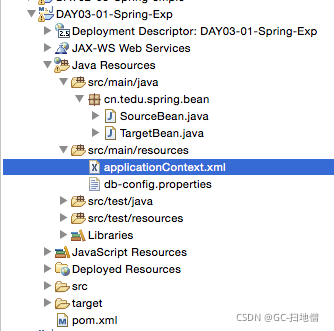
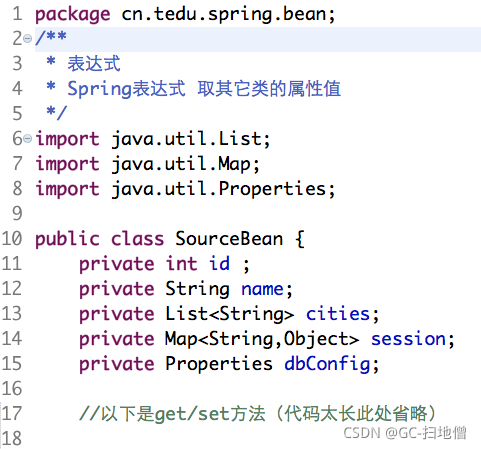
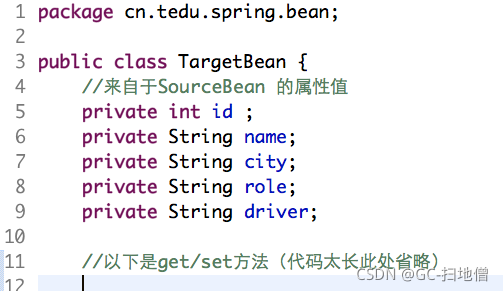
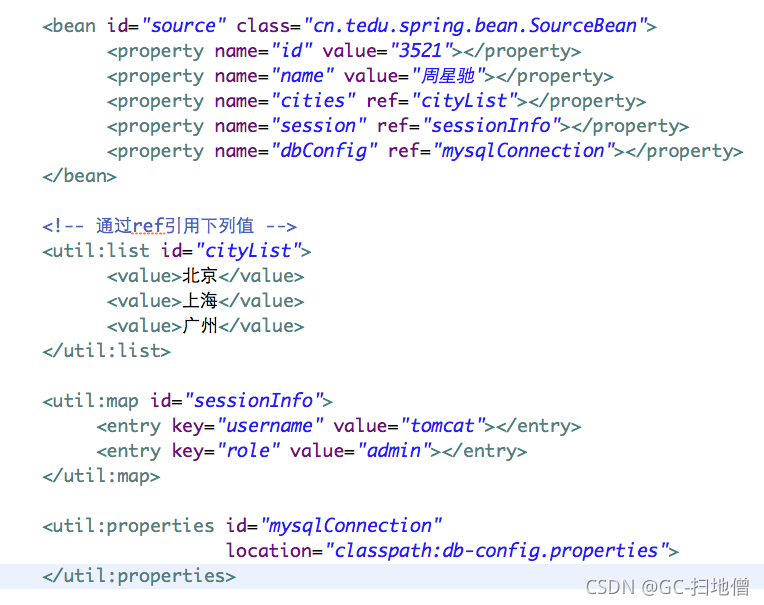
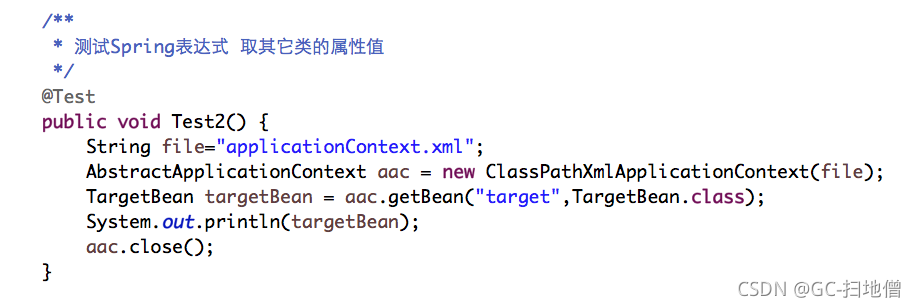
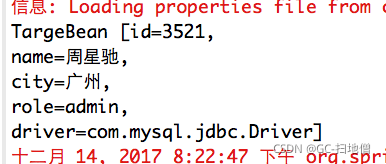
5. 在applicationContext.xml文件中采用Spring表达式获取


Spring的组件扫描
什么是组件扫描

为什么要使用组件扫描
基本开发步骤
<context:component-scan
base-package="cn.tedu.spring" />
注:配置包的时候,不一定是精确的指向某个类所在的包,可以是更加父级的包名,例如cn.tedu.spring也是可以的,
那么,在cn.tedu.spring.bean或cn.tedu.spring.dao等这些包中的类都将被Spring管理!
3 在需要被Spring管理的类的声明上方添加 @Component 的注解。
基本项目的大致实现原理
为Bean自定义ID
@Component("u")
public class User { }
---------------------------------------------------------------------------------------------------------------------------------
常用于类的注解(详见Spring-程祖红的笔记)
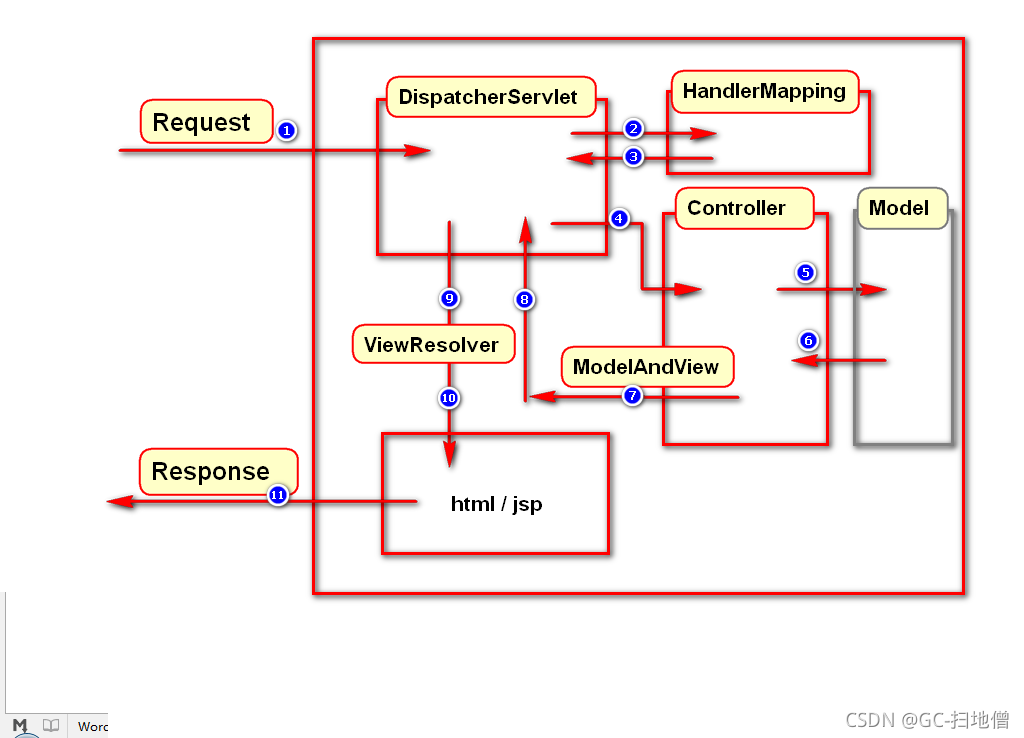
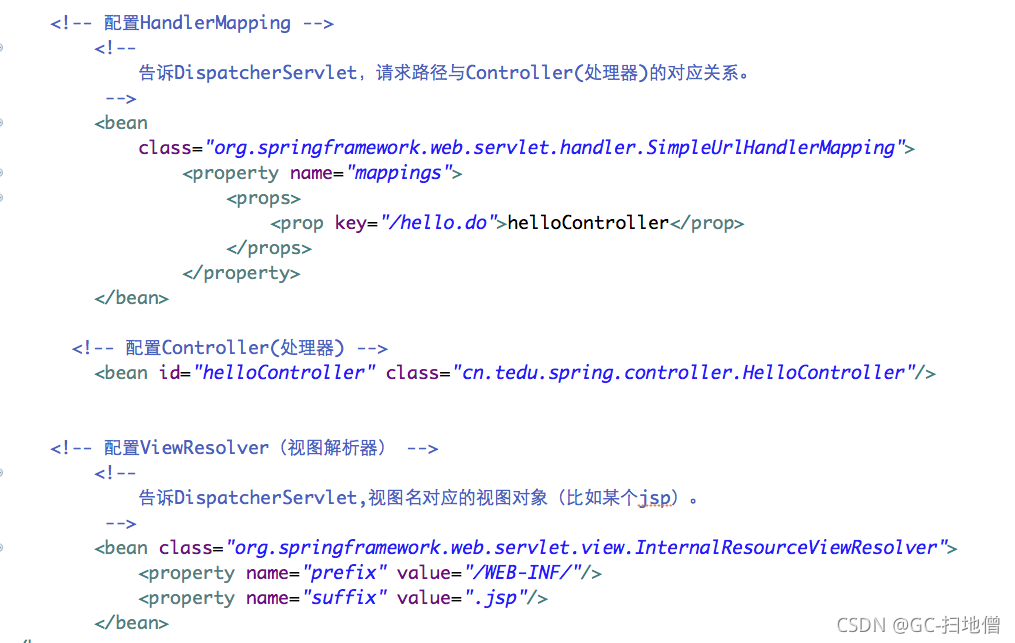
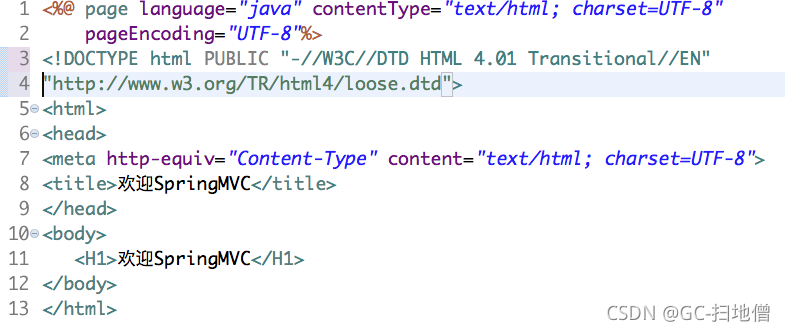
SpringMVC流程
组件说明:
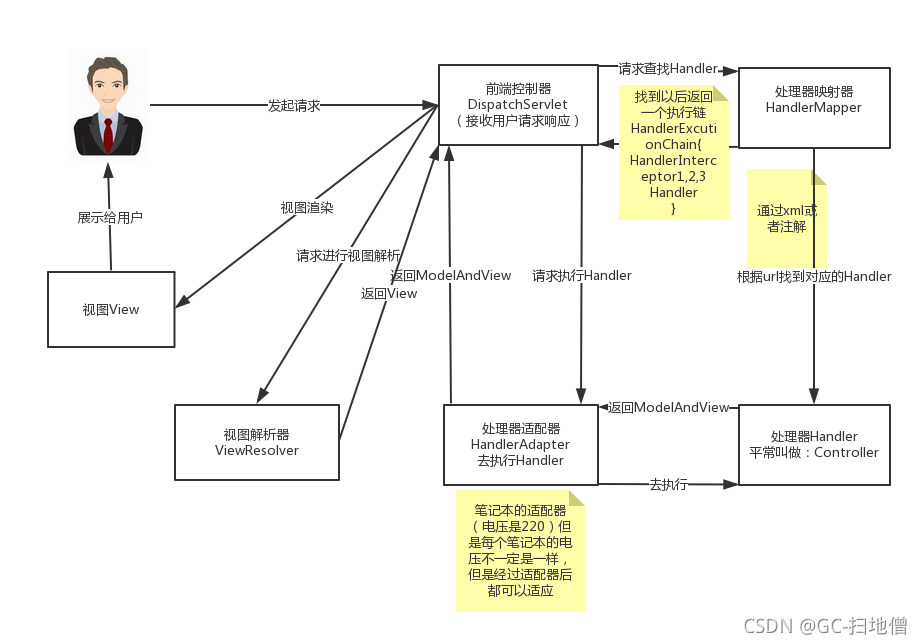
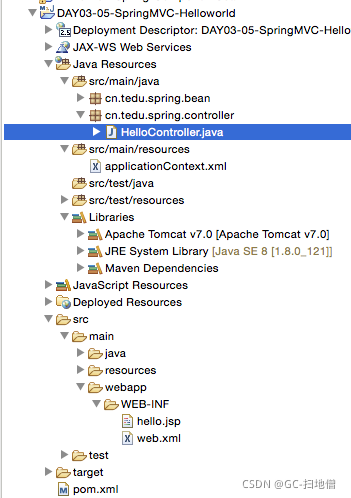
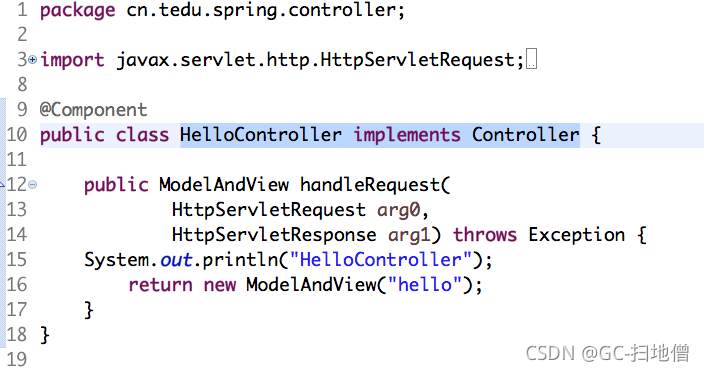
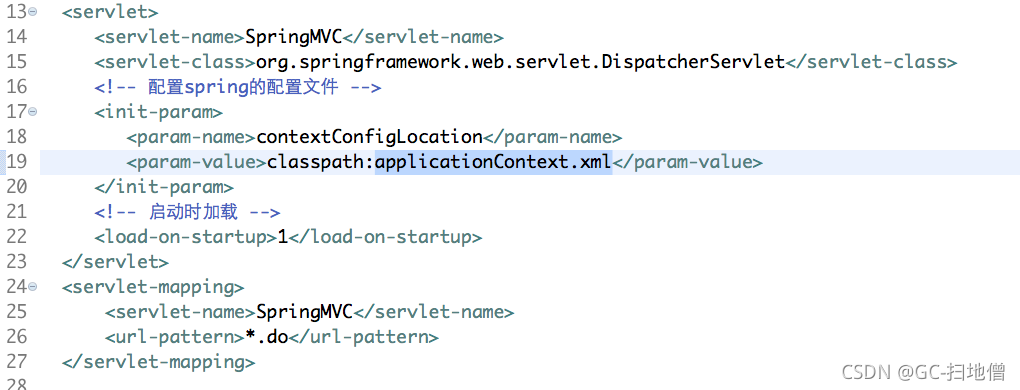
4、day04-基于注解的Spring MVC
使用@Controller注解
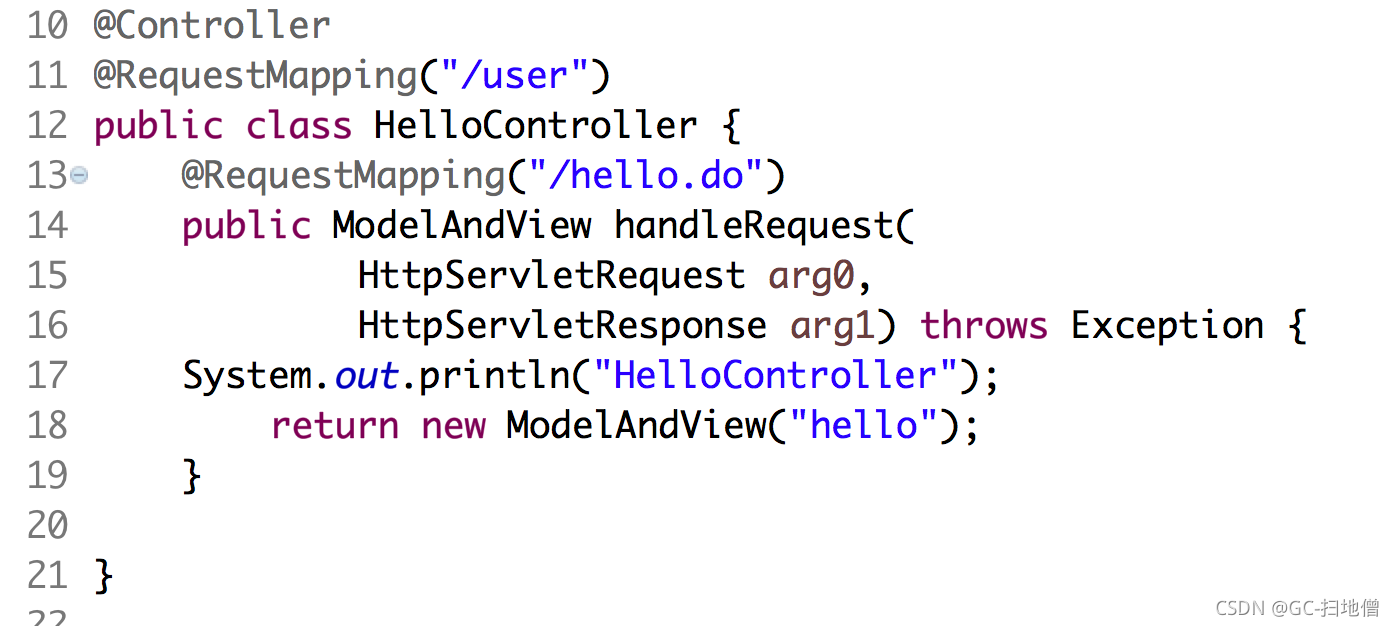
使用@RequestMapping注解
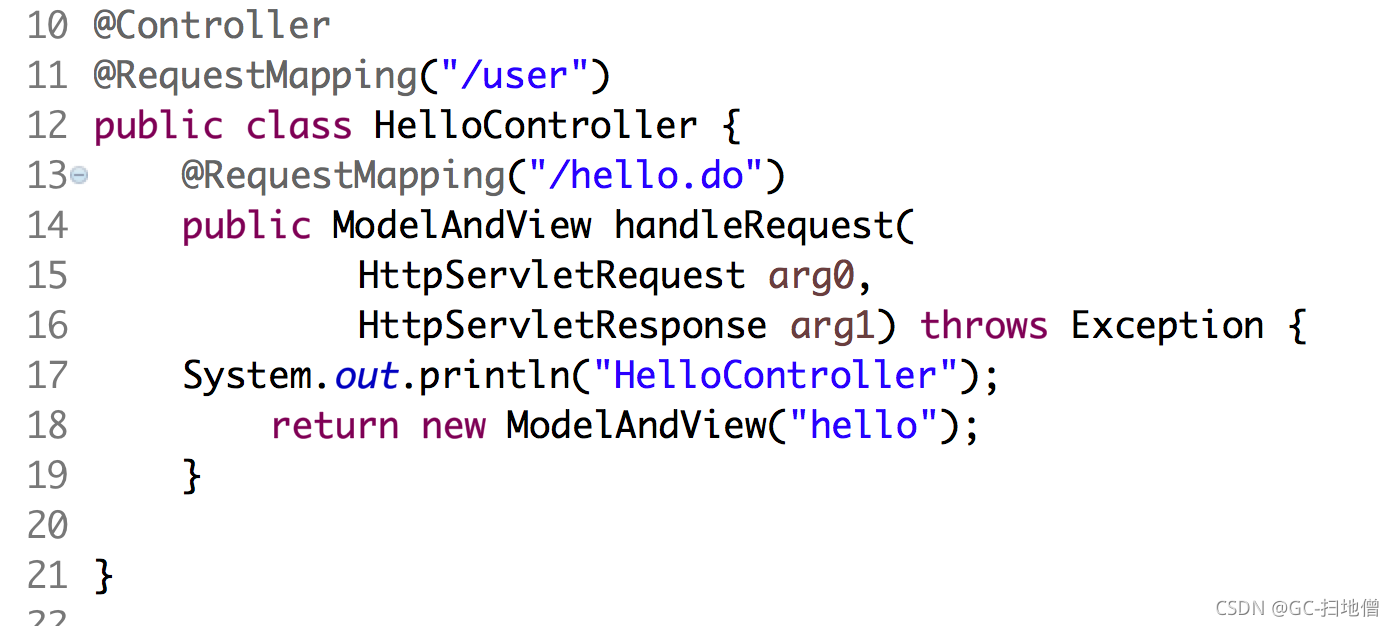

http://SERVER:PORT/PROJECT/user/register.do@Controller
@RequestMapping("/user")
public class RegisterController {
@RequestMapping("/register.do")
public ModelAndView handleRequest(...当使用@RequestMapping同时注解处理器类和方法时,两处所写的路径对于组合时的路径分隔符是没有要求的!例如以下组合都是正确的:
/user /register.do 【推荐】
/user register.do
/user/ /register.do
user /register.do
user register.do小结:@RequestMapping用于配置处理器类和请求路径的映射,必须对处理器类中的方法进行注解,如果请求路径有多层级,可以添加对处理器类的注解,则在对方法的注解中可以少写一些路径。
---------------------------------------------------------------------------------------------------------------------------------
使用同一个Controller处理多种不同的请求
基于注解的Spring MVC开发流程
@Controller
@RequestMapping("/user")
public class UserController {
}
6 在控制器类中添加处理请求的方法,并使用@RequestMapping映射到请求的资源:
@Controller
@RequestMapping("/user")
public class UserController {
@RequestMapping("/login.do")
public String showLoginForm() {
return null;
}
}练习
获取请求参数
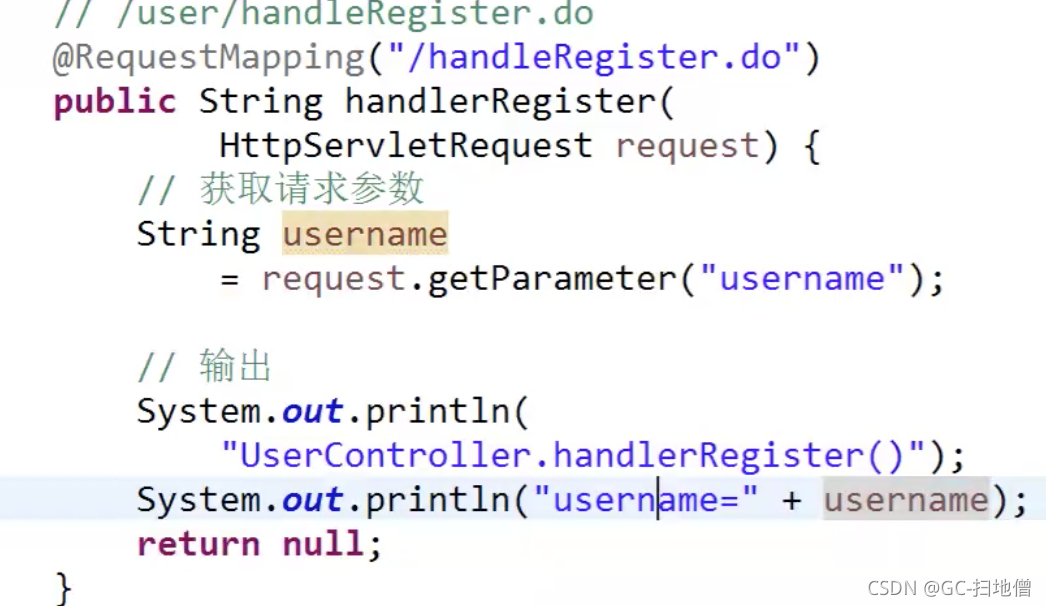
通过HttpRequestServlet获取请求参数
public String handleRegister(HttpServletRequest request) {
// ...
}
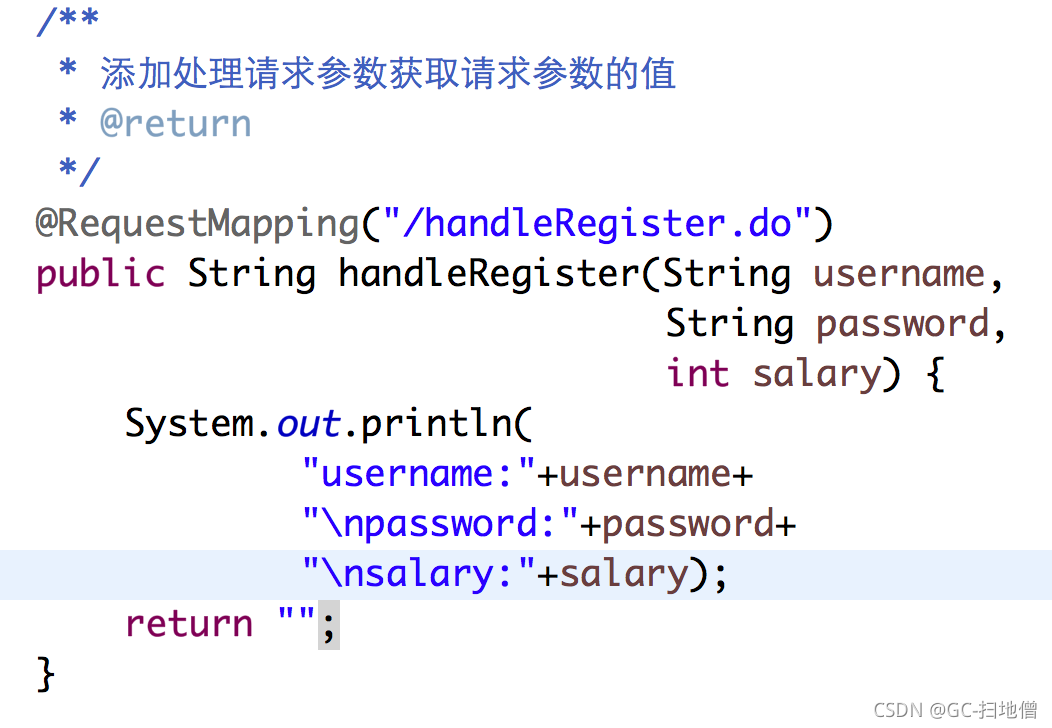
通过添加处理请求的方法的参数获取请求参数值
public String handleRegister(String username, String password, int salary) {
// 直接使用以上参数即可,这些参数已经被赋值
}
public String handlerRegister(
String username, // 名称相同,则直接使用
@RequestParam("password") String pwd // 名称不同,则注解
) {
// ...
}
尽管这种方式简单易用,但是,不太适用于提交的数据个数偏多的应用场景,假设某个业务需要用户提交20个数据,则为方法添加20个参数是不合适的!
---------------------------------------------------------------------------------------------------------------------------------
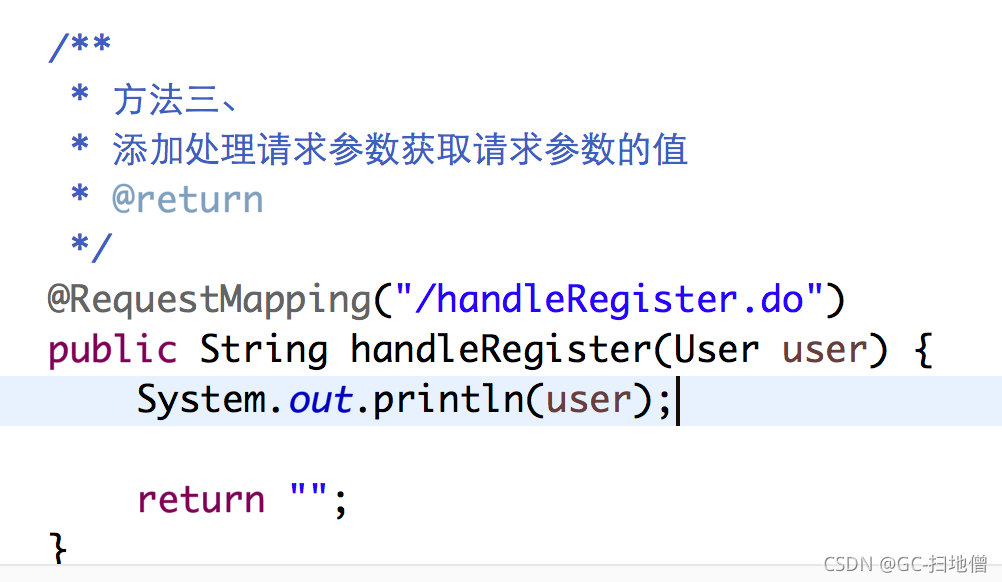
通过Java Bean直接接收所有请求参数的值
public class User {
private String username;
private String password;
private int salary;
// ... Set/Get方法 ...
}
public String handleRegister(User user) {
// 直接使用参数即可,这些参数已经被赋值
}
将处理完毕后的数据转发给View组件
通过request封装,然后转发
public String handlerRegister(
HttpServletRequest request,
User user) {
// 封装数据,以转发到JSP
request.setAttribute("name", user.getUsername());
// ....
}
以上做法中,转发的行为不需要自己写,Spring会自动完成!
---------------------------------------------------------------------------------------------------------------------------------
使用ModelAndView
String viewName = "user_register_info";
Map<String, Object> data = new HashMap<String, Object>();
data.put("pwd", "123456");
ModelAndView mav = new ModelAndView(
如果方法中已有ModelAndView的对象,也可以:
mav.getModel.put("pwd, "123456");
return mav;
这种做法要求处理请求的方法的返回值必须是ModelAndView类型的!
---------------------------------------------------------------------------------------------------------------------------------
使用ModelMap
public String handlerRegister(User user, ModelMap data) {
// 封装数据
data.addAttribute("name", user.getUsername());
// ....
}
虽然这种做法从代码上来看与使用HttpServletRequest是相同的,但是推荐使用这种做法(原因待续)。
---------------------------------------------------------------------------------------------------------------------------------
使用HttpSession
5、day05-案例目标:注册
界面
用户信息
数据库与数据表
CREATE TABLE user (
id int auto_increment,
username varchar(16) not null unique,
password varchar(16) not null,
salary int,
primary key(id)
);
程序中需要哪些类
-- Integer(id) insert(User user)
-- User findUserByUsername(String username)-- Integer(id) reg(User user)cn.tedu.spring.service.UserServiceImpl
程序中需要哪些配置
db.properties
<util:properties location="classpath:db.properties" id="dbConfig" />
<bean id="ds" class="......BasicDataSource">
<property name="driverClassName" value="#{dbConfig.???}">
<property name="url" value="#{dbConfig.???}"">
</bean>
开发步骤
界面
用户信息
数据库与数据表
CREATE TABLE user (
id int auto_increment,
username varchar(16) not null unique,
password varchar(16) not null,
salary int,
primary key(id)
);
程序中需要哪些类
-- Integer(id) insert(User user)

-- User findUserByUsername(String username)
cn.tedu.spring.dao.UserDaoImpl
-- Integer(id) reg(User user)cn.tedu.spring.service.UserServiceImpl
程序中需要哪些配置
db.properties
<util:properties location="classpath:db.properties" id="dbConfig" />
<bean id="ds" class="......BasicDataSource">
<property name="driverClassName" value="#{dbConfig.???}">
<property name="url" value="#{dbConfig.???}"">
</bean>
开发步骤
合理的转发数据
解决乱码问题
<filter>
<filter-name>CharacterEncodingFilter</filter-name>
<filter-class>org.springframework.web.filter.CharacterEncodingFilter</filter-class>
<init-param>
<param-name>encoding</param-name>
<param-value>utf-8</param-value>
</init-param>
</filter>

<filter-mapping>
<filter-name>CharacterEncodingFilter</filter-name>
<url-pattern>/*</url-pattern>
</filter-mapping>拦截器:Interceptor
使用拦截器的步骤
<mvc:interceptors>
<mvc:interceptor>
<mvc:mapping path="/*" />
<mvc:exclude-mapping path="/login.do"/>
<mvc:exclude-mapping path="/handleLogin.do"/>
<bean class="cn.tedu.spring.interceptor.SessionInterceptor"></bean>
</mvc:interceptor>
</mvc:interceptors>
什么情况下需要使用拦截器
配置拦截器时匹配所有资源
如何使用拦截器的例外(exclude-mapping)
拦截器与过滤器有什么区别
使用拦截器实现判断是否登录
login.do user_info.do index.do其中,login.do可以不需要登录即可直接访问,而另2个必须登录后才可以访问,在没有登录之前,如果访问的话,将直接跳转到login.do。
public boolean preHandle(
HttpServletRequest request,
HttpServletResponse response, Object handler)
throws Exception {
// 输出日志
System.out.println("SessionInterceptor.preHandle()");
System.out.println("\targ0=" + request);
System.out.println("\targ1=" + response);
System.out.println("\targ2=" + handler);

// 获取Session
HttpSession session = request.getSession();
// 检查Session
// 例如存在规则:登录后Session中一定有username
if (session.getAttribute("username") == null) {
// Session中没有登录数据,则重定向到登录
response.sendRedirect("login.do");
// 不允许放行,此次请求将被拦截
return false;
} else {
// Session中有登录数据,则正常放行
return true;
}
}
增加一个请求 /handleLogin.do 用于模拟登录并赋予Session信息。
<mvc:interceptor>
<mvc:mapping path="/*" />
<mvc:exclude-mapping path="/login.do"/>
<mvc:exclude-mapping path="/handleLogin.do"/>
<bean class="cn.tedu.spring.interceptor.SessionInterceptor" />
</mvc:interceptor>
Spring MVC的异常处理
SimpleMappingExceptionResolver
@ExceptionHandler
两种方式对比
Spring MVC的转发与重定向
注解的驱动
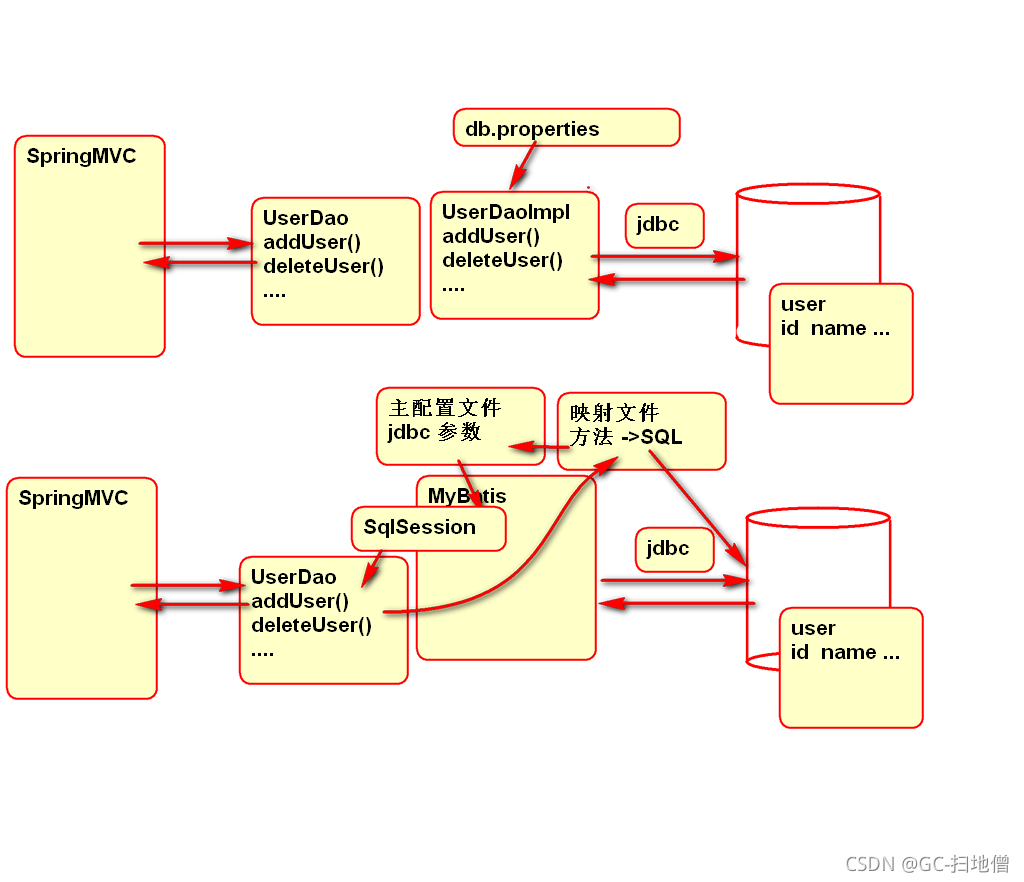
7、day07-图
8、day-08-SSM
SSM应用搭建
1.部署Spring + Spring MVC
-
导入包
<dependency> <groupId>org.mybatis</groupId> <artifactId>mybatis</artifactId> <version>3.2.8</version> </dependency> <dependency> <groupId>mysql-connector-java</groupId> <artifactId>mysql-connector-java</artifactId> <version>5.1.37</version> </dependency> <dependency> <groupId>junit</groupId> <artifactId>junit</artifactId> <version>4.12</version> </dependency> <dependency> <groupId>org.mybatis</groupId> <artifactId>mybatis-spring</artifactId> <version>1.3.1</version> </dependency> <dependency> <groupId>org.springframework</groupId> <artifactId>spring-webmvc</artifactId> <version>3.2.8.RELEASE</version> </dependency> <dependency> <groupId>org.springframework</groupId> <artifactId>spring-jdbc</artifactId> <version>3.2.8.RELEASE</version> </dependency> <dependency> <groupId>commons-dbcp</groupId> <artifactId>commons-dbcp</artifactId> <version>1.4</version> </dependency> -
配置Spring MVC的前端控制器web.xml:
<servlet>
<description></description>
<display-name>DispatcherServlet</display-name>
<servlet-name>DispatcherServlet</servlet-name>
<servlet-class>org.springframework.web.servlet.DispatcherServlet</servlet-class>
<init-param>
<param-name>contextConfigLocation</param-name>
<param-value>classpath:conf/spring-*.xml</param-value>
</init-param>
<load-on-startup>1</load-on-startup>
</servlet>
<servlet-mapping>
<servlet-name>DispatcherServlet</servlet-name>
<url-pattern>*.do</url-pattern>
</servlet-mapping>
Spring配置文件村存在conf文件夹中,并且其文件名符合spring - *。xml规则。 -
添加数据库连接参数文件conf / db.properties
url=jdbc:mysql://localhost:3306/tedustore driver=com.mysql.jdbc.Driver user=root password=root initsize=1 maxsize=5 -
添加数据库连接池配置文件spring-db.xml
<?xml version="1.0" encoding="UTF-8"?> <beans xmlns="http://www.springframework.org/schema/beans" xmlns:xsi="http://www.w3.org/2001/XMLSchema-instance" xmlns:context="http://www.springframework.org/schema/context" xmlns:jdbc="http://www.springframework.org/schema/jdbc" xmlns:jee="http://www.springframework.org/schema/jee" xmlns:tx="http://www.springframework.org/schema/tx" xmlns:aop="http://www.springframework.org/schema/aop" xmlns:mvc="http://www.springframework.org/schema/mvc" xmlns:util="http://www.springframework.org/schema/util" xmlns:jpa="http://www.springframework.org/schema/data/jpa" xsi:schemaLocation=" http://www.springframework.org/schema/beans http://www.springframework.org/schema/beans/spring-beans-3.2.xsd http://www.springframework.org/schema/context http://www.springframework.org/schema/context/spring-context-3.2.xsd http://www.springframework.org/schema/jdbc http://www.springframework.org/schema/jdbc/spring-jdbc-3.2.xsd http://www.springframework.org/schema/jee http://www.springframework.org/schema/jee/spring-jee-3.2.xsd http://www.springframework.org/schema/tx http://www.springframework.org/schema/tx/spring-tx-3.2.xsd http://www.springframework.org/schema/data/jpa http://www.springframework.org/schema/data/jpa/spring-jpa-1.3.xsd http://www.springframework.org/schema/aop http://www.springframework.org/schema/aop/spring-aop-3.2.xsd http://www.springframework.org/schema/mvc http://www.springframework.org/schema/mvc/spring-mvc-3.2.xsd http://www.springframework.org/schema/util http://www.springframework.org/schema/util/spring-util-3.2.xsd"> <!-- conf/spring-db.xml 用于管理数据库的连接 --> <!-- 读取conf/db.properties --> <util:properties id="dbConfig" location="classpath:conf/db.properties" /> <!-- 配置DBCP所需的Bean --> <!-- 各property中的name以类中的set方法名称为准 --> <bean id="ds" class="org.apache.commons.dbcp.BasicDataSource"> <property name="driverClassName" value="#{dbConfig.driver}"/> <property name="url" value="#{dbConfig.url}"/> <property name="username" value="#{dbConfig.user}"/> <property name="password" value="#{dbConfig.password}"/> <property name="initialSize" value="#{dbConfig.initsize}"/> <property name="maxActive" value="#{dbConfig.maxsize}"/> </bean> </beans> -
添加Spring MVC配置文件spring-mvc.xml:
<?xml version="1.0" encoding="UTF-8"?> <beans xmlns="http://www.springframework.org/schema/beans" xmlns:xsi="http://www.w3.org/2001/XMLSchema-instance" xmlns:context="http://www.springframework.org/schema/context" xmlns:jdbc="http://www.springframework.org/schema/jdbc" xmlns:jee="http://www.springframework.org/schema/jee" xmlns:tx="http://www.springframework.org/schema/tx" xmlns:aop="http://www.springframework.org/schema/aop" xmlns:mvc="http://www.springframework.org/schema/mvc" xmlns:util="http://www.springframework.org/schema/util" xmlns:jpa="http://www.springframework.org/schema/data/jpa" xsi:schemaLocation=" http://www.springframework.org/schema/beans http://www.springframework.org/schema/beans/spring-beans-3.2.xsd http://www.springframework.org/schema/context http://www.springframework.org/schema/context/spring-context-3.2.xsd http://www.springframework.org/schema/jdbc http://www.springframework.org/schema/jdbc/spring-jdbc-3.2.xsd http://www.springframework.org/schema/jee http://www.springframework.org/schema/jee/spring-jee-3.2.xsd http://www.springframework.org/schema/tx http://www.springframework.org/schema/tx/spring-tx-3.2.xsd http://www.springframework.org/schema/data/jpa http://www.springframework.org/schema/data/jpa/spring-jpa-1.3.xsd http://www.springframework.org/schema/aop http://www.springframework.org/schema/aop/spring-aop-3.2.xsd http://www.springframework.org/schema/mvc http://www.springframework.org/schema/mvc/spring-mvc-3.2.xsd http://www.springframework.org/schema/util http://www.springframework.org/schema/util/spring-util-3.2.xsd"> <!-- conf/spring-mvc.xml 用于管理MVC的配置 --> <context:component-scan base-package="cn.tedu.spring" /> <mvc:annotation-driven/> <bean class="org.springframework.web.servlet.view.InternalResourceViewResolver"> <property name="prefix" value="/WEB-INF/jsp/"></property> <property name="suffix" value=".jsp"></property> </bean> </beans> -
部署测试...
2.部署Spring MyBatis
-
导入包(略)
-
添加Spring MyBatis配置文件spring-mybatis.xml
<?xml version="1.0" encoding="UTF-8"?>
<beans xmlns="http://www.springframework.org/schema/beans"
xmlns:xsi="http://www.w3.org/2001/XMLSchema-instance"
xmlns:context="http://www.springframework.org/schema/context"
xmlns:jdbc="http://www.springframework.org/schema/jdbc"
xmlns:jee="http://www.springframework.org/schema/jee"
xmlns:tx="http://www.springframework.org/schema/tx"
xmlns:aop="http://www.springframework.org/schema/aop"
xmlns:mvc="http://www.springframework.org/schema/mvc"
xmlns:util="http://www.springframework.org/schema/util"
xmlns:jpa="http://www.springframework.org/schema/data/jpa"
xsi:schemaLocation="
http://www.springframework.org/schema/beans http://www.springframework.org/schema/beans/spring-beans-3.2.xsd
http://www.springframework.org/schema/context http://www.springframework.org/schema/context/spring-context-3.2.xsd
http://www.springframework.org/schema/jdbc http://www.springframework.org/schema/jdbc/spring-jdbc-3.2.xsd
http://www.springframework.org/schema/jee http://www.springframework.org/schema/jee/spring-jee-3.2.xsd
http://www.springframework.org/schema/tx http://www.springframework.org/schema/tx/spring-tx-3.2.xsd
http://www.springframework.org/schema/data/jpa http://www.springframework.org/schema/data/jpa/spring-jpa-1.3.xsd
http://www.springframework.org/schema/aop http://www.springframework.org/schema/aop/spring-aop-3.2.xsd
http://www.springframework.org/schema/mvc http://www.springframework.org/schema/mvc/spring-mvc-3.2.xsd
http://www.springframework.org/schema/util http://www.springframework.org/schema/util/spring-util-3.2.xsd">
<!-- conf/spring-mybatis.xml 用于管理MVC的配置 -->
<bean id="sqlSessionFactory"
class="org.mybatis.spring.SqlSessionFactoryBean">
<property name="dataSource" ref="ds"/>
<!--
<property name="mapperLocations"
value="classpath:mapping/*.xml"/> -->
</bean>
<bean class="org.mybatis.spring.mapper.MapperScannerConfigurer">
<property name="sqlSessionFactory"
ref="sqlSessionFactory"/>
<property name="basePackage"
value="cn.tedu.store.dao"/>
</bean>
</beans>
其中mapperLocations属性被临时注释掉了,再以后有映射文件以后打开。 -
利用JUnit进行离线测试:
public class MyBatisTest {
ClassPathXmlApplicationContext ctx;
@Before
public void init(){
ctx = new ClassPathXmlApplicationContext(
"conf/spring-db.xml",
"conf/spring-mybatis.xml");
}
@Test
public void testSqlSession(){
SqlSessionFactory factory=
ctx.getBean("sqlSessionFactory",
SqlSessionFactory.class);
SqlSession session=factory.openSession();
System.out.println(session);
session.close();
}
}
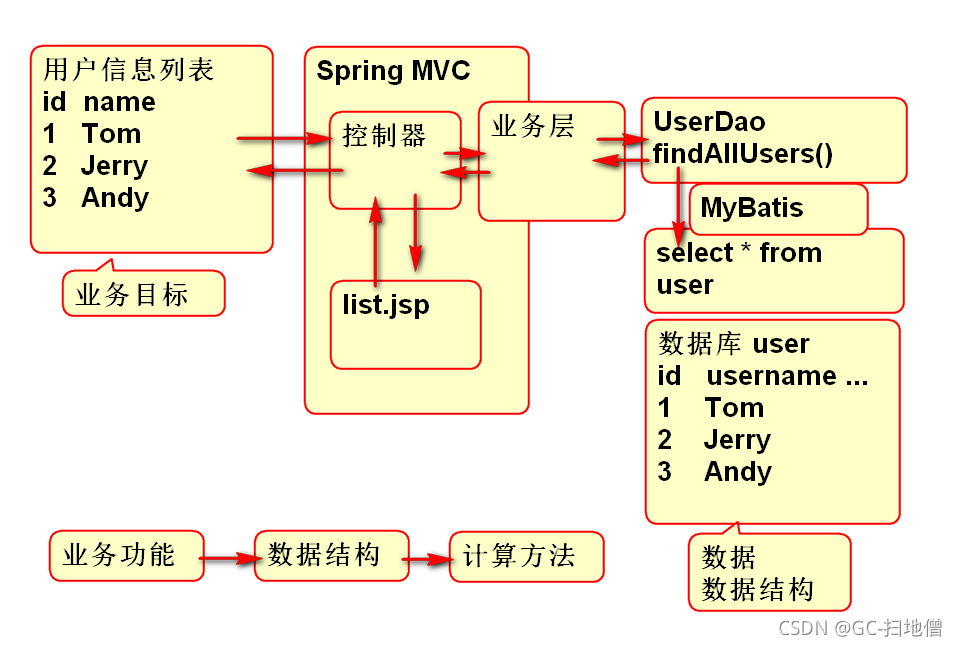
实现用户列表功能
数据层
-
数据表结构:
desc user; +-------------+-------------+------+-----+-------------------+-----------------------------+ | Field | Type | Null | Key | Default | Extra | +-------------+-------------+------+-----+-------------------+-----------------------------+ | id | int(11) | NO | PRI | NULL | auto_increment | | username | varchar(20) | YES | | NULL | | | password | varchar(30) | YES | | NULL | | | email | varchar(20) | YES | | NULL | | | mobile | varchar(20) | YES | | NULL | | | create_time | timestamp | NO | | CURRENT_TIMESTAMP | on update CURRENT_TIMESTAMP | +-------------+-------------+------+-----+-------------------+-----------------------------+ -
添加实体类用户
public class User implements Serializable { private static final long serialVersionUID = -7291170424207323214L; private Integer id; private String username; private String password; private String mobile; private String email; private Date createTime; public User() { } public User(Integer id, String username, String password, String mobile, String email, Date createTime) { super(); this.id = id; this.username = username; this.password = password; this.mobile = mobile; this.email = email; this.createTime = createTime; } public Integer getId() { return id; } public void setId(Integer id) { this.id = id; } public String getUsername() { return username; } public void setUsername(String username) { this.username = username; } public String getPassword() { return password; } public void setPassword(String password) { this.password = password; } public String getMobile() { return mobile; } public void setMobile(String mobile) { this.mobile = mobile; } public String getEmail() { return email; } public void setEmail(String email) { this.email = email; } public Date getCreateTime() { return createTime; } public void setCreateTime(Date createTime) { this.createTime = createTime; } @Override public String toString() { return "User [id=" + id + ", username=" + username + ", password=" + password + ", mobile=" + mobile + ", email=" + email + ", createTime=" + createTime + "]"; } @Override public int hashCode() { final int prime = 31; int result = 1; result = prime * result + ((id == null) ? 0 : id.hashCode()); return result; } @Override public boolean equals(Object obj) { if (this == obj) return true; if (obj == null) return false; if (getClass() != obj.getClass()) return false; User other = (User) obj; if (id == null) { if (other.id != null) return false; } else if (!id.equals(other.id)) return false; return true; } } -
声明道接口
public interface UserDao { /** * 查询全部的用户信息 * @return 用户信息列表 */ List<User> findAllUsers(); } -
添加映射配置文件mapping / userMapper.xml
<?xml version="1.0" encoding="UTF-8"?> <!DOCTYPE mapper PUBLIC "-//mybatis.org//DTD Mapper 3.0//EN" "http://mybatis.org/dtd/mybatis-3-mapper.dtd"> <mapper namespace="cn.tedu.store.dao.UserDao"> <!-- mapping/userMapper.xml 映射文件 --> <!-- result: 结果 parameter: 参数 type: 类型 resultType: 用于声明方法的返回结果元素的类型 parameterType: 参数的类型,当方法只有一个参数时候使用! 如果有更多个参数建议使用 @Param 注解标注 --> <select id="findAllUsers" resultType="cn.tedu.store.bean.User"> select id, username, password, mobile, email, create_time as createTime from user </select> </mapper> -
更新db.properties
url=jdbc:mysql://localhost:3306/tedustore -
更新spring-mybatis.xml
<property name="mapperLocations" value="classpath:mapping/*.xml"/> -
利用JUnit的进行离线测试
public class UserDaoTest {
ClassPathXmlApplicationContext ctx;
UserDao dao;
@Before //在全部测试案例之前执行的方法
public void init(){
ctx = new ClassPathXmlApplicationContext(
"conf/spring-db.xml",
"conf/spring-mybatis.xml");
dao = ctx.getBean("userDao",UserDao.class);
}
@After //全部测试案例执行之后执行 destory方法
public void destory(){
ctx.close();
}
@Test
public void testFindAllUsers(){
List<User> list=dao.findAllUsers();
for (User user : list) {
System.out.println(user);
}
}
}


 4752
4752

 被折叠的 条评论
为什么被折叠?


