


Angular 中使用ngx-translate国际化配置
Github地址:https://github.com/ngx-translate/core
第一步 :安装核心translate/core
npm install @ngx-translate/core --save
第二步: 创建国际化文件
根据自身项目需要,在menu文件下创建i18n文件夹,并在文件夹内创建所需要的语言文件
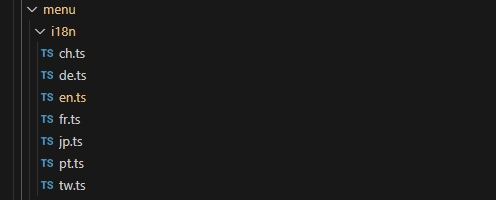
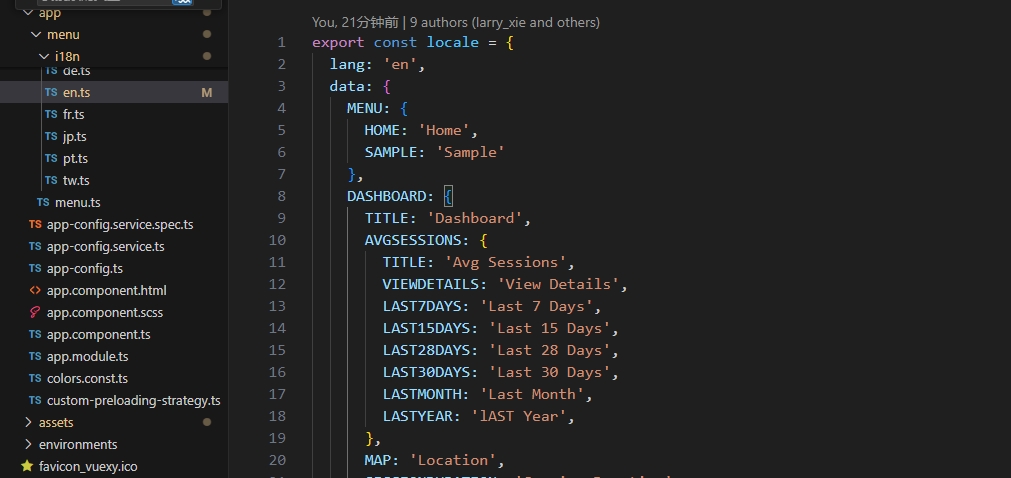
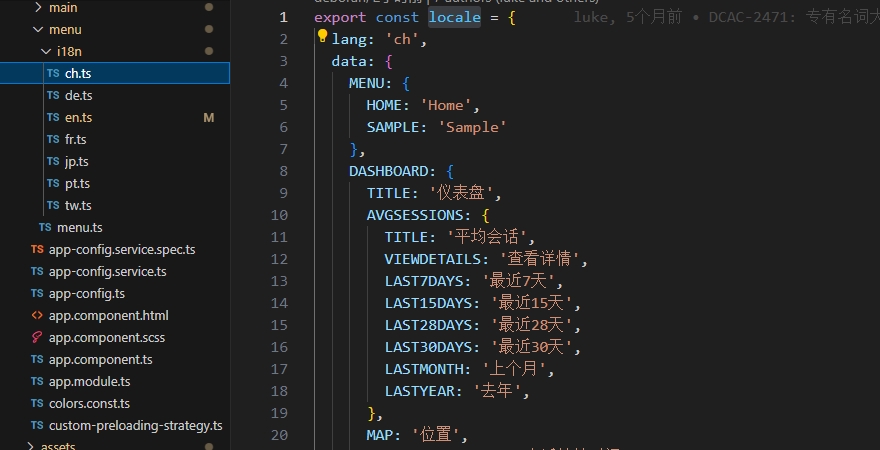
多语言文件格式,例如:
第三步: 引入TranslateModule模块
1.在项目根模块中导入支持的包并配置(app.component.ts)
import { Component, Inject, OnDestroy, OnInit, ElementRef, Renderer2, HostListener, AfterViewChecked } from '@angular/core';
import { TranslateService } from '@ngx-translate/core';
import { CoreTranslationService } from '@core/services/translation.service';
//导入了一个名为 locale 的模块别名,这个别名来自 'app/menu/i18n/en' 模块。通常情况下,这表示你正在导入一个国际化(i18n)文件,该文件提供了英语(en)版本的菜单(menu)本地化资源。
import { locale as menuEnglish } from 'app/menu/i18n/en';
import { locale as menuChinese } from 'app/menu/i18n/ch';
@Component({
  selector: 'app-root',
  templateUrl: './app.component.html',
  styleUrls: ['./app.component.scss']
})
export class AppComponent implements OnInit, AfterViewChecked, OnDestroy {
  coreConfig: any;
  menu: any;
  defaultLanguage: 'en'; // This language will be used as a fallback when a translation isn't found in the current language
  appLanguage: 'en'; // Set application default language i.e fr
  constructor(
    @Inject(DOCUMENT) private document: any,
    private _coreTranslationService: CoreTranslationService,
    private _translateService: TranslateService,
  ) {
    // Add languages to the translation service
    this._translateService.addLangs(['en', 'jp', 'tw', 'ch', 'fr', 'de']);
    // This language will be used as a fallback when a translation isn't found in the current language
    this._translateService.setDefaultLang('en');
    // 调用了_coreTranslationService服务的translate方法,目的是为了设置应用程序菜单的多语言翻译
    //_coreTranslationService是一个自定义的服务,它的translate方法可能设计为接收多个语言对象,并根据应用程序的当前语言设置或其他逻辑,来更新界面中菜单的显示文本。每个参数应该是一个对象,结构类似于前面提到的国际化文件内容,包含各菜单项的键值对
    this._coreTranslationService.translate(
      menuEnglish,
      menuChinese,);
  }
  ngOnInit(): void {
    // Init wave effect (Ripple effect)
    Waves.init();
    // Subscribe to config changes
    this._coreConfigService.config.pipe(takeUntil(this._unsubscribeAll)).subscribe(config => {
      this.coreConfig = config;

      // ? Use app-config.ts file to set default language
      const appLanguage = this.coreConfig.app.appLanguage || 'en';
      this._translateService.use(appLanguage);

      setTimeout(() => {
        this._translateService.setDefaultLang('en');
        this._translateService.setDefaultLang(appLanguage);
      });
}
2.自定义服务src@core\services\translation.service.ts
- 导入声明:
Injectable从@angular/core导入,用于标记服务为可注入的。TranslateService从@ngx-translate/core导入,这是 Angular 项目中用于多语言翻译的核心服务。
- 定义接口
Locale:- 定义了一个接口Locale,包含两个属性:
lang:表示语言的字符串。data:一个对象,包含特定语言的翻译数据。
- 定义了一个接口Locale,包含两个属性:
- 服务定义:
- 使用
@Injectable装饰器标记CoreTranslationService为 Angular 服务,并使用providedIn: 'root'指定服务为全局单例。
- 使用
- 构造函数:
- 接收一个
TranslateService实例,通过依赖注入自动注入,用于调用翻译相关的 API。
- 接收一个
- 公共方法
translate:- 这个方法接受一个或多个
Locale类型的参数,使用扩展运算符...args收集这些参数到locales数组中。 - 使用
forEach遍历locales数组中的每个语言对象。 - 在遍历过程中,调用
this._translateService.setTranslation方法,将每个语言对象的lang作为语言标识,data作为翻译数据传入。第三个参数true表示追加翻译,而不是替换已有的翻译,这允许添加新的翻译而不丢失之前的。
- 这个方法接受一个或多个
import { Injectable } from '@angular/core';
import { TranslateService } from '@ngx-translate/core';

export interface Locale {
  lang: string;
  data: Object;
}

@Injectable({
  providedIn: 'root'
})
export class CoreTranslationService {
  constructor(private _translateService: TranslateService) {}
  translate(...args: Locale[]): void {
    const locales = [...args];
    locales.forEach(locale => {
      // use setTranslation() with the third argument value as true to append translations instead of replacing them
      this._translateService.setTranslation(locale.lang, locale.data, true);
    });
  }
}
第四步: 使用国际化
1.在菜单中的使用
创建src\app\menu\menu.ts菜单配置文件
translate:用于国际化的翻译键,通常与翻译文件中的键对应,用于动态加载不同语言的菜单文字。
import { CoreMenu } from '@core/types'

export const menu: CoreMenu[] = [
  {
    id: 'dashboard',
    title: 'Dashboard',
    translate: 'DASHBOARD.TITLE',
    type: 'item',
    icon: 'grid',
    url: 'dashboard'
  },
  {
    id: 'system',
    title: 'System',
    translate: 'SYSTEM.COLLAPSIBLE',
    type: 'collapsible',
    icon: 'settings',
    children: [
      {
        id: 'system-events',
        title: 'Events',
        translate: 'SYSTEM.EVENTS',
        type: 'item',
        icon: 'circle',
        url: 'system/events'
      },
    ]
  }
]
2.使用管道来翻译输入信息
<h4 class="card-title">{{ accessor.name | translate }}</h4>
3.使用指令来翻译指定信息
<span [translate]="item.translate">{{ item.title }}</span>
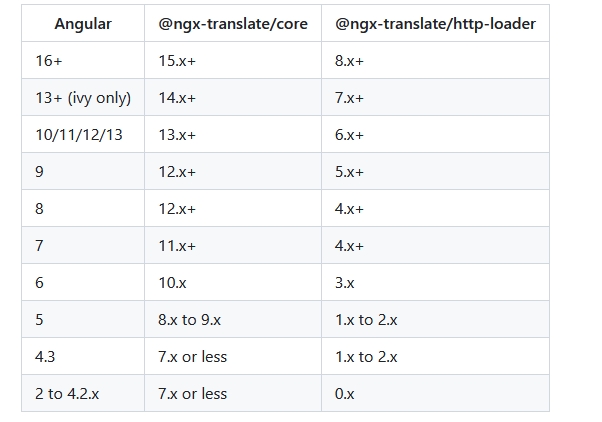
注意点:ngx-translate官网给出的相应的依赖库对应的angular版本


 3548
3548

 被折叠的 条评论
为什么被折叠?
被折叠的 条评论
为什么被折叠?
 到【灌水乐园】发言


