


前言
之前实践了下face++在线人脸识别版本,这回做一下离线版本。github 上面有关于face_recognition的相关资料,本人只是做个搬运工,对其中的一些内容进行搬运,对其中一些例子进行实现。
官方描述:
face_recognition是一个强大、简单、易上手的人脸识别开源项目,并且配备了完整的开发文档和应用案例,特别是兼容树莓派系统。本项目是世界上最简洁的人脸识别库,你可以使用Python和命令行工具提取、识别、操作人脸。本项目的人脸识别是基于业内领先的C++开源库 dlib中的深度学习模型,用Labeled Faces in the Wild人脸数据集进行测试,有高达99.38%的准确率。但对小孩和亚洲人脸的识别准确率尚待提升。
(关于兼容树莓派,以后有板子了再做一下)
下面两个链接划重点
环境配置ubuntu16.04(其他环境的安装可以参考第一个链接,官方有说明)
pycharm(可忽略,怎么舒服怎么来)
python3
opencv(我的是4.1.2,三点几的版本应该也一样)
实际上只需要安装face_recognition,当然,没有opencv的也需要安装一下opencv
图片准备
由于需要做一些图片的比对,因此需要准备一些图片,本文图片取自以下链接
https://www.zhihu.com/question/314169580/answer/872770507
接下来开始操作
官方还有提供命令行的操作(这个没去做),本文不做这个,我们只要是要在python中用face_recognition,因此定位到这一块。

这个api文档地址就是上面的第二个链接。进去之后可以看到:

part1.识别图片中的人是谁
代码
结果
[True]
yes
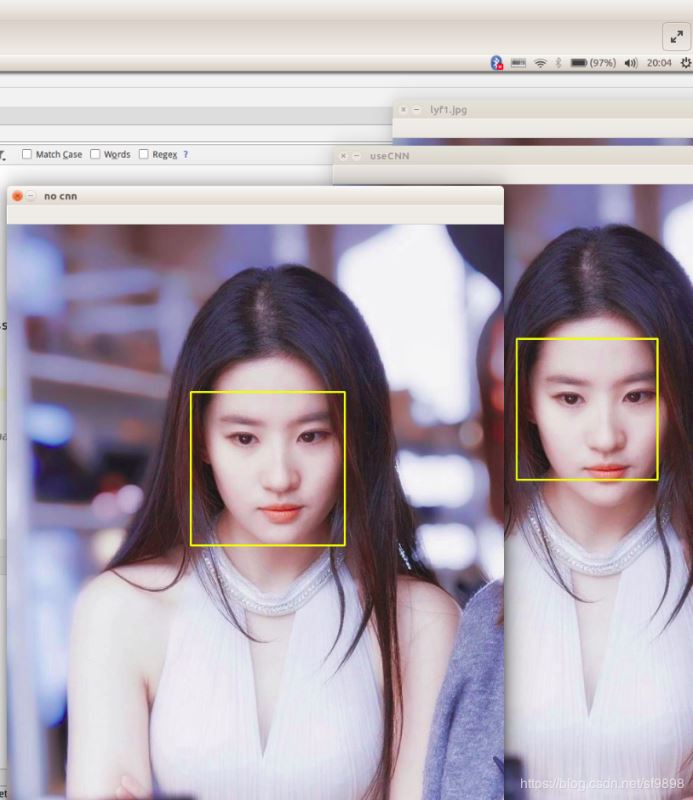
part2.从图片中找到人脸
代码
结果face_location_useCNN:
[(223, 470, 427, 266)]
1
face_location_noCNN:
[(242, 489, 464, 266)]
1
图片效果大致是这样
part3.找到人脸并将其裁剪打印出来(使用cnn定位人脸)
代码
结果I found 1 face(s) in this photograph.
A face is located at pixel location Top: 205, Left: 276, Bottom: 440, Right: 512
图片效果大致是这样

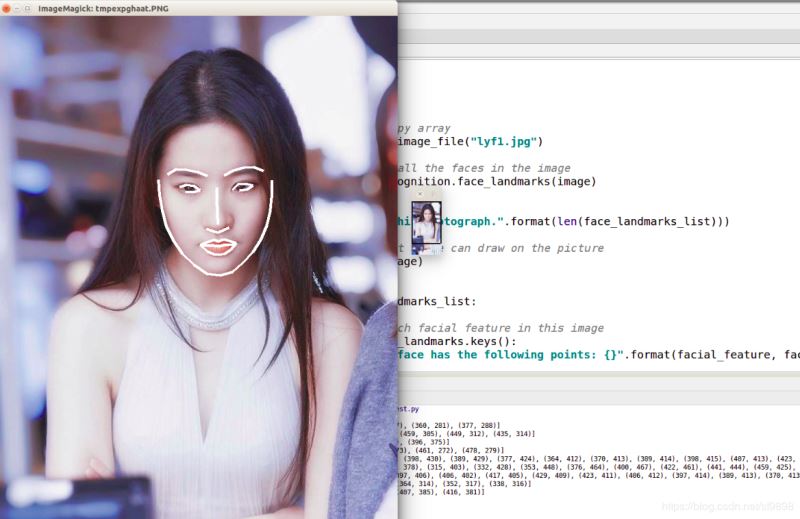
part4.识别单张图片中人脸的关键点
代码
结果I found 1 face(s) in this photograph.
The left_eyebrow in this face has the following points: [(305, 285), (321, 276), (340, 277), (360, 281), (377, 288)]
The right_eye in this face has the following points: [(422, 313), (432, 303), (446, 302), (459, 305), (449, 312), (435, 314)]
The nose_bridge in this face has the following points: [(394, 309), (394, 331), (395, 354), (396, 375)]
The right_eyebrow in this face has the following points: [(407, 287), (424, 278), (442, 273), (461, 272), (478, 279)]
The bottom_lip in this face has the following points: [(429, 409), (419, 421), (408, 428), (398, 430), (389, 429), (377, 424), (364, 412), (370, 413), (389, 414), (398, 415), (407, 413), (423, 411)]
The chin in this face has the following points: [(289, 295), (291, 323), (296, 351), (303, 378), (315, 403), (332, 428), (353, 448), (376, 464), (400, 467), (422, 461), (441, 444), (459, 425), (473, 403), (484, 377), (490, 351), (493, 323), (493, 296)]
The top_lip in this face has the following points: [(364, 412), (377, 407), (389, 403), (397, 406), (406, 402), (417, 405), (429, 409), (423, 411), (406, 412), (397, 414), (389, 413), (370, 413)]
The left_eye in this face has the following points: [(327, 308), (339, 304), (353, 306), (364, 314), (352, 317), (338, 316)]
The nose_tip in this face has the following points: [(375, 383), (386, 387), (396, 390), (407, 385), (416, 381)]
图片效果
到此这篇关于Python3 利用face_recognition实现人脸识别的方法的文章就介绍到这了,更多相关Python3 人脸识别内容请搜索脚本之家以前的文章或继续浏览下面的相关文章希望大家以后多多支持脚本之家!
转载本文请联系原作者获取授权,同时请注明本文来自林清莹科学网博客。
收藏
分享
分享到:


 1488
1488


 被折叠的 条评论
为什么被折叠?
被折叠的 条评论
为什么被折叠?
 到【灌水乐园】发言


