


Windows 下的 Python 环境经常会给人带来一系列的困扰,如,时隐时现的各种因为环境变量导致的奇怪报错,Conda 库更新不到最新的版本,还有诸如 xgboost 等库压根儿就不提供 Win 版等。现在,WSL2(Windows Subsystem Linux 2)的出现,让我们有了一种新的选择。WSL2 是一个 Windows 的内置虚拟机,可以运行 Linux 环境,一旦有了 Linux 环境,后面的配置不必多说。
下面仅以 Miniconda 的安装为例,分享一下我自己关于 WSL2 配置的一些经验。
安装 WSL2
开启虚拟机功能
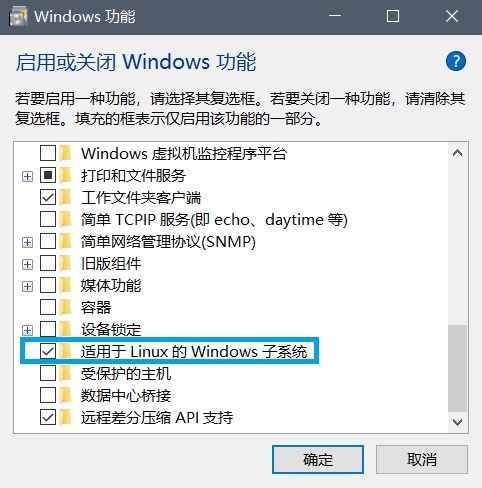
在控制面板 -> 程序和功能 -> Windows 功能窗口中勾选适用于 Linux 的 Windows 子系统 功能,点击确定,并按照提示重启电脑。
安装发行版
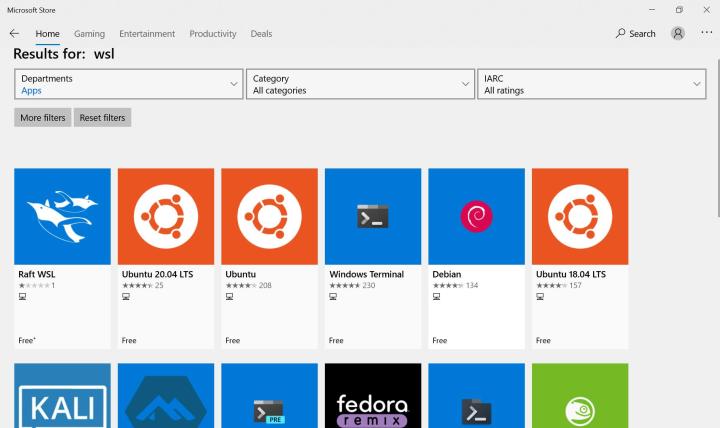
在 Windows 应用商店搜索 WSL ,选择自己想要的 Linux 发行版,点击下载安装即可。这里选择的是 Ubuntu 20.04。
升级
由于版本问题,好多人的的子系统还停留在 WSL,而不是 WSL2。对于升级,输入如下命令
wsl --set-version Ubuntu-20.04 2然后,通过如下命令查看
wsl -l -v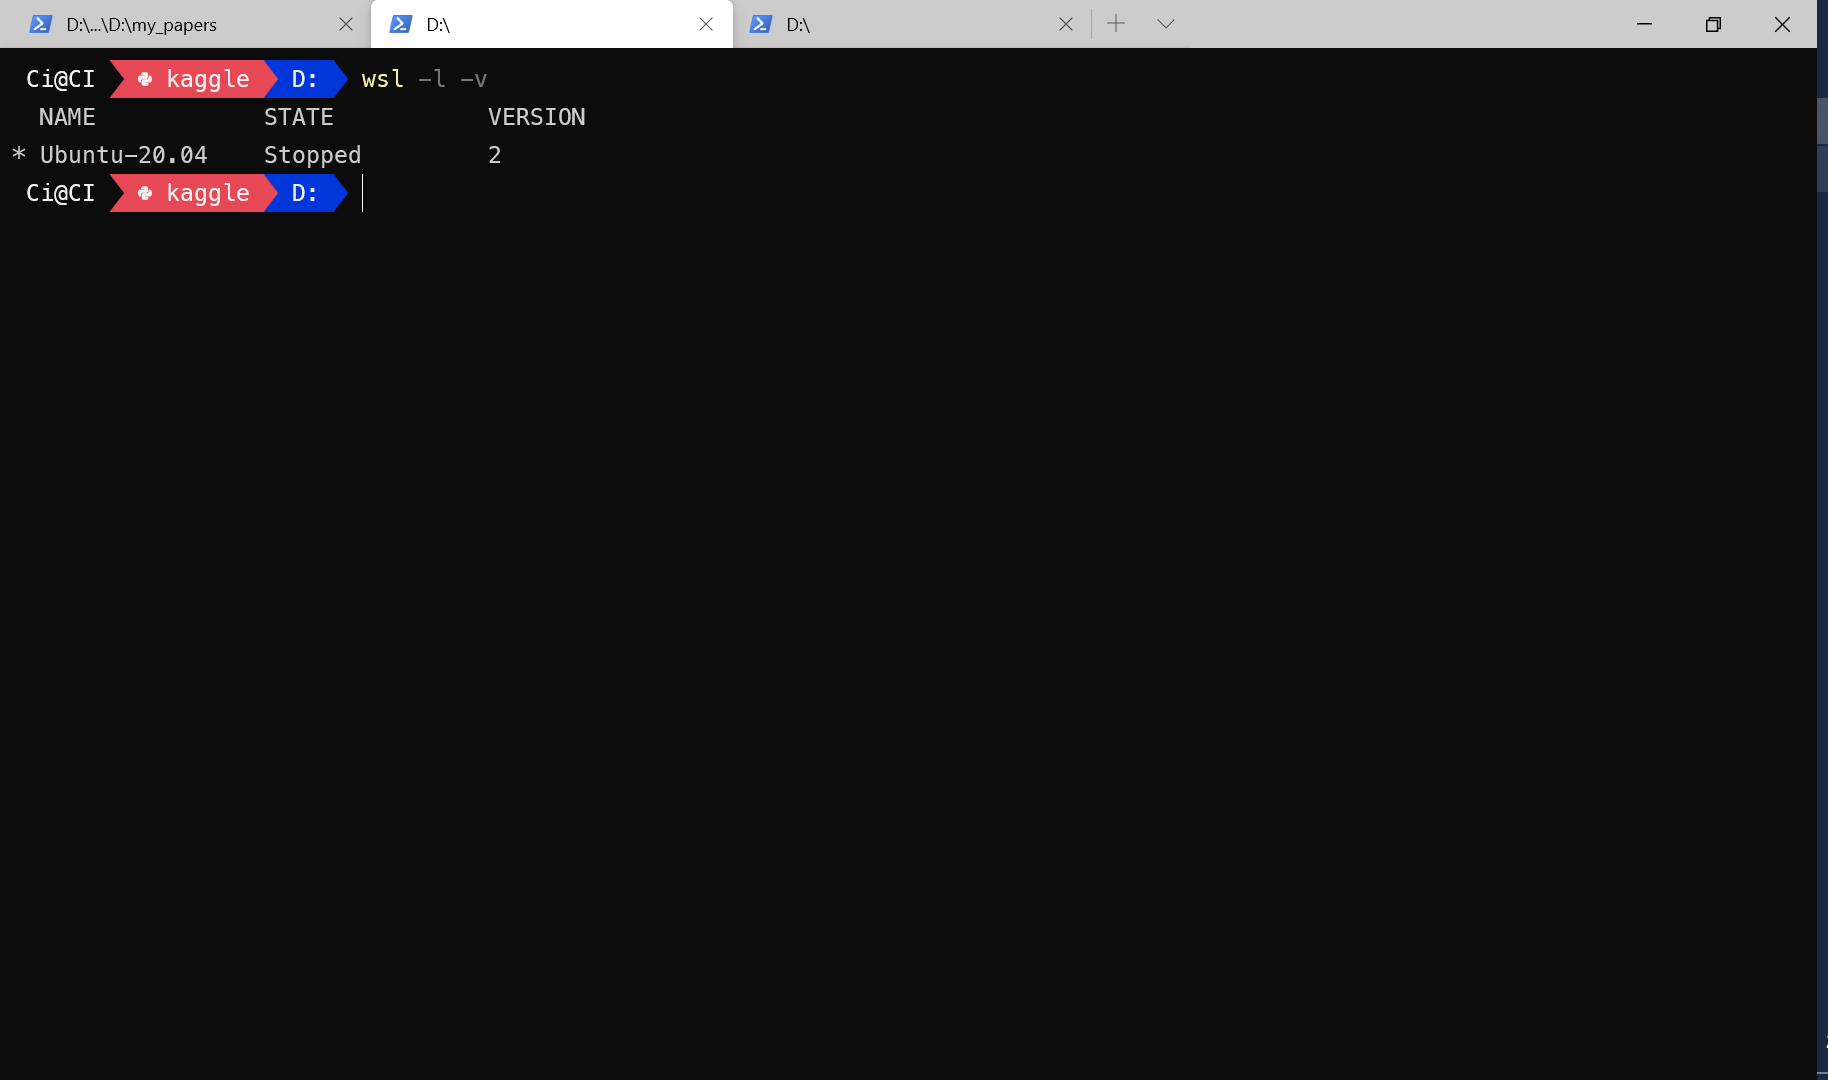
设置 WSL2 为默认版本
wsl --set-default-version 2调试 Linux
初始化
安装完成后,可在开始菜单里找到 Ubuntu 的快捷方式并打开,
也可以使用微软自家的 Windows-Terminal 打开一个 Ubuntu 标签,待其初始化完成。输入以下命令,为 root 用户设置密码。
sudo passwd root当然,你也可以使用如下命令,创建新用户
sudo adduser username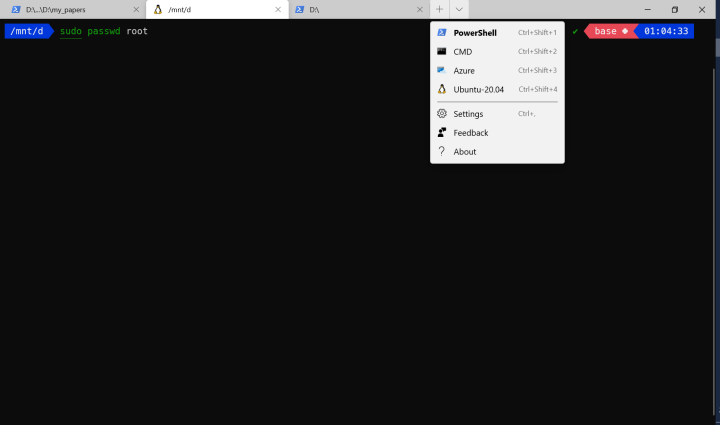
软件源
打开sources.list:
sudo vi /etc/apt/sources.list更改软件源:
deb http://mirrors.aliyun.com/ubuntu/ trusty main restricted universe multiverse
deb http://mirrors.aliyun.com/ubuntu/ trusty-security main restricted universe multiverse
deb http://mirrors.aliyun.com/ubuntu/ trusty-updates main restricted universe multiverse
deb http://mirrors.aliyun.com/ubuntu/ trusty-proposed main restricted universe multiverse
deb http://mirrors.aliyun.com/ubuntu/ trusty-backports main restricted universe multiverse
deb-src http://mirrors.aliyun.com/ubuntu/ trusty main restricted universe multiverse
deb-src http://mirrors.aliyun.com/ubuntu/ trusty-security main restricted universe multiverse
deb-src http://mirrors.aliyun.com/ubuntu/ trusty-updates main restricted universe multiverse
deb-src http://mirrors.aliyun.com/ubuntu/ trusty-proposed main restricted universe multiverse
deb-src http://mirrors.aliyun.com/ubuntu/ trusty-backports main restricted universe multiverse
更新:
sudo apt update && sudo apt update -y
sudo apt -y install dist-upgrade
# 清理缓存
sudo apt -y clean && sudo apt -y autoclean && sudo apt -y autoremove
工具链
为了更方便地使用 Linux,墙裂建议安装 Zsh,关于 Zsh 的安装,请参照
请服我一把:打造 MacOS/Linux 优雅终端(Oh-My-Zsh)zhuanlan.zhihu.com
同时,也推荐安装 Homebrew,相关文章为
请服我一把:搭建 MacOS/Linux 统一开发环境(Homebrew)zhuanlan.zhihu.com
此处仅是建议,如果觉得 Homebrew 对 Linux 来说纯属鸡肋,权当我没说。
安装 Miniconda
下载安装
# 下载
wget -c https://mirrors.tuna.tsinghua.edu.cn/anaconda/miniconda/Miniconda3-latest-Linux-x86_64.sh
# 安装
bash Miniconda3-latest-Linux-x86_64.sh
添加镜像
conda config --add channels https://mirrors.tuna.tsinghua.edu.cn/anaconda/pkgs/free
conda config --add channels https://mirrors.tuna.tsinghua.edu.cn/anaconda/cloud/conda-forge
有关 Conda 的具体使用,请参考
请服我一把:搭建 Python 轻量级编写环境(Anaconda+VSCode)zhuanlan.zhihu.com
安装 JupyterLab
第一步非常简单,命令如下
conda install -c conda-forge jupyterlab关键是第二步,让 JupyterLab 自动打开宿主浏览器。打开配置文件jupyter_notebook_config.py。
vi ~/.jupyter/jupyter_notebook_config.py修改下面这如下一行
c.NotebookApp.use_redirect_file = False退回到主界面,在~/.bashrc 或~/.zshrc文件末尾添加,指定默认浏览器地址,其中,/mnt/之后的部分是你默认浏览器的在 Windows 上的地址
export BROWSER='/mnt/c/scoop/apps/firefox/current/firefox.exe'使用source刷新后,就可以愉快地使用 Linux 版的 Python 了。


 1万+
1万+

 被折叠的 条评论
为什么被折叠?
被折叠的 条评论
为什么被折叠?
 到【灌水乐园】发言


