


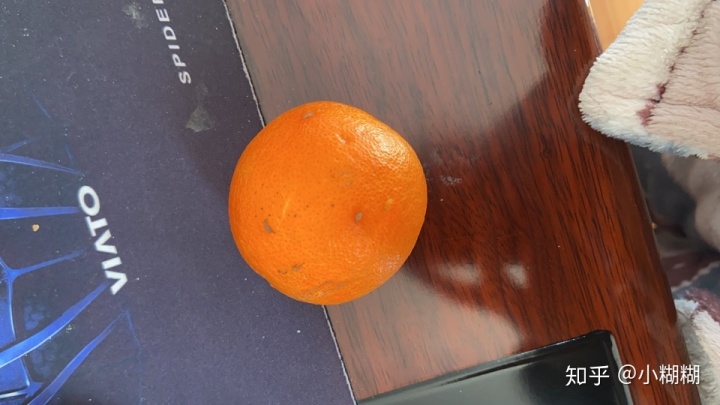
本文介绍当摄像头捕获到特定事件后,使用python和opencv来自动保存特定事件出现的视频片段。特定事件可以是指人脸检测、目标检测、动作检测等等,本文的特定事件指检测到橙子出现在摄像头下。如果橙子出现在摄像头下,我们会打开一个新的视频文件流,向其中写入摄像头记录的视频,一旦橙子从摄像头离开我们将停止写入,因此我们的硬盘上存储的是许多个橙子出现的视频片段。另外,我们存储的视频文件应该包括橙子出现在摄像头前的几帧和橙子离开摄像头后的几帧。
代码结构
|--- output
|--- pyimagesearch
|    |--- __init__.py
|    |--- keyclipwriter.py
|--- save_key_events.py
在pyimagesearch模块内,我们在keyclipwriter.py文件中定义了一个名为KeyClipWriter的类,这个类接收传入的视频帧,然后采用多线程的方式来写入视频文件到磁盘中。
save_key_events.py是主函数文件,在这个文件中我们定义什么是特定事件(橙子出现),然后将视频帧传入KeyClipWriter。
output文件夹用来保存摄像头捕获的特定事件视频文件。
将视频帧写入文件
keyclipwriter.py的代码如下:
# import the necessary packages
from collections import deque
from threading import Thread
from queue import Queue
import time
import cv2

class KeyClipWriter:
	def __init__(self, bufSize=64, timeout=1.0):
		# store the maximum buffer size of frames to be kept
		# in memory along with the sleep timeout during threading
		self.bufSize = bufSize
		self.timeout = timeout

		# initialize the buffer of frames, queue of frames that
		# need to be written to file, video writer, writer thread,
		# and boolean indicating whether recording has started or not
		self.frames = deque(maxlen=bufSize)
		self.Q = None
		self.writer = None
		self.thread = None
		self.recording = False

	def update(self, frame):
		# update the frames buffer
		self.frames.appendleft(frame)

		# if we are recording, update the queue as well
		if self.recording:
			self.Q.put(frame)

	def start(self, outputPath, fourcc, fps):
		# indicate that we are recording, start the video writer,
		# and initialize the queue of frames that need to be written
		# to the video file
		self.recording = True
		self.writer = cv2.VideoWriter(outputPath, fourcc, fps,
			(self.frames[0].shape[1], self.frames[0].shape[0]), True)
		self.Q = Queue()

		# loop over the frames in the deque structure and add them
		# to the queue
		for i in range(len(self.frames), 0, -1):
			self.Q.put(self.frames[i - 1])

		# start a thread write frames to the video file
		self.thread = Thread(target=self.write, args=())
		self.thread.daemon = True
		self.thread.start()

	def write(self):
		# keep looping
		while True:
			# if we are done recording, exit the thread
			if not self.recording:
				return

			# check to see if there are entries in the queue
			if not self.Q.empty():
				# grab the next frame in the queue and write it
				# to the video file
				frame = self.Q.get()
				self.writer.write(frame)

			# otherwise, the queue is empty, so sleep for a bit
			# so we don't waste CPU cycles
			else:
				time.sleep(self.timeout)

	def flush(self):
		# empty the queue by flushing all remaining frames to file
		while not self.Q.empty():
			frame = self.Q.get()
			self.writer.write(frame)

	def finish(self):
		# indicate that we are done recording, join the thread,
		# flush all remaining frames in the queue to file, and
		# release the writer pointer
		self.recording = False
		self.thread.join()
		self.flush()
		self.writer.release()
用opencv检测特定事件然后保存
save_key_events.py代码如下:
# USAGE
# python save_key_events.py --output output

# import the necessary packages
from pyimagesearch.keyclipwriter import KeyClipWriter
from imutils.video import VideoStream
import argparse
import datetime
import imutils
import time
import cv2

# construct the argument parse and parse the arguments
ap = argparse.ArgumentParser()
ap.add_argument("-o", "--output", required=True,
	help="path to output directory")
ap.add_argument("-p", "--picamera", type=int, default=-1,
	help="whether or not the Raspberry Pi camera should be used")
ap.add_argument("-f", "--fps", type=int, default=20,
	help="FPS of output video")
ap.add_argument("-c", "--codec", type=str, default="MJPG",
	help="codec of output video")
ap.add_argument("-b", "--buffer-size", type=int, default=32,
	help="buffer size of video clip writer")
args = vars(ap.parse_args())
# args={"output":"output","picamera":-1,"fps":20,"codec":"MJPG","buffer_size":32}

# initialize the video stream and allow the camera sensor to
# warmup
print("[INFO] warming up camera...")
vs = VideoStream(usePiCamera=args["picamera"] > 0).start()
time.sleep(2.0)

# define the lower and upper boundaries of the "green" ball in
# the HSV color space
# greenLower = (29, 43, 46)
# greenUpper = (64, 255, 255)
orangeLower = (11, 43, 46)
orangeUpper = (25, 255, 255)

# initialize key clip writer and the consecutive number of
# frames that have *not* contained any action
kcw = KeyClipWriter(bufSize=args["buffer_size"])
consecFrames = 0

# keep looping
while True:
	# grab the current frame, resize it, and initialize a
	# boolean used to indicate if the consecutive frames
	# counter should be updated
	frame = vs.read()
	frame = imutils.resize(frame, width=600)
	updateConsecFrames = True

	# update the key frame clip buffer
	kcw.update(frame)

	# blur the frame and convert it to the HSV color space
	blurred = cv2.GaussianBlur(frame, (11, 11), 0)
	hsv = cv2.cvtColor(blurred, cv2.COLOR_BGR2HSV)
	# print(hsv.min(axis=(0,1)))
	# print(hsv.max(axis=(0,1)))

	# construct a mask for the color "green", then perform
	# a series of dilations and erosions to remove any small
	# blobs left in the mask
	mask = cv2.inRange(hsv, orangeLower, orangeUpper)
	mask = cv2.erode(mask, None, iterations=2)
	mask = cv2.dilate(mask, None, iterations=2)

	# find contours in the mask
	cnts = cv2.findContours(mask.copy(), cv2.RETR_EXTERNAL,
		cv2.CHAIN_APPROX_SIMPLE)
	cnts = imutils.grab_contours(cnts)

	# only proceed if at least one contour was found
	if len(cnts) > 0:
		# find the largest contour in the mask, then use it
		# to compute the minimum enclosing circle
		c = max(cnts, key=cv2.contourArea)
		((x, y), radius) = cv2.minEnclosingCircle(c)
		updateConsecFrames = radius <= 10

		# only proceed if the redius meets a minimum size
		if radius > 10:
			# reset the number of consecutive frames with
			# *no* action to zero and draw the circle
			# surrounding the object
			consecFrames = 0
			cv2.circle(frame, (int(x), int(y)), int(radius),
				(0, 0, 255), 2)

			# if we are not already recording, start recording
			if not kcw.recording:
				timestamp = datetime.datetime.now()
				p = "{}/{}.avi".format(args["output"],
					timestamp.strftime("%Y%m%d-%H%M%S"))
				kcw.start(p, cv2.VideoWriter_fourcc(*args["codec"]),
					args["fps"])

	# otherwise, no action has taken place in this frame, so
	# increment the number of consecutive frames that contain
	# no action
	if updateConsecFrames:
		consecFrames += 1

	# if we are recording and reached a threshold on consecutive
	# number of frames with no action, stop recording the clip
	if kcw.recording and consecFrames == args["buffer_size"]:
		kcw.finish()

	# show the frame
	cv2.imshow("Frame", frame)
	key = cv2.waitKey(1) & 0xFF

	# if the `q` key was pressed, break from the loop
	if key == ord("q"):
		break

# if we are in the middle of recording a clip, wrap it up
if kcw.recording:
	kcw.finish()

# do a bit of cleanup
cv2.destroyAllWindows()
vs.stop()
结果展示
命令行运行:
python save_key_events.py --output output在运行后,我的磁盘上新增了3个视频文件:

这些视频记录了橙子出现的时刻:
视频片段1:

视频片段2:

视频片段3:

总结
可以看到我们很好的保存了橙子出现的事件视频。由于我们是直接将颜色作为判断橙子的依据,橙子检测的不是很准,而且受光照影响较大。将检测方法换成现在流行的深度学习方法会达到更好的效果。


 2381
2381

 被折叠的 条评论
为什么被折叠?
被折叠的 条评论
为什么被折叠?
 到【灌水乐园】发言


