


Swagger
1. 配置
pom文件添加swagger依赖,注意版本,2.8.0可以使用
io.springfox
springfox-swagger2
2.8.0
io.springfox
springfox-swagger-ui
2.8.0
新建一个配置类,添加以下内容和注解(注意修改相关的内容,比如包)
@Configuration
@EnableSwagger2
public class Swagger2Setting {
@Bean
public Docket createRestAPI(){
return new Docket(DocumentationType.SWAGGER_2)
//.apiInfo(apiInfo())
.select()
.apis(RequestHandlerSelectors.basePackage("com.crab.classfight.controller"))
.paths(PathSelectors.any())
.build();
}
private ApiInfo apiInfo(){
return new ApiInfoBuilder()
.title("classfight项目")
.description("这里是classfight项目的API列表说明")
.contact("crab")
.version("1.0")
.build();
}
}
开发restful风格的接口,例如:
@DeleteMapping(value = "/deleteUser/{username}")
@ApiOperation("删除一个用户")
public void deleteUser(@PathVariable("username") String username){
userService.deleteUserByName(username);
}
编写注释文档,例如:
在rest接口上使用@Api注解:
@RestController
@Api("用户相关的API")
public class UserController {
}
- 在方法上使用@ApiOperation注解:
` @ApiOperation(value = "添加一个用户")`
- 方法参数注解
@ApiParam或者
```
@ApiImplicitParams({
@ApiImplicitParam(name = "userName", required = true, value = "输入用户名关键字", dataType = "String"),
@ApiImplicitParam(name = "courseId", required = true, value = "当前报名的课程id", dataType = "String")
})
- 在实体类上使用@ApiModelProperty注解,可选参数(name, value, required, hidden, default value)
还有相关其他的注解,这里不举例了
- 运行项目,进入网址http://localhost:8080/swagger-ui.html查看接口信息文档,测试接口。
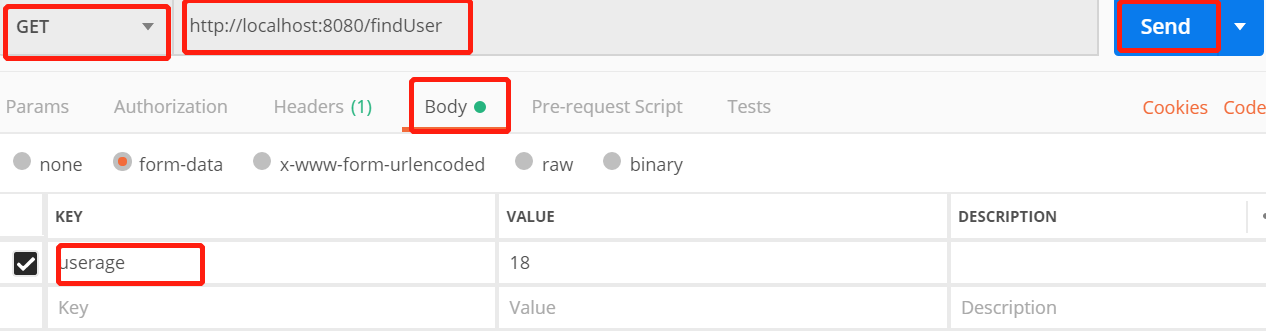
### Postman
- 去Postman官网下载并安装,运行项目,在Postman中按照请求方式输入网址和请求参数,测试。
- 可以选择相应的请求方式,然后在body中添加相应的参数,点击send查看返回结果。


 5750
5750

 被折叠的 条评论
为什么被折叠?
被折叠的 条评论
为什么被折叠?
 到【灌水乐园】发言


