


下面总结了一些canvas绘制标签的心得体会,希望能够对你有所帮助。
绘制圆弧
<canvas id="canvas" width="300" height="300" ref="canvas">canvas>var canvas = document.getElementById('canvas');var ctx = canvas.getContext('2d');ctx.beginPath();ctx.arc(150,150,50,0,Math.PI*1/2);ctx.stroke();运行结果:
绘制直线
var canvas = document.getElementById('canvas');var ctx = canvas.getContext('2d');ctx.beginPath();ctx.moveTo(100,100);ctx.lineTo(200,150);ctx.stroke();运行结果:
绘制圆角矩形
通过圆弧与直线相结合,绘制出矩形路径。
var canvas = document.getElementById('canvas');var ctx = canvas.getContext('2d');var width = 100;var height = 50;var radius = 5;ctx.translate(100, 100);ctx.beginPath(0);ctx.arc(width - radius, height - radius, radius, 0, Math.PI / 2);ctx.lineTo(radius, height);ctx.arc(radius, height - radius, radius, Math.PI / 2, Math.PI);ctx.lineTo(0, radius);ctx.arc(radius, radius, radius, Math.PI, Math.PI * 3 / 2);ctx.lineTo(width - radius, 0);ctx.arc(width - radius, radius, radius, Math.PI * 3 / 2, Math.PI * 2);ctx.lineTo(width, height - radius);ctx.closePath();// 填充背景色ctx.fillStyle = "#ff6a61";ctx.fill();ctx.restore();运行结果:
填充文本
...ctx.font = '16px PingFangSC-Regular';ctx.textAlign = "center";ctx.textBaseline = 'middle';ctx.fillStyle = '#fff';ctx.fillText('快狗打车', 50, 25);textBaseline 属性设置或返回在绘制文本时的当前文本基线。
运行结果:
宽度自适应
标签宽度设置定值的做法难免有些耍流氓,怎样才能实现标签宽度由文本内容撑起?canvas为我们提供了ctx.measureText(text).width接口获得文本内容宽度;标签宽度 = 文本内容宽度 + 左右内边距。
先把绘制圆角矩形背景的部分单独抽出来:
function drawRoundRect(ctx, x, y, width, height, radius, bgc) { ctx.save(); ctx.translate(x, y); drawRoundRectPath(ctx, width, height, radius); ctx.fillStyle = bgc; ctx.fill(); ctx.restore();}function drawRoundRectPath(ctx, width, height, radius) { ctx.beginPath(0); ctx.arc(width - radius, height - radius, radius, 0, Math.PI / 2); ctx.lineTo(radius, height); ctx.arc(radius, height - radius, radius, Math.PI / 2, Math.PI); ctx.lineTo(0, radius); ctx.arc(radius, radius, radius, Math.PI, (Math.PI * 3) / 2); ctx.lineTo(width - radius, 0); ctx.arc(width - radius, radius, radius, (Math.PI * 3) / 2, Math.PI * 2); ctx.lineTo(width, height - radius); ctx.closePath();}};复制代码接下来只需要设定参数调用即可 var canvas = document.getElementById("canvas"); var ctx = canvas.getContext("2d"); ctx.font = "16px PingFangSC-Regular"; ctx.textAlign = "center"; ctx.textBaseline = "middle"; ctx.fillStyle = "#fff"; var config = { paddingLeft: 20, // 文本左内边距 paddingRight: 20, // 文本右内边距 labelHeight: 50, // 标签高度 labelRadius: 5, // 圆角 labelBackgroundColor: "#ff6a61" // 标签背景色 }; var x = 100; var y = 100; var str = "快狗打车"; var textWidth = ctx.measureText(str).width; drawRoundRect( ctx, x, y, textWidth + config.paddingLeft + config.paddingRight, config.labelHeight, config.labelRadius, config.labelBackgroundColor); ctx.fillText( str, x + config.paddingLeft + textWidth / 2, y + config.labelHeight / 2 ); var x = 100; var y = 200; var str = "快狗打车-前端团队"; var textWidth = ctx.measureText(str).width; drawRoundRect( ctx, x, y, textWidth + config.paddingLeft + config.paddingRight, config.labelHeight, config.labelRadius, config.labelBackgroundColor); ctx.fillText( str, x + config.paddingLeft + textWidth / 2, y + config.labelHeight / 2 );运行结果:
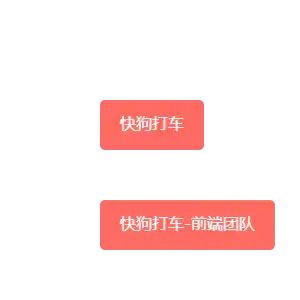
measureText() 方法返回包含一个对象,该对象包含以像素计的指定字体宽度。
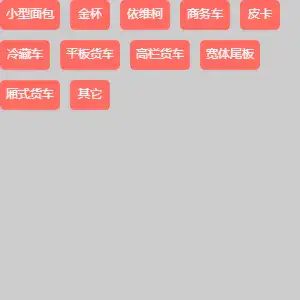
多标签自动换行
如何实现绘制多标签自动换行?
标签的实际占用空间宽度 = 文本宽度 + 左右内边距 + 左右外边距
遍历所有标签文本,根据限定空间宽度与标签的实际占用空间宽度计算出每一个标签的具体坐标值。
配置参数:
var labelList = [ { "id": 1, "name": "小型面包" }, { "id": 2, "name": "金杯" }, { "id": 3, "name": "依维柯" }, { "id": 4, "name": "商务车" }, { "id": 5, "name": "皮卡" }, { "id": 6, "name": "冷藏车" }, { "id": 7, "name": "平板货车" }, { "id": 8, "name": "高栏货车" }, { "id": 9, "name": "宽体尾板" }, { "id": 10, "name": "厢式货车" }, { "id": 11, "name": "其它" }]var config = { // 标签范围参数 spaceX: 0, // x坐标 spaceY: 0, // y坐标 spaceWidth: 300, // 宽度 spaceHeight: 300, // 高度 // 标签参数 paddingRight: 10, // 文本至左边框距离 paddingLeft: 10, // 文本至右边框距离 marginTop: 0, // 上外边界 marginRight: 10, // 右外边界 marginBottom: 10, // 下外边界 marginLeft: 0, // 左外边界 labelHeight: 30, // 高度 labelRadius: 5, // 圆角 labelBackgroundColor: '#ff6a61', // 背景色 // 字体参数 fontSize: 12, // 字体大小 fontColor: '#fff', // 字体颜色 fontFamily: 'PingFangSC-Regular', // 字体类型}遍历标签列表计算出每一个标签具体参数:
function formatLine(ctx, list, config) { let labelLine = []; let lineIndex = 0; let usedWidth = 0; list.forEach(item => { item.textWidth = ctx.measureText(item.name).width; // 文字占据空间 let labelSpace = item.textWidth + config.paddingLeft + config.paddingRight + config.marginLeft + config.marginRight; // 标签实际占据宽度 if(usedWidth + labelSpace > config.spaceWidth) { usedWidth = 0; lineIndex = lineIndex + 1; } item.x = config.spaceX + usedWidth + config.marginLeft; item.y = config.spaceY + lineIndex * (config.labelHeight + config.marginTop + config.marginBottom) + config.marginTop; labelLine.push(item); usedWidth = usedWidth + labelSpace; }); return labelLine}接下来就是遍历标签进行绘制了:
let canvas = document.getElementById('canvas');let ctx = canvas.getContext('2d');// 填充背景色,以便于观察边界ctx.fillStyle = "#ccc";ctx.fillRect(config.spaceX, config.spaceY, config.spaceWidth, config.spaceHeight);let labelLine = formatLine(ctx, labelList, config);drawLabel(ctx, labelLine, config);function drawLabel(ctx, labelLine, config) { ctx.font = `${config.fontSize}px ${config.fontFamily}`; ctx.textAlign = "center"; ctx.textBaseline = 'middle'; ctx.fillStyle = config.fontColor; labelLine.map((item)=>{ drawRoundRect(ctx, item.x, item.y, item.textWidth + config.paddingLeft + config.paddingRight , config.labelHeight , config.labelRadius , config.labelBackgroundColor); ctx.fillText(item.name, item.x + config.paddingLeft + item.textWidth/2, item.y + config.labelHeight/2); })}运行结果:
延伸
那么到这里标签的绘制已经结束。鬼机灵的小伙伴可能会想到既然ctx.measureText(text).width可以获得文本实际占据宽度,那ctx.measureText(text).height肯定就是获取文本实际占据高度了呗(俺也一样),很遗憾并不是_(°:з」∠)_)
canvas并没有提供获取文本高度的接口,需要通过其他方式间接获取。所幸,我还是百度到了一种解决方案(百度打钱_(°:з」∠)_)——通过获取指定范围内的所有像素数据,计算非白色像素点之间的最大高度差值即为文本实际像素高度。说人话就是找出第一个与最后一个非白色像素点,两者所在像素行之间的差值即为文本实际高度。
核心代码如下:
function measureTextHeight(ctx, x, y, width, height) { // 从画布获取像素数据 var data = ctx.getImageData(x, y, width, height).data, first = false, last = false, r = height, c = 0; // 找到最后一行非白色像素 while (!last && r) { r--; for (c = 0; c < width; c++) { if (data[r * width * 4 + c * 4 + 3]) { last = r; break; } } } // 找到第一行非白色像素 while (r) { r--; for (c = 0; c < width; c++) { if (data[r * width * 4 + c * 4 + 3]) { first = r; break; } } if (first != r) return last - first; } return 0;}getImageData()属性:复制画布上指定矩形的像素数据
这种方法简单粗暴,但是局限性也非常明显,先绘制后获取数据等于耍流氓。小伙伴们还有除此之外的方法不妨在评论区探讨一下。
推荐阅读
前端获取微信头像 base64 数据的踩坑实践
使用vue实现HTML页面生成图片
如何实现微信小程序图像剪切?代码拿去用,不谢!

好文我在看?


 3481
3481

 被折叠的 条评论
为什么被折叠?
被折叠的 条评论
为什么被折叠?
 到【灌水乐园】发言


