


 本文介绍了依赖注入(Dependency Injection)的概念,它简化了相互依赖对象的创建。通过一个PHP实现库http://php-di.org/作为参考,文章详细阐述了控制反转的原理,即依赖对象不再由依赖者自行创建,而是由外部传入。同时,文章还探讨了服务定位器模式在Yii2框架中的应用,展示了如何通过配置组件并在需要时通过服务定位器获取它们,这实际上涉及到了依赖注入的实现。
依赖注入(dependency injection)
Inversion of Control Containers and the Dependency Injection
pattern
参考库 http://php-di.org/ ,这是依赖注入的php实现
依赖注入能做什么?
简单地说,可以让相互依赖的对象的创建变得简单。具体可以参考 The Dependency Injection Container for humans
什么是依赖注入?
这里先介绍下控制反转:
控制反转(Inversion of Control,缩写为IoC),是面向对象编程中的一种设计原则,可以用来减低计算机代码之间的耦合度。其中最常见的方式叫做依赖注入(Dependency Injection,简称DI)
依赖注入是控制反转的一种实现方式
具体什么是控制反转呢?
Class A中用到了Class B的对象b,一般情况下,需要在A的代码中显式的new一个B的对象。
采用依赖注入技术之后,A的代码只需要定义一个私有的B对象,不需要直接new来获得这个对象,而是通过相关的容器控制程序来将B对象在外部new出来并注入到A类里的引用中。而具体获取的方法、对象被获取时的状态由配置文件(如XML)来指定。
简单地说,就是当A对象依赖B对象时,传统的做法时在A中new一个B对象,现在改为:在外部先new一个B对象,然后通过class A的构造函数传递给A对象。
回到最开始的问题,关于依赖注入的解释参考:
The Dependency Injection Container for humans
例子:
有个Permission类,依赖一个User对象,
class Permission {
    /**
     * @var User
     */
    public $user;
}
在Yii中可以如下测试:
/**
 * 此时,没有事先关于这个类的_definitions,走$container->build($class, $params, $config)逻辑
 * 顺便解释下:
 * $config参数: $config a list of name-value pairs that will be used to initialize the object properties
 * $params参数:a list of constructor parameter values
 */
$permission = Yii::createObject(Permission::class);
print_r($permission);


Yii::$container->set(Permission::class, [
    'user' => appmodelsUser::findOne(['id' => 2])
]);
/**
 * 此时,有了这个类的_definitions
 * $definition = $this->_definitions[$class]; // 前面$container->set()定义的
 * $config = array_merge($definition, $config);
 * $object = $this->build($class, $params, $config);
 * build()方法的作用: Creates an instance of the specified class.
 * This method will resolve dependencies of the specified class, instantiate them, and inject
 * them into the new instance of the specified class.
 *
 */
$permission = Yii::createObject(Permission::class);
print_r($permission);
服务定位器模式
服务定位器是一个了解如何提供各种应用所需的服务(或组件)的对象。在服务定位器中, 每个组件都只有一个单独的实例,并通过ID 唯一地标识。 用这个 ID 就能从服务定位器中得到这个组件。
服务定位器模式作用以及简单的实现方式:
4.1. Service Locator - DesignPatternsPHP 1.0 documentation
To implement a loosely coupled architecture in order to get better testable, maintainable and extendable code. DI pattern and Service Locator pattern are an implementation of the Inverse of Control pattern.
实现低耦合架构,这个架构可测试、可维护、可扩展
WithServiceLocatoryou can register a service for a given interface. By using the interface you can retrieve the service and use it in the classes of the application without knowing its implementation. You can configure and inject the Service Locator object on bootstrap.
可以获取一个service,而不需要关注他的具体实现
这里结合yii2框架说下服务定位器模式的应用
每个yii2引用,main.php都有一个components配置:
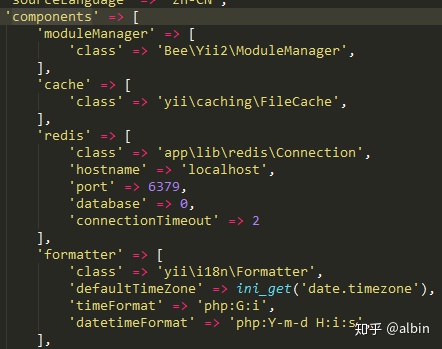
有个这个配置之后,就可以通过
Yii::$app->$componentName 方便地调用一些全局的组件(对象),无需再手动new组件对象。这是怎么做到的呢?
参考 服务定位器(Service Locator)
1、Application类继承自ServiceLocator类
2、yii2应用启动的时候,需要new Application($config),会调用
ServiceLocator的setComponents方法:
public function setComponents($components)
    {
        foreach ($components as $id => $component) {
            $this->set($id, $component);
        }
    }
把components中配置的所有组件,通过id,注册到服务定位器中。
比如当调用Yii::$app->redis的时候,会调用ServiceLocator.php中定义的魔术方法:
public function __get($name)
    {
        if ($this->has($name)) {
            return $this->get($name);
        }

        return parent::__get($name);
    }
即调用$ServiceLocator->get('redis'),get()方法定义如下:
public function get($id, $throwException = true)
{
    if (isset($this->_components[$id])) {
        return $this->_components[$id];
    }

    if (isset($this->_definitions[$id])) {
        $definition = $this->_definitions[$id];
        if (is_object($definition) && !$definition instanceof Closure) {
            return $this->_components[$id] = $definition;
        }

        return $this->_components[$id] = Yii::createObject($definition);
    } elseif ($throwException) {
        throw new InvalidConfigException("Unknown component ID: $id");
    }

    return null;
}
会调用
Yii::createObject([
    'class' => 'applibredisConnection',
    'hostname' => 'localhost',
    'port' => 6379,
    'database' => 0,
    'connectionTimeout' => 2
])
再看看Yii::createObject()的定义:
public static function createObject($type, array $params = [])
    {
        if (is_string($type)) {
            return static::$container->get($type, $params);
        } elseif (is_array($type) && isset($type['class'])) {
            $class = $type['class'];
            unset($type['class']);
            return static::$container->get($class, $params, $type);
        } elseif (is_callable($type, true)) {
            return static::$container->invoke($type, $params);
        } elseif (is_array($type)) {
            throw new InvalidConfigException('Object configuration must be an array containing a "class" element.');
        }

        throw new InvalidConfigException('Unsupported configuration type: ' . gettype($type));
    }
这里其实就调用到依赖注入容器里面的东西了。
到此结束,理清了服务定位器和依赖注入的原理。


 564
564

 被折叠的 条评论
为什么被折叠?
被折叠的 条评论
为什么被折叠?
 到【灌水乐园】发言


