


#查看系统版本和内核
[root@zabbix ~]# cat /etc/redhat-release CentOS Linux release 7.5.1804 (Core) [root@zabbix ~]# uname -r3.10.0-862.el7.x86_64#1.首先进行初始配置
#centos 7 添加阿里云镜像wget -O /etc/yum.repos.d/CentOS-Base.repo http://mirrors.aliyun.com/repo/Centos-7.repoyum install epel-release -y #配置yum仓库 关闭SElinux和iptablessystemctl stop firewalld.servicesystemctl disable firewalld.servicesetenforce 0sed -i 's#SELINUX=enforcing#SELINNUX=disabled#' /etc/selinux/config 安装常用的开发组件yum groups install "Development Tools" -yyum groups info "Development Tools" -y #2.安装zabbix
#增加Zabbix镜像源wget https://repo.zabbix.com/zabbix/4.0/rhel/7/x86_64/zabbix-release-4.0-1.el7.noarch.rpmrpm -ivh https://repo.zabbix.com/zabbix/4.0/rhel/7/x86_64/zabbix-release-4.0-1.el7.noarch.rpm安装Zabbix Server和Frontendyum install zabbix-server-mysql -yyum install zabbix-web-mysql -y#3.安装和配置MySQL
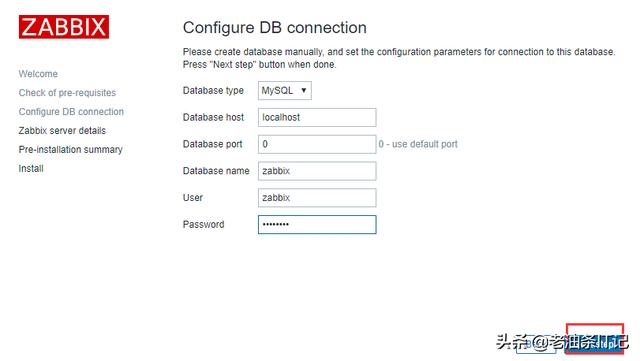
#安装wget http://dev.mysql.com/get/mysql57-community-release-el7-7.noarch.rpmrpm -ivh mysql57-community-release-el7-7.noarch.rpmyum install mysql-community-server -y#配置数据库systemctl start mysqld #启动服务grep password /var/log/mysqld.log #查找出临时密码mysql -uroot -p"t2/w_hWUShT1" #登录数据库mysql> set global validate_password_policy=LOW; #修改密码策略Query OK, 0 rows affected (0.00 sec)mysql> set password for root@localhost=password('guoke123'); #修改密码Query OK, 0 rows affected, 1 warning (0.00 sec)mysql> create database zabbix character set=utf8; #创建utf8字符集的数据库Query OK, 1 row affected (0.00 sec)mysql> grant all privileges on zabbix.* to zabbix@localhost identified by 'guoke123'; #创建用户Query OK, 0 rows affected, 1 warning (0.00 sec)mysql> flush privileges;Query OK, 0 rows affected (0.00 sec)#导入数据结构# zcat /usr/share/doc/zabbix-server-mysql-4.0.18/create.sql.gz | mysql -uroot -p zabbix#4.配置zabbix
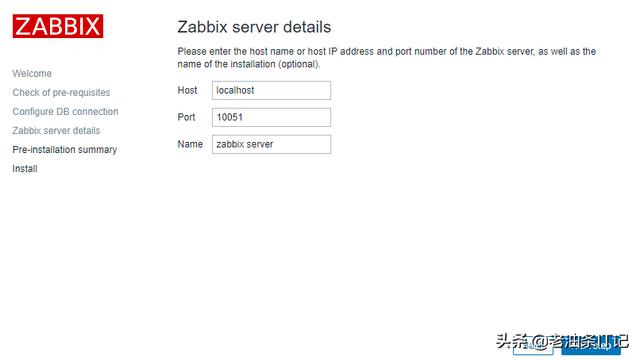
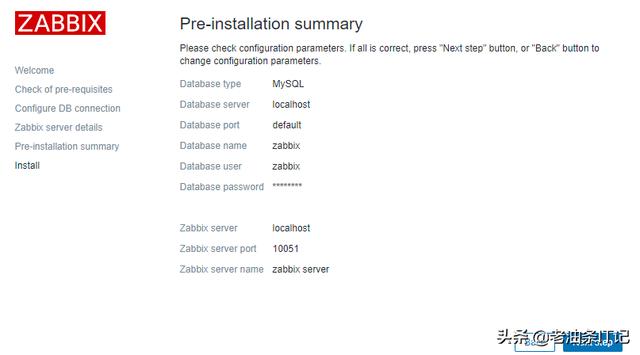
#配置Zabbix Servevim /etc/zabbix/zabbix_server.confDBPassword="guoke123"#启动Zabbix Serversystemctl start zabbix-server.servicesystemctl status zabbix-server.service#日志文件/var/log/zabbix/zabbix_server.log#配置zabbix frontentvim /etc/php.inimax_execution_time = 300memory_limit = 128Mpost_max_size = 16Mupload_max_filesize = 2Mmax_input_time = 300max_input_vars = 10000always_populate_raw_post_data = -1date.timezone = Asia/Shanghai#启动httpdsystemctl start httpd.servicesystemctl status httpd.service#访问
#http://192.168.226.147/zabbix/


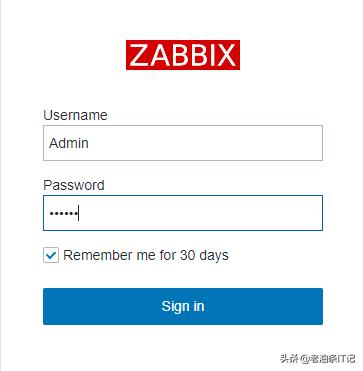
#默认登录用户名和密码
Admin
zabbix
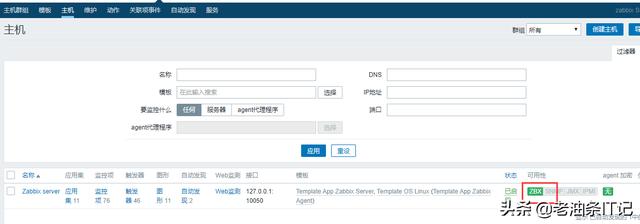
#自己监控自己,安装agent客户端
[root@zabbix yum.repos.d]# yum install zabbix-agent.x86_64 -y[root@zabbix ~]# systemctl start zabbix-agent.service #启动#显示已经监控起自己
#提示:如果重启agent客户端还没有绿起来,可以重启zabbix-server可以快速生效
#获取更多资料,点击更多,关注老油条IT记公众号,一起学习


 1211
1211


 被折叠的 条评论
为什么被折叠?
被折叠的 条评论
为什么被折叠?
 到【灌水乐园】发言


