


在使用 Byzer-python 前,需要 Driver 的节点上配置好 Python 环境 ( Executor 节点可选) 。如果您使用 yarn 做集群管理,推荐使用 Conda 管理 Python 环境(参考Conda 环境安装)。而如果您使用 K8s,则可直接使用镜像管理。
接下来,我们以 Conda 为例,介绍创建 Byzer-python 环境的流程。
1. Python 环境搭建
创建一个名字为 byzerllm-desktop 的 Python 3.10 环境
conda create -n byzerllm-desktop python=3.10激活 byzerllm-desktop 环境
source activate byzerllm-desktop安装基础以下基础依赖包
pandas==1.5.3
pyarrow==11.0.0
aiohttp==3.8.4
ray[default]==2.3.0
pyjava==0.5.0
2. Ray 环境搭建
Ray 是 Byzer 的运行时环境之一。尽管如此,他是可选的。当你有如下需求时:
- 分布式Python处理,或者分布式 Pandas 的能力
- 或者需要 GPU 等资源的管理能力
- 需要大模型等支持
则用户需要部署 Ray 方便 Byzer 使用。
Ray 依赖 Python 环境,需要和前面的环境保持一致。这里直接在 byzerllm-desktop 启动 Ray.
1) 单机启动
ray start --head看到以下日志说明启动成功:

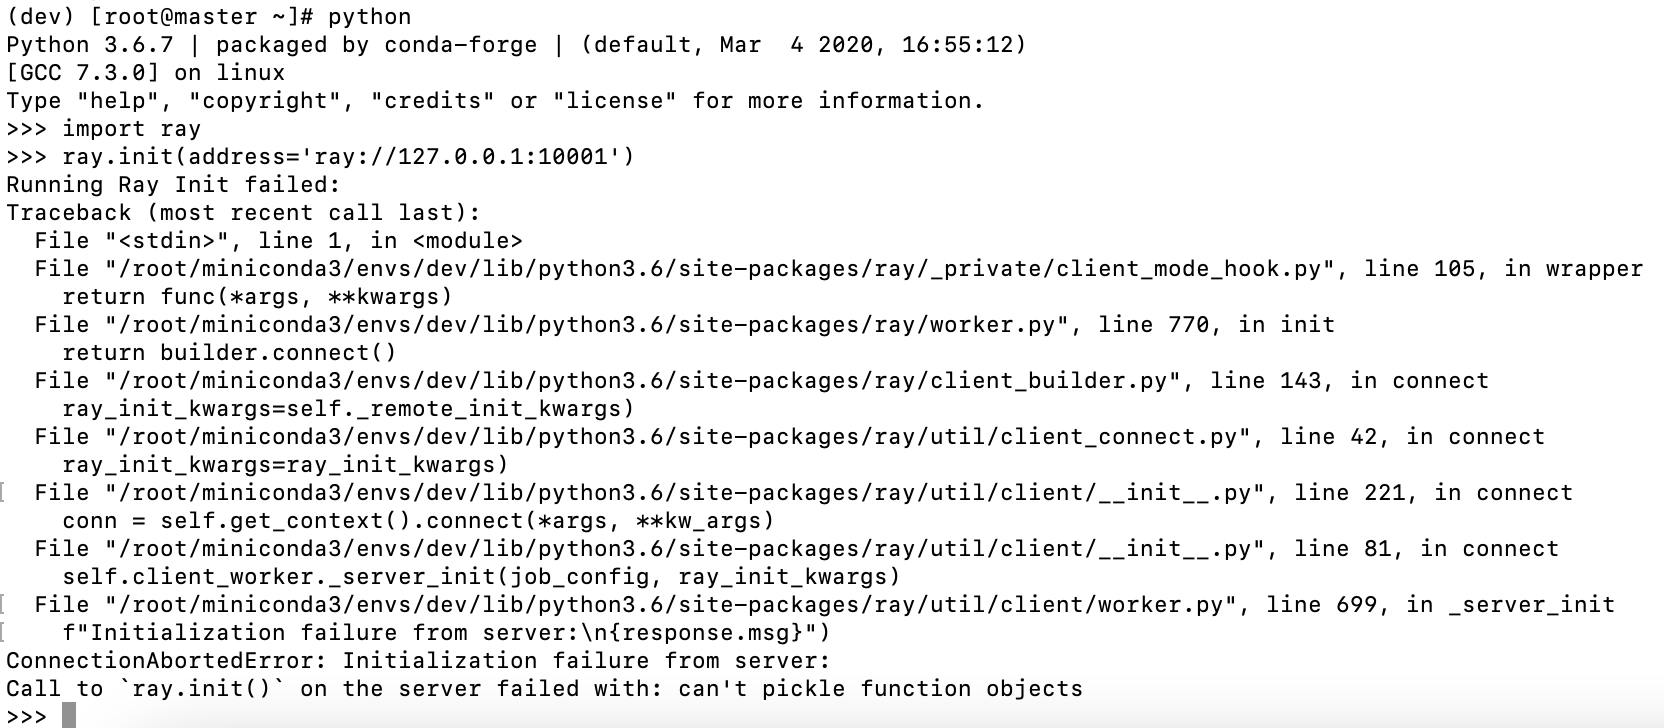
运行上文日志中给出的 Python 代码,测试能否正常连接到 Ray 节点:
import ray
ray.init(address="ray://<head_node_ip_address>:10001")
如果出现下方报错可能是 Conda 虚拟环境版本问题,建议重新安装,更多信息见Ray Issue #19938。
2) 集群启动
在 Head 节点上运行
ray start --headWorker 节点上运行
ray start --address='<head_node_ip_address>:6379' --redis-password='<password>'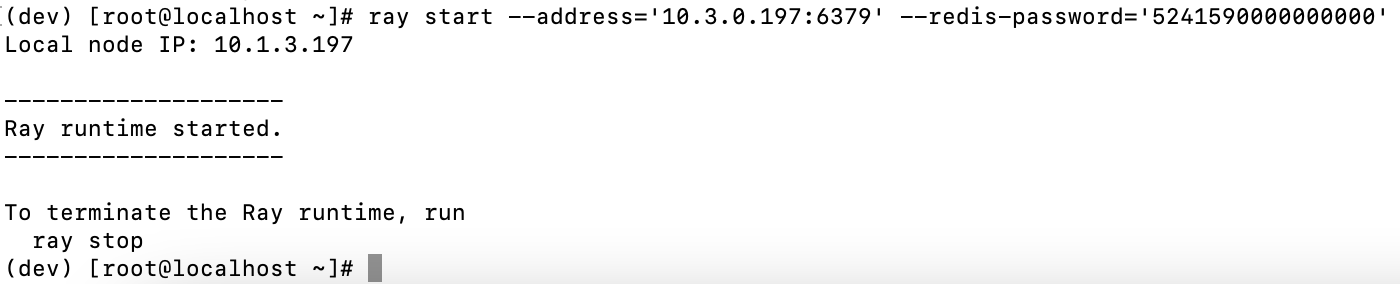
这里只是简单地启动了 Ray 环境,更多配置信息可参考 Ray 官方文档
代码示例
下面是一个使用了Python高阶 API进行对SQL表进行分布式处理的一个示例。您复制黏贴到 Byzer-Notebook中即可执行。
-- 分布式获取 python hello world

set jsonStr='''
{"Busn_A":114,"Busn_B":57},
{"Busn_A":55,"Busn_B":134},
{"Busn_A":27,"Busn_B":137},
{"Busn_A":101,"Busn_B":129},
{"Busn_A":125,"Busn_B":145},
{"Busn_A":27,"Busn_B":60},
{"Busn_A":105,"Busn_B":49}
''';

load jsonStr.`jsonStr` as data;

!python conf "pythonExec=/home/winubuntu/miniconda3/envs/byzerllm-desktop/bin/python";
!python conf "schema=st(field(ProductName,string),field(SubProduct,string))";
!python conf "dataMode=data";
!python conf "runIn=driver";

run command as Ray.`` where
inputTable="data"
and outputTable="python_output_table"
and code='''
from pyjava.api.mlsql import PythonContext,RayContext

# type hint
context:PythonContext = context

ray_context = RayContext.connect(globals(),"127.0.0.1:10001")

def echo(row):
    row1 = {}
    row1["ProductName"]=str(row['Busn_A'])+'_jackm'
    row1["SubProduct"] = str(row['Busn_B'])+'_product'
    return row1

ray_context.foreach(echo)
''';
3. Byzer-python 与 Ray
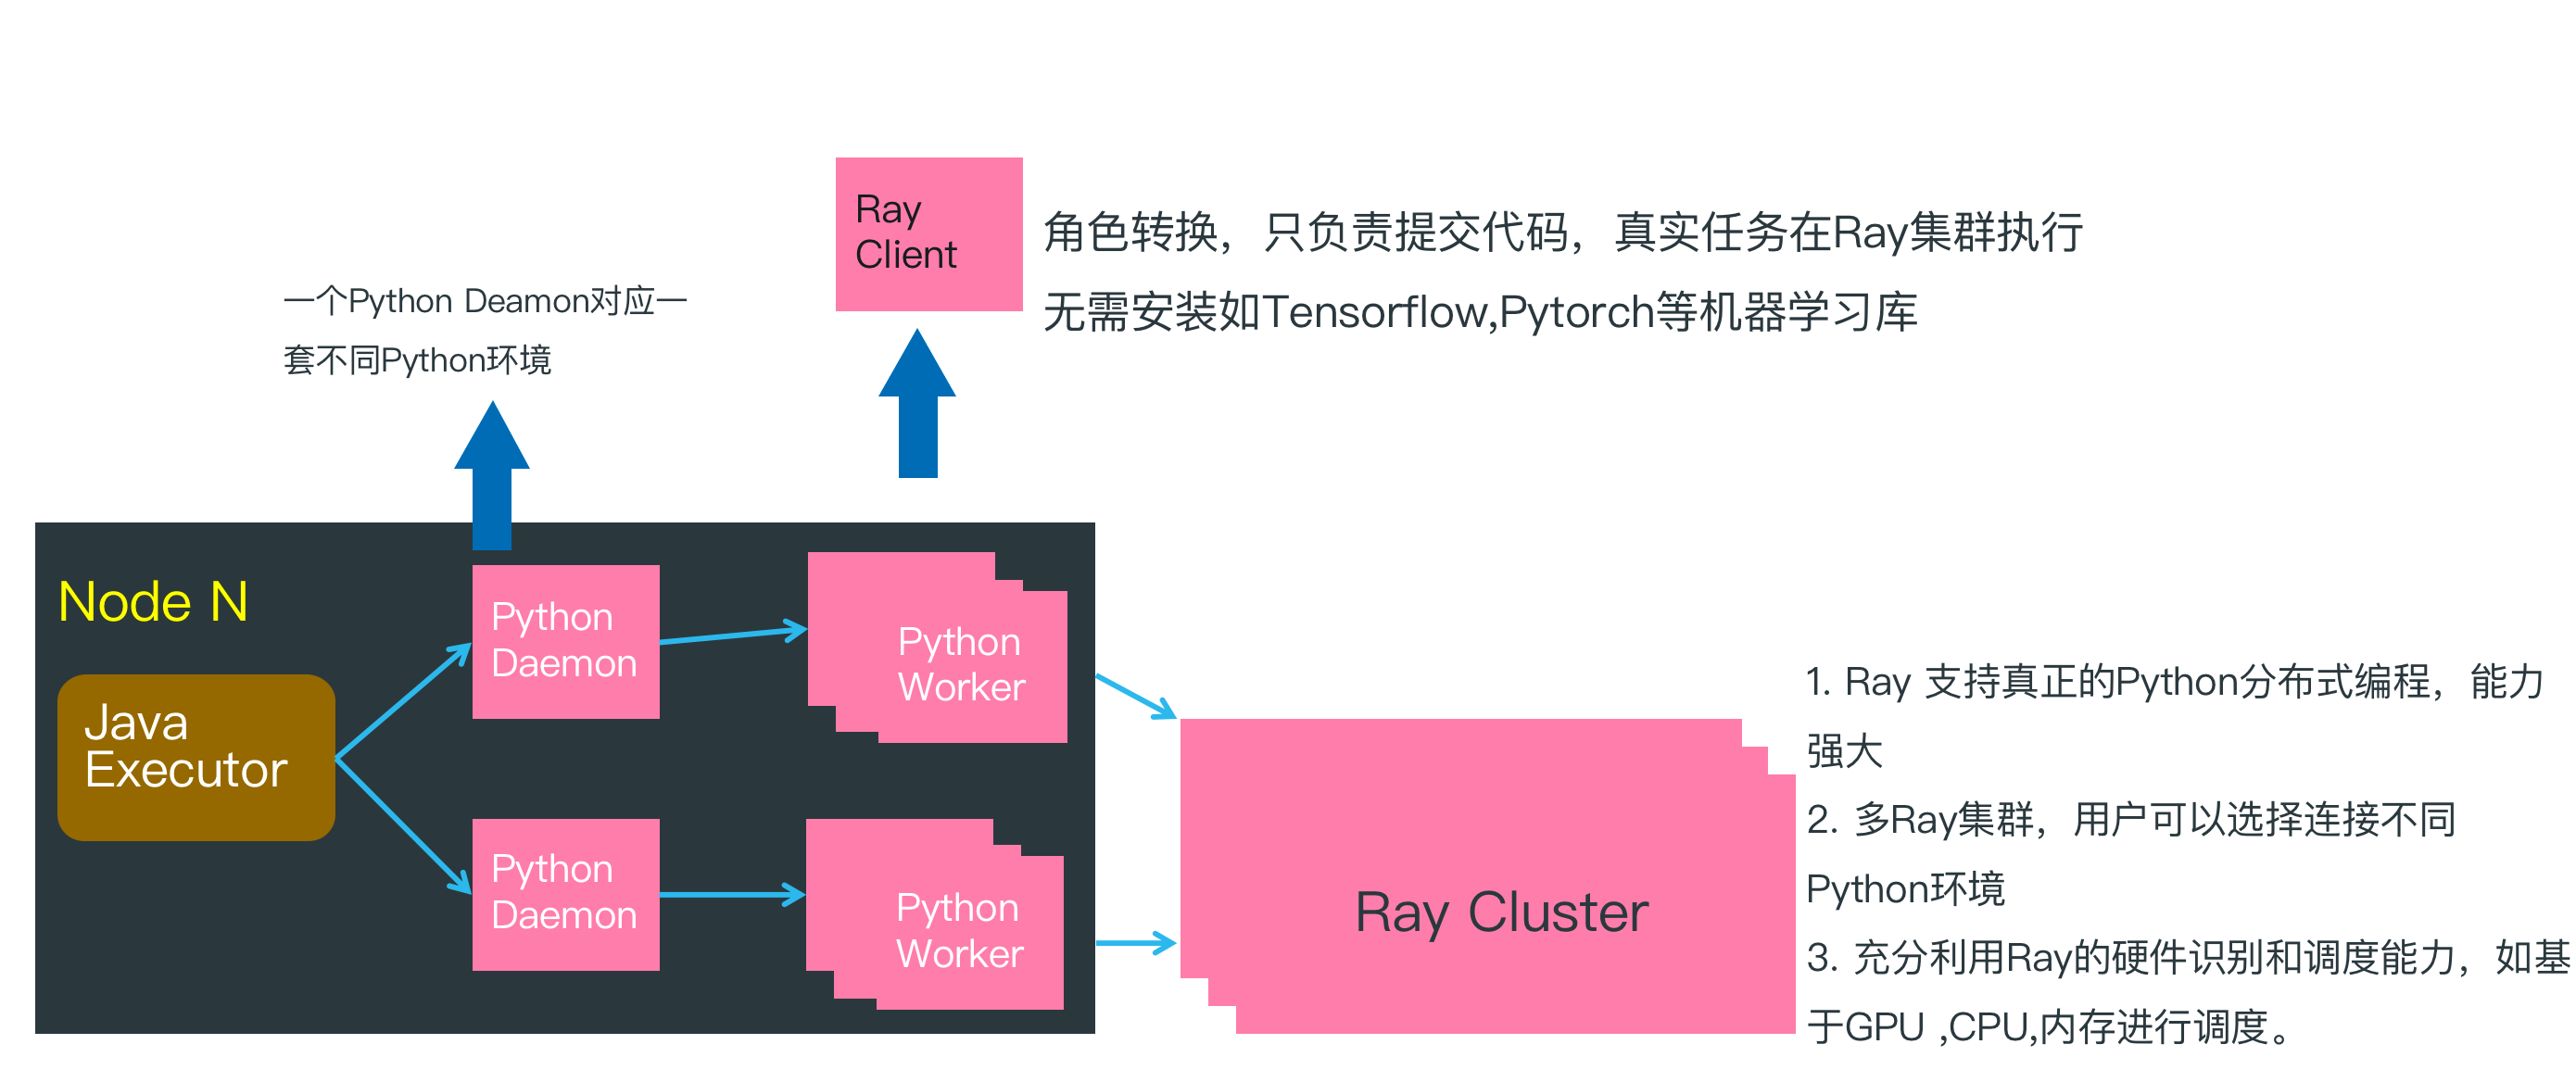
在上一篇 Hello World 例子中, 脚本在 Java Executor节点执行,然后再把 Byzer-python 代码传递给 Python Worker 执行。此时因为没有连接 Ray 集群,所以所有的逻辑处理工作都在 Python Worker 中完成,并且是单机执行。
在上文分布式的 Hello World 示例中, 通过连接 Ray Cluster, Python Worker 转化为 Ray Client,只负责把 Byzer-python 代码转化为任务提交给 Ray Cluster,所以在分布式计算场景下 Python Worker 可以很轻量,除了基本的 Ray,Pyjava 等库以外,不需要安装额外的 Python 依赖库。


 153
153


 被折叠的 条评论
为什么被折叠?
被折叠的 条评论
为什么被折叠?
 到【灌水乐园】发言


