


如今是人工智能时代,人脸识别也是一大应用。我们的手机人脸解锁、火车站人脸识别检票、公积金查询的人脸识别登陆等等,总之,用处很是广泛。那么人脸识别是怎么完成的?这里你肯定要说一些复杂的算法,不用,Python的开源库Face Recognition帮助你实现操作。据说识别率达到99.38%,这肯定是一件很有趣的事情,下面我们来看看如何实现吧。

人工智能时代
在写文章之前,可以说是经历了千辛万苦。因为这个模块的安装很是复杂,到处都是坑,总之,用了大半天的时间才成功导入模块,如果看了本文,有想大胆尝试的小伙伴在安装过程中出现问题了,欢迎私信沟通。
准备工作
- windows10
- Pycharm
- Python
- Visual Studio 2017
- Face Recognition
一、Python安装
这个相对来说最简单的,直接官网下载安装包(win64),然后按照步骤,点击安装,这步简单不多说了。注意的是安装的时候勾选自动添加环境变量,不然解释器没法解释,安装完成就生成了Python解释器。
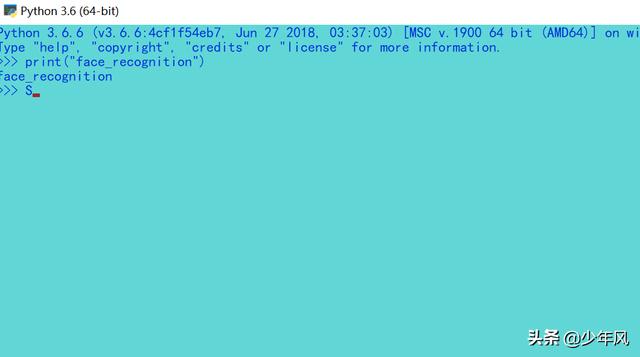
Python解释器
二、Pycharm安装
同上,官网下载安装包后一键安装,选择安装路径。安装完成后有重要的一步就是选择解释器,不然,我们写的代码没有办法运行。
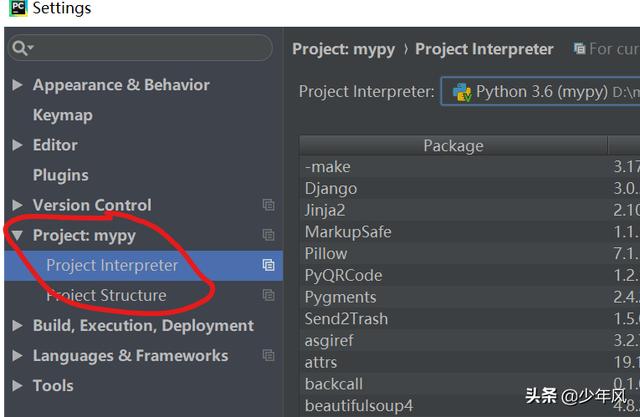
在Pycharm上选择Python解释器
三、Visual Studio 2017安装
我们直接在终端执行pip install face_recognition会报错。报错信息主要就是dlib安装失败,因为face_recognition依赖dlib,而dlib又需要CMake去编译。最可靠的方法我们就是去安装Visual Studio 去解决,我安装的是Visual Studio 2017。安装要注意的是勾选C++相关的选项,因为我们下载的目的就是安装windows版的CMake。这里说一下,VS自带CMake,不需要单独下载。

Visual Studio 2017安装
将VS的库和cl、CMake以及相关头文件加入系统环境变量,否则还会找不到,安装报错。windows添加环境变量这个不难吧。这里涉及到的相关路径如下:
C:Program Files (x86)Microsoft Visual Studio2017CommunityCommon7IDECommonExtensionsMicrosoftCMakeCMakebinC:Program Files (x86)Microsoft Visual Studio2017CommunityVCToolsMSVC14.16.27023binHostx64x64C:Program Files (x86)Microsoft Visual Studio2017CommunityCommon7IDEVCLinuxincludeusrincludeC:Program Files (x86)Microsoft Visual Studio2017CommunityVCAuxiliaryBuildC:Program Files (x86)Microsoft Visual Studio2017CommunityVCToolsMSVC14.16.27023bin当我们在终端输入命令正常执行则安装成功。如下图所示:

cl、CMake安装完毕
开始安装Face Recognition了吗?不,还需要一步,那就是安装boost,官网上进行下载。然后三步执行命令,在执行命令之前,先运行一下vcvars64.bat,文件路径为C:Program Files (x86)Microsoft Visual Studio2017CommunityVCAuxiliaryBuild,然后安装下边的步骤来操作。
- 执行bootstrap.bat
- 执行 b2 install,这步我等了两个小时,请耐心等待!
- 执行 b2 -a --with-python address-model=64 toolset=msvc runtime-link=static
- 将生成的库加入环境变量,我的是C:甥敳獲ZXDDownloadsboost_1_70_0stagelib
- 再次执行vcvars64.bat
四、Face Recognition安装
命令行输入pip install face_recognition安装。我这里是先下载的dlib tar包手动安装完成再安装face_recognition,其实可以直接安装的,只不过速度要快一些,pip搜索到dlib包下载太慢。我的dlib版本是dlib-19.17.0,face_recognition版本是face-recognition-1.3.0。
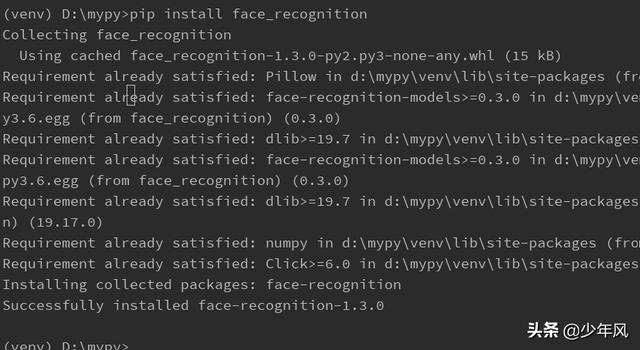
face_recognition成功安装
Face Recognition方法理解
一、将图像文件(.jpg、.png等)加载到numpy数组中
face_recognition.api.load_image_file(file, mode='RGB')
file:要加载的图像文件名或文件对象。
mode:转换图像的格式,仅支持“RGB”(8位RGB,3个通道)和“L”(黑白)。
返回:图像内容作为数字阵列,即元组存储数据。
二、返回图像中人脸的边框数组
face_recognition.api.face_locations(img, number_of_times_to_upsample=1, model='hog')
img: img–图像(作为numpy数组),由load_image_file返回的数据。
number_of_times_to_upsample:对图像进行重新查找脸的次数,次数越大,脸越小。
model:要使用的人脸检测模型。“hog”在CPU上不太准确,但速度更快。“cnn”是一个更精确的深度学习模型,它是GPU/CUDA加速(如果有的话)。默认值是“hog”。
返回:在css(上、右、下、左)顺序中找到的人脸位置的元组列表。
三、给定图像,返回图像中每个人脸的面部特征位置(眼睛、鼻子等)的字典
face_recognition.api.face_landmarks(face_image, face_locations=None, model='large')
face_image:人脸图像–要搜索的图像。
face_locations:面位置–可以选择提供要检查的面位置列表。
model:模型-可选-要使用的模型,“大”(默认)或“小”,只返回5点,但速度更快。
返回:面部特征位置(眼睛、鼻子等)的字典数据。
四、给定一个图像,返回图像中每个面的128维人脸编码
face_recognition.api.face_encodings(face_image, known_face_locations=None, num_jitters=1, model='small')
face_image:人脸图像–包含一个或多个人脸的图像
known_face_locations:已知的面位置-可选-如果您已经知道每个面的边界框。
num_jitters:在计算编码时,要对人脸重新采样多少次。更高更准确,但更慢。
model:模型-可选-要使用的模型,“大”(默认)或“小”,只返回5点,但速度更快。
五、给定一个人脸编码列表,将它们与已知的人脸编码进行比较,距离反映这些脸有多相似
face_recognition.api.face_distance(face_encodings, face_to_compare)
face_encodings:要比较的面编码列表 。
face_to_compare:要与之比较的面部编码。
六、将人脸编码列表与候选编码进行比较,看它们是否匹配
face_recognition.api.compare_faces(known_face_encodings, face_encoding_to_check, tolerance=0.6)
known_face_encodings:已知的人脸编码列表。
face_encoding_to_check:与列表进行比较的单面编码。
tolerance:两个脸编码列表之间的距离。越低越严格。0.6是典型的最佳性能。
返回:一个真/假值列表,指示哪些已知的面部编码与要检查的面部编码匹配。
七、返回使用cnn人脸检测器的图像中的人脸边界框的2d数组如果您使用GPU,这可以给您更快的结果,因为GPU可以同时处理成批图像。如果你不使用GPU,你就不需要这个功能
face_recognition.api.batch_face_locations(images, number_of_times_to_upsample=1, batch_size=128)
images:图像列表(每个都是numpy数组)
number_of_times_to_upsample:对图像进行重新查找脸的次数,次数越大,脸越小。
batch_size:批大小–每个GPU处理批中要包含多少个图像。
返回:在css(上、右、下、左)顺序中找到的面位置的元组列表。
Face Recognition应用
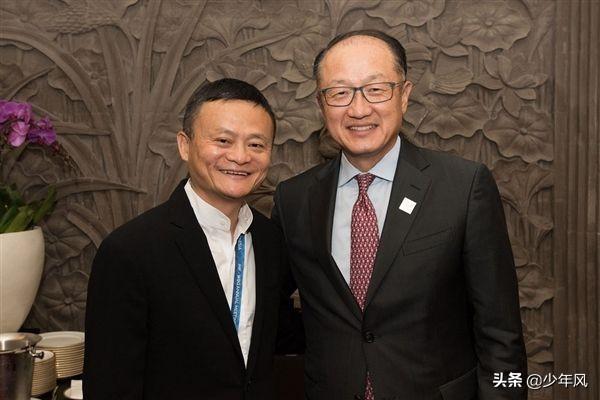
测试用图马云和金墉
上边介绍完API,下面我们就开始这些有趣的实践吧!
一、识别照片中的人脸信息
import face_recognitionimport cv2# 读取图片,返回人脸信息的元组列表img = face_recognition.load_image_file("test.jpg")face_locations = face_recognition.face_locations(img)print(face_locations)返回图像信息为:
# 图片中是两个人,所以出现两个人的信息[(66, 404, 156, 315), (106, 285, 196, 195)]二、人脸识别并显示
这里用到了cv2模块,Python3下载命令为:pip install opencv-python。
import face_recognitionimport cv2# 读取图片并获取人脸的信息img = face_recognition.load_image_file("test.jpg")face_locations = face_recognition.face_locations(img)print(face_locations)# 调用opencv函数显示图片img = cv2.imread("test.jpg")cv2.namedWindow("test")cv2.imshow("test", img)# 遍历每个人脸的信息faceNum = len(face_locations)for i in range(0, faceNum): top = face_locations[i][0] right = face_locations[i][1] bottom = face_locations[i][2] left = face_locations[i][3] start = (left, top) end = (right, bottom) color = (55,255,155) thickness = 3 cv2.rectangle(img, start, end, color, thickness)# 显示识别结果cv2.namedWindow("test_chg")cv2.imshow("test_chg", img)cv2.waitKey(0)cv2.destroyAllWindows()# readme:这里文件窗口名字中文乱码,还在解决中,有解决的,私信一下。输出信息:
[(66, 404, 156, 315), (106, 285, 196, 195)]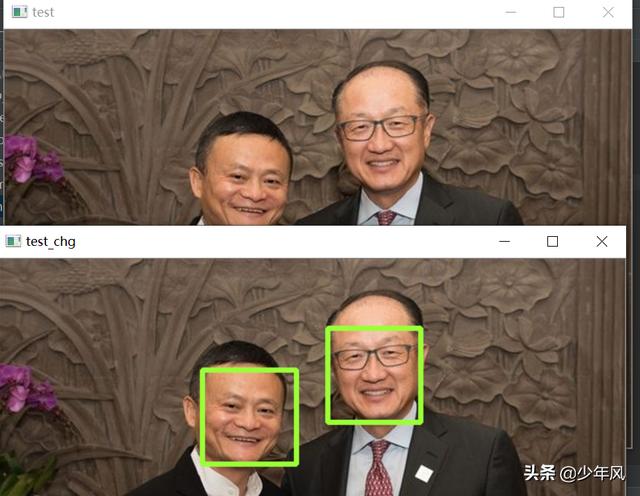
人脸信息获取并显示
三、识别人脸并保存下来
我们给的图中有两张人脸马云和金墉,那么我们就要保存两张图片,这里我们用到了PIL模块。
import face_recognitionfrom PIL import Imageimage = face_recognition.load_image_file("test.jpg")face_locations = face_recognition.face_locations(image)print(face_locations)N = 1for x in face_locations: top, right, bottom, left = x face_image = image[top:bottom, left:right] pil_image = Image.fromarray(face_image) pil_image.save(fp=str(N) + ".jpg") N = N + 1# 保存文件格式以数组开始1.jpg、2.jpg...输出信息:
[(66, 404, 156, 315), (106, 285, 196, 195)]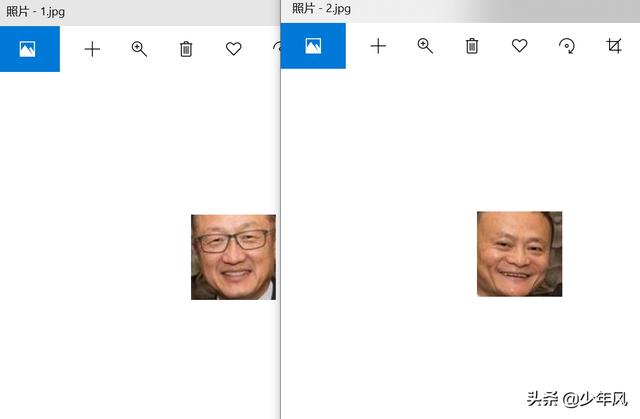
成功获取图片并保存
四、显示人脸中的关键点
from PIL import Image, ImageDrawimport face_recognition# Load the jpg file into a numpy arrayimage = face_recognition.load_image_file("test.jpg")# Find all facial features in all the faces in the imageface_landmarks_list = face_recognition.face_landmarks(image)print("I found {} face(s) in this photograph.".format(len(face_landmarks_list)))# Create a PIL imagedraw object so we can draw on the picturepil_image = Image.fromarray(image)d = ImageDraw.Draw(pil_image)for face_landmarks in face_landmarks_list: # Print the location of each facial feature in this image for facial_feature in face_landmarks.keys(): print("The {} in this face has the following points: {}".format(facial_feature, face_landmarks[facial_feature])) # Let's trace out each facial feature in the image with a line! for facial_feature in face_landmarks.keys(): d.line(face_landmarks[facial_feature], width=5)# Show the picturepil_image.show()输出信息为:
I found 2 face(s) in this photograph.The chin in this face has the following points: [(321, 97), (322, 107), (324, 116), (326, 125), (330, 134), (336, 142), (344, 148), (353, 153), (364, 153), (374, 151), (383, 145), (391, 138), (397, 129), (400, 120), (401, 109), (400, 99), (400, 89)]The left_eyebrow in this face has the following points: [(326, 88), (329, 82), (335, 79), (342, 79), (349, 81)]The right_eyebrow in this face has the following points: [(365, 79), (371, 75), (378, 73), (384, 75), (389, 79)]The nose_bridge in this face has the following points: [(357, 90), (358, 98), (358, 105), (358, 113)]The nose_tip in this face has the following points: [(350, 116), (355, 118), (360, 119), (365, 116), (369, 114)]The left_eye in this face has the following points: [(335, 95), (339, 93), (343, 92), (347, 94), (343, 95), (339, 95)]The right_eye in this face has the following points: [(369, 91), (373, 89), (378, 89), (381, 90), (378, 91), (374, 91)]The top_lip in this face has the following points: [(346, 128), (351, 125), (356, 123), (361, 124), (366, 123), (372, 123), (378, 125), (376, 125), (366, 125), (361, 126), (357, 126), (348, 128)]The bottom_lip in this face has the following points: [(378, 125), (372, 132), (367, 135), (362, 136), (357, 136), (351, 134), (346, 128), (348, 128), (356, 131), (361, 130), (366, 130), (376, 125)]The chin in this face has the following points: [(191, 135), (191, 144), (191, 154), (192, 164), (197, 173), (204, 182), (213, 188), (223, 194), (233, 197), (243, 196), (251, 191), (258, 186), (264, 180), (267, 172), (270, 163), (271, 155), (271, 148)]The left_eyebrow in this face has the following points: [(210, 130), (216, 128), (223, 128), (230, 130), (236, 133)]The right_eyebrow in this face has the following points: [(248, 135), (254, 133), (259, 133), (264, 135), (267, 139)]The nose_bridge in this face has the following points: [(241, 142), (241, 148), (241, 153), (241, 159)]The nose_tip in this face has the following points: [(229, 160), (234, 162), (239, 165), (244, 164), (248, 163)]The left_eye in this face has the following points: [(217, 140), (221, 139), (225, 140), (229, 143), (224, 143), (220, 142)]The right_eye in this face has the following points: [(249, 146), (253, 144), (257, 144), (260, 146), (257, 147), (253, 147)]The top_lip in this face has the following points: [(217, 170), (226, 169), (233, 169), (238, 170), (242, 169), (247, 171), (252, 174), (250, 174), (241, 172), (237, 172), (232, 171), (220, 170)]The bottom_lip in this face has the following points: [(252, 174), (246, 178), (241, 179), (236, 179), (231, 178), (224, 175), (217, 170), (220, 170), (232, 174), (237, 175), (241, 175), (250, 174)]Process finished with exit code 0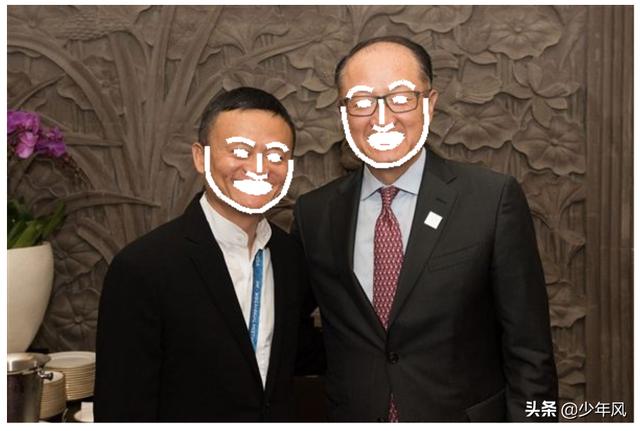
人脸热点描述
五、人脸对比,识别名字
首先我们要先对已知图片编码,获取咱们的编码列表,然后对位置图片编码,最后比对数据。我们的图片信息如下,两张小图是我们上边保存下来的马云和金墉,大图是马云。
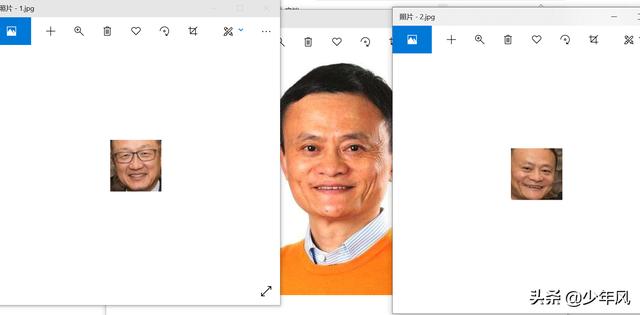
# 先对已知图片编码获得列表信息,再对位置图片编码去比对import face_recognitionjinyong = face_recognition.load_image_file("1.jpg")mayun = face_recognition.load_image_file("2.jpg")unknown = face_recognition.load_image_file("mayun.jpg")jinyong_encoding = face_recognition.face_encodings(jinyong)[0]mayun_encoding = face_recognition.face_encodings(mayun)[0]unknown_encoding = face_recognition.face_encodings(unknown)[0]print(jinyong_encoding,mayun_encoding,unknown_encoding)results = face_recognition.compare_faces([jinyong_encoding, mayun_encoding], unknown_encoding)labels = ['jinyong', 'mayun']print('results:'+str(results))for i in range(0, len(results)): if results[i] == True: print('The person is:'+labels[i])输出信息:
D:mypyvenvScriptspython.exe D:/mypy/face_test/4.py[-6.41071498e-02 4.57859598e-02 5.27002327e-02 -1.40622780e-02 -1.20637275e-01 -2.96903607e-02 -6.10315949e-02 -1.45489812e-01 6.81377351e-02 -1.03024773e-01 1.82645693e-01 -5.69491386e-02 -1.94709033e-01 -1.30582929e-01 -1.54860141e-02 2.23359317e-01 -8.29880983e-02 -1.71079144e-01 -9.91774574e-02 -5.65758422e-02 -1.36728520e-02 -6.98016677e-03 5.01618199e-02 1.07119018e-02 -7.78796300e-02 -3.31336200e-01 -7.85840377e-02 -5.55558018e-02 9.82184857e-02 -8.66466686e-02 -1.07937478e-01 5.98570891e-02 -1.62494466e-01 -6.37969300e-02 6.49503097e-02 1.49020508e-01 -4.13671024e-02 -9.83317718e-02 1.57926977e-01 -2.80774646e-02 -2.13490501e-01 2.28623785e-02 3.33306342e-02 2.42282107e-01 2.57480621e-01 3.89384776e-02 6.57843649e-02 -8.75610039e-02 1.33450106e-01 -1.29126757e-01 5.05320132e-02 9.99446288e-02 5.94070256e-02 5.98248951e-02 1.61938109e-02 -1.01723894e-01 6.15413859e-02 8.69997591e-02 -8.70335102e-02 4.22259700e-03 1.31846875e-01 -1.11113407e-01 -3.80535387e-02 -4.39342186e-02 1.81451827e-01 3.45594890e-04 -9.70682949e-02 -1.99421436e-01 1.02753468e-01 -1.62706479e-01 -7.69117102e-02 -1.35678276e-02 -1.65880203e-01 -7.81732425e-02 -3.37618619e-01 -7.77842477e-04 4.01853502e-01 9.89510417e-02 -1.88209862e-01 7.76859447e-02 -1.07675325e-04 3.19941491e-02 1.38678744e-01 1.36150613e-01 -3.51422839e-03 -2.70695165e-02 -1.50363117e-01 -3.31149548e-02 2.12478399e-01 -8.32761005e-02 -3.36620025e-02 1.27679616e-01 -3.50174755e-02 6.15451820e-02 3.13217826e-02 8.52589905e-02 -1.12792015e-01 6.34636208e-02 -5.33675402e-02 -3.28851342e-02 1.00370340e-01 -6.01078197e-02 3.63541245e-02 1.16832785e-01 -1.08944938e-01 1.84577420e-01 -4.70522158e-02 1.55453429e-01 7.75493532e-02 1.61618181e-02 -1.11461610e-01 -7.27987885e-02 1.04319796e-01 -1.74951047e-01 1.86562717e-01 2.20800981e-01 1.58811510e-02 5.60735799e-02 1.73168510e-01 1.29990846e-01 4.66801878e-03 7.16798604e-02 -1.93709120e-01 -9.04647037e-02 2.04452910e-02 -3.78411263e-04 7.22055808e-02 7.58817568e-02] [-8.48065913e-02 5.62640801e-02 -4.54282612e-02 -7.01875761e-02 -3.85176539e-02 -1.20444089e-01 2.94735283e-02 -1.49563327e-01 9.81603488e-02 -5.40242232e-02 1.91758022e-01 -5.20822741e-02 -8.85962471e-02 -1.15739532e-01 5.99462576e-02 1.43313423e-01 -2.25986883e-01 -1.85569286e-01 -1.02313980e-01 -4.58195172e-02 2.84424182e-02 -3.91752310e-02 3.80685702e-02 -7.79974554e-03 -3.58455628e-02 -2.77811766e-01 -1.21727571e-01 -1.12939991e-01 1.22850440e-01 1.92194451e-02 7.97242969e-02 2.05312893e-02 -2.57476300e-01 -1.03219457e-01 7.48269856e-02 4.87128645e-02 -1.18433256e-02 -8.91066566e-02 2.34010369e-01 -1.86448265e-03 -1.84067756e-01 9.85127129e-03 6.34424165e-02 2.40567043e-01 1.38710812e-01 -1.92360375e-02 5.39230444e-02 -1.03038758e-01 9.69827697e-02 -7.96393007e-02 6.90834075e-02 7.87111819e-02 1.25983536e-01 1.05206512e-01 -2.46933103e-02 -1.23598985e-01 1.27790466e-01 7.98651129e-02 -1.93481371e-01 2.12511490e-03 1.34473607e-01 -6.35540113e-02 -3.77505012e-02 6.65604696e-03 2.41342068e-01 8.09826478e-02 -3.41216810e-02 -2.28545099e-01 1.30753621e-01 -6.16488494e-02 -5.85200042e-02 5.32300808e-02 -1.51226863e-01 -9.01909769e-02 -2.60754555e-01 6.12329505e-03 3.58225465e-01 1.12475688e-02 -1.37932301e-01 5.41652590e-02 -9.81984735e-02 -4.10812395e-03 1.07992843e-01 9.45443884e-02 -6.34822696e-02 6.71573952e-02 -8.88411999e-02 5.14037535e-02 2.07332388e-01 -7.73808435e-02 -9.50397775e-02 1.25408754e-01 -2.88750511e-02 1.03544444e-05 4.77371477e-02 4.29244991e-03 -5.90438675e-03 6.09547943e-02 -1.09203875e-01 -4.06020433e-02 9.69444439e-02 -4.17353734e-02 2.48016440e-03 1.04297072e-01 -1.58170968e-01 9.37378779e-02 1.84830464e-02 3.17053013e-02 -4.55622450e-02 -2.33302396e-02 -3.77600156e-02 -4.12680320e-02 6.87204450e-02 -1.89212754e-01 2.63484925e-01 1.75999597e-01 7.28446711e-03 1.03189275e-01 6.39451370e-02 5.74537441e-02 -1.95968673e-02 -7.49396067e-03 -1.93166435e-01 3.01640597e-03 6.29455522e-02 1.29550666e-01 8.90261009e-02 5.63256368e-02] [-0.08572441 0.06876274 -0.04764109 -0.11493011 -0.02701453 -0.0861344 -0.0122882 -0.14607804 0.13070302 -0.06538121 0.21709172 0.01503999 -0.16653855 -0.10058892 0.05778487 0.13800021 -0.24233022 -0.1776239 -0.0900903 -0.04455275 0.06918941 -0.05691139 0.05978278 0.01879831 -0.10160051 -0.25380772 -0.13918245 -0.08891045 0.07542726 -0.04058303 0.0419238 -0.03509465 -0.27028856 -0.10281393 0.07182063 0.03817703 -0.0373608 -0.07750945 0.2331607 0.01778938 -0.17242573 0.02961051 0.07272886 0.20601627 0.16212469 0.05405843 0.06045298 -0.15432994 0.06631847 -0.11165521 0.08747676 0.10835565 0.11788844 0.09612929 -0.02433744 -0.20647249 0.10077842 0.07662166 -0.1847515 -0.00056439 0.09649776 -0.07057394 -0.04728526 0.01058953 0.22553393 0.1019683 -0.07123996 -0.23352303 0.1327149 -0.06397877 -0.08788677 0.04715944 -0.16408762 -0.12964636 -0.30651119 -0.01646567 0.38484851 0.04264892 -0.15246069 0.06612203 -0.10385856 -0.0010734 0.07060979 0.09746283 -0.10218845 0.0608863 -0.07828135 0.07749923 0.17459843 -0.06044863 -0.10012975 0.09706655 -0.009803 0.05666885 0.06368063 0.03949668 -0.0594545 0.04689715 -0.1347689 -0.05370829 0.05024107 -0.01137399 0.01972833 0.13717225 -0.15737553 0.11478093 0.03044034 -0.04834257 -0.09064103 0.02293721 -0.0590416 -0.04775573 0.04303839 -0.24180904 0.27746281 0.23922367 0.01700981 0.12056382 0.09467486 0.07151601 -0.01650471 0.04228232 -0.20202446 -0.01143393 0.04618327 0.10968567 0.1591796 0.04280829]results:[False, True]The person is:mayun六、摄像头实时识别人脸
首先我们要调用摄像头,然后加载已经存在的图片并编码,与计算机实时获取的图片的编码进行比对去确定是哪个人。
import face_recognitionimport cv2video_capture = cv2.VideoCapture(0) # windows传入0,调起winwods的摄像头mayun = face_recognition.load_image_file("mayun.jpg") # 加载已经存在的马云的图片mayun_face_encoding = face_recognition.face_encodings(mayun)[0] # 对图片进行编码face_locations = []face_encodings = []face_names = []process_this_frame = Truewhile True: ret, frame = video_capture.read() # 计算机实时获取图片 small_frame = cv2.resize(frame, (0, 0), fx=0.25, fy=0.25) #缩小获取的图片 if process_this_frame: face_locations = face_recognition.face_locations(small_frame) face_encodings = face_recognition.face_encodings(small_frame, face_locations) # 对获取的图片进行编码 face_names = [] for face_encoding in face_encodings: match = face_recognition.compare_faces([mayun_face_encoding], face_encoding) #进行比对返回布尔值去判断 if match[0]: name = "mayun" else: name = "unknown" face_names.append(name) process_this_frame = not process_this_frame for (top, right, bottom, left), name in zip(face_locations, face_names): top *= 4 right *= 4 bottom *= 4 left *= 4 cv2.rectangle(frame, (left, top), (right, bottom), (0, 0, 255), 2) cv2.rectangle(frame, (left, bottom - 35), (right, bottom), (0, 0, 255), 2) font = cv2.FONT_HERSHEY_DUPLEX cv2.putText(frame, name, (left+6, bottom-6), font, 1.0, (255, 255, 255), 1) cv2.imshow('Video', frame) # 显示摄像头方框 if cv2.waitKey(1) & 0xFF == ord('q'): # 手动触发关闭 breakvideo_capture.release()cv2.destroyAllWindows()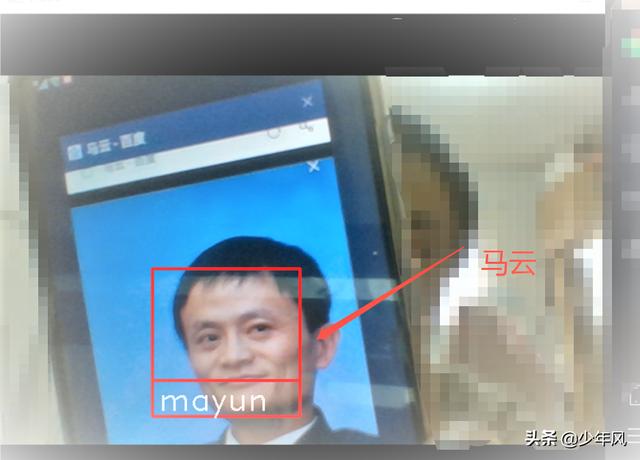
取图片成功识别
到这里就结束了,这几个主要方法都已经操作过了,感兴趣的快动手试试吧。喜欢本文的,动动小手点赞支持一下。

谢谢!


 592
592

 被折叠的 条评论
为什么被折叠?
被折叠的 条评论
为什么被折叠?
 到【灌水乐园】发言


