


为了使机器更智能,开发人员正在研究机器学习和深度学习技术。人类通过反复练习和重复执行任务来学习执行任务,从而记住了如何执行任务。然后,他大脑中的神经元会自动触发,它们可以快速执行所学的任务。深度学习与此也非常相似。它针对不同类型的问题使用不同类型的神经网络体系结构。对象识别,图像和声音分类,对象检测,图像分割等。
什么是手写数字识别?
手写数字识别是计算机识别人类手写数字的能力。对于机器而言,这是一项艰巨的任务,因为手写数字不是完美的,可以用多种方法。手写数字识别是使用数字图像并识别图像中存在的数字的解决方案。
在本文中,我们将使用MNIST数据集实现一个手写数字识别应用程序。我们将使用一种特殊类型的深度神经网络,即卷积神经网络。最后,我们将构建一个GUI,您可以在其中绘制数字并立即识别它。
在这里我们使用Keras库和Tkinter库进行深度学习以构建GUI。
MNIST数据集
这可能是机器学习和深度学习爱好者中最受欢迎的数据集之一。该MNIST数据集包含的手写数字从0到9 60000个训练图像和10,000张进行测试。因此,MNIST数据集具有10个不同的类。手写数字图像表示为28×28矩阵,其中每个单元格都包含灰度像素值。
步骤如下:
1、导入库并加载数据集
首先,我们将导入训练模型所需的所有模块。Keras库已经包含一些数据集,而MNIST是其中之一。因此,我们可以轻松导入数据集并开始使用它。该mnist.load_data()方法返回训练数据,它的标签,也是测试数据和标签。
import kerasfrom keras.datasets import mnistfrom keras.models import Sequentialfrom keras.layers import Dense, Dropout, Flattenfrom keras.layers import Conv2D, MaxPooling2Dfrom keras import backend as K# the data, split between train and test sets(x_train, y_train), (x_test, y_test) = mnist.load_data()print(x_train.shape, y_train.shape)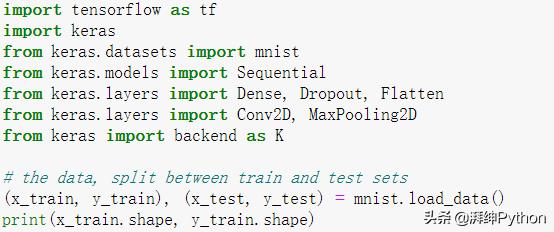
2、预处理数据
图像数据无法直接输入模型中,因此我们需要执行一些操作并处理数据以使其准备好用于神经网络。训练数据的维数为(60000,28,28)。CNN模型将需要一维,因此我们将矩阵重塑为(60000,28,28,1)。
x_train = x_train.reshape(x_train.shape[0], 28, 28, 1)x_test = x_test.reshape(x_test.shape[0], 28, 28, 1)input_shape = (28, 28, 1)# convert class vectors to binary class matricesy_train = keras.utils.to_categorical(y_train, 10)y_test = keras.utils.to_categorical(y_test, 10)x_train = x_train.astype('float32')x_test = x_test.astype('float32')x_train /= 255x_test /= 255print('x_train shape:', x_train.shape)print(x_train.shape[0], 'train samples')print(x_test.shape[0], 'test samples')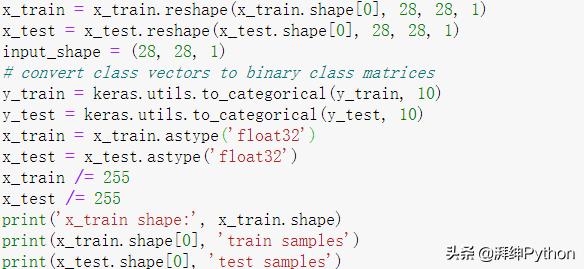
3、创建模型
现在,我们开始创建CNN模型。CNN模型通常由卷积层和池化层组成。它对于以网格结构表示的数据更有效,这就是CNN能够很好地解决图像分类问题的原因。dropout层用于使一些神经元失活,在训练时,它会降低模型的拟合度。然后,我们将使用Adadelta优化器来编译模型。
batch_size = 128num_classes = 10epochs = 10model = Sequential()model.add(Conv2D(32, kernel_size=(3, 3),activation='relu',input_shape=input_shape))model.add(Conv2D(64, (3, 3), activation='relu'))model.add(MaxPooling2D(pool_size=(2, 2)))model.add(Dropout(0.25))model.add(Flatten())model.add(Dense(256, activation='relu'))model.add(Dropout(0.5))model.add(Dense(num_classes, activation='softmax'))model.compile(loss=keras.losses.categorical_crossentropy,optimizer=keras.optimizers.Adadelta(),metrics=['accuracy'])
4、训练模型
Keras的model.fit()函数将开始对模型的训练。它获取训练数据、验证数据、周期和批大小。
训练模型需要一些时间。在培训之后,我们将权重和模型定义保存在“ mnist.h5”文件中。
hist = model.fit(x_train, y_train,batch_size=batch_size,epochs=epochs,verbose=1,validation_data=(x_test, y_test))print("The model has successfully trained")model.save('mnist.h5')print("Saving the model as mnist.h5")
5、评估模型
我们的数据集中有10,000张图像,这些图像将用于评估模型的效果。测试数据不参与数据的训练,因此,这是我们模型的新数据。MNIST数据集平衡良好,因此我们可以获得约99%的准确性。
score = model.evaluate(x_test, y_test, verbose=0)print('Test loss:', score[0])print('Test accuracy:', score[1])
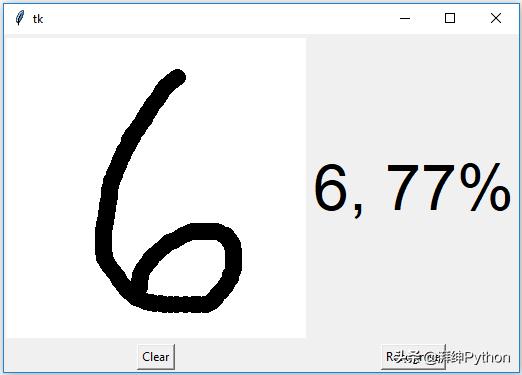
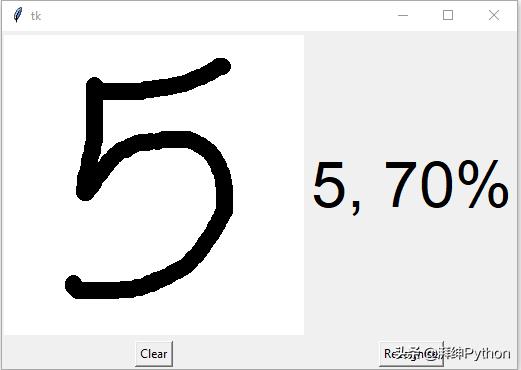
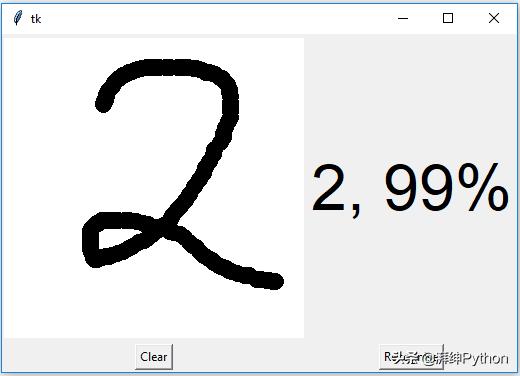
6、创建GUI来预测数字
现在,对于GUI,我们创建了一个新文件,在其中创建了一个交互式窗口以在对话框中绘制数字,并使用按钮可以识别数字。Tkinter库位于Python标准库中。我们创建了一个函数predict_digit(),将图像作为输入,然后使用经过训练的模型来预测数字。
然后,我们创建App类,他负责为我们的应用构建GUI。我们创建一个对话框,在其中可以通过捕获鼠标事件进行绘制,并使用一个按钮来触发predict_digit()函数并显示结果。
以下是完整的gui_digit_recognizer.py文件的代码:
from keras.models import load_modelfrom tkinter import *import tkinter as tkimport win32guifrom PIL import ImageGrab, Imageimport numpy as npmodel = load_model('mnist.h5')def predict_digit(img): #resize image to 28x28 pixels img = img.resize((28,28)) #convert rgb to grayscale img = img.convert('L') img = np.array(img) #reshaping to support our model input and normalizing img = img.reshape(1,28,28,1) img = img/255.0 #predicting the class res = model.predict([img])[0] return np.argmax(res), max(res)class App(tk.Tk): def __init__(self): tk.Tk.__init__(self) self.x = self.y = 0 # Creating elements self.canvas = tk.Canvas(self, width=300, height=300, bg = "white", cursor="cross") self.label = tk.Label(self, text="Thinking..", font=("Helvetica", 48)) self.classify_btn = tk.Button(self, text = "Recognise", command = self.classify_handwriting) self.button_clear = tk.Button(self, text = "Clear", command = self.clear_all) # Grid structure self.canvas.grid(row=0, column=0, pady=2, sticky=W, ) self.label.grid(row=0, column=1,pady=2, padx=2) self.classify_btn.grid(row=1, column=1, pady=2, padx=2) self.button_clear.grid(row=1, column=0, pady=2) #self.canvas.bind("", self.start_pos) self.canvas.bind("", self.draw_lines) def clear_all(self): self.canvas.delete("all") def classify_handwriting(self): HWND = self.canvas.winfo_id() # get the handle of the canvas rect = win32gui.GetWindowRect(HWND) # get the coordinate of the canvas im = ImageGrab.grab(rect) digit, acc = predict_digit(im) self.label.configure(text= str(digit)+', '+ str(int(acc*100))+'%') def draw_lines(self, event): self.x = event.x self.y = event.y r=8 self.canvas.create_oval(self.x-r, self.y-r, self.x + r, self.y + r, fill='black')app = App()mainloop()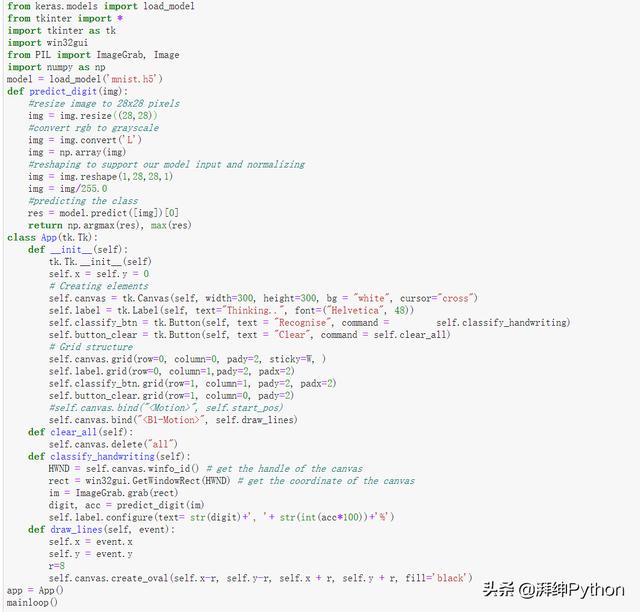
结论
在本文中,我们已经在手写数字识别应用程序上成功构建了我们的项目。我们已经构建并训练了卷积神经网络,该网络对于图像分类非常有效。稍后,我们构建GUI,在对话框上绘制一个数字,然后对数字进行分类并显示结果。
注:如果在运行时出现问题时可以私信给我。


 1139
1139

 被折叠的 条评论
为什么被折叠?
被折叠的 条评论
为什么被折叠?
 到【灌水乐园】发言


