


上一篇文章《什么是linux环境变量》一文中提到,shell在开机启动的时候会读取环境配置文件,将环境变量读取到自己进程的内存空间里,然后由shell创建的子进程就会继承这个shell的环境变量。那么开机启动的时候shell会读取哪些配置文件呢?
总的来讲,shell读取的配置文件主要有两种:
一种是针对系统环境配置的/etc/environment文件和对所有用户生效的全局配置文件/etc/profile;
还有一种是针对不同用户设置的,只对当前登录用户生效的配置文件。这类文件在每个用户的home目录下以隐藏文件的形式存在。在不同的发行版中都是不一样的。例如,在我的mint中是~/.profile,在centos中是~/.bash_profile文件。那么,在开机启动的时候,shell是怎么选择使用哪个配置文件的呢?一般情况,shell会在用户home目录下,按照如下顺序检查三个文件:
1.~/.bash_profile
2.~/.bash_login
3.~/.profile
shell只会读取遇到的第一个存在的文件。例如你的home目录下存在~/.bash_profile和~/.bash_login文件,那么shell只会读取~/.bash_profile,而忽略~/.bash_login。
所以如果我们想对shell进行配置,如果你的配置对系统中的所有用户都生效,那么按照正常的逻辑只需要在/etc/profile文件中配置就好了,如果只想对某个用户生效,那么就在该用户的home目录下修改上述三个配置文件中的一个,通常在mint下是~/.profile,在centos中是~/.bash_profile。
我在mint下查看/etc/profile文件是这样的:
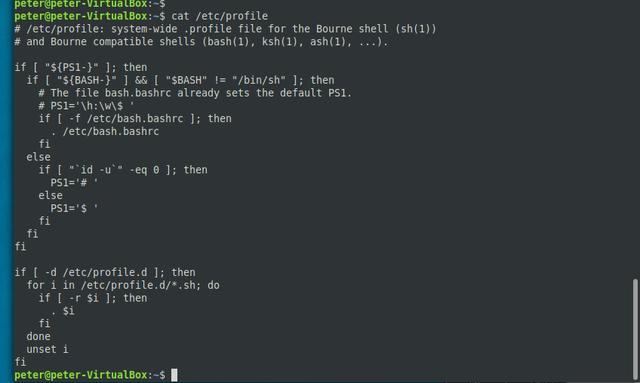
/etc/profile
该文件比较简单,先是对PS1变量进行设置,根据不同的shell,不同的登录用户设置PS1。如果系统bash不是/bin/sh,就会读取/etc/bash.bashrc文件,在该文件中配置PS1变量。
配置完ps1变量后,我们主要关注最后面的这部分代码:
if [ -d /etc/profile.d ]; then
for i in /etc/profile.d/*.sh; do
if [ -r $i ]; then
. $i
fi
done
unset i
fi
这部分代码会遍历/etc/profile.d目录,读取并执行该目录下所有的.sh文件。所以刚才我说如果你想让配置对系统中所有的用户都生效,按照正常的逻辑只需要修改/etc/profile文件就好了。其实这样做是有问题的,更好的方法是在/etc/profile.d目录下创建自己的配置文件。
我们再来看一下centos下的/etc/profile文件,该文件截图不方便,我将整个源码粘贴过来:
[root@pozoko ~]# cat /etc/profile
# /etc/profile
# System wide environment and startup programs, for login setup
# Functions and aliases go in /etc/bashrc
# It's NOT a good idea to change this file unless you know what you
# are doing. It's much better to create a custom.sh shell script in
# /etc/profile.d/ to make custom changes to your environment, as this
# will prevent the need for merging in future updates.
pathmunge () {
case ":${PATH}:" in
*:"$1":*)
;;
*)
if [ "$2" = "after" ] ; then
PATH=$PATH:$1
else
PATH=$1:$PATH
fi
esac
}
if [ -x /usr/bin/id ]; then
if [ -z "$EUID" ]; then
# ksh workaround
EUID=`/usr/bin/id -u`
UID=`/usr/bin/id -ru`
fi
USER="`/usr/bin/id -un`"
LOGNAME=$USER
MAIL="/var/spool/mail/$USER"
fi
# Path manipulation
if [ "$EUID" = "0" ]; then
pathmunge /usr/sbin
pathmunge /usr/local/sbin
else
pathmunge /usr/local/sbin after
pathmunge /usr/sbin after
fi
HOSTNAME=`/usr/bin/hostname 2>/dev/null`
HISTSIZE=1000
if [ "$HISTCONTROL" = "ignorespace" ] ; then
export HISTCONTROL=ignoreboth
else
export HISTCONTROL=ignoredups
fi
export PATH USER LOGNAME MAIL HOSTNAME HISTSIZE HISTCONTROL
# By default, we want umask to get set. This sets it for login shell
# Current threshold for system reserved uid/gids is 200
# You could check uidgid reservation validity in
# /usr/share/doc/setup-*/uidgid file
if [ $UID -gt 199 ] && [ "`/usr/bin/id -gn`" = "`/usr/bin/id -un`" ]; then
umask 002
else
umask 022
fi
for i in /etc/profile.d/*.sh /etc/profile.d/sh.local ; do
if [ -r "$i" ]; then
if [ "${-#*i}" != "$-" ]; then
. "$i"
else
. "$i" >/dev/null
fi
fi
done
unset i
unset -f pathmunge
在该文件中也主要是设置几个主要的环境变量PATH、USER、LOGNAME、MAIL、HOSTNAME、HISTSIZE、HISTCONTROL,根据不同的用户权限设置文件掩码,在文件的最后,同样是遍历/etc/profile.d目录下的sh文件。
在文件的开头有如下注释:
# It's NOT a good idea to change this file unless you know what you
# are doing. It's much better to create a custom.sh shell script in
# /etc/profile.d/ to make custom changes to your environment, as this
# will prevent the need for merging in future updates.
意思是不建议我们直接修改该文件,最好是在/etc/profile.d/目录下建立自己的sh文件。这样做的好处是,如果你在这个文件中做了修改,那么如果下次你对系统做了升级,你做的修改就会被覆盖掉。
我们再来查看下用户家目录下的配置文件,在mint下我的配置文件是~/.profile。该文件源码如下:
# ~/.profile: executed by the command interpreter for login shells.
# This file is not read by bash(1), if ~/.bash_profile or ~/.bash_login
# exists.
# see /usr/share/doc/bash/examples/startup-files for examples.
# the files are located in the bash-doc package.
# the default umask is set in /etc/profile; for setting the umask
# for ssh logins, install and configure the libpam-umask package.
#umask 022
# if running bash
if [ -n "$BASH_VERSION" ]; then
# include .bashrc if it exists
if [ -f "$HOME/.bashrc" ]; then
. "$HOME/.bashrc"
fi
fi
# set PATH so it includes user's private bin if it exists
if [ -d "$HOME/bin" ] ; then
PATH="$HOME/bin:$PATH"
fi
# set PATH so it includes user's private bin if it exists
if [ -d "$HOME/.local/bin" ] ; then
PATH="$HOME/.local/bin:$PATH"
fi
该文件主要读取home目录下的.bashrc文件,然后如果你的目录下面有bin目录或者/.local/bin目录,就会将这两个目录添加到PATH环境变量中。所以如果你有自己的程序需要运行,但是又不想将可执行文件放在系统目录下,就可以在自己的home目录下面建立bin目录或者/.local/bin目录,然后将可执行文件放在这个目录下,就可以像执行命令一样运行你的测试程序了。
我们再来看一下该文件开头的注释部分:
# ~/.profile: executed by the command interpreter for login shells.
# This file is not read by bash(1), if ~/.bash_profile or ~/.bash_login
# exists.
这句话的意思是~/.profile文件会由登录shell执行,如果~/.bash_profile 或者 ~/.bash_login存在,那么shell就不会读取该文件了。这也应证了我前面提到的shell对home目录下三个文件的处理顺序。
再来看一下centos下的~/.bash_profile文件:
# .bash_profile
# Get the aliases and functions
if [ -f ~/.bashrc ]; then
. ~/.bashrc
fi
# User specific environment and startup programs
PATH=$PATH:$HOME/bin
export PATH
该文件和mint下的文件一样,同样会读取home目录下的.bashrc文件,然后将home目录下的~/bin 目录追加到环境变量PATH中。
通过mint和centos两个发行版的对比,我们发现不管家目录下是什么文件,最后都会执行~/.bashrc文件。
所以如果你想对某个用户shell进行配置,也可以在~/.bashrc文件中进行配置。在该文件中所作的配置不需要重新登录就可以生效,只需要执行. ~/.bashr或者重新打开一个shell就可以了。这是为什么呢?我们在mint下打开~/.bashrc文件,最前面有这样一行注释:
~/.bashrc: executed by bash(1) for non-login shells.
我们之前在 ~/.profile文件中也见过类似的注释:
~/.profile: executed by the command interpreter for login shells.
~/.bashrc是由non-login shells执行,而~/.profile是由login shells执行。什么是non-login shells和login shells呢?其实很简单,通过登录后取得shell就是登录shell,比如开机启动登录后获取的就是登录shell,通过ssh远程登录获取的shell也是登录shell。那什么是非登录shell呢?非登录shell就是你开机登录以后,自己手动启动的shell就是非登录shell了,比如在mint图形界面下,通过terminal打开的就是非登录shell了。你在登录shell里面再次执行的shell,比如直接敲bash命令,这样进入的也是非登录shell。
上面的注释简单的理解就是:登录shell会执行所有的配置文件,非登录shell只会执行~/.bashrc文件。
这里既然提到了登录shell和非登录shell,这里就顺便再提一下交互式shell和非交互式shell,因为如果你仔细查看shell配置文件的话,就会看到有些地方会提到交互式shell和非交互式shell,大部分情况下你只要能看到shell的提示符,可以敲命令,那么就是在shell的交互式模式下。如果你执行了一个shell脚本,那么这个脚本就是在shell的非交互模式下运行的。既然是非交互式shell,所以那些你肉眼能看到效果的变量其实也就没必要配置了,比如PS1,所以你会在配置文件的某个角落看到这样一句[ -z "$PS1" ] && return,意思就是如果是非交互式shell,就直接撂挑子退出了,因为你都看不到,配置还有个毛用。
在不同的发行版下,~/.bashrc又会调用其他的文件,比较特殊的是centos下~/.bashrc又会执行/etc/bashrc文件。代码如下:
# .bashrc
# User specific aliases and functions
alias rm='rm -i'
alias cp='cp -i'
alias mv='mv -i'
# Source global definitions
if [ -f /etc/bashrc ]; then
. /etc/bashrc
fi
这些文件限于篇幅就不继续往下追踪了,基本都是对几个变量还有一些命令别名的配置。有兴趣的大家可以顺着源码继续往下探索。不过到这里,基本也算是把整个脉络梳理的差不多了。
通过上面对配置文件源码的分析,我们大概可以总结出shell读取配置文件的顺序如下(从左到右,从上到下):
/etc/profile--->/etc/profile.d/*sh--->/etc/locale.conf
~/.bash_profile || ~/.bash_login || ~/.profile --->~/.bashrc --->(仅限centos) /etc/bashrc
这些配置文件大部分都是配置系统变量,也有一些是配置命令别名的。这里要注意,我说系统变量,没有说系统环境变量,因为有些不一定是环境变量,比如PS1(诡异懵逼的笑)。
所以如果想配置环境变量只需要在/etc/profile.d/目录下建立自己的sh文件,然后写上自己的配置,这是针对所有用户的配置。然后如果只是针对某个用户进行配置,就到这个用户的home目录下,在~/.bash_profile 、 ~/.bash_login、~/.profile、~/.bashrc任意一个文件中添加自己的配置就好了。
这里要注意的一点是,很多人在/etc/profile.d/目录下做了一些配置,但是在开机启动后并没有生效,这很有可能是后面的配置文件又重新对某个变量做了配置,把之前的配置覆盖掉了。比如在home目录下又对该变量进行了配置。
除了在上述提到的配置文件中配置环境变量,我们还可以直接在命令行中配置环境变量,直接在命令行中配置的环境变量,在重新开机后就会消失,只适合用于临时性的测试。
由于时间仓促,本篇文章并没有手把手教你怎么配置环境变量,只是和大家一起缕清楚了在哪里可以配置环境变量,也没有说明变量和环境变量(export)的区别。如果有没有说明白的地方,欢迎关注本人公众号,也可留言讨论。本人水平有限,欢迎批评指正。


 1530
1530

 被折叠的 条评论
为什么被折叠?
被折叠的 条评论
为什么被折叠?
 到【灌水乐园】发言


