


准备工作
首先你需要准备以下一些东西:
1、PowerShell 7.x
2、Scoop
3、一款你喜欢的 NerdFont
4、Windows Terminal(微软商店下载,非必需)
在上述软件/字体都安装好之后,你需要在 PowerShell 里执行一下策略:
Set-ExecutionPolicy RemoteSigned -Scope CurrentUser之后,我们就可以开始我们的美化操作了。
安装 oh-my-posh
第一步是安装 oh-my-posh,我们可以简单地用 Scoop 安装:
scoop install https://github.com/JanDeDobbeleer/oh-my-posh3/releases/latest/download/oh-my-posh.json我们安装的版本是 oh-my-posh 3,它能够给我们的 PowerShell 提供一个非常好看的样式。
用 Scoop 安装好之后,我们打开 PowerShell,键入如下内容:
notepad $profile打开Profile文件进行编辑,下面是 oh-my-posh 3 官方给出的一个参考配置:
[ScriptBlock]$Prompt = {
    $lastCommandSuccess = $?
    $realLASTEXITCODE = $global:LASTEXITCODE
    $errorCode = 0
    if ($lastCommandSuccess -eq $false) {
        #native app exit code
        if ($realLASTEXITCODE -is [int]) {
            $errorCode = $realLASTEXITCODE
        }
        else {
            $errorCode = 1
        }
    }
    $startInfo = New-Object System.Diagnostics.ProcessStartInfo
    $startInfo.FileName = "C:toolsoh-my-posh.exe"
    $cleanPWD = $PWD.ProviderPath.TrimEnd("")
    $startInfo.Arguments = "-config=""$env:USERPROFILE.poshthemesjandedobbeleer.omp.json"" -error=$errorCode -pwd=""$cleanPWD"""
    $startInfo.Environment["TERM"] = "xterm-256color"
    $startInfo.CreateNoWindow = $true
    $startInfo.StandardOutputEncoding = [System.Text.Encoding]::UTF8
    $startInfo.RedirectStandardOutput = $true
    $startInfo.UseShellExecute = $false
    if ($PWD.Provider.Name -eq 'FileSystem') {
      $startInfo.WorkingDirectory = $PWD.ProviderPath
    }
    $process = New-Object System.Diagnostics.Process
    $process.StartInfo = $startInfo
    $process.Start() | Out-Null
    $standardOut = $process.StandardOutput.ReadToEnd()
    $process.WaitForExit()
    $standardOut
    $global:LASTEXITCODE = $realLASTEXITCODE
    #remove temp variables
    Remove-Variable realLASTEXITCODE -Confirm:$false
    Remove-Variable lastCommandSuccess -Confirm:$false
}
Set-Item -Path Function:prompt -Value $Prompt -Force把这一大段先复制粘贴进去,需要注意的是这里面有一个oh-my-posh.exe的路径,还有一个主题文件,也就是jandedobbeleer.omp.json,由于我们是通过 Scoop 安装的,这两个路径实际上不存在。
我们需要手动把这两个路径改一下。
oh-my-posh.exe的位置:
C:Users[USER]scoopappsoh-my-poshcurrentoh-my-posh.exe注意其中的[USER]对应你当前的 Windows 用户,Scoop 安装的东西都在你的 Windows 用户文件夹下面。
主题文件jandedobbeleer.omp.json的位置:
C:Users[USER]scoopappsoh-my-poshcurrentthemesjandedobbeleer.omp.json这个主题文件你是可以自行配置的,虽然工具作者说默认主题满足大多数用户的需要,但是我个人认为它的一些 segments 有些多余。
下面是我自己调的一个配置:
{
  "blocks": [
    {
      "type": "prompt",
      "alignment": "left",
      "segments": [
        {
          "type": "session",
          "style": "diamond",
          "foreground": "#ffffff",
          "background": "#c386f1",
          "leading_diamond": "uE0B6",
          "trailing_diamond": "uE0B0"
        },
        {
          "type": "path",
          "style": "powerline",
          "powerline_symbol": "uE0B0",
          "foreground": "#ffffff",
          "background": "#ff479c",
          "properties": {
            "prefix": " uE5FF ",
            "style": "agnoster_full"
          }
        },
        {
          "type": "git",
          "style": "powerline",
          "powerline_symbol": "uE0B0",
          "foreground": "#193549",
          "background": "#fffb38",
          "properties": {
            "display_status": false,
            "display_status_detail": false,
            "display_stash_count": true,
            "display_upstream_icon": true
          }
        },
        {
          "type": "root",
          "style": "powerline",
          "powerline_symbol": "uE0B0",
          "foreground": "#ffffff",
          "background": "#ffff66"
        },
        {
          "type": "exit",
          "style": "diamond",
          "foreground": "#ffffff",
          "background": "#2e9599",
          "leading_diamond": "",
          "trailing_diamond": "uE0B4",
          "properties": {
            "display_exit_code": false,
            "always_enabled": false,
            "error_color": "#f1184c",
            "color_background": true,
            "prefix": "<transparent>uE0B0</> uE23A"
          }
        }
      ]
    }
  ],
  "final_space": true
}
配置完成后在 PowerShell 里输入. $profile就可以看到效果,如果你是在 VSCode 或者命令行窗口里使用,出于渲染的问题,你看到的效果可能会有一些怪,在 Windows Terminal 下总体的效果是最好的,这里推荐使用 Windows Terminal。
为了能够正确显示 Powerline,你需要给你使用的 Terminal 配上合适的字体,也就是之前安装的 NerdFont。
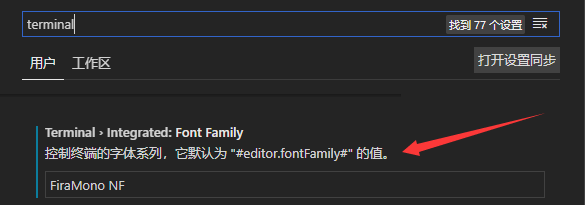
比如在 VSCode 里,你需要设置一下 Terminal 的 Font Family:
到这里第一步美化结束。
这里附上 oh-my-posh 的官方文档,你可以对照文档调整你自己的主题配置:
Oh my Posh 3 Docs
安装 PSReadLine
PowerShell/PSReadLine
第二个需要安装的东西叫 PSReadLine,你可以选择性地安装预览版或者稳定版,这里我个人推荐安装预览版。
Install-Module PSReadLine -AllowPrerelease -Force在 PowerShell 里执行这一行就可以进行安装,安装完成后我们需要再次通过notepad $profile进行一些设置。
我们在 Profile 里面增加下面这些内容:
Import-Module PSReadLine
Set-PSReadLineOption -PredictionSource History
# 下面是三条是文档里推荐的,根据自己的习惯决定是否添加
Set-PSReadLineKeyHandler -Key UpArrow -Function HistorySearchBackward
Set-PSReadLineKeyHandler -Key DownArrow -Function HistorySearchForward
Set-PSReadLineKeyHandler -Key Tab -Function Complete
添加好之后我们就可以基于历史执行过的命令来进行一些快速的命令补全。
除此之外你还可以定义一些快捷键,你可以根据自己的习惯来设置,比如我希望 Ctrl+G 是菜单命令补全,那我可以添加这样一行:
Set-PSReadLineKeyHandler -Key "Ctrl+g" -Function MenuComplete具体可以对照 PSReadLine 的文档来配置。
安装 posh-git
这个东西是专门针对git做的命令补全模块。
dahlbyk/posh-git
安装方法也很简单,执行下面这一条命令即可:
Install-Module posh-git -Scope CurrentUser -AllowPrerelease -Force然后你只需要在 Profile 里引入就好了:
Import-Module posh-git安装 npm-completion(非必需)
对于前端开发者,你可能需要 npm-completion。
PowerShell-Completion/npm-completion
安装方式一样很简单,和 posh-git 差不多:
Install-Module npm-completion -Scope CurrentUser然后在Profile里引入:
Import-Module npm-completion如果你用的不是npm,而是yarn,那么你也可以安装一个posh-yarn-completion。
其他
到这里我们的美化基本上就结束了,在 GitHub 上还有一些其他项目,比如 Docker 的补全matt9ucci/DockerCompletion,这些你都可以根据自己的实际需要安装。
最后上个效果图:


 904
904


 被折叠的 条评论
为什么被折叠?
被折叠的 条评论
为什么被折叠?
 到【灌水乐园】发言


