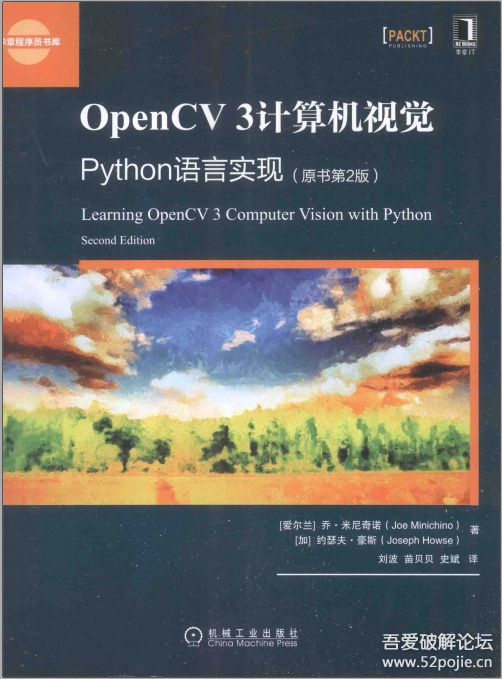
因为要做的项目,只能从小白开始学习,感觉知乎上大神的一些推荐离我还是有点遥远,于是想从自己小白学习开始记录方便给更多的人来参考。
(后来发现网上有学习笔记有梦放飞 - 博客园,更系统,不过我还是会坚持自己的记录)
首先花了几天简单的学习了下python,不深入,但是安装了anaconda这个应用,这个应用配置opencv环境简直不要太方便!!!网上有安装教程。也可以按照书上配置。
# -*- coding: utf-8 -*-
opencv Python书2.1.1+2.1.2
"""
import cv2
import numpy as np
import os
#创建一个矩阵作为图像,默认灰度图单通道
img_1=np.zeros((3,3),dtype=np.uint8)
#图像转化为BGR三通道
img_3=cv2.cvtColor(img_1,cv2.COLOR_GRAY2BGR)
#查看图像信息:(行,列,通道数)img.shape
image=cv2.imread('1.jpg')#默认以BGR三通道形式读取,会删除透明度信息
cv2.imwrite('mypic.png',image)#图像要求BGR或者灰度形式
grayImage=cv2.imread('1.jpg',cv2.IMREAD_GRAYSCALE)#以灰度图形式读取图像
cv2.imwrite('mygray.jpg',grayImage)#存储结果是灰度图
byteArray=bytearray(img_1)#转化成一维的bytearray格式
#一定格式的bytearry转化成图像的例子
#120000比特的随机数列
randomByteArray=bytearray(os.urandom(120000))
flatNumpyArray=np.array(randomByteArray)
#将单列矩阵转化为400*300灰度图
grayImage=flatNumpyArray.reshape(300,400)#注意这里是300行400列的图,即长400宽300
cv2.imwrite('RandomGray.png',grayImage)
#将此矩阵转化为400*100的三通道彩色图
bgrImage=flatNumpyArray.reshape(100,400,3)
cv2.imwrite('bgrImage.png',bgrImage)
#正常简要的随机生成的语句
grayImage_2=np.random.randint(0,256,120000).reshape(300,400)
cv2.imwrite('RandomGray_2.png',grayImage_2)
接下来是2.1.3的代码,每个注释之间是单独可以运行的代码,注意import包
# -*- coding: utf-8 -*-
"""
2.1.3使用numpy.array访问图像数据
"""
import cv2
import numpy as np
"""
#改变单个像素为白色
img=np.zeros((30,30),dtype=np.uint8)
img=cv2.cvtColor(img,cv2.COLOR_GRAY2BGR)
cv2.imwrite('random.png',img)
img_1=cv2.imread('random.png')
img_1[0,0]=[255,255,255]#不会改变原图
cv2.imshow('img_1',img_1)
cv2.waitKey()
cv2.destroyAllWindows()
"""
"""
#用itemset改变
img=cv2.imread('random.png')
print img.item(29,12,0)#第29行第12列的B通道
img.itemset((29,12,0),255)#不会改变原图
print img.item(29,12,0)
cv2.imshow('img',img)
cv2.waitKey()
cv2.destroyAllWindows()
"""
"""
#获取和改变图单一通道
img=cv2.imread('random.png')
img[:,:,1]=255#图片所有行和列的1(第二)通道,即路色通道的值设置为255,BGR是0,0,255就是绿色
cv2.imshow('img',img)#得到全绿色的图
cv2.waitKey()
cv2.destroyAllWindows()
"""
'''
#感兴趣区域的获取和使用
img=cv2.imread('1.jpg')
my_roi=img[0:100,0:200]#注意这里原图600*400的尺寸,这里应该是0:399行和0:599列
img[300:400,300:500]=my_roi
cv2.imshow('roi',img)
cv2.waitKey()
cv2.destroyAllWindows()
'''
'''
#numpy访问图像属性
import cv2
import numpy as np
img=cv2.imread('1.jpg')
print img.shape#(401L,600L,3L)宽度高度,通道数,
print img.size#72188图像像素大小
print img.dtype#uint8数据类型
'''
2.1.4代码:
"""
Created on Mon Jan 14 14:59:19 2019
2-1-4视频文件的读写
"""
#读取avi文件,并用YUV编码写入另一个帧中
import cv2
videoCapture=cv2.VideoCapture('test.avi')
fps=videoCapture.get(cv2.CAP_PROP_FPS)#获得帧速率
size=(int(videoCapture.get(cv2.CAP_PROP_FRAME_WIDTH)),int(videoCapture.get(cv2.CAP_PROP_FRAME_HEIGHT)))
videoWriter=cv2.VideoWriter('MyOut.avi',cv2.VideoWriter_fourcc('I','4','2','0'),fps,size)#输出名字,编码格式,帧速率,大小(宽高)
success,frame=videoCapture.read()#读取视频帧
#接下加载直到没有视频帧
while success:
videoWriter.write(frame)#用设定好的编译器写入帧到输出文件
success,frame=videoCapture.read()#读取下一帧,当没有帧时候success为0,退出循环
2.1.5代码:
"""
Created on Mon Jan 14 15:34:13 2019
2-1-5捕获摄像头的帧
"""
import cv2
cameraCapture=cv2.VideoCapture(0)
fps=30#假设为30
size=(int(cameraCapture.get(cv2.CAP_PROP_FRAME_WIDTH)),int(cameraCapture.get(cv2.CAP_PROP_FRAME_HEIGHT)))
videoWriter=cv2.VideoWriter('MyOut_215.avi',cv2.VideoWriter_fourcc('I','4','2','0'),fps,size)
success,frame=cameraCapture.read()
numFramesRemaining=10*fps-1#一秒30帧,读10秒
while success and numFramesRemaining>0:
videoWriter.write(frame)
success,frame=cameraCapture.read()
numFramesRemaining-=1
cameraCapture.release
'''
当同步多个摄像头时候:
success0,frame0=cameraCapture0.grab()
success0,frame0=cameraCapture1.grab()
if success0 and success1:
frame0=cameraCapture0.rertrive()
frame1=cameraCapture1.rertrive()
'''
2.1.6+2.1.7代码:
"""
Created on Tue Jan 15 10:56:07 2019
2_1_6+2_1_7
"""
import cv2
clicked=False
def onMouse(event,x,y,flags,param):
global clicked
if event==cv2.EVENT_LBUTTONUP:
clicked=True
cameraCapture=cv2.VideoCapture(0)
cv2.namedWindow('My')
cv2.setMouseCallback('My',onMouse)
print'展示摄像机流,点击屏幕或者任意键停止'
success,frame=cameraCapture.read()
while success and cv2.waitKey(1)==-1 and not clicked:
cv2.imshow('My',frame)
success,frame=cameraCapture.read()
print('clicked',clicked)
cv2.destroyWindow('My')
cameraCapture.release()
##################################################################
这是一个悲伤的事情,没有找到代码然后按照书上的敲,书上是有错的代码的缩进
#################################################################
接下来是第二章的重头戏,最后的大程序实现,自己按照代码敲结果总是报错,找到了别人运行通过的版本。也没对比出来哪里错了。总之毕设中期在即,先用上再说。cameo程序:
# -*- coding: utf-8 -*-
"""
Created on Fri Jan 18 12:03:30 2019
@author: 123
"""
# -- coding: utf-8 --
import cv2
import os
from managers import WindowManager, CaptureManager
class Cameo(object):
def __init__(self):
'''创建一个窗口,写上按键的回调方法'''
self._windowManager = WindowManager('Cameo', self.onKeypress)
'''告诉程序数据来自摄像头, 还有镜面效果'''
self._captureManager = CaptureManager(cv2.VideoCapture(0), self._windowManager, True)
def run(self):
"""Run the main loop."""
self._windowManager.createWindow()
while self._windowManager.isWindowCreated:
'''这里的enterFrame就是告诉程序从摄像头中取数据'''
self._captureManager.enterFrame()
'''下面的这个frame是原始帧数据,这里没有做任何修改,后面的教程会对这个帧数据进行修改'''
frame = self._captureManager._frame
'''后面章节对frame的处理放在这里'''
'''exitFrame看起来是像是退出的意思,其实主要功能都是在这里方法里实现的,截屏、录像都是在这里'''
self._captureManager.exitFrame()
self._windowManager.processEvents()
def onKeypress(self, keycode):
'''
快捷键设置:
当按下“空格”键的时候,会进行抓屏。
当按下‘tab’键的时候,就开始或者停止录像。
当然相应的目录也会生成图片或者视频文件
'''
if keycode == 32:#space
'''告诉程序,截屏保存的文件名字'''
self._captureManager.writeImage('changeOnePixel.png')
elif keycode == 9:#tab
if not self._captureManager.isWritingVideo:
'''告诉程序,录像保存的文件名字'''
self._captureManager.startWritingVideo('record.avi')
else:
self._captureManager.stopWritingVideo()
elif keycode == 27: #escape
self._windowManager.destroyWindow()
if __name__=="__main__":
Cameo().run()
###############################################################################
manage程序:
# -*- coding: utf-8 -*-
"""
Created on Fri Jan 18 12:07:08 2019
@author: 123
"""
# -- coding: utf-8 --
import cv2
import numpy
import time
class CaptureManager(object):
def __init__(self, capture, previewWindowManager = None, shouldMirrorPreview = False):
self.previewWindowManager = previewWindowManager
self.shouldMirrorPreview = shouldMirrorPreview
self._capture = capture
self._channel = 0
self._enteredFrame = False
self._frame = None
self._imageFilename = None
self._videoFilename = None
self._videoEncoding = None
self._videoWriter = None
self._startTime = None
self._framesElapsed = long(0)
self._fpsEstimate = None
@property
def channel(self):
return self._channel
@channel.setter
def channel(self, value):
if self._channel != value:
self._channel = value
self._frame = None
@property
def frame(self):
if self._enteredFrame and self._frame is None:
_, self._frame = self._capture.retrieve()
return self._frame
@property
def isWritingImage(self):
return self._imageFilename is not None
@property
def isWritingVideo(self):
return self._videoFilename is not None
def enterFrame(self):
"""Capture the next frame, if any"""
assert not self._enteredFrame,
'previous enterFrame() had no mathcing exitFrame'
if self._capture is not None:
self._enteredFrame = self._capture.grab()
'''程序里最复杂的就是这方法了,担负了视频显示、视频视频录制、截屏保存的功能。'''
def exitFrame (self):
"""Draw to the window. Write to files. Release the frame"""
if self.frame is None:
self._enteredFrame = False
return
if self._framesElapsed == 0:
self._startTime = time.time()
else:
timeElapsed = time.time() - self._startTime
self._fpsEstimate = self._framesElapsed / timeElapsed
self._framesElapsed += 1
if self.previewWindowManager is not None:
if self.shouldMirrorPreview:
mirroredFrame = numpy.fliplr(self._frame).copy()
self.previewWindowManager.show(mirroredFrame)
else:
self.previewWindowManager.show(self._frame)
'''将生成截屏文件'''
if self.isWritingImage:
cv2.imwrite(self._imageFilename, self._frame)
self._imageFilename = None
'''在这里进行录像'''
self._writeVideoFrame()
self._frame = None
self._enteredFrame = False
def writeImage(self, filename):
"""Wirte the next exited frame to an image file."""
self._imageFilename = filename
def startWritingVideo(self, filename, encodeing = cv2.VideoWriter_fourcc('I', '4', '2', '0')):
"""Start wirting exited frames to a video file."""
self._videoFilename = filename
self._videoEncoding = encodeing
def stopWritingVideo(self):
"""Stop writing eited frames to a video file."""
self._videoFilename = None
self._videoEncodding = None
self._videoWriter = None
def _writeVideoFrame(self):
if not self.isWritingVideo:
return
if self._videoWriter is None:
fps = self._capture.get(cv2.CAP_PROP_FPS)
if fps == 0.0:
if self._framesElapsed < 20:
return
else:
fps = self._fpsEstimate
size = (int(self._capture.get(cv2.CAP_PROP_FRAME_WIDTH)), int(self._capture.get(cv2.CAP_PROP_FRAME_HEIGHT)))
self._videoWriter = cv2.VideoWriter(self._videoFilename, self._videoEncoding, fps, size)
self._videoWriter.write(self._frame)
class WindowManager(object):
def __init__(self, windowName, keypressCallback = None):
self.keypressCallback = keypressCallback
self._windowName = windowName
self._isWindowCreated = False
@property
def isWindowCreated(self):
return self._isWindowCreated
def createWindow(self):
cv2.namedWindow(self._windowName)
self._isWindowCreated = True
def show(self, frame):
cv2.imshow(self._windowName, frame)
def destroyWindow(self):
cv2.destroyWindow(self._windowName)
self._isWindowCreated = False
def processEvents(self):
keycode = cv2.waitKey(1)
if self.keypressCallback is not None and keycode != 255:
#Discard any non-ASCII info encoded by GTK.
keycode &= 0xFF
self.keypressCallback(keycode)


 3612
3612

 被折叠的 条评论
为什么被折叠?


