


1.控制系统原理
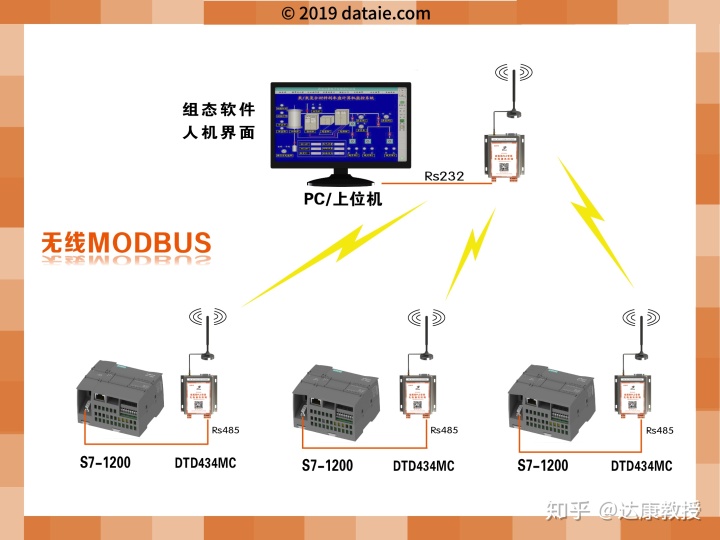
2.硬件需求
S7-1200 PLC目前有3种类型的CPU:
1)S7-1211C CPU
2)S7-1212C CPU
3)S7-1214C CPU
这三种类型的CPU都可以连接三个串口通信模版本例中使用的PLC硬件为:
1)PM1207电源 (6EP1 332 -1SH71 )
2)S7-1214C (6ES7 214 -1BE30 -0XB0 )
3)CM1241 RS232 (6ES7 241 -1AH30 -0XB0 )
3.软件需求
1) 编程软件 Step7 Basic V10.5 ( 6ES7 822-0AA0-0YA0)
4.组态
我们通过下述的实际操作来介绍如何在Step7 Basic V10.5 中组态S7-1214C 和超级终端通信。
点击桌面上的“Totally Integrated Automation Portal V10”图标,打开如
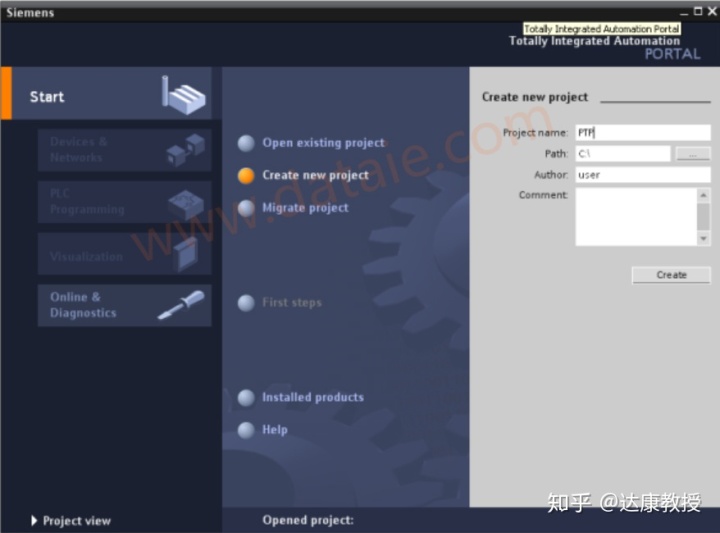
首先需要选择“Create new project”选项,然后在“Project name:”里输入PTP;在“Path:”修改项目的存储路径为“C:”;点击“Create”,这样就创建了一个文件PTP的新项目。创建后的窗口如下图所示:
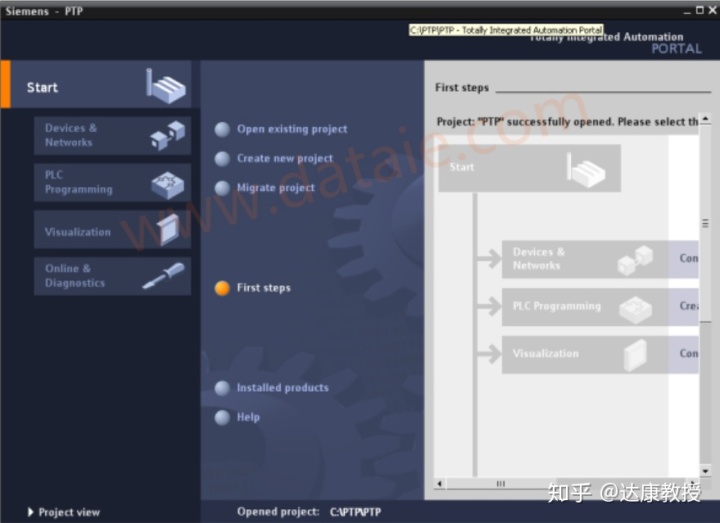
点击门户视图左下角的“Project View”切换到项目视图下,如下图:
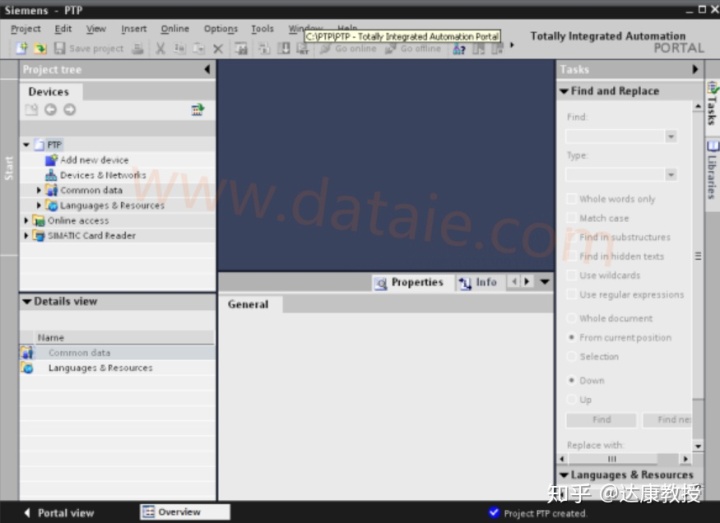
打开后,在“Devices”标签下,点击“Add new device”,在弹出的菜单中输入设备名“PLC_1”并在设备列表里选择CPU的类型。选择后如下图
 最低0.47元/天 解锁文章


 2076
2076


 被折叠的 条评论
为什么被折叠?
被折叠的 条评论
为什么被折叠?
 到【灌水乐园】发言


