


目录
2.2 代码示例--使用VMProtectBegin进行保护
2.3 代码示例--使用VMProtectBeginUltraLockByKey进行保护
4.3 常见报错:由于找不到VMProtectSDK32.dll
1. VMP代码保护流程
使用VMP进行代码保护的步骤如下:
① 被保护的代码集成VMP的sdk
② 给被保护的程序加壳
2. 集成VMP的sdk
2.1 代码加壳保护接口说明
VMP支持的代码保护有三类:
- 虚拟保护
- 变异保护,也叫突变保护
- Ultra(虚拟保护 + 变异保护)
VMProtectSDK.h提供的sdk如下所示:
#pragma once

#if defined(__APPLE__) || defined(__unix__)
#define VMP_IMPORT
#define VMP_API
#define VMP_WCHAR unsigned short
#else
#define VMP_IMPORT __declspec(dllimport)
#define VMP_API __stdcall
#define VMP_WCHAR wchar_t
#ifdef _WIN64
#pragma comment(lib, "VMProtectSDK64.lib")
#else
#pragma comment(lib, "VMProtectSDK32.lib")
#endif // _WIN64
#endif // __APPLE__ || __unix__

#ifdef __cplusplus
extern "C" {
#endif
	// 代码保护函数
	VMP_IMPORT void VMP_API VMProtectBegin(const char *);                 // 常规保护(虚拟保护 + 变异保护),参数一般设置为要保护的函数名
	VMP_IMPORT void VMP_API VMProtectBeginVirtualization(const char *);   // 虚拟保护
	VMP_IMPORT void VMP_API VMProtectBeginMutation(const char *);         // 变异保护
	VMP_IMPORT void VMP_API VMProtectBeginUltra(const char *);            // 超级保护(虚拟保护 + 变异保护)
	VMP_IMPORT void VMP_API VMProtectBeginVirtualizationLockByKey(const char *);// 虚拟保护。但是绑定序列码,需要先设置序列码,再调用此函数进行代码保护
	VMP_IMPORT void VMP_API VMProtectBeginUltraLockByKey(const char *);   // 超级保护(虚拟保护 + 变异保护)。但是绑定序列码,需要先设置序列码,再调用此函数进行代码保护

	VMP_IMPORT void VMP_API VMProtectEnd(void); // 结束保护(上面的每一个保护函数都要对应一个结束保护)

	// 工具函数
	VMP_IMPORT bool VMP_API VMProtectIsProtected();               // 判断是否处于保护代码中
	VMP_IMPORT bool VMP_API VMProtectIsDebuggerPresent(bool);     // 判断是否处于调试器中
	VMP_IMPORT bool VMP_API VMProtectIsVirtualMachinePresent(void);// 判断是否处于虚拟机中
	VMP_IMPORT bool VMP_API VMProtectIsValidImageCRC(void);        // 判断程序CRC是否正确

   // 字符串保密函数:被保护后,明文字符串不再出现在内存,除非被解密
	VMP_IMPORT const char * VMP_API VMProtectDecryptStringA(const char *value);           // 获取加密后的char字符串
	VMP_IMPORT const VMP_WCHAR * VMP_API VMProtectDecryptStringW(const VMP_WCHAR *value); // 获取加密后的wchar_t字符串
	VMP_IMPORT bool VMP_API VMProtectFreeString(const void *value);                       // 释放加密后的字符串

	// 序列号状态
	enum VMProtectSerialStateFlags
	{
		SERIAL_STATE_SUCCESS = 0,			// 成功状态
		SERIAL_STATE_FLAG_CORRUPTED = 0x00000001,	// 损坏状态
		SERIAL_STATE_FLAG_INVALID = 0x00000002,		// 无效状态
		SERIAL_STATE_FLAG_BLACKLISTED = 0x00000004,	// 黑名单状态
		SERIAL_STATE_FLAG_DATE_EXPIRED = 0x00000008,	// 过期状态
		SERIAL_STATE_FLAG_RUNNING_TIME_OVER = 0x00000010,// 超过最大运行次数限制
		SERIAL_STATE_FLAG_BAD_HWID = 0x00000020,	 // 机器HWID校验失败
		SERIAL_STATE_FLAG_MAX_BUILD_EXPIRED = 0x00000040, // 超过最大创建日期
	};

#pragma pack(push, 1)
	typedef struct
	{
		unsigned short wYear;	// 年
		unsigned char	bMonth;	// 月
		unsigned char	bDay;	// 日
	} VMProtectDate;

	typedef struct
	{
		int nState;			// VMProtectSerialStateFlags
		VMP_WCHAR wUserName[256];	// 用户名
		VMP_WCHAR wEMail[256];		// 邮箱
		VMProtectDate dtExpire;		// 序列号到期时间
		VMProtectDate dtMaxBuild;	// 最大创建日期
		int bRunningTime;		// 运行次数限制
		unsigned char	nUserDataLength;// length of user data in bUserData :
		unsigned char	bUserData[255];	// up to 255 bytes of user data : 用户数据
	} VMProtectSerialNumberData;
#pragma pack(pop)

	VMP_IMPORT int VMP_API VMProtectSetSerialNumber(const char *serial);// 设置序列号
	VMP_IMPORT int VMP_API VMProtectGetSerialNumberState(); // 获取序列号状态
	VMP_IMPORT bool VMP_API VMProtectGetSerialNumberData(VMProtectSerialNumberData *data, int size); // 获取序列号数据
	VMP_IMPORT int VMP_API VMProtectGetCurrentHWID(char *hwid, int size); // 获取当前机器的HWID。
         // 注意:未加壳时,此函数获取的HWID是myhiwd,不是真正的VMP的HWID

	// activation
	enum VMProtectActivationFlags
	{
		ACTIVATION_OK = 0,		// 成功
		ACTIVATION_SMALL_BUFFER,	// 缓冲区太小
		ACTIVATION_NO_CONNECTION,	// 没有连接
		ACTIVATION_BAD_REPLY,		// 错误的回复
		ACTIVATION_BANNED,		// 禁止
		ACTIVATION_CORRUPTED,		// 损坏
		ACTIVATION_BAD_CODE,		// 错误的代码
		ACTIVATION_ALREADY_USED,	// 已经使用过
		ACTIVATION_SERIAL_UNKNOWN,	// 未知序列号
		ACTIVATION_EXPIRED,		// 已经过期
		ACTIVATION_NOT_AVAILABLE	// 无法使用
	};

	VMP_IMPORT int VMP_API VMProtectActivateLicense(const char *code, char *serial, int size);             // 激活许可证
	VMP_IMPORT int VMP_API VMProtectDeactivateLicense(const char *serial);                                 // 停用许可证
	VMP_IMPORT int VMP_API VMProtectGetOfflineActivationString(const char *code, char *buf, int size);     // 获取离线激活字符串
	VMP_IMPORT int VMP_API VMProtectGetOfflineDeactivationString(const char *serial, char *buf, int size); // 获取离线停用字符串

#ifdef __cplusplus
}
#endif
2.2 代码示例--使用VMProtectBegin进行保护
注意:对代码进行简单保护可以使用此函数进行保护
#include "stdafx.h"
#include <string>
#include <iostream>
#include "VMProtectSDK.h"
int main()
{
/* 超级保护开始 */
VMProtectBeginUltra("main");
/* 程序基本检测 */
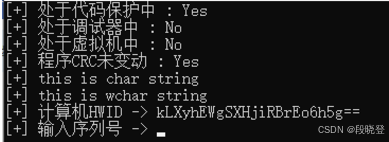
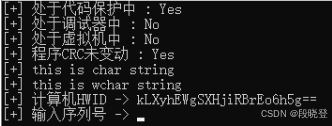
printf("[+] 处于代码保护中 : %s \n", VMProtectIsProtected() ? "Yes" : "No");
printf("[+] 处于调试器中 : %s \n", VMProtectIsDebuggerPresent(true) ? "Yes" : "No");
printf("[+] 处于虚拟机中 : %s \n", VMProtectIsVirtualMachinePresent() ? "Yes" : "No");
printf("[+] 程序CRC未变动 : %s \n", VMProtectIsValidImageCRC() ? "Yes" : "No");
/* 加密char字符串 */
const char* char_str = VMProtectDecryptStringA("[+] this is char string \n");
printf("%s", char_str);
VMProtectFreeString(char_str);
/* 加密wchar字符串 */
const wchar_t* wchar_str = VMProtectDecryptStringW(L"[+] this is wchar string \n");
wprintf(L"%ws", wchar_str);
VMProtectFreeString(wchar_str);
/* 获取HWID */
char hwid[0x100]{ 0 };
VMProtectGetCurrentHWID(hwid, 0x100);
printf("[+] 计算机HWID -> %s \n", hwid);
/* 获取序列号 */
std::string Serial;
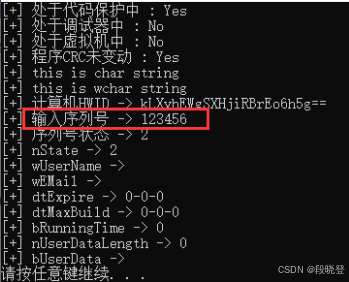
std::cout << "[+] 输入序列号 -> ";
getline(std::cin, Serial);
/* 设置序列号 */
int state = VMProtectSetSerialNumber(Serial.c_str());
printf("[+] 序列号状态 -> %d \n", state);
/* 获取序列号的相关信息 */
VMProtectSerialNumberData data{ 0 };
VMProtectGetSerialNumberData(&data, sizeof(data));
printf("[+] nState -> %d \n", data.nState);
printf("[+] wUserName -> %ws \n", data.wUserName);
printf("[+] wEMail -> %ws \n", data.wEMail);
printf("[+] dtExpire -> %d-%d-%d \n", data.dtExpire.wYear, data.dtExpire.bMonth, data.dtExpire.bDay);
printf("[+] dtMaxBuild -> %d-%d-%d \n", data.dtMaxBuild.wYear, data.dtMaxBuild.bMonth, data.dtMaxBuild.bDay);
printf("[+] bRunningTime -> %d \n", data.bRunningTime);
printf("[+] nUserDataLength -> %d \n", data.nUserDataLength);
printf("[+] bUserData -> %s \n", data.bUserData);
/* 超级保护结束 */
VMProtectEnd();
system("pause");
return 0;
}2.3 代码示例--使用VMProtectBeginUltraLockByKey进行保护
如果要使用序列号对代码进行保护和验证,那么就使用此函数进行代码保护
#include "stdafx.h"
#include <string>
#include <iostream>
#include "VMProtectSDK.h"

int main()
{
    /* 获取序列号 */
	std::string Serial;
	std::cout << "[+] 输入序列号 -> ";
	getline(std::cin, Serial);

	/* 设置序列号 */
	int state = VMProtectSetSerialNumber(Serial.c_str()); // 在保护之前需要先设置序列号,否则加壳以后会报错,如下所示

	/* 超级保护开始 */
	VMProtectBeginUltraLockByKey("main");

	/* 程序基本检测 */
	printf("[+] 处于代码保护中 : %s \n", VMProtectIsProtected() ? "Yes" : "No");
	printf("[+] 处于调试器中 : %s \n", VMProtectIsDebuggerPresent(true) ? "Yes" : "No");
	printf("[+] 处于虚拟机中 : %s \n", VMProtectIsVirtualMachinePresent() ? "Yes" : "No");
	printf("[+] 程序CRC未变动 : %s \n", VMProtectIsValidImageCRC() ? "Yes" : "No");

	/* 加密char字符串 */
	const char* char_str = VMProtectDecryptStringA("[+] this is char string \n");
	printf("%s", char_str);
	VMProtectFreeString(char_str);

	/* 加密wchar字符串 */
	const wchar_t* wchar_str = VMProtectDecryptStringW(L"[+] this is wchar string \n");
	wprintf(L"%ws", wchar_str);
	VMProtectFreeString(wchar_str);

	/* 获取HWID */
	char hwid[0x100]{ 0 };
	VMProtectGetCurrentHWID(hwid, 0x100);
	printf("[+] 计算机HWID -> %s \n", hwid);

	printf("[+] 序列号状态 -> %d \n", state);

	/* 获取序列号的相关信息 */
	VMProtectSerialNumberData data{ 0 };
	VMProtectGetSerialNumberData(&data, sizeof(data));
	printf("[+] nState -> %d \n", data.nState);
	printf("[+] wUserName -> %ws \n", data.wUserName);
	printf("[+] wEMail -> %ws \n", data.wEMail);
	printf("[+] dtExpire -> %d-%d-%d \n", data.dtExpire.wYear, data.dtExpire.bMonth, data.dtExpire.bDay);
	printf("[+] dtMaxBuild -> %d-%d-%d \n", data.dtMaxBuild.wYear, data.dtMaxBuild.bMonth, data.dtMaxBuild.bDay);
	printf("[+] bRunningTime -> %d \n", data.bRunningTime);
	printf("[+] nUserDataLength -> %d \n", data.nUserDataLength);
	printf("[+] bUserData -> %s \n", data.bUserData);

	/* 超级保护结束 */
	VMProtectEnd();

	system("pause");
    return 0;
}
3. 程序加壳
是否有必要在安装程序中包含 VMProtectSDK32.dll 或 VMProtectSDK64.dll?
这些库是必要的,直到你保护应用程序。在保护之后,VMProtect 会用嵌入式模块的调用取代对这些库的每一次调用,所以你不再需要这些文件了。
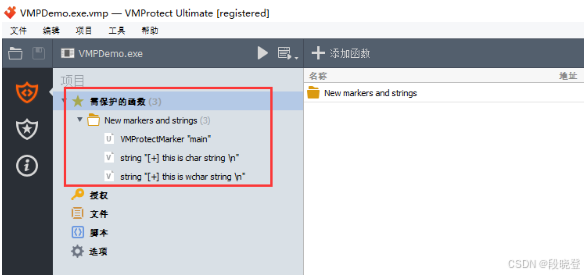
3.1 界面交互加壳
① 通过VMProtect.exe打开要保护的二进制可执行程序
可以看到已经分析出了代码中指定的要保护的内容
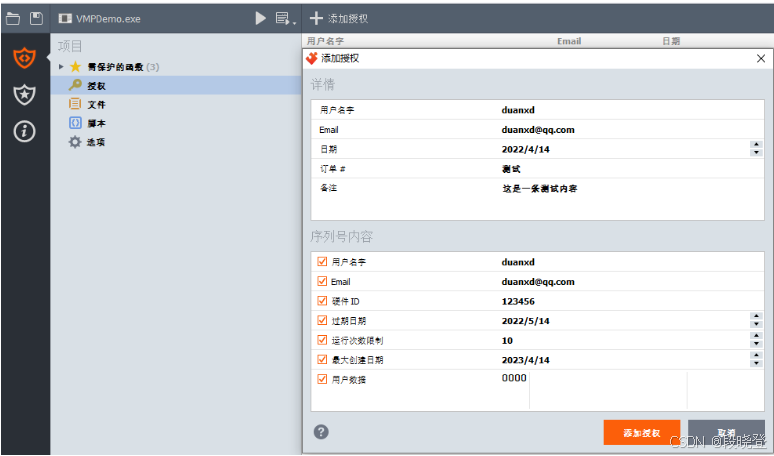
② 为要保护的程序添加授权文件
授权文件设置如下:
③ 编译
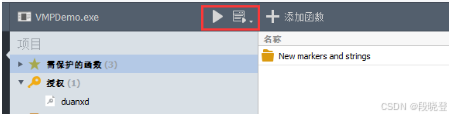
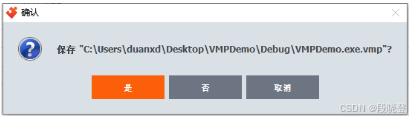
点击编译得到.vmp文件和加壳以后的程序

注:.vmp文件是关闭软件是提示生成的
④ 运行加壳以后的程序
可以看到:需要输入序列号才能继续执行。如果输入错误的序列号,则:
可以看到:State = 2,表示SERIAL_STATE_FLAG_INVALID无效状态,其他信息输出也有问题
正确的序列号获取方式继续往下看
3.2 命令行加壳
命令行加壳需要使用VMProtect_Con.exe,命令行格式如下:

① 命令行加壳
使用得到的.vmp文件编译被保护的程序:

② 运行加壳以后的程序
4. VMP使用注意事项
4.1 dll加壳
如果对代码保护以后将其编译成dll,需要使用VMProtect.exe对dll进行加壳处理,然后把加壳以后的dll改名为需要的名称
注意:如果加壳以后LoadLibrary动态加载失败,则有可能是由于在加壳的过程中,VMP对加壳的处理有问题。这种情况下就需要对需要加壳的函数逐一去除进行验证。
4.2 lib集成加壳
如果对代码保护以后将其编译成静态库lib,其他代码在集成sdk以后,对编译得到的exe需要使用VMProtect.exe进行加壳处理,否则就需要产品携带对应的VMProtectSDK32.dll或VMProtectSDK64.dll进行发布。
但是非常不建议产品携带VMProtectSDK32.dll或VMProtectSDK64.dl,这样会导致逆向破解代码变得很容易。
4.3 常见报错:由于找不到VMProtectSDK32.dll

如果报错如上,则表示此exe使用了VMP保护代码,或者继承了使用VMP保护的sdk,但是其编译以后没有使用VMProtect.exe对二进制exe进行加壳处理,导致exe依赖于VMProtectSDK32.dll运行。


 5467
5467

 被折叠的 条评论
为什么被折叠?
被折叠的 条评论
为什么被折叠?
 到【灌水乐园】发言


