


1.public / robots.txt --- Disallow: /user 禁止搜索引擎访问到 user 页面
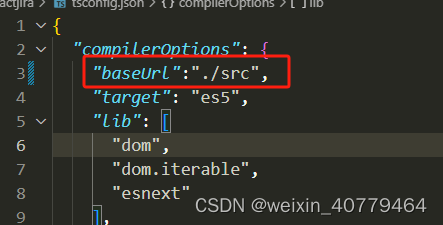
2.tsconfig.json 添加 baseUrl:"./src" 配置基础路径
3.json server 模拟数据 (以下安装 确保 node.js 在18.3.X以上版本)
1)全局安装 npm i json-server -g
2)项目安装 yarn add json-server -D
3)package.json 配置 启动命名 “json-server”(自定义名称):"json-server __json_server_mock__/db.json --watch",__json_server_mock__/db.json 跟目录下模拟数据文件地址
4)启动模拟服务:npm run json-server
5) postman : localhost:3000 操作数据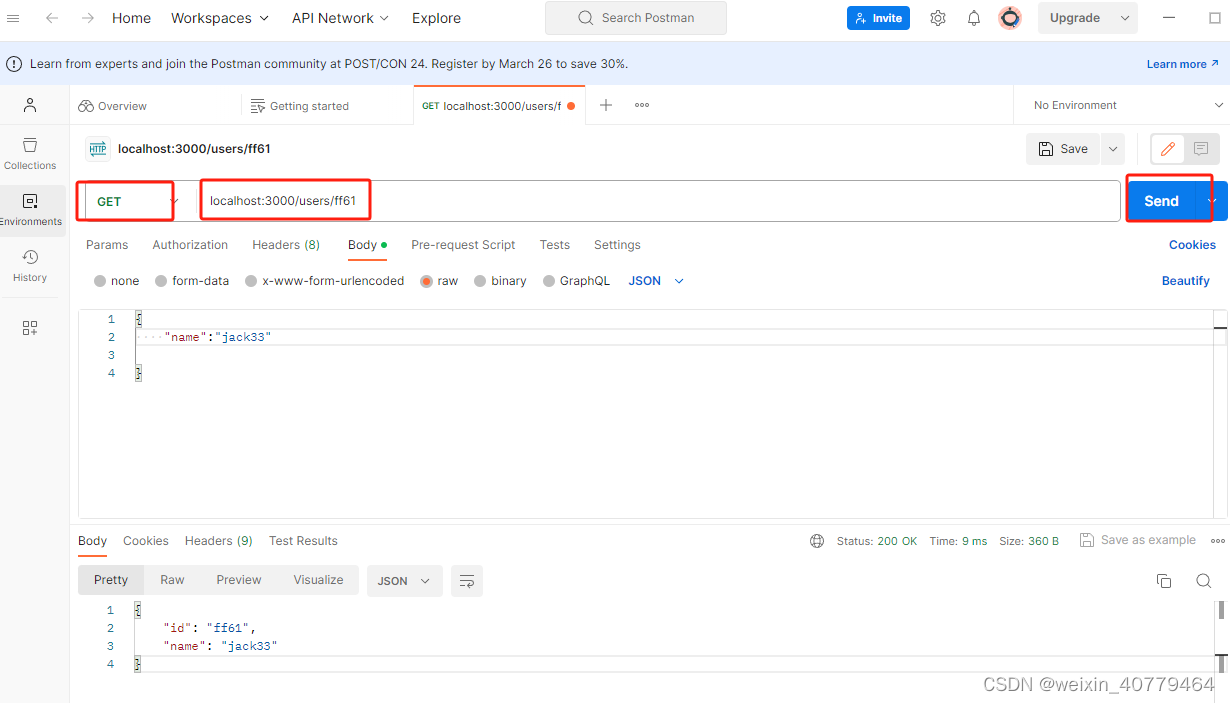
4.组件引入
若子组件是 默认输出 export default App,则父组件 使用 import App from './App' ,若子组件是 export const app = ()=>{} , 组件引用需使用大括号, import {App}from './App';
5.useEffect()
使用 useEffect 时,需要提供两个参数:1.要执行的函数,2.依赖项数组。
当依赖项为空数组时,函数只在首次渲染执行一次,依耐项不为空时,随着依耐项的改变,函数执行多次,当不传递依耐项时,函数会无限循环执行!
useEffect(() => {
    fetch(serverUrl).then(async response => {
        if(response.ok){
            setList(await response.json())
        }
    })
},[param])
6.每个react 组件都需要引入 import React from 'react'
因为打包时需要 React.createElement 这个方法把你写的jsx转化为虚拟DOM
7.custom hooks 与普通函数的区别
hooks 只能在组件和hooks 函数中运行,不能在普通函数中运行
8.react ts 引入 qs
除了安装 qs,还需要 yarn add @types/qs -D 增加类型定义
9.Unterminated regular expression.
有dom元素的文件类型为 tsx


 397
397


 被折叠的 条评论
为什么被折叠?
被折叠的 条评论
为什么被折叠?
 到【灌水乐园】发言


