


概念
Karma(卡玛)是一个测试运行器,它可以呼起浏览器,加载测试脚本,然后运行测试用例,完成后关闭浏览器。
Mocha(摩卡)是一个单元测试测试框架/库,它可以用来写测试用例。
Chai 是用于节点和浏览器的BDD / TDD断言库,可以与任何javascript测试框架完美地配对。
我们主要就是用Karma与Mocha来实现自动化测试。
下面我以自己Vue的项目举例。
一、安装Karma与Mocha
在项目中你可以用npm或者yarn 执行下面的命令。
npm i -D karma karma-chrome-launcher karma-mocha karma-sinon-chai mocha sinon sinon-chai karma-chai karma-chai-spies上面的命令安装了:
- Karma
- Mocha
- chai断言库
- Sinon(西农)是一个 spy / stub / mock 库,用以辅助测试
二、配置Karma
首先在项目根目录中创建karma.conf.js文件

然后在karma.conf.js中进行相关配置
module.exports = function (config) {
     config.set({

         // base path that will be used to resolve all patterns (eg. files, exclude)
         basePath: '',
            // frameworks to use
            // available frameworks: https://npmjs.org/browse/keyword/karma-adapter
            frameworks: ['mocha', 'sinon-chai'],
            client: {
                chai: {
                    includeStack: true
                }
            },


            // list of files / patterns to load in the browser
            files: [
                'dist/**/*.test.js',
                'dist/**/*.test.css'
            ],


            // list of files / patterns to exclude
            exclude: [],


            // preprocess matching files before serving them to the browser
            // available preprocessors: https://npmjs.org/browse/keyword/karma-preprocessor
            preprocessors: {},


            // test results reporter to use
            // possible values: 'dots', 'progress'
            // available reporters: https://npmjs.org/browse/keyword/karma-reporter
            reporters: ['progress'],


            // web server port
            port: 9876,


            // enable / disable colors in the output (reporters and logs)
            colors: true,


            // level of logging
            // possible values: config.LOG_DISABLE || config.LOG_ERROR || config.LOG_WARN || config.LOG_INFO || config.LOG_DEBUG
            logLevel: config.LOG_INFO,


            // enable / disable watching file and executing tests whenever any file changes
            autoWatch: true,


            // start these browsers
            // available browser launchers: https://npmjs.org/browse/keyword/karma-launcher
            browsers: ['ChromeHeadless'],


            // Continuous Integration mode
            // if true, Karma captures browsers, runs the tests and exits
            singleRun: false,

            // Concurrency level
            // how many browser should be started simultaneous
            concurrency: Infinity
        })
}
以上配置中重点需要明白两个:
files: [
   'dist/**/*.test.js',
   'dist/**/*.test.css'
]
1、files:表示karma需要加载的文件,dist/**/*表示dist目录下所有的test.js与test.css文件,如果只写成dist/*则只会读取dist下子目录的test. 相关文件,若目录层级更深则无法读取到。
browsers: ['ChromeHeadless']2、browsers:默认打开哪个浏览器,我们这里配置的是‘ChromeHeadless’谷歌无头浏览器,无头浏览器意思就是没有UI界面的浏览器,适合用来跑测试。当然咯,如果你的项目需要支持一些特定的浏览器,比如:'Chrome', 'Firefox', 'Safari',你也可以自行配置。
三、创建测试文件,用Mocha和Chai写单元测试
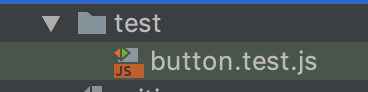
我们在项目根目录创建test目录,在test目录下创建测试文件。
例如我这里创建了一个按钮的测试文件button.test.js
文件内容:
const expect = chai.expect;
import Vue from 'vue'
import Button from '../src/button'

Vue.config.productionTip = false
Vue.config.devtools = false

describe('Button', () => {
    it('存在.', () => {
        expect(Button).to.be.ok //不是false值就ok
        expect([1,2,3]).to.deep.eq([1,2,3])  // deep 深入进去比较是否相等
        expect(NaN).to.be.NaN  // 专门为NaN做的断言
    })

    it('可以设置icon.', () => {
        const Constructor = Vue.extend(Button)
        const vm = new Constructor({
            propsData: {
                icon: 'settings'
            }
        }).$mount()
        const useElement = vm.$el.querySelector('use')
        expect(useElement.getAttribute('xlink:href')).to.equal('#i-settings')
        vm.$destroy()
    })
})
首先引入chai.expect(断言库),再引入Vue和需要测试的文件,然后写单元测试 。
我们通过Mocha中的describe it语句执行一个单元的N个测试用例。因为Mocha是行为驱动风格的测试(BDD),因此该测试库的书写风格非常贴合人们沟通的自然语言:描述(describe)某某某 可以做什么(it)。
describe('Button',()=>{})指执行的为Button单元,it('存在', ()=>{})指一个测试用例,‘存在’指用例的描述。
四、创建测试脚本
在项目里的package.json文件中找到script,并增加下面两行命令
"scripts": {
    "dev-test": "parcel watch test/* --no-cache & karma start",
    "test": "parcel build test/* --no-minify && karma start --single-run"
  },
"parcel watch test/* --no-cache & karma start" ——指使用parcel打包、监听、不要缓存、启动karma
"parcel build test/* --no-minify && karma start --single-run" ——指parcel打包,build直接一次性运行
五、运行测试脚本
使用npm run dev-test

button的6个测试用例通过,并进行监听,每一次代码的改动都会实时监听。
使用npm run test

一次性构建运行,6个测试用例通过。
因此,当你开发的时候新开一个命令行窗口,运行 npm run dev-test 便可以实时查看测试结果。
如果只想看一次结果,只需运行npm run test。


 410
410


 被折叠的 条评论
为什么被折叠?
被折叠的 条评论
为什么被折叠?
 到【灌水乐园】发言


