


目录
界面样式
所谓界面样式,就是更改一些用户操作样式,以提高用户体验
- 更改用户的鼠标样式
- 表单轮廓
- 防止表单域拖拽
鼠标样式 cursor
li {
    cursor: pointer;
}
设置或检索在对象上移动的鼠标指针采用何种系统预定义的光标形状
| 属性值 | 描述 |
|---|---|
| default | 小白 默认 |
| pointer | 小手 |
| move | 移动 |
| text | 文本 |
| not-allowed | 禁止 |


配合 js 使用
轮廓线 outline
给表单添加 outline: 0; 或者 outline: none; 样式之后,就可以去掉默认的蓝色边框
input {
    outline: none;
}
防止拖拽文本域 resize
textarea {
    outline: none;
    resize: none;
}
/*文本域最好写在一行,要不文本域内容会有缩进*/
<textarea name="" id="" cols="30" rows="10"></textarea>vertical-align 属性应用
使用场景:经常用于设置图片或者表单(行内块元素)和文字垂直对齐
![]()
官方解释:用于设置一个元素的垂直对齐方式,但是这只对行内元素或者行内块元素有效
img {
    vertical-align: baseline;
}| 值 | 描述 |
|---|---|
| baseline | 默认。元素放置在父元素的基线上 |
| top | 把元素的顶端与行中最高元素的顶端对齐 |
| middle | 把此元素放置在父元素的中部 |
| bottom | 把元素的顶端与行中最低的元素的顶端对齐 |

<div class="user">\
    <!--让图片和文字垂直居中-->
    <img src="images/user.png" alt="" style="vertical-align: middle">
    qq-lilei
</div>![]()
解决图片底部默认空白缝隙的问题
bug:图片底侧会有一个空白缝隙,原因是行内块元素会和文字的基线对齐
主要解决方法有两种:
- 给图片添加 vertical-align: middle | top | bottom 等(只要不是 baseline 即可)。提倡使用
- 将 img 转换为块级元素 display: block;
溢出的文字省略号显示
单行文本溢出显示省略号

必须满足三个条件:
div {
    width: 200px;
    height: 100px;
    border: 3px solid darkcyan;
    /*1. 先强制一行内显示文本*/
    white-space: nowrap;  /*默认 normal 自动换行*/
    /*2. 超出的部分隐藏*/
    overflow: hidden;
    /*3. 文字用省略号替代超出的部分*/
    text-overflow: ellipsis;
}
多行文本溢出显示省略号

多行文本溢出显示省略号,有较大的兼容性问题,适合于 webKit 浏览器或移动端(移动端大部分是 webKit 内核)
.duohangslh {
    overflow: hidden;
    text-overflow: ellipsis;
    /*弹性伸缩盒子模型显示*/
    display: -webkit-box;
    /*限制在一个块元素显示的文本的行数*/
    -webkit-line-clamp: 2;
    /*设置或检索伸缩盒对象的子元素的排列方式*/
    -webkit-box-orient: vertical;
}
<div class="duohangslh">别后音杳魂梦茫,未悔相识,纵天各一方。</div>![]()
更推荐后端人员实现,后端人员可以设置显示多少字,操作更简单
常见布局技巧
- margin 负值的运用
- 文字围绕浮动元素
- 行内块的巧妙运用
- CSS 三角强化
margin 负值的运用
li {
    float: left;
    list-style: none;
    width: 100px;
    height: 100px;
    border: 2px solid darkcyan;
    margin-left: -1px;
}
1. 让每个盒子 margin 往左侧移动 -1px 正好压住相邻盒子的边框

2. 鼠标经过某个盒子的时候,提高当前盒子的层级即可(如果没有定位,则加相对定位(保留位置);如果有定位,则加 z-index )
ul li:hover {
    position: relative;
    border: 2px solid orange;
}
文字围绕浮动元素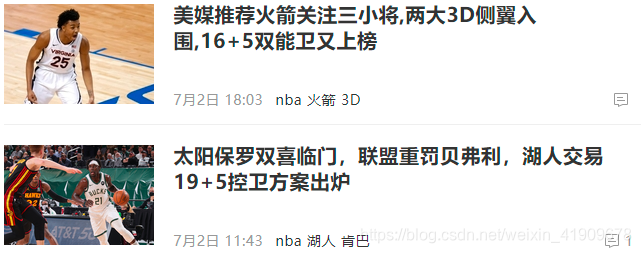
巧妙运用浮动元素不会压住文字的特性
        <div class="box">
            <div class="box1">
                <img src="images/huojian.jpg" alt="">
                <p>美媒推荐火箭关注三小将,两大3D侧翼入围,16+5双能卫又上榜</p>
            </div>
            <div class="box2">
                <img src="images/huren.jpg" alt="">
                <p>太阳保罗双喜临门,联盟重罚贝弗利,湖人交易19+5控卫方案出炉</p>
            </div>
        </div>
* {
margin: 0;
padding: 0;
}
.box {
margin: 0 auto;
width: 628px;
height: 220px;
}
.box1,
.box2 {
width: 628px;
height: 105px;
padding: 10px;
}
.box img {
float: left;
margin-right: 10px;
}
.box p {
font: 800 25px '黑体';
}效果图

行内块元素的巧妙运用

<!DOCTYPE html>
<html lang="en">
<head>
<meta charset="UTF-8">
<title>hang</title>
<link rel="stylesheet" href="style.css">
</head>
<body>
<div class="box">
<a href="#" class="prev"> < 上一页</a>
<a href="#">1</a>
<a href="#" class="current">2</a>
<a href="#">3</a>
<a href="#">4</a>
<a href="#">5</a>
<a href="#">6</a>
<a href="#">7</a>
<a href="#">8</a>
<a href="#">9</a>
<a href="#">10</a>
<a href="#" class="next">下一页 > </a>
到第
<input type="text">
页
<button>确定</button>
</div>
</body>
</html>* {
margin: 0;
padding: 0;
}
.box {
text-align: center;
padding: 50px;
}
.box a {
display: inline-block;
width: 36px;
height: 36px;
line-height: 36px;
text-align: center;
color: black;
background-color: #fff;
font-size: 18px;
text-decoration: none;
border: 1px solid #fff;
border-radius: 8px;
}
.box a:hover {
background-color: #2d58c1;
border: 0px;
}
.box .prev,
.box .next {
width: 85px;
height: 36px;
}
.box .current {
background-color: #2d58c1;
}
.box input {
display: inline-block;
width: 40px;
height: 30px;
font-size: 18px;
line-height: 20px;
text-align: center;
border: 1px solid rgba(0,0,0,.3);
border-radius: 5px;
}
.box button {
display: inline-block;
width: 50px;
height: 28px;
font-size: 16px;
text-align: center;
margin-left: 5px;
}
CSS 三角强化
![]()
画底和高不等的三角形
.box {
    width: 0;
    height: 0;
    /*先将左边和下边的边框设为0*/
    border-bottom: 0;
    border-left: 0;
    /*将上边框的宽度设为100px,颜色设为透明*/
    border-top: 100px solid transparent;
    /*最后设置右边框的样式*/
    border-right: 50px solid darkcyan;
}![]()
实例
<!DOCTYPE html>
<html lang="en">
    <head>
        <meta charset="UTF-8">
        <title>Title</title>
        <link rel="stylesheet" href="style.css">
    </head>
    <body>
        <div class="box">
            <div class="box1"></div>
            <div class="box2">¥649.00</div>
            <div class="box3">¥699.00</div>
        </div>
    </body>
</html>
.box {
position: relative;
width: 250px;
height: 48px;
border: 1px solid black;
margin: 0 auto;
text-align: center;
line-height: 48px;
}
.box1 {
position: absolute;
top: 0;
left: 125px;
width: 0;
height: 0;
/*先将左边和下边的边框设为0*/
border-bottom: 0;
border-left: 0;
/*将上边框的宽度设为100px,颜色设为透明*/
border-top: 48px solid red;
/*最后设置右边框的样式*/
border-right: 24px solid transparent;
}
.box2 {
float: left;
width: 125px;
height: 48px;
font-size: 25px;
color: rgba(255,255,255,1);
background-color: red;
}
.box3 {
float: right;
width: 125px;
height: 48px;
background-color: #fff;
font-size: 18px;
color: rgba(0,0,0,.5);
text-decoration: line-through;
}效果图
![]()


 1878
1878

 被折叠的 条评论
为什么被折叠?
被折叠的 条评论
为什么被折叠?
 到【灌水乐园】发言


