


Weex Ui已经上线了加载动画了点击这里跳转,手写的我眼泪都掉了下来!!!
由于Weex手机端不支持gif图片,然而公司项目又要我加个加载动画,所以手写了一个动画加载组件。
注意1:
需要用到组件不会用组件的可以点击看看这篇文章:Weex&&Vue组件的使用与传参
注意2:
mounted()方法还没调用接口的话就直接拉到文章最后面的篇章++看能不能解决你的问题
自定义旋转动画组件
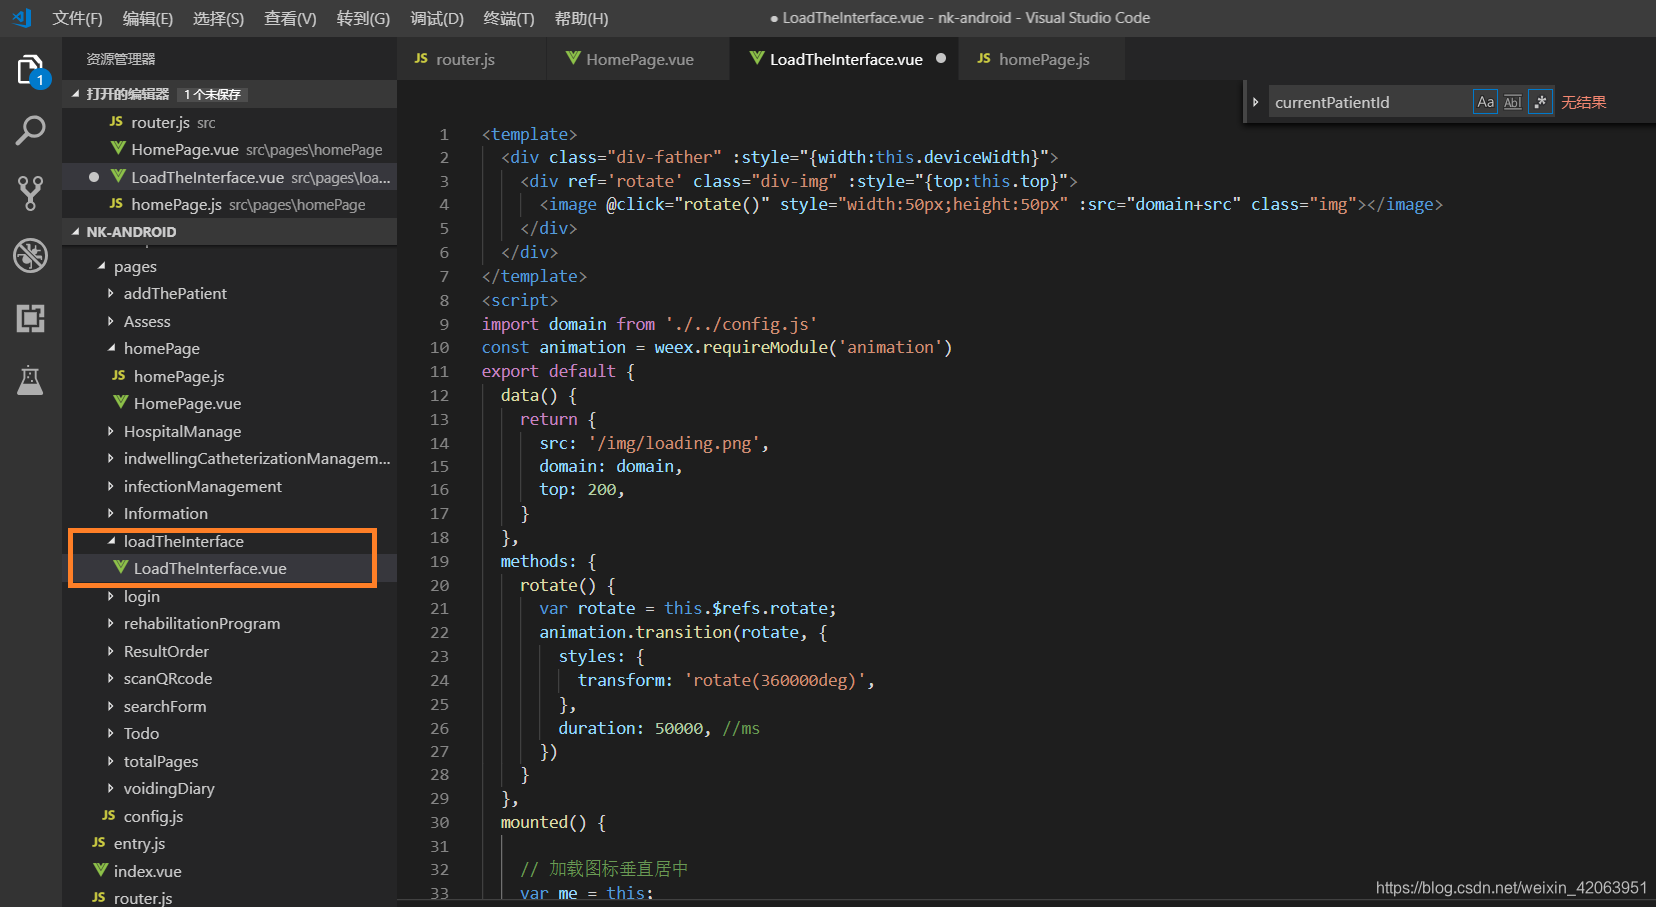
整个组件的代码
(用到了weex封装的animation
const animation = weex.requireModule(‘animation’)
transform是旋转的圈数,duration是多少秒旋转完transform的圈数,可以自行修改处理)
<template>
  <div class="div-father" :style="{width:this.deviceWidth}">
    <div ref='rotate' class="div-img" :style="{top:this.top}">
      <image @click="rotate()" style="width:50px;height:50px" :src="domain+src" class="img"></image>
    </div>
  </div>
</template>
<script>
import domain from './../config.js'
const animation = weex.requireModule('animation')
export default {
  data() {
    return {
      src: '/img/loading.png',
      domain: domain,
      top: 200,
    }
  },
  methods: {
    rotate() {
      var rotate = this.$refs.rotate;
      animation.transition(rotate, {
        styles: {
          transform: 'rotate(360000deg)',
        },
        duration: 50000, //ms
      })
    }
  },
  mounted() {

    // 加载图标垂直居中
    var me = this;
    me.top = parseInt(me.realHeight) / 2 - 25;
    this.rotate();

  },
  created() {

  }
}
</script>
<style>
.div-father {
  background-color: black;
  opacity: 0.3;
  height: 1000px;
  position: absolute;
}
.div-img {
  width: 50px;
  position: relative;
  left: 350px;
}
.img {
  border-radius: 50%;
}
</style>
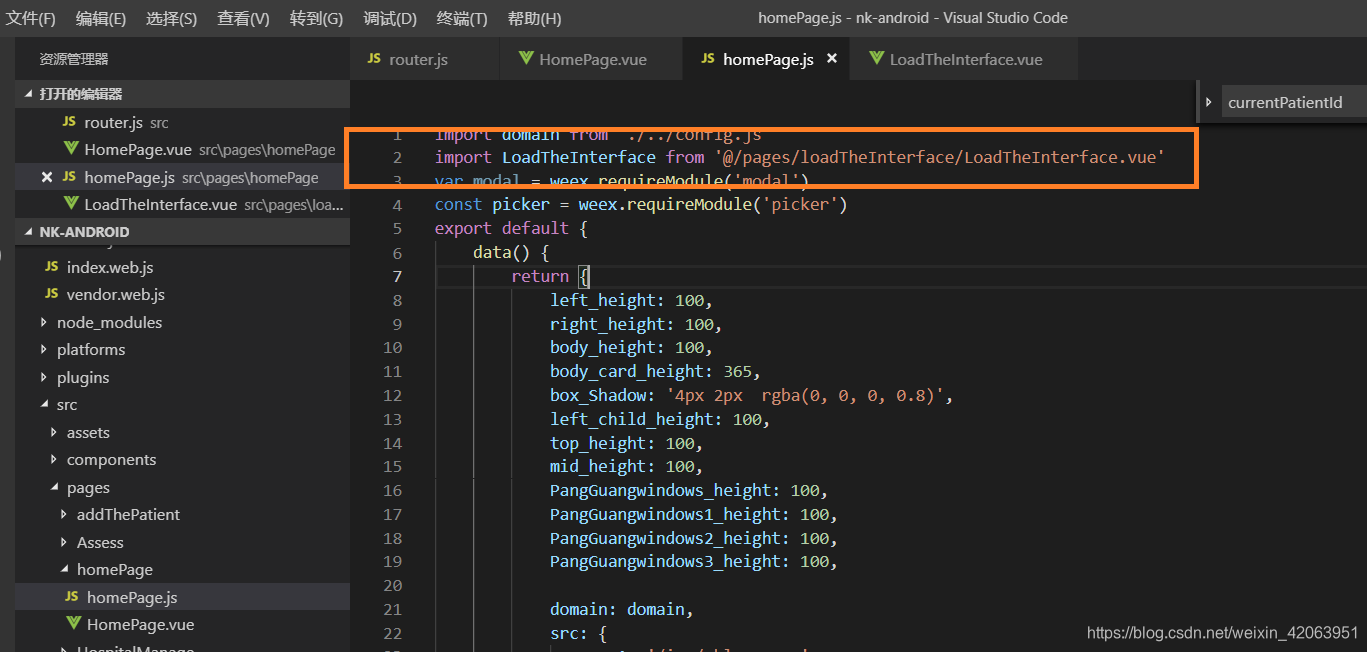
需用到页面的JS代码
引入缓冲加载组件
需用到页面的CSS
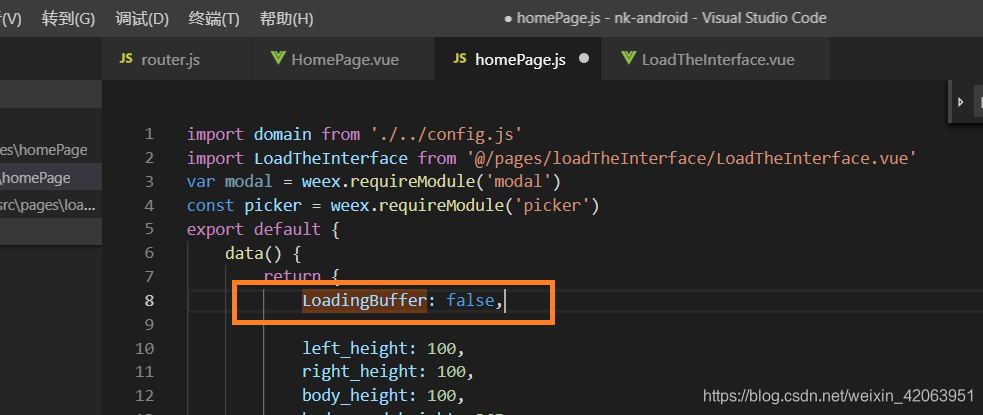
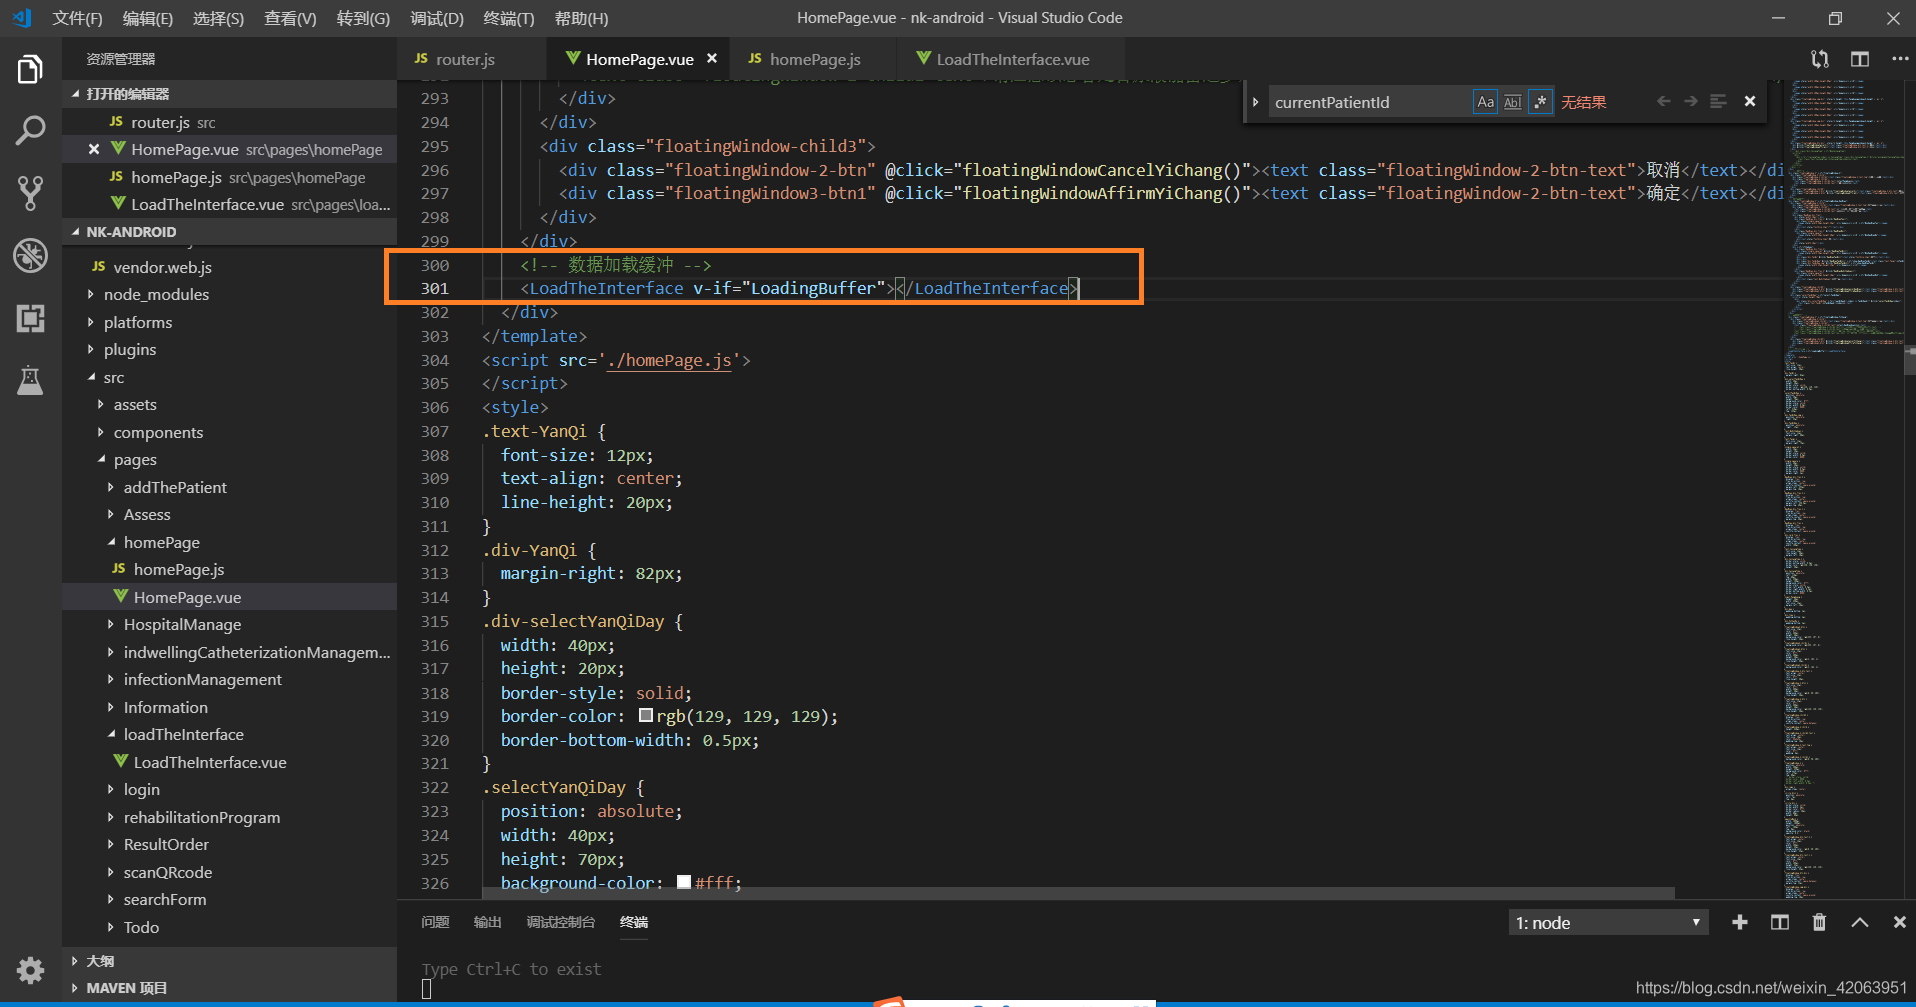
在最外层div的最后面引入组件,用v-if判断他什么时候显示动画,LoadingBuffer为自定义的Boolean值,在data()方法写就好,状态是false也就是不显示
<!-- 数据加载缓冲 -->
<LoadTheInterface v-if="LoadingBuffer"></LoadTheInterface>
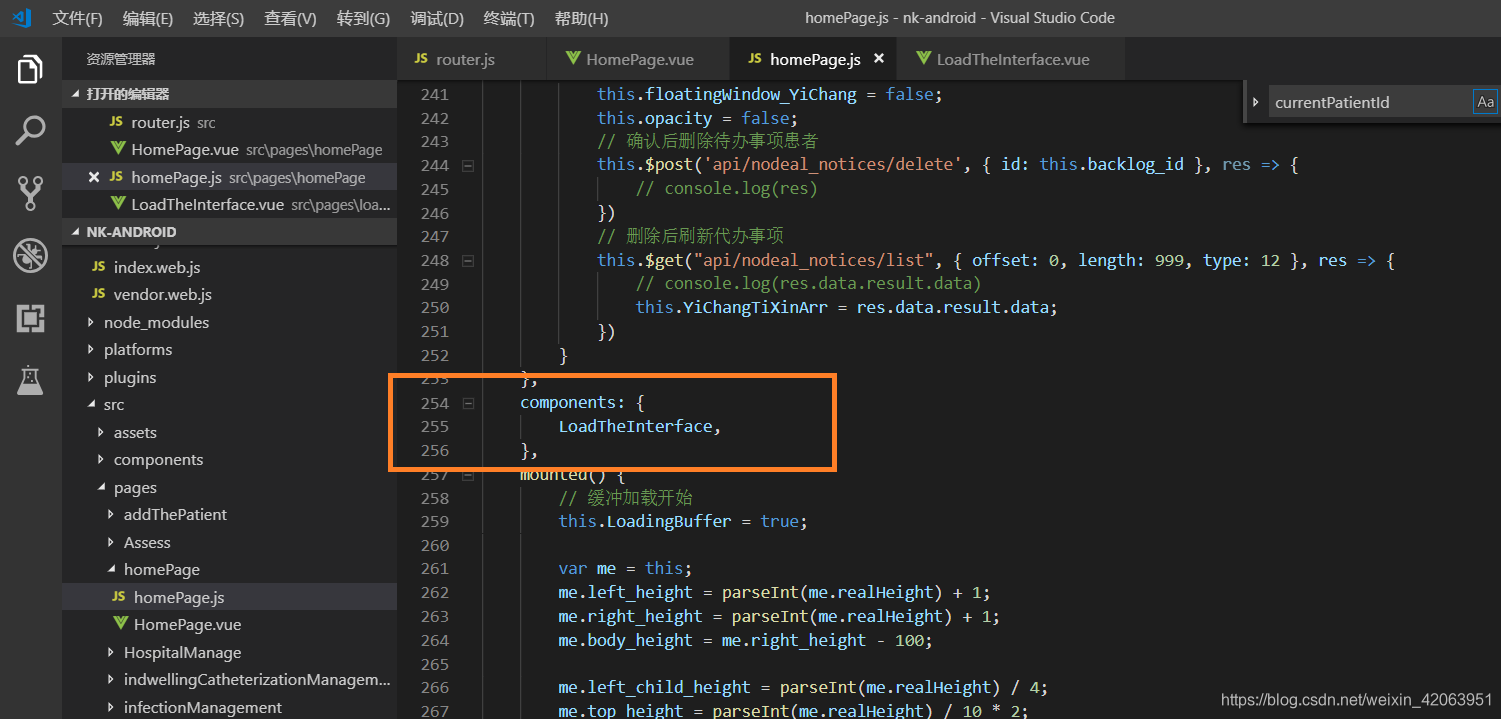
最后就是判断它什么时候执行动画了
首先在mounted()方法开头打开动画
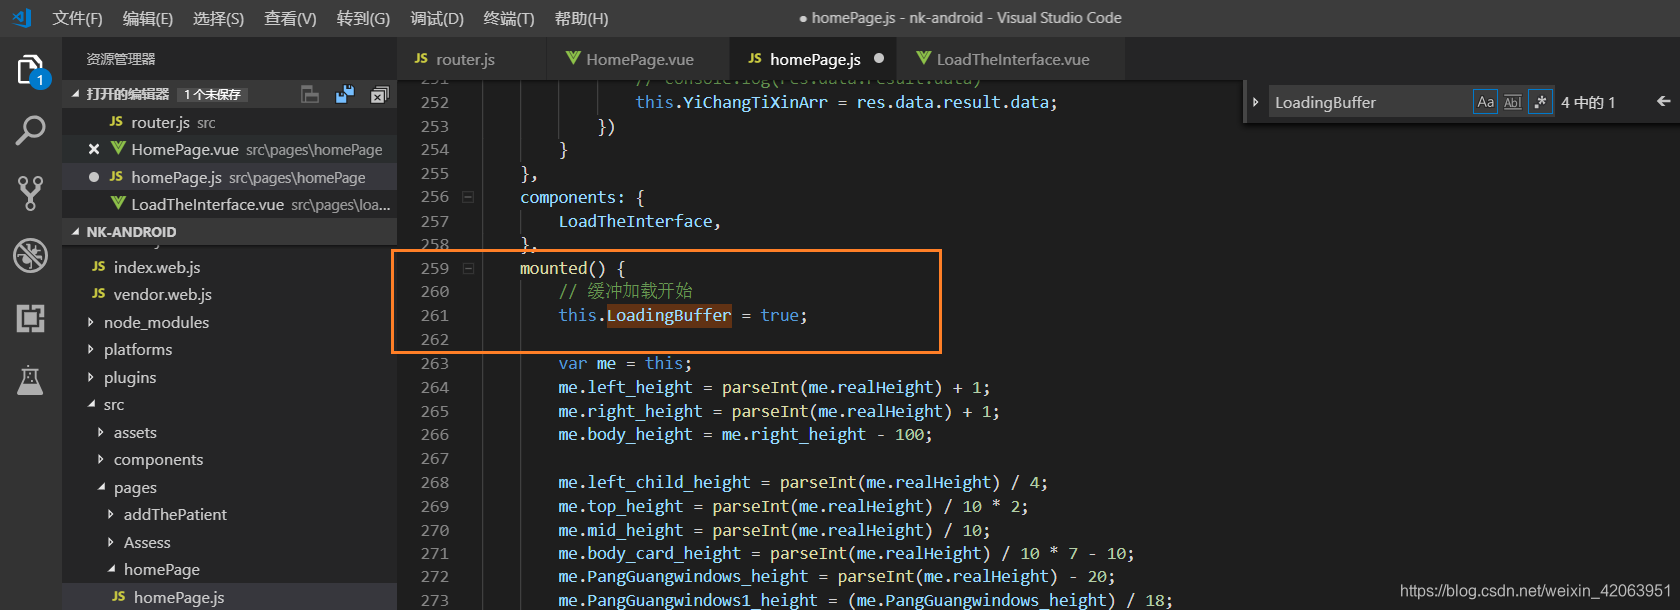
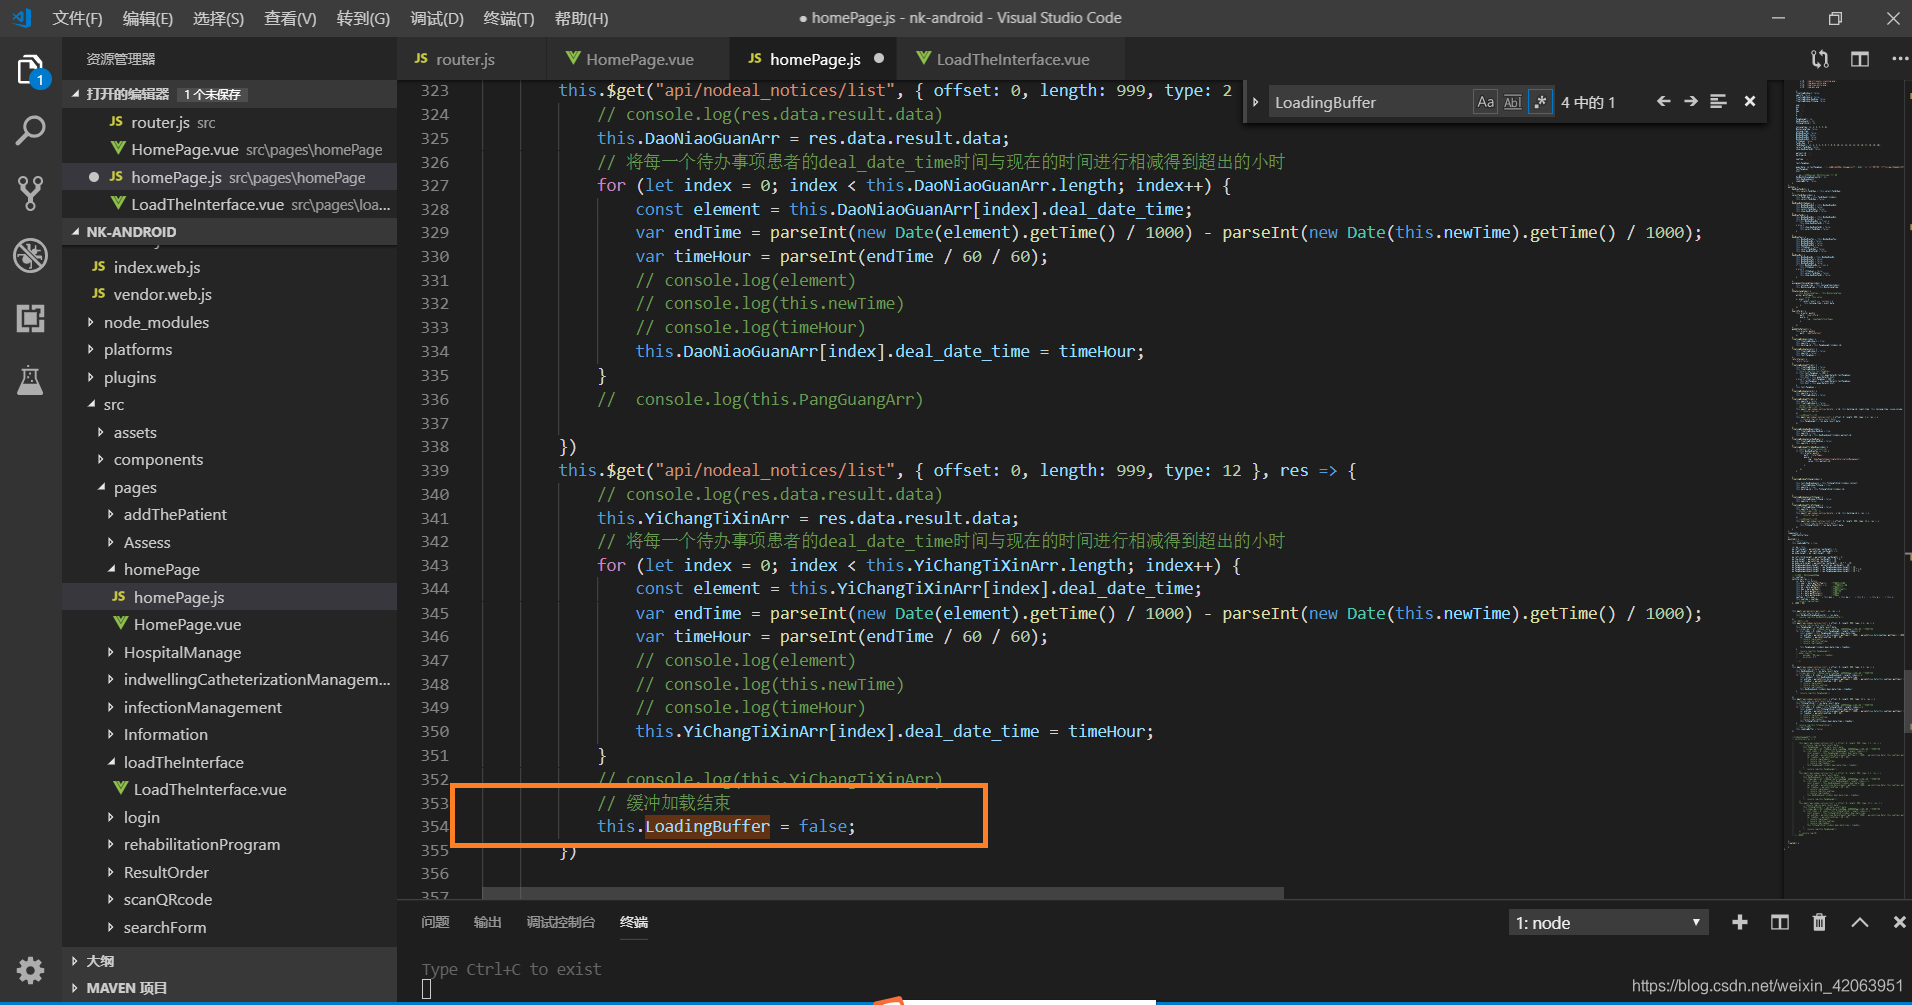
然后在mounted()方法需要调用接口最久的地方结束缓冲,如果你直接写在mounted()方法的最后面是不生效的,因为mounted()方法里是异步的也是执行的顺序不定的,一起执行的话动画还没开始就已经结束了,mounted()方法还没调用接口的话就直接拉到文章最后面的篇章++看能不能解决你的问题(开头已说明)
篇章++
逻辑是这样的:
当前页面不跳转:
页面A跳转到=》加载缓冲页=》页面A
当前页面跳转到另一个页面:
页面A跳转到=》加载缓冲页=》页面B
所以要用到延时器setTimeout,让它在缓冲页停留几秒后返回当前页
页面A点击某个方法路由跳转到加载缓冲页面并且带个log标识
this.$router.push({
    path: '/loadTheInterface',
    query: {
        log: 'addThePatient'
    }
})
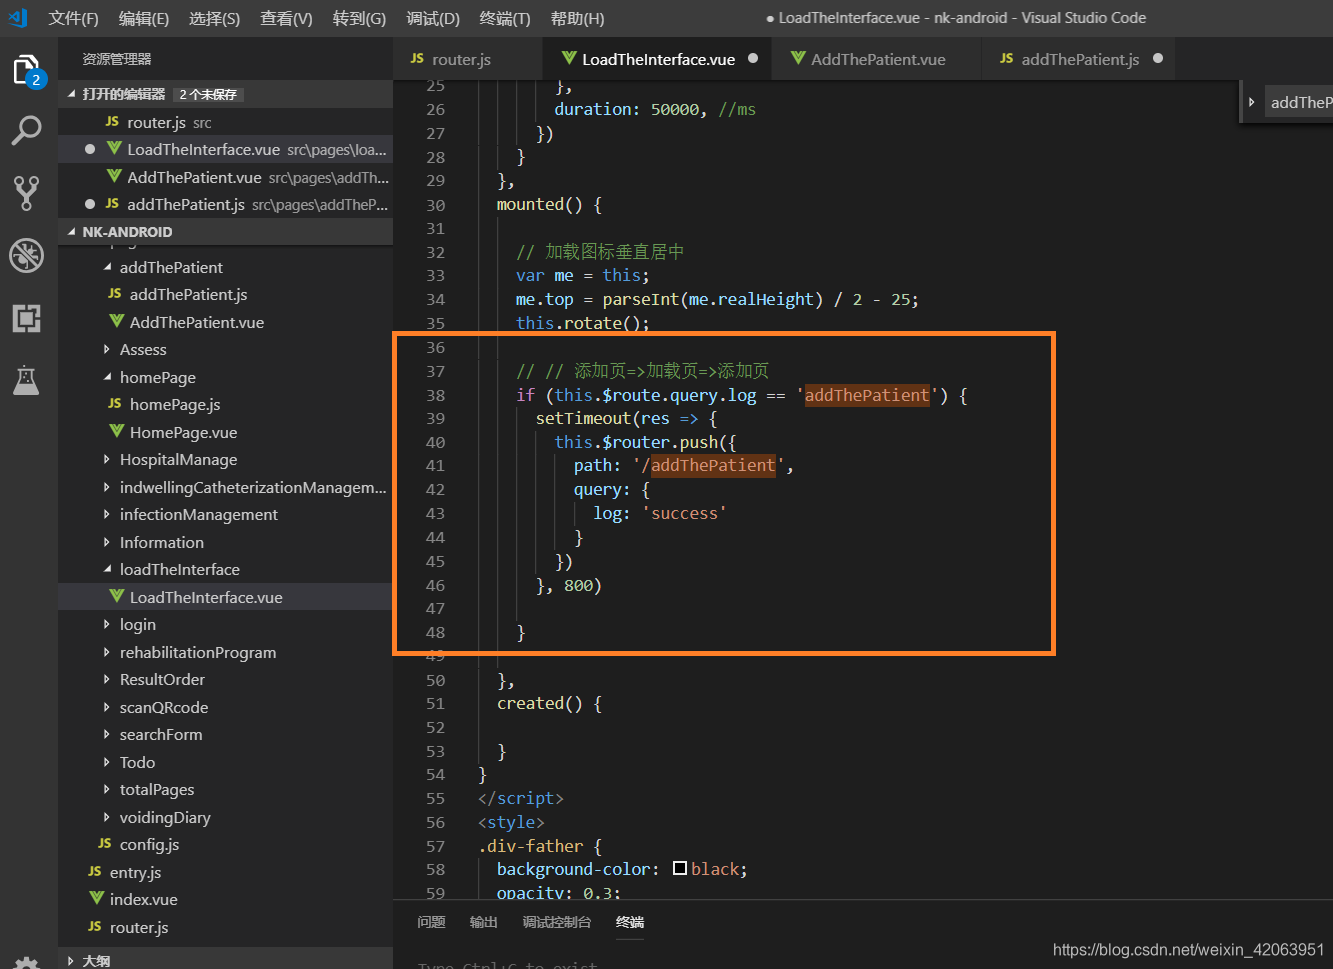
加载缓冲页的代码和上面的代码是一样的只不过加了个路由判断
<template>
  <div class="div-father" :style="{width:this.deviceWidth}">
    <div ref='rotate' class="div-img" :style="{top:this.top}">
      <image @click="rotate()" style="width:50px;height:50px" :src="domain+src" class="img"></image>
    </div>
  </div>
</template>
<script>
import domain from './../config.js'
const animation = weex.requireModule('animation')
export default {
  data() {
    return {
      src: '/img/loading.png',
      domain: domain,
      top: 200,
    }
  },
  methods: {
    rotate() {
      var rotate = this.$refs.rotate;
      animation.transition(rotate, {
        styles: {
          transform: 'rotate(360000deg)',
        },
        duration: 50000, //ms
      })
    }
  },
  mounted() {

    // 加载图标垂直居中
    var me = this;
    me.top = parseInt(me.realHeight) / 2 - 25;
    this.rotate();

    // // 添加页=>加载页=>添加页
    if (this.$route.query.log == 'addThePatient') {
      setTimeout(res => {
        this.$router.push({
          path: '/addThePatient',
          query: {
            log: 'success'
          }
        })
      }, 800)

    }

  },
  created() {

  }
}
</script>
<style>
.div-father {
  background-color: black;
  opacity: 0.3;
  height: 1000px;
  position: absolute;
}
.div-img {
  width: 50px;
  position: relative;
  left: 350px;
}
.img {
  border-radius: 50%;
}
</style>
在加载缓冲页的mounted() 判断页面A传来的log,对应后让延迟800毫秒后跳回页面A,缓冲多少秒舒服自己修改
// // 添加页=>加载页=>添加页
if (this.$route.query.log == 'addThePatient') {
  setTimeout(res => {
    this.$router.push({
      path: '/addThePatient',
      query: {
        log: 'success'
      }
    })
  }, 800)

}
然后页面A跳转到=》加载缓冲页=》页面B的用法和页面A跳转到=》加载缓冲页=》页面A的用法大同小异改一下返回的路由地址就好了
**希望能够帮上忙,珂珂**


 407
407


 被折叠的 条评论
为什么被折叠?
被折叠的 条评论
为什么被折叠?
 到【灌水乐园】发言


