


要想全面快速学习Spring的内容,最好的方法肯定是先去Spring官网去查阅文档,在Spring官网中找到了适合新手了解的官网Guides,一共68篇,打算全部过一遍,能尽量全面的了解Spring框架的每个特性和功能。
接着上篇看过的guide45,接着往下看。
guide46、Serving Web Content with Spring MVC
Spring MVC 是 Spring Framework 的一个模块,它是一个基于 MVC(模型-视图-控制器)设计模式的 Web框架,用于构建 Web 应用程序。
在 Spring MVC
中,请求从客户端发送到控制器(Controller),然后控制器根据业务逻辑处理请求,并将结果传递给视图(View),最后视图将结果渲染成
HTML 或其他格式的响应发送给客户端。
Spring MVC 提供了一组易于使用的 API,用于处理 HTTP 请求和响应、验证用户输入、生成视图等等。它还支持多种视图技术,例如
JSP、Velocity、Freemarker、Thymeleaf 等等,可以根据需求选择适合的视图技术。
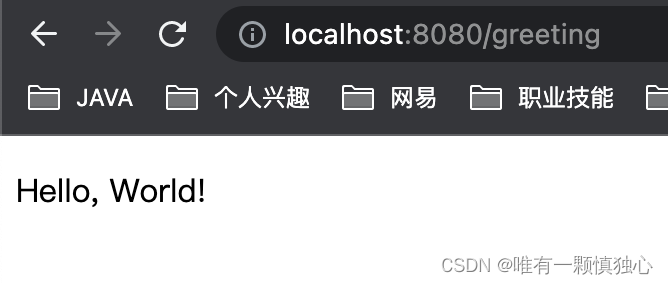
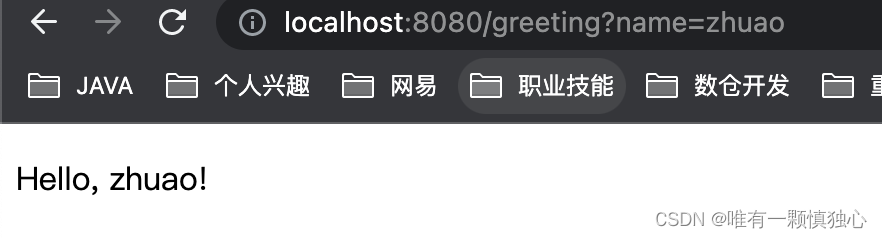
写一个controller:
@Controller
public class GreetingController {
    @GetMapping("/greeting")
    public String greeting(@RequestParam(name="name", required=false, defaultValue="World") String name, Model model) {
     model.addAttribute("name", name);
    return "greeting";    }}
@RequestParam将查询字符串参数的值绑定name到方法name的参数中greeting(). World参数的值name被添加到一个Model对象中,最终使其可以被视图模板访问。
方法体的实现依赖于视图技术(在本例中为Thymeleaf)来执行 HTML 的服务器端呈现。
<!DOCTYPE HTML>
<html xmlns:th="http://www.thymeleaf.org">
<head>
    <title>Getting Started: Serving Web Content</title>
    <meta http-equiv="Content-Type" content="text/html; charset=UTF-8" />
</head>
<body>
    <p th:text="'Hello, ' + ${name} + '!'" />
</body>
</html>
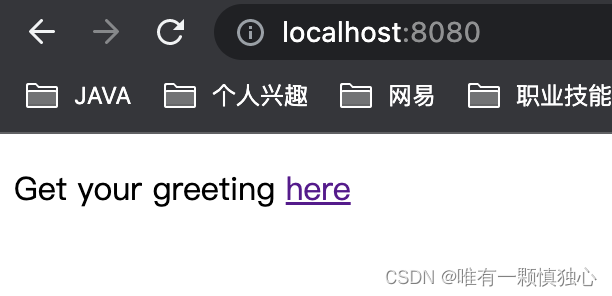
还有主页html:
<!DOCTYPE HTML>
<html>
<head>
    <title>Getting Started: Serving Web Content</title>
    <meta http-equiv="Content-Type" content="text/html; charset=UTF-8" />
</head>
<body>
    <p>Get your greeting <a href="/greeting">here</a></p>
</body>
</html>
执行下项目,结果如下:
guide47、Creating Asynchronous Methods
@Async注解是核心:
Spring3开始提供了@Async注解,该注解可以标注在方法或者类上,从而可以方便的实现方法的异步调用。调用者在调用异步方法时将立即返回,方法的实际执行将提交给指定的线程池中的线程执行。
@Async注意事项:
- @Async标注在类上时,表示该类的所有方法都是异步方法。
- @Async注解的方法一定要通过依赖注入调用(因为要通过代理对象调用),不能直接通过this对象调用,否则不生效。
@Service
public class MyService {

    @Async
    public CompletableFuture<String> asyncMethod() {
        // 异步执行的方法体
        return CompletableFuture.completedFuture("Async method finished.");
    }

}
@Async注解被应用于asyncMethod()方法上,表明该方法应该被异步执行。方法返回一个CompletableFuture对象,表示异步操作的结果。当调用该方法时,它将在一个不同的线程上执行,并且调用线程不会被阻塞。
请注意,要使用@Async注解,必须在应用程序中启用异步支持。这可以通过在配置类上添加@EnableAsync注解来实现。例如:
@Configuration
@EnableAsync
public class AppConfig {
    // 配置异步执行器
    @Bean
    public Executor asyncExecutor() {
        ThreadPoolTaskExecutor executor = new ThreadPoolTaskExecutor();
        executor.setCorePoolSize(10);
        executor.setMaxPoolSize(20);
        executor.setQueueCapacity(50);
        executor.setThreadNamePrefix("MyAsyncThread-");
        executor.initialize();
        return executor;
    }}
在上面的示例中,我们配置了一个名为"asyncExecutor"的异步执行器,它使用线程池来管理异步执行的线程。这个执行器将被@Async注解使用。
执行方法也简单:
@RestController
@RequestMapping("/api/async/test/")
public class AsyncController {
    @Autowired
    MyService myService;
    // 有返回值
    @GetMapping("/withReturn")
    public String withReturn() {
        Future<String> future = myService.asyncMethod();
        try {
            String res = future.get();// 阻塞获取返回值
            System.out.println("res = " + res);
        } catch (InterruptedException | ExecutionException e) {
            e.printStackTrace();
        }
        return "success";
    }
}
参考文档:https://segmentfault.com/a/1190000041380298 以及gpt3.5-turbo问答能力
guide48、Building an Application with Spring Boot
没啥讲的,就是用spring boot创建一个应用程序。
guide49、Working a Getting Started guide with STS
用sts进行编程的新手入门指南,现在都用Intellij软件了。
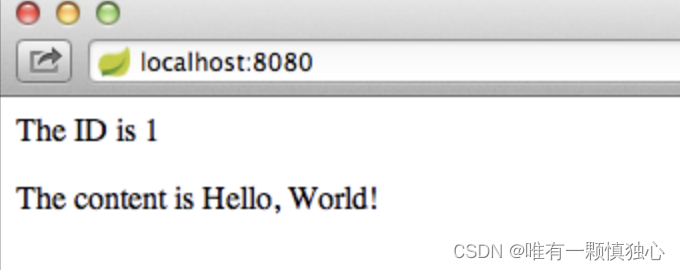
guide50、Consuming a RESTful Web Service with jQuery
用jquery去访问restful 服务。
jQuery是一个JavaScript库,它简化了JavaScript编程,提供了许多易于使用的API,使得开发者可以更加方便地操作HTML文档、处理事件、实现动画效果、发起AJAX请求等。
创建hello.js
$(document).ready(function() {
    $.ajax({
        url: "http://rest-service.guides.spring.io/greeting"
    }).then(function(data) {
       $('.greeting-id').append(data.id);
       $('.greeting-content').append(data.content);
    });
});
这就是一个js函数了,访问了url,并且将返回的结果存到data中,将id和content添加到dom元素里。
再写一个index.html
<!DOCTYPE html>
<html>
    <head>
        <title>Hello jQuery</title>
        <script src="https://ajax.googleapis.com/ajax/libs/jquery/1.10.2/jquery.min.js"></script>
        <script src="hello.js"></script>
    </head>

    <body>
        <div>
            <p class="greeting-id">The ID is </p>
            <p class="greeting-content">The content is </p>
        </div>
    </body>
</html>
后端应用程序再写个Controller启动下,就可以在页面上看到结果了。


 1668
1668


 被折叠的 条评论
为什么被折叠?
被折叠的 条评论
为什么被折叠?
 到【灌水乐园】发言


