


一、计算属性、内容分发、自定义事件
1.1、什么是计算属性
计算属性的重点突出在属性两个字上(属性是名词),首先它是个属性其次这个属性有计算的能力(计算是动词),这里的计算就是个函数:简单点说,它就是一个能够将计算结果缓存起来的属性(将行为转化成了静态的属性),仅此而已;可以想象为缓存!
上代码 👇🏾👇🏾
<!DOCTYPE html>
<html lang="en">
<head>
<meta charset="UTF-8">
<title>Title</title>
</head>
<body>
<!--view层,模板-->
<div id="app">
<p>
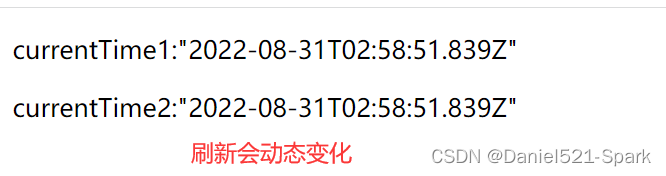
currentTime1:{{currentTime1()}}
</p>
<p>
currentTime2:{{currentTime2}}
</p>
</div>
<!--1.导入Vue.js-->
<script src="https://cdn.jsdelivr.net/npm/vue@2.5.21/dist/vue.min.js"></script>
<script>
var vm = new Vue({
el:"#app",
data:{
message:"pan",
},
methods: {
currentTime1: function () {
return new Date();//返回一个时间戳
}
},
computed:{
currentTime2:function () {//计算属性:methods,computed方法名不能重名,重名之后,只会调用methods的方法
this.message;
return new Date();//返回一个时间戳
}
}
});
</script>
</body>
</html>
注意:
methods和computed里的东西不能重名
说明:
- methods:定义方法, 调用方法使用currentTime1(), 需要带括号
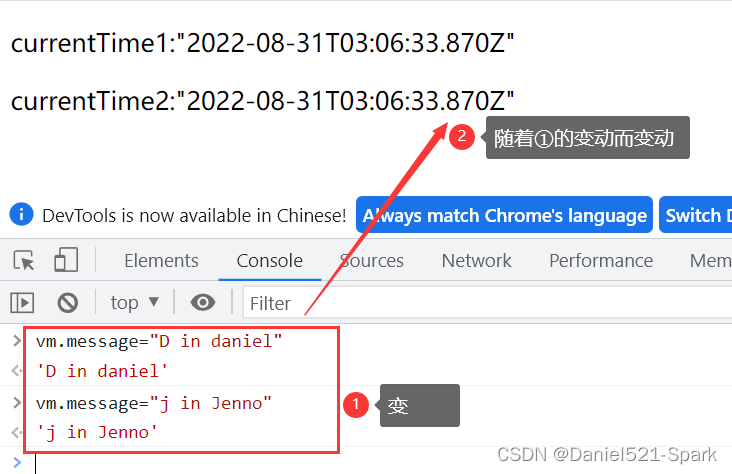
- computed:定义计算属性, 调用属性使用currentTime2, 不需要带括号:this.message是为了能够让currentTime2观察到数据变化而变化
如何在方法中的值发生了变化,则缓存就会刷新!可以在控制台使用vm.message=”D in daniel", 改变下数据的值,再次测试观察效果!
结论:
调用方法时,每次都需要讲行计算,既然有计算过程则必定产生系统开销,那如果这个结果是不经常变化的呢?此时就可以考虑将这个结果缓存起来,采用计算属性可以很方便的做到这点,计算属性的主要特性就是为了将不经常变化的计算结果进行缓存,以节约我们的系统开销;
1.2、内容分发
在
Vue.js中我们使用<slot>元素作为承载分发内容的出口,作者称其为插槽,可以应用在组合组件的场景中;
测试
比如准备制作一个待办事项组件(todo) , 该组件由待办标题(todo-title) 和待办内容(todo-items)组成,但这三个组件又是相互独立的,该如何操作呢?
第一步定义一个待办事项的组件
<!DOCTYPE html>
<html lang="en">
<head>
    <meta charset="UTF-8">
    <title>Title</title>
</head>
<body>

<!--1.导入Vue.js-->
<script src="https://cdn.jsdelivr.net/npm/vue@2.5.21/dist/vue.min.js"></script>
<script type="text/javascript">

    Vue.component('todao',{

        template:'<div><div>代办事项</div>' +
            '<ui>' +
            '<li>爪哇知识库</li>' +
            '</ui>' +
            '</div> '

    });

</script>

</body>
</html>
第二步 我们需要让,代办事项的标题和值实现动态绑定,怎么做呢?我们可以留一个插槽!
1-将上面的代码留出一个插槽,即slot
 Vue.component('todo',{
        template:'<div>\
                <slot name="todo-title"></slot>\
                <ul>\
                    <slot name="todo-items"></slot>\
                </ul>\
            </div>'
});
2-定义一个名为todo-title的待办标题组件 和 todo-items的待办内容组件
Vue.component('todo-title',{
        props:['title'],
        template:'<div>{{title}}</div>'
    });

12345
//这里的index,就是数组的下标,使用for循环遍历的时候,可以循环出来!
Vue.component("todo-items",{
    props:["item","index"],
    template:"<li>{{index+1}},{{item}}</li>"
});
3-实例化Vue并初始化数据
var vm = new Vue({
       el:"#vue",
       data:{
           todoItems:['test1','test2','test3']
       }
   });
4-将这些值,通过插槽插入
<!--view层,模板-->
<div id="vue">
    <todo>
        <todo-title slot="todo-title" :title="title"></todo-title>
        <!--<todo-items slot="todo-items" v-for="{item,index} in todoItems" v-bind:item="item"></todo-items>-->
        <!--如下为简写-->
        <todo-items slot="todo-items" v-for="(item, index) in todoItems" :item="item" :index="index"></todo-items>
    </todo>
</div>
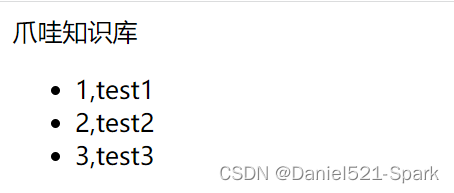
说明:我们的todo-title和todo-items组件分别被分发到了todo组件的todo-title和todo-items插槽中
完整代码如下:
<!DOCTYPE html>
<html lang="en">
<head>
    <meta charset="UTF-8">
    <title>Title</title>
</head>
<body>
<!--view层,模板-->
<div id="vue">
    <todo>
        <todo-title slot="todo-title" :title="title"></todo-title>
        <!--<todo-items slot="todo-items" v-for="{item,index} in todoItems" v-bind:item="item"></todo-items>-->
        <!--如下为简写-->
        <todo-items slot="todo-items" v-for="(item, index) in todoItems" :item="item" :index="index"></todo-items>
    </todo>
</div>
<!--1.导入Vue.js-->
<script src="https://cdn.jsdelivr.net/npm/vue@2.5.21/dist/vue.min.js"></script>
<script type="text/javascript">
    Vue.component('todo',{
        template:'<div>\
                <slot name="todo-title"></slot>\
                <ul>\
                    <slot name="todo-items"></slot>\
                </ul>\
            </div>'
    });
    Vue.component('todo-title',{
        props:['title'],
        template:'<div>{{title}}</div>'
    });
    //这里的index,就是数组的下标,使用for循环遍历的时候,可以循环出来!
    Vue.component("todo-items",{
        props:["item","index"],
        template:"<li>{{index+1}},{{item}}</li>"
    });

    var vm = new Vue({
        el:"#vue",
        data:{
            title:"爪哇知识库",
            todoItems:[
                'test1','test2','test3'
            ]
        }
    });
</script>
</body>
</html>
1.3、自定义事件
通以上代码不难发现,数据项在
Vue的实例中, 但删除操作要在组件中完成, 那么组件如何才能删除Vue实例中的数据呢?此时就涉及到参数传递与事件分发了,Vue为我们提供了自定义事件的功能很好的帮助我们解决了这个问题; 使用this.$emit(‘自定义事件名’, 参数), 操作过程如下:
1-在vue的实例中增加了methods对象并定义了一个名为removeTodoltems的方法
var vm = new Vue({
        el:"#vue",
        data:{
            title_text:"爪哇知识库",
            todoItems:['test1','test2','test3']
        },
        methods:{
            removeItems:function(index){
                console.log("删除了"+this.todoItems[index]+"OK");
                //splice() 方法向/从数组中添加/删除项目,然后返回被删除的项目,其中index
                this.todoItems.splice(index,1);
            }
        }
});
2-修改todo-items待办内容组件的代码,增加一个删除按钮,并且绑定事件!
Vue.component("todo-items",{
        props:["item_p","index_p"],
        template:"<li>{{index_p+1}},{{item_p}} <button @click='remove'>删除</button></li>",
        methods:{
            remove:function (index) {
            //这里的remove是自定义事件名称,需要在HTML中使用v-on:remove的方式
                //this.$emit 自定义事件分发
                this.$emit('remove',index);
            }
        }
});
3-修改todo-items待办内容组件的HTML代码,增加一个自定义事件,比如叫remove,可以和组件的方法绑定,然后绑定到vue的方法!
<!--增加了v-on:remove="removeTodoItems(index)"自定义事件,该组件会调用Vue实例中定义的-->
<todo-items slot="todo-items" v-for="(item,index) in todoItems"
                    :item_p="item" :index_p="index" v-on:remove="removeItems(index)" :key="index"></todo-items>
123
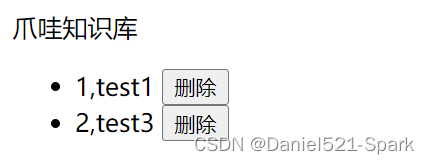
对上一个代码进行修改,实现删除功能
<!DOCTYPE html>
<html lang="en">
<head>
    <meta charset="UTF-8">
    <title>Title</title>
</head>
<body>
<!--view层,模板-->
<div id="vue">
    <todo>
        <todo-title slot="todo-title" :title="title_text"></todo-title>
        <!--<todo-items slot="todo-items" v-for="(item,index) in todoItems" v-bind:item="item"></todo-items>-->
        <!--如下为简写-->
        <todo-items slot="todo-items"
                    v-for="(item,index) in todoItems"
                    :item_p="item" :index_p="index"
                    v-on:remove="removeItems(index)"
                    :key="index">
        </todo-items>
    </todo>
</div>
<!--1.导入Vue.js-->
<script src="https://cdn.jsdelivr.net/npm/vue@2.5.21/dist/vue.min.js"></script>
<script type="text/javascript">
    Vue.component('todo',{
        template:'<div>\
                <slot name="todo-title"></slot>\
                <ul>\
                    <slot name="todo-items"></slot>\
                </ul>\
            </div>'
    });
    Vue.component('todo-title',{
        props:['title'],
        template:'<div>{{title}}</div>'
    });
    //这里的index,就是数组的下标,使用for循环遍历的时候,可以循环出来!
    Vue.component("todo-items",{
        props:["item_p","index_p"],
        template:"<li>{{index_p+1}},{{item_p}} <button @click='remove_methods'>删除</button></li>",
        methods:{
            remove_methods:function (index) {
                //this.$emit 自定义事件分发
                this.$emit('remove',index);
            }
        }
    });

    var vm = new Vue({
        el:"#vue",
        data:{
            title_text:"爪哇知识库",
            todoItems:['test1','test2','test3']
        },
        methods:{
            removeItems:function(index){
                console.log("删除了"+this.todoItems[index]+"OK");
                this.todoItems.splice(index,1);
            }
        }
    });
</script>
</body>
</html>
test2 被删除了
1.4、Vue入门小结
- 核心:数据驱动,组件化
- 优点:借鉴了AngularJS的模块化开发和React的虚拟Dom,虚拟Dom就是把Demo操作放到内存中执行;
常用的属性:
- v-if
- v-else-if
- v-else
- v-for
- v-on 绑定事件,简写@
- v-model 数据双向绑定
- v-bind 给组件绑定参数,简写:
组件化:
- 组合组件slot插槽
- 组件内部绑定事件需要使用到this.$emit(“事件名”,参数);
- 计算属性的特色,缓存计算数据
遵循SoC关注度分离原则,Vue是纯粹的视图框架,并不包含,比如Ajax之类的通信功能,为了解决通信问题,我们需要使用Axios框架做异步通信;
说明
Vue的开发都是要基于NodeJS,实际开发采用Vue-cli脚手架开发,vue-router路由,vuex做状态管理;Vue UI,界面我们一般使用ElementUI(饿了么出品),或者ICE(阿里巴巴出品)来快速搭建前端项目~~
二 、第一个vue-cli项目
2.1、什么是vue-cli
vue-cli官方提供的一个脚手架,用于快速生成一个vue的项目模板;
预先定义好的目录结构及基础代码,就好比咱们在创建Maven项目时可以选择创建一个骨架项目,这个估计项目就是脚手架,我们的开发更加的快速;
项目的功能
- 统一的目录结构
- 本地调试
- 热部署
- 单元测试
- 集成打包上线
2.2、需要的环境
最好以管理员身份安装进行
- Node.js 中文网
- 安装就是无脑的下一步就好,安装在自己的环境目录下
- 镜像
确认nodejs安装成功:
- cmd下输入
node -v,查看是否能够正确打印出版本号即可!- cmd下输入
npm -v,查看是否能够正确打印出版本号即可!- 这个npm,就是一个软件包管理工具,就和linux下的
apt软件安装差不多!
2.3、第一个vue-cli 应用程序
- 创建一个Vue项目,我们随便建立一个空的文件夹在电脑上,我这里在D盘下新建一个目录
D:\develop\ideaIU-2018.2.5\idea\idea_workspace\vue;
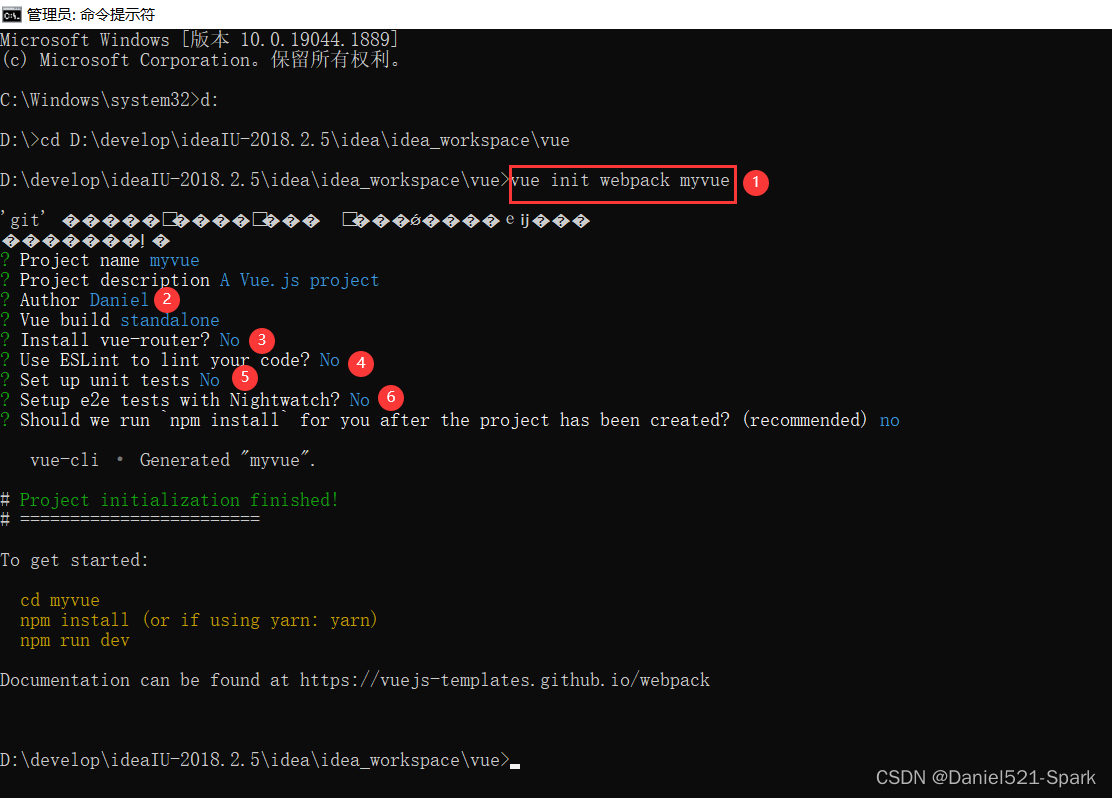
- 创建一个基于webpack模板的vue应用程序
#1、首先需要进入到对应的目录 cd D:\develop\ideaIU-2018.2.5\idea\idea_workspace\vue

#2、这里的myvue是顶日名称,可以根据自己的需求起名

vue init webpack myvue
一路都选择no即可;
说明:
- Project name:项目名称,默认回车即可
- Project description:项目描述,默认回车即可
- Author:项目作者,默认回车即可(也可以写个自己得自定义或英文名)
- Install vue-router:是否安装vue-router,选择n不安装(后期需要再手动添加)
- Use ESLint to lint your code:是否使用ESLint做代码检查,选择n不安装(后期需要再手动添加)
- Set up unit tests:单元测试相关,选择n不安装(后期需要再手动添加)
- Setupe2etests with Nightwatch:单元测试相关,选择n不安装(后期需要再手动添加)
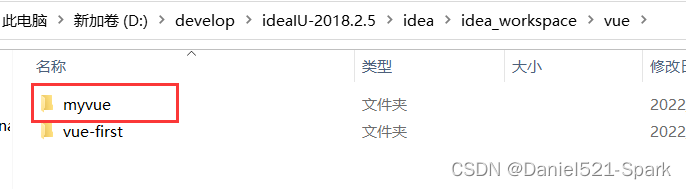
- Should we run npm install for you after the,project has been created:创建完成后直接初始化,选择n,我们手动执行;运行结果!
然而自己得文件中就多了一个muvue

(1)初始化并运行( 报错 按照提示走,问题都一样,答案别人得真是不一定到你的上面就能解决哈😒)
这里几个报错,我搞了好一会,没搞定,最终无奈之下卸载node重新安装走了一步,上面得⑥第二次选择了默认,不过报错了,没有管,直接运行,结果OK.
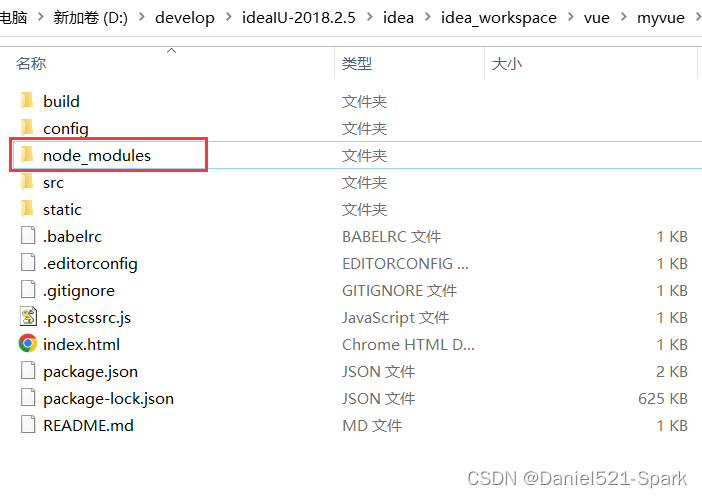
# 进入上面安装得项目下
cd myvue
# 安装项目依赖包
npm install
# 启动当前这个项目
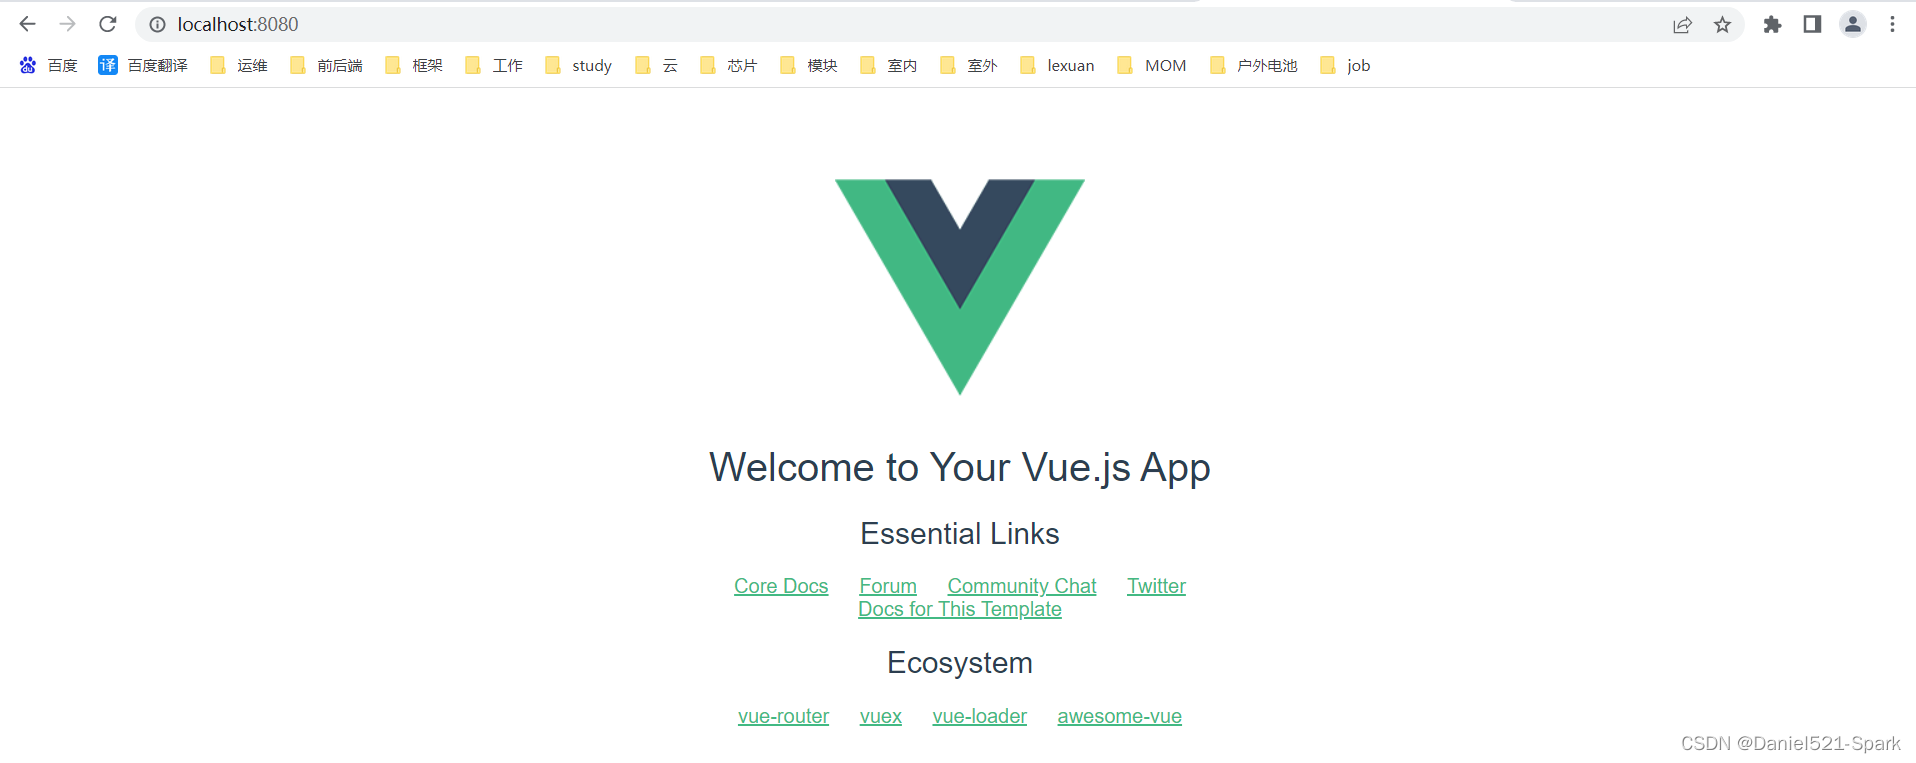
npm run dev
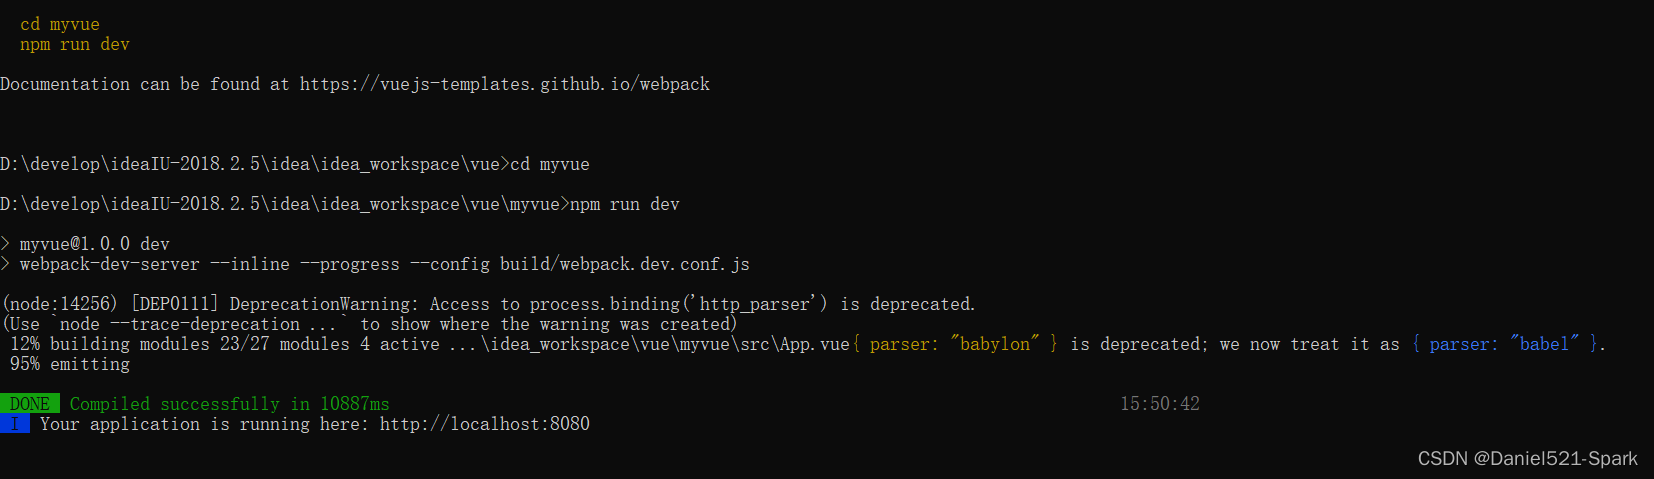
浏览器输入:http://localhost:8080/
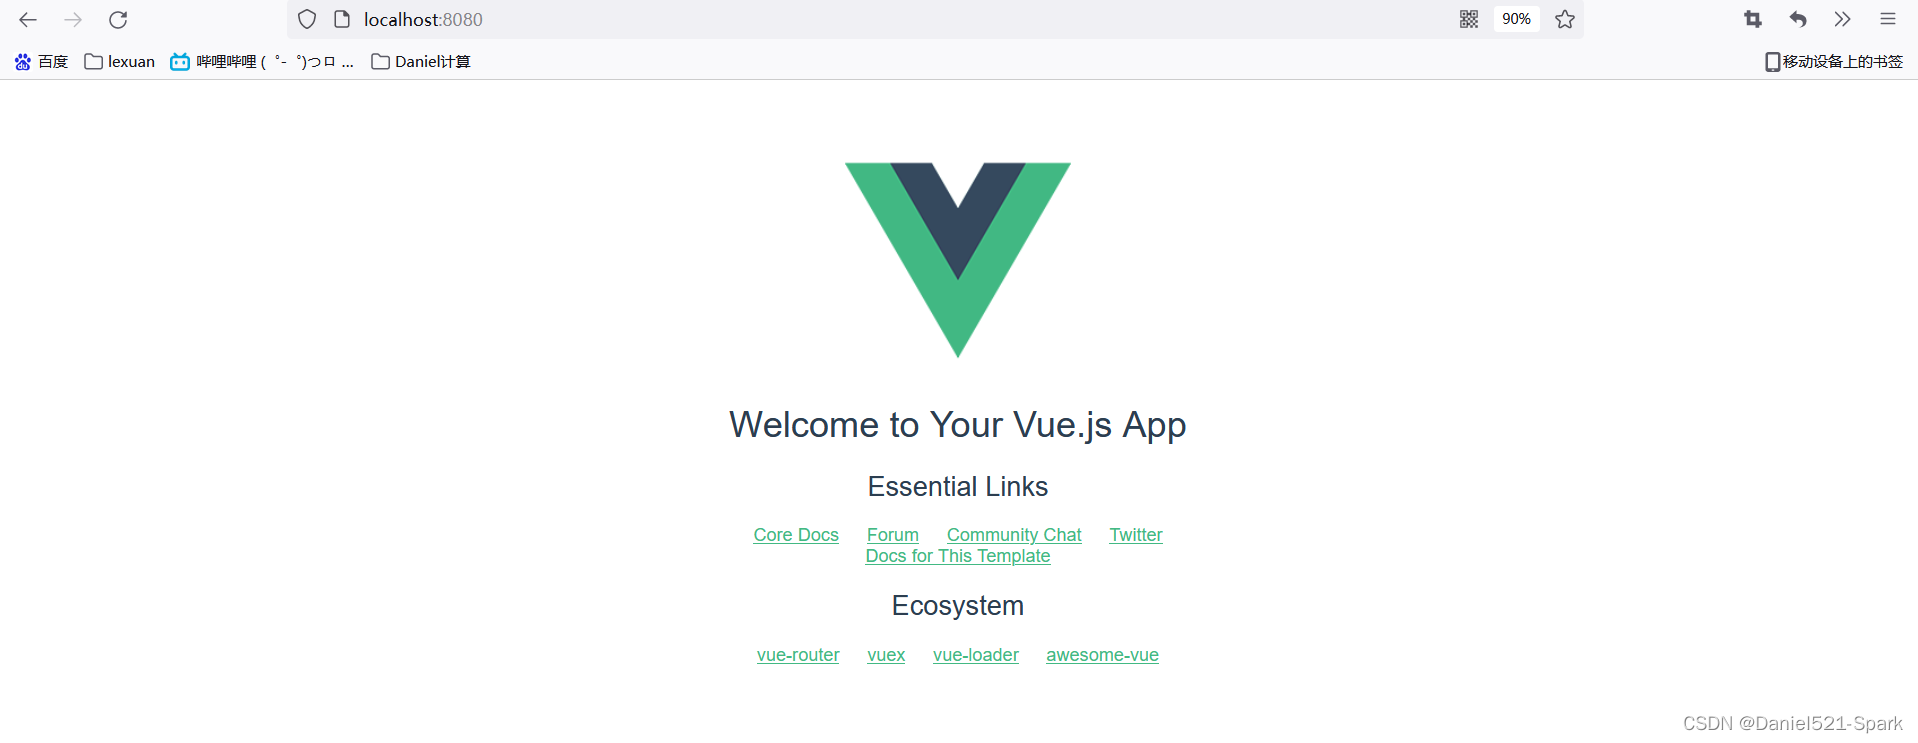
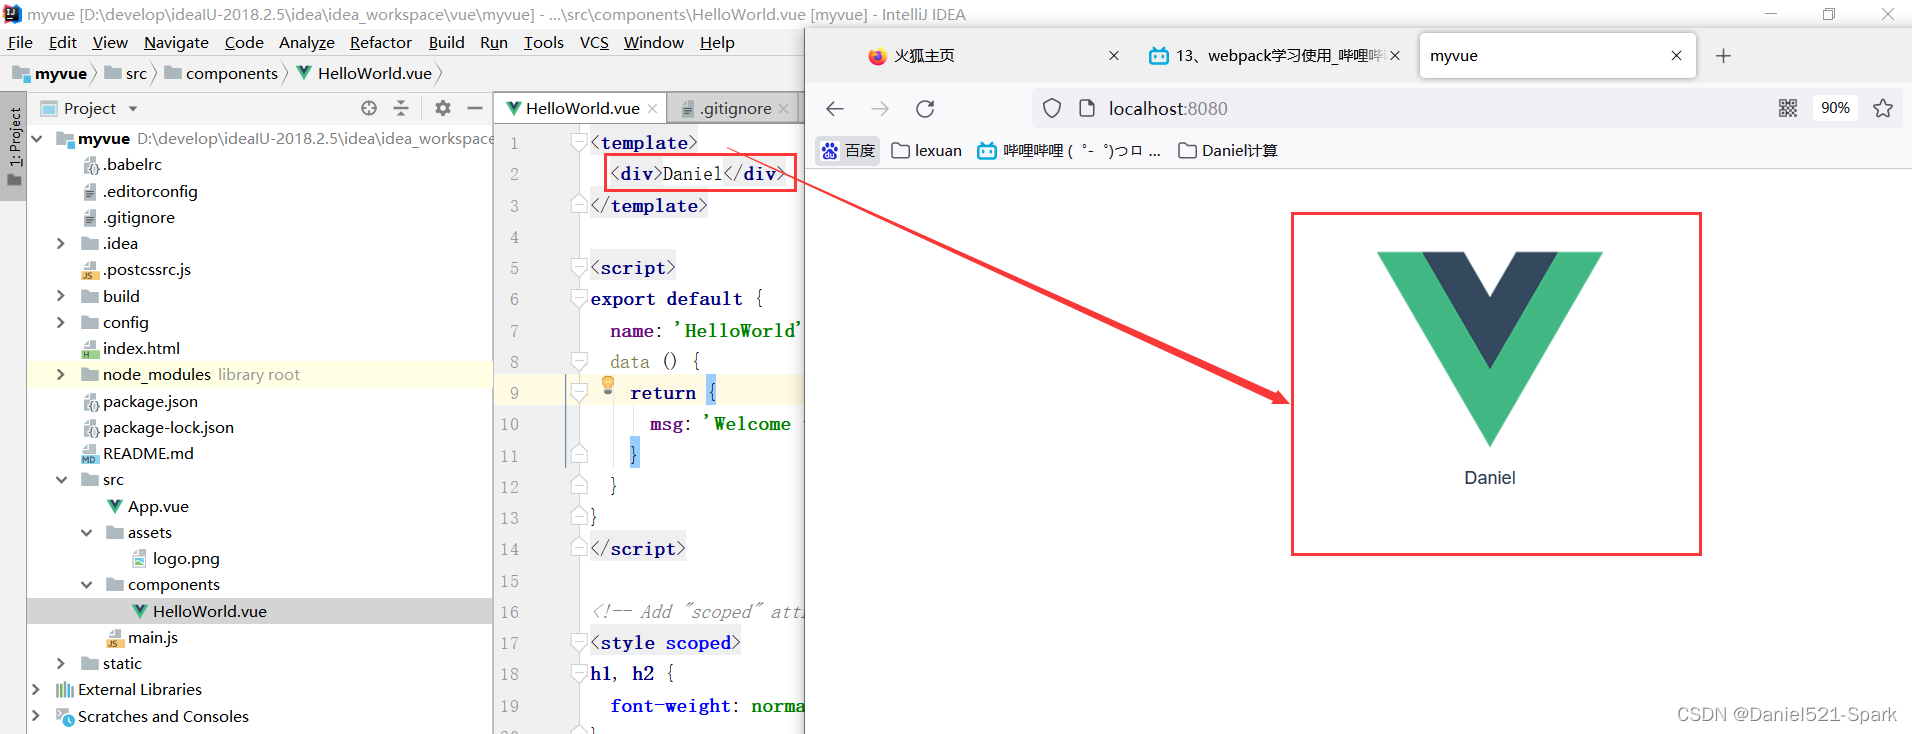
使用IDEA打开刚才创建得 myvue

做稍微改动会出现下面效果
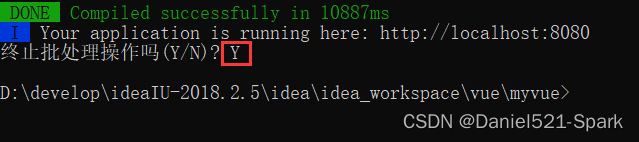
停止:
CTRL+C
IDEA中启动 Vue项目

解决 👉🏾 Idea启动Vue项目管理员权限开启
三、webpack 的使用
3.1、什么是 Webpack
- 本质上, webpack是一个现代JavaScript应用程序的静态模块打包器(module bundler) 。当webpack处理应用程序时, 它会递归地构建一个依赖关系图(dependency graph) , 其中包含应用程序需要的每个模块, 然后将所有这些模块打包成一个或多个bundle.
- Webpack是当下最热门的前端资源模块化管理和打包工具, 它可以将许多松散耦合的模块按照依赖和规则打包成符合生产环境部署的前端资源。还可以将按需加载的模块进行代码分离,等到实际需要时再异步加载。通过loader转换, 任何形式的资源都可以当做模块, 比如Commons JS、AMD、ES6、CSS、JSON、Coffee Script、LESS等;
- 伴随着移动互联网的大潮, 当今越来越多的网站已经从网页模式进化到了WebApp模式。它们运行在现代浏览器里, 使用HTML 5、CSS3、ES6等新的技术来开发丰富的功能, 网页已经不仅仅是完成浏览器的基本需求; WebApp通常是一个SPA(单页面应用) , 每一个视图通过异步的方式加载,这导致页面初始化和使用过程中会加载越来越多的JS代码,这给前端的开发流程和资源组织带来了巨大挑战。
- 前端开发和其他开发工作的主要区别,首先是前端基于多语言、多层次的编码和组织工作,其次前端产品的交付是基于浏览器的,这些资源是通过增量加载的方式运行到浏览器端,如何在开发环境组织好这些碎片化的代码和资源,并且保证他们在浏览器端快速、优雅的加载和更新,就需要一个模块化系统,这个理想中的模块化系统是前端工程师多年来一直探索的难题。
3.2、模块化的演进
Script标签
<script src = "module1.js"></script>
<script src = "module2.js"></script>
<script src = "module3.js"></script>
这是最原始的JavaScript文件加载方式,如果把每一个文件看做是一个模块,那么他们的接口通常是暴露在全局作用域下,也就是定义在window对象中,不同模块的调用都是一个作用域。
这种原始的加载方式暴露了一些显而易见的弊端:
- 全局作用域下容易造成变量冲突
- 文件只能按照
<script>的书写顺序进行加载- 开发人员必须主观解决模块和代码库的依赖关系
- 在大型项目中各种资源难以管理,长期积累的问题导致代码库混乱不堪
CommonsJS
服务器端的
NodeJS遵循CommonsJS规范,该规范核心思想是允许模块通过require方法来同步加载所需依赖的其它模块,然后通过exports或module.exports来导出需要暴露的接口。
require("module");
require("../module.js");
export.doStuff = function(){};
module.exports = someValue;
优点:
- 服务器端模块便于重用
- NPM中已经有超过45万个可以使用的模块包
- 简单易用
缺点:
同步的模块加载方式不适合在浏览器环境中,同步意味着阻塞加载,浏览器资源是异步加载的
不能非阻塞的并行加载多个模块
实现:
- 服务端的 NodeJS
- Browserify,浏览器端的CommonsJS实现,可以使用NPM的模块,但是编译打包后的文件体积较大
- modules-webmake,类似Browserify,但不如Browserify灵活
- wreq,Browserify 的前身
AMD
Asynchronous Module Definition规范其实主要一个主要接口define(id?,dependencies?,factory);它要在声明模块的时候指定所有的依赖dependencies,并且还要当做形参传到factory中,对于依赖的模块提前执行。
define("module",["dep1","dep2"],functian(d1,d2){
	return someExportedValue;
});
require(["module","../file.js"],function(module,file){});
1234
12345
优点
- 适合在浏览器环境中异步加载模块
- 可以并行加载多个模块
缺点
- 提高了开发成本,代码的阅读和书写比较困难,模块定义方式的语义不畅
- 不符合通用的模块化思维方式,是一种妥协的实现
实现
- RequireJS
- curl
- CMD
- Commons Module Definition规范和AMD很相似,尽保持简单,并与CommonsJS和NodeJS的
Modules规范保持了很大的兼容性。
define(function(require,exports,module){
	var $=require("jquery");
	var Spinning = require("./spinning");
	exports.doSomething = ...;
	module.exports=...;
});
123456
优点:
-依赖就近,延迟执行
-可以很容易在NodeJS中运行缺点
-依赖SPM打包,模块的加载逻辑偏重
实现
- Sea.js
- coolie
ES6模块
- EcmaScript 6标准增加了JavaScript语言层面的模块体系定义。ES 6模块的设计思想, 是尽量静态化, 使编译时就能确定模块的依赖关系, 以及输入和输出的变量。Commons JS和AMD模块,都只能在运行时确定这些东西。
import "jquery"
export function doStuff(){}
module "localModule"{}
优点
- 容易进行静态分析
- 面向未来的Ecma Script标准
缺点
- 原生浏览器端还没有实现该标准
- 全新的命令,新版的Node JS才支持
实现
- Babel
大家期望的模块
系统可以兼容多种模块风格, 尽量可以利用已有的代码, 不仅仅只是JavaScript模块化, 还有CSS、图片、字体等资源也需要模块化。
3.3、安装Webpack
WebPack是一款模块加载器兼打包工具, 它能把各种资源, 如JS、JSX、ES 6、SASS、LESS、图片等都作为模块来处理和使用。
安装:
npm install webpack -g

npm install webpack-cli -g
测试安装成功
webpack -vwebpack-cli -v

配置
创建 webpack.config.js配置文件
- entry:入口文件, 指定Web Pack用哪个文件作为项目的入口
- output:输出, 指定WebPack把处理完成的文件放置到指定路径
- module:模块, 用于处理各种类型的文件
- plugins:插件, 如:热更新、代码重用等
- resolve:设置路径指向
- watch:监听, 用于设置文件改动后直接打包
module.exports = {
	entry:"",
	output:{
		path:"",
		filename:""
	},
	module:{
		loaders:[
			{test:/\.js$/,;\loade:""}
		]
	},
	plugins:{},
	resolve:{},
	watch:true
}
直接运行 webpack 命令打包
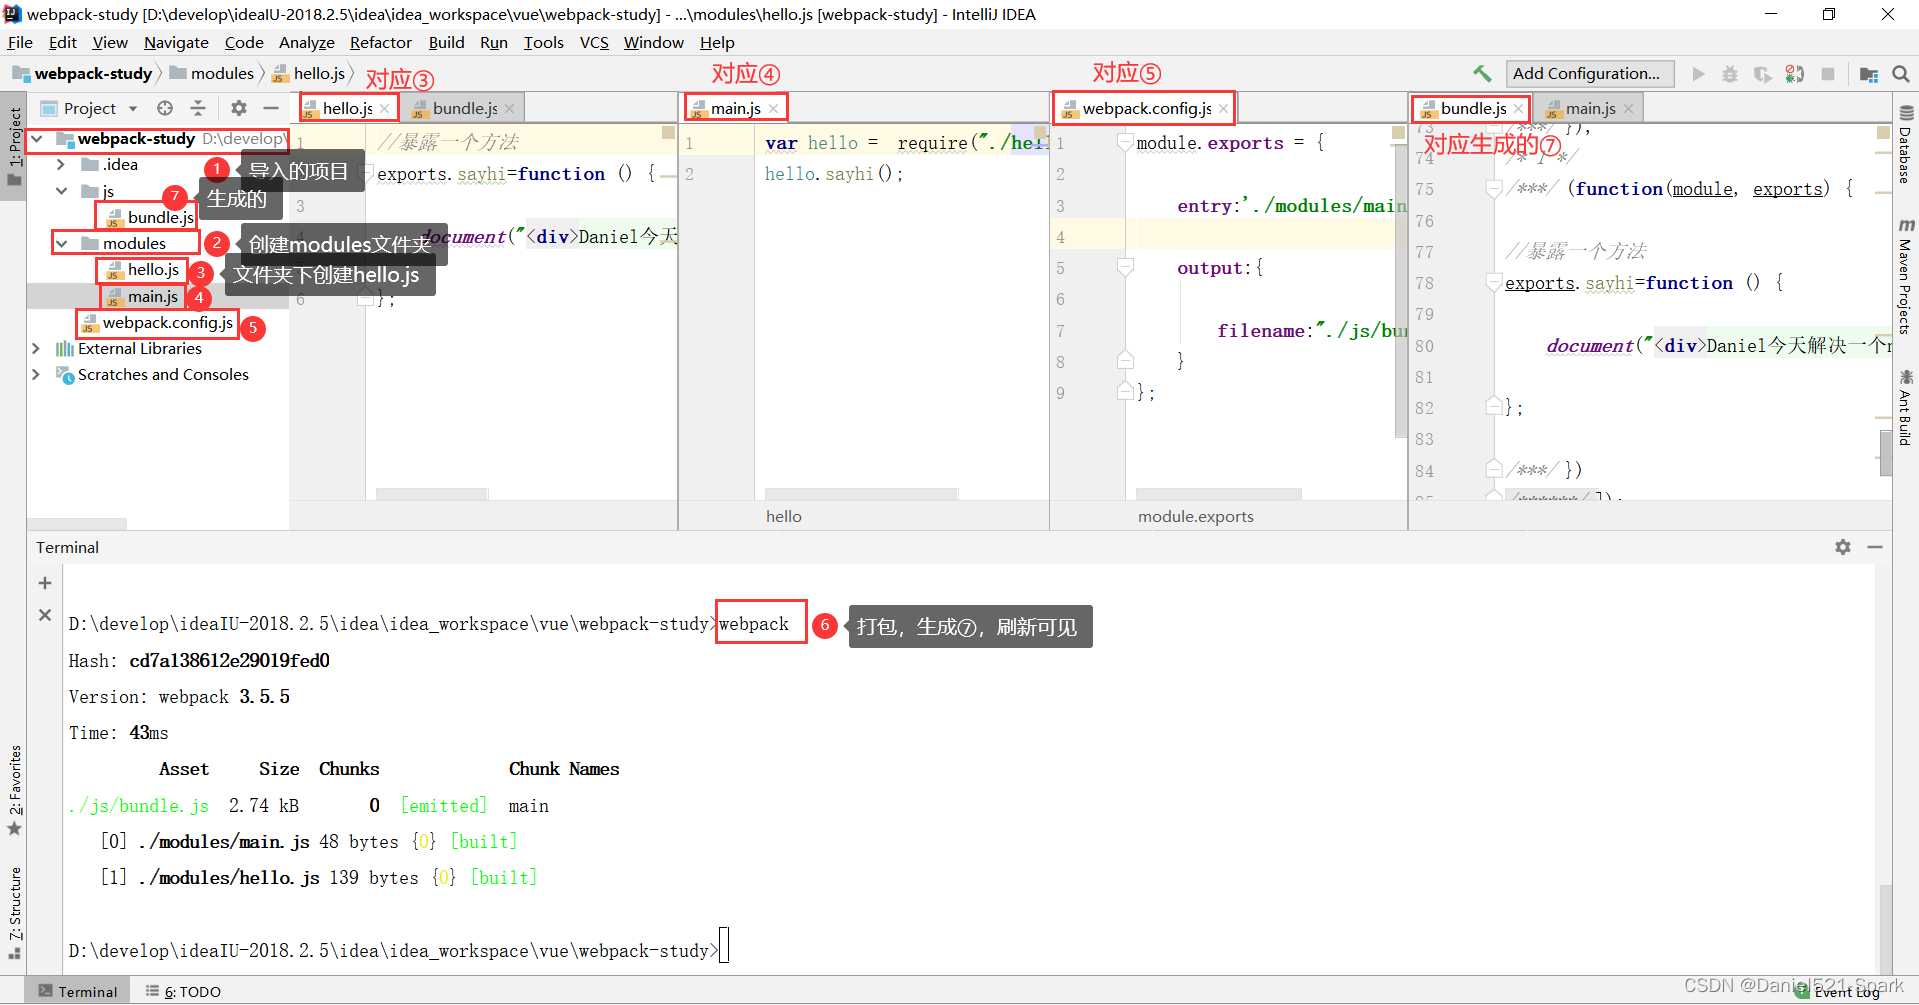
3.4、使用 webpack
- 创建项目
webpack-study

- 创建一个名为
modules的目录,用于放置JS模块等资源文件- 在modules下创建模块文件,如
hello.js,用于编写JS模块相关代码
//暴露一个方法
exports.sayhi=function () {

    document.write("<div>Daniel今天解决一个node.js的bug差点崩溃了</div>");

};
在modules下创建一个名为main.js的入口文件,用于打包时设置entry属性
//require 导入一个模块,就可以调用这个模块中的方法了
var hello =  require("./hello");
hello.sayhi();
在项目目录下创建webpack.config.js配置文件,使用webpack命令打包
module.exports = {

    entry:'./modules/main.js',

    output:{

        filename:"./js/bundle.js"
    }
};
在项目目录下创建HTML页面,如
index.html,导入webpack打包后的JS文件
<!DOCTYPE html>
<html lang="en">
<head>
    <meta charset="UTF-8">
    <title>Title</title>
</head>
<body>

<script src="./js/bundle.js"></script>

</body>
</html>

以
- 在IDEA控制台中直接执行webpack;如果失败的话,就使用管理员权限运行即可!
- 运行HTML看效果

说明
# 参数--watch 用于监听变化

webpack --watch
四、vue-router路由
4.1、说明
学习的时候,尽量的打开官方的文档
Vue Router是Vue.js官方的路由管理器。它和Vue.js的核心深度集成, 让构建单页面应用变得易如反掌。包含的功能有:
- 嵌套的路由/视图表
- 模块化的、基于组件的路由配置
- 路由参数、查询、通配符
- 基于Vue js过渡系统的视图过渡效果
- 细粒度的导航控制
- 带有自动激活的CSS class的链接
- HTML5 历史模式或hash模式, 在IE 9中自动降级
- 自定义的滚动行为
4.2、安装
- 基于第一个
vue-cli进行测试学习; 先查看node modules中是否存在vue-routervue-router是一个插件包, 所以我们还是需要用npm/cn pm来进行安装的。打开命令行工具,进入你的项目目录,输入下面命令。
(1)在idea中打开上面导入的 myvue 项目 操作(删除)下面⑤处;

(2)搜索此项目中是否有vue-router(没有)

(3)进行安装
npm install vue-router --save-dev
安装报错解决 四、安装vue-router报错
如果在一个模块化工程中使用它,必须要通过Vue.use()明确地安装路由功能:
import Vue from 'vue'
import VueRouter from 'vue-router'

//显示声名使用VueRouter
Vue.use(VueRouter);
4.3、测试
- 先删除没有用的东西(上面(1)已经删除了)
- components 目录下存放我们自己编写的组件
- 定义一个
Content.vue的组件
<template>
	<div>
		<h1>内容页</h1>
	</div>
</template>

<script>
	export default {
		name:"Content"
	}
</script>
Main.vue组件
<template>
	<div>
		<h1>首页</h1>
	</div>
</template>

<script>
	export default {
		name:"Main"
	}
</script>
- 安装路由,在 src 目录下,新建一个文件夹:
router,专门存放路由,配置路由index.js,如下
import Vue from'vue'
//导入路由插件
import VueRouterfrom 'vue-router'
//导入上面定义的组件
import Content from '../components/Content'
import Main from '../components/Main'
//安装路由
Vue.use(VueRouter) ;
//配置路由
export default new VueRouter({
	routes:[
		{
			//路由路径
			path:'/content',
			//路由名称
			name:'content',
			//跳转到组件
			component:Content
			},{
			//路由路径
			path:'/main',
			//路由名称
			name:'main',
			//跳转到组件
			component:Main
			}
		]
	});
- 在main.js中配置路由
import Vue from 'vue'
import App from './App'

//导入上面创建的路由配置目录
import router from './router'//自动扫描里面的路由配置

//来关闭生产模式下给出的提示
Vue.config.productionTip = false;

new Vue({
	el:"#app",
	//配置路由
	router,
	components:{App},
	template:'<App/>'
});
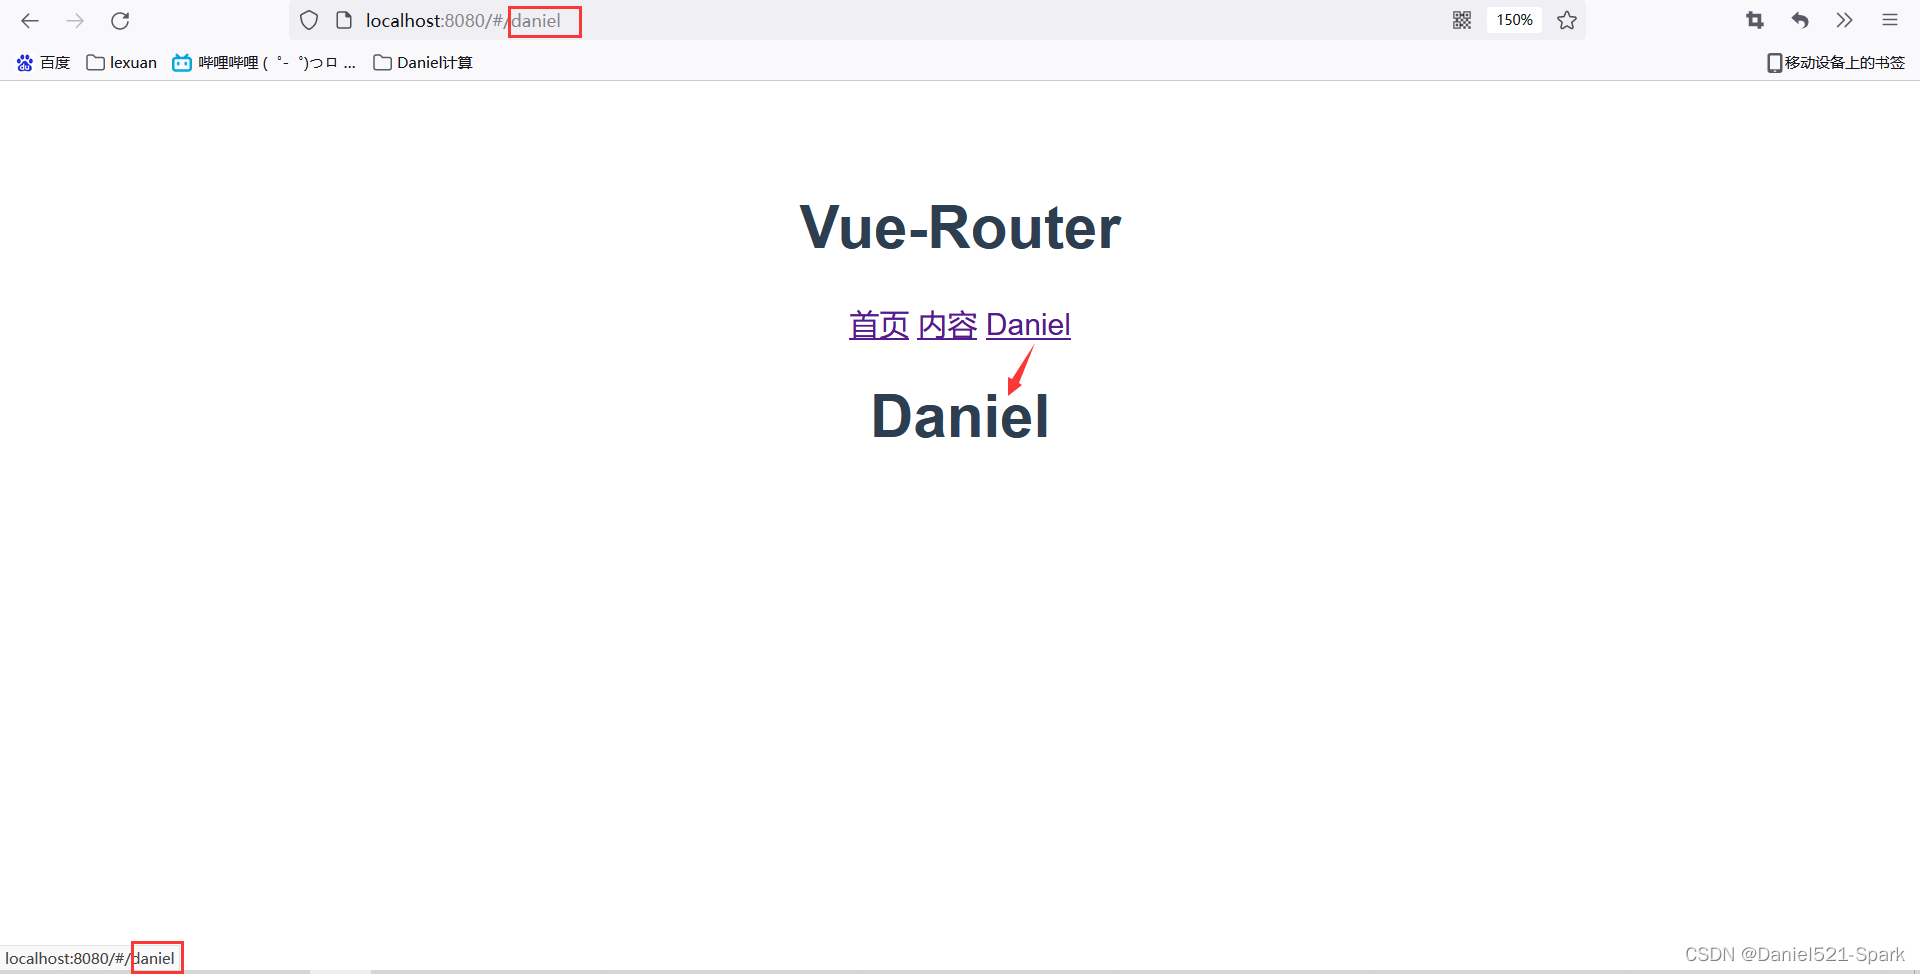
- 在App.vue中使用路由
<template>
	<div id="app">
		<!--
			router-link:默认会被渲染成一个<a>标签,to属性为指定链接
			router-view:用于渲染路由匹配到的组件
		-->
		<h1>Vue-Router</h1>
		<router-link to="/main">首页</router-link>
		<router-link to="/content">内容</router-link>
		<router-view></router-view>
	</div>
</template>

<script>
	export default{
		name:'App'
	}
</script>
<style></style>

比如再增加一个:

效果显示
五、实战快速上手-element-ui
我们采用实战教学模式并结合 ElementUI 组件库,将所需知识点应用到实际中,以最快速度带领大家掌握Vue的使用;
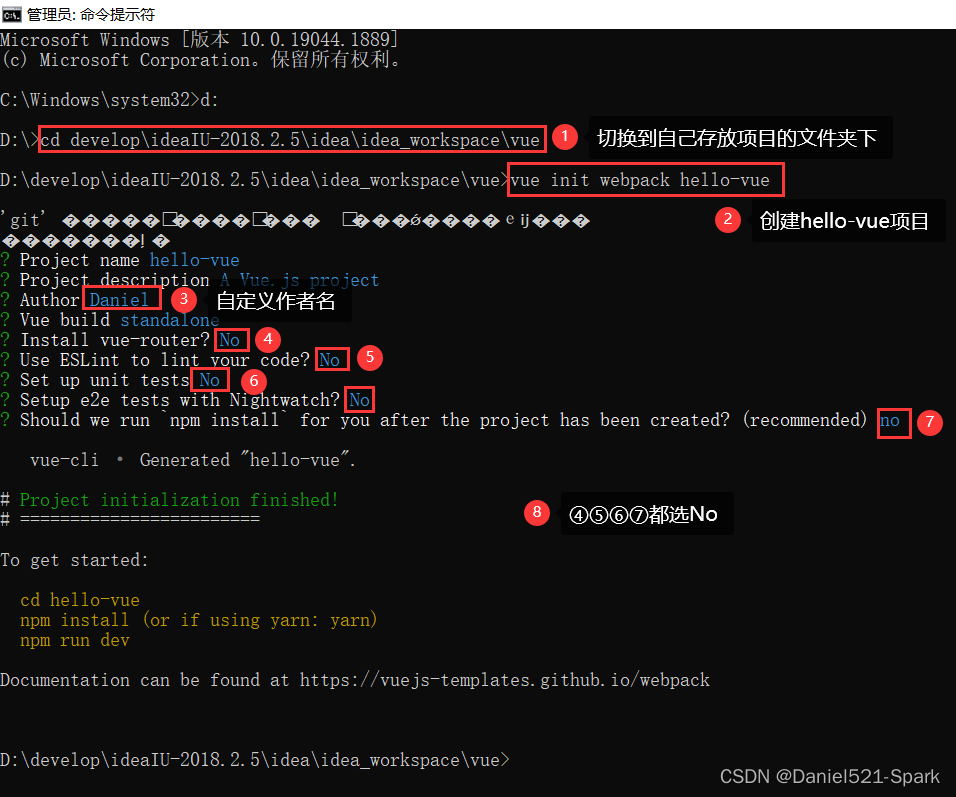
5.1、创建工程
注意:命令行都要使用管理员模式运行
以管理员身份切入到要创建的文件夹下:
cd develop\ideaIU-2018.2.5\idea\idea_workspace\vue
- 创建一个名为
hello-vue的工程vue init webpack hello-vue- 安装依赖, 我们需要安装
vue-router、element-ui、sass-loader和node-sass四个插件
#进入工程目录
cd hello-vue

#安装vue-routern  报错看下面解决
npm install vue-router --save-dev

#安装element-ui  官网复制过来的哦
npm i element-ui -S

#安装依赖
npm install

# 安装SASS加载器
cnpm install sass-loader node-sass --save-dev

#启功测试
npm run dev
安装报错解决 四、安装vue-router报错
Npm命令解释:
npm install moduleName:安装模块到项目目录下npm install -g moduleName:-g的意思是将模块安装到全局,具体安装到磁盘哪个位置要看npm config prefix的位置npm install -save moduleName:–save的意思是将模块安装到项目目录下, 并在package文件的dependencies节点写入依赖,-S为该命令的缩写npm install -save-dev moduleName:–save-dev的意思是将模块安装到项目目录下,并在package文件的devDependencies节点写入依赖,-D为该命令的缩写
5.2、创建登录页面
使用 IDEA打开上面创建的hello-vue项目,把没有用的初始化东西删掉!

在源码目录中(src目录下)创建如下结构:
assets:用于存放资源文件(初始化已生成)components:用于存放Vue功能组件(初始化已生成)views:用于存放Vue视图组件(需要创建)router:用于存放vue-router配置(需要创建)
创建首页视图,在views目录下创建一个名为Main.vue的视图组件:
<template>
	<div>首页</div>
</template>
<script>
	export default {
			name:"Main"
	}
</script>
<style scoped>
</style>
创建登录页视图在views目录下创建名为Login.vue的视图组件,其中el-*的元素为ElementUI组件;
下面代码也是根据 ElementUI 中的 Form表单 copy过来修改而已!
<template>
  <div>
    <el-form ref="loginForm" :model="form" :rules="rules" label-width="80px" class="login-box">
      <h3 class="login-title">欢迎登录</h3>
      <el-form-item label="账号" prop="username">
        <el-input type="text" placeholder="请输入账号" v-model="form.username"/>
      </el-form-item>
      <el-form-item label="密码" prop="password">
        <el-input type="password" placeholder="请输入密码" v-model="form.password"/>
      </el-form-item>
      <el-form-item>
        <el-button type="primary" v-on:click="onsubmit('loginForm')">登录</el-button>
      </el-form-item>
    </el-form>

    <el-dialog title="温馨提示" :visible.sync="dialogVisiable" width="30%" :before-close="handleClose">
      <span>请输入账号和密码</span>
      <span slot="footer" class="dialog-footer">
          <el-button type="primary" @click="dialogVisible = false">确定</el-button>
        </span>
    </el-dialog>
  </div>
</template>

<script>
    export default {
        name: "Login",
      data(){
          return{
            form:{
              username:'',
              password:''
            },
            //表单验证,需要在 el-form-item 元素中增加prop属性
            rules:{
              username:[
                {required:true,message:"账号不可为空",trigger:"blur"}
              ],
              password:[
                {required:true,message:"密码不可为空",tigger:"blur"}
              ]
            },

            //对话框显示和隐藏
            dialogVisible:false
          }
      },
      methods:{
          onsubmit(formName){
            //为表单绑定验证功能
            this.$refs[formName].validate((valid)=>{
              if(valid){
                //使用vue-router路由到指定界面,该方式称为编程式导航
                this.$router.push('/main');
              }else{
                this.dialogVisible=true;
                return false;
              }
            });
          }
      }
    }
</script>

<style lang="scss" scoped>
  .login-box{
    border:1px solid #DCDFE6;
    width: 350px;
    margin:180px auto;
    padding: 35px 35px 15px 35px;
    border-radius: 5px;
    -webkit-border-radius: 5px;
    -moz-border-radius: 5px;
    box-shadow: 0 0 25px #909399;
  }
  .login-title{
    text-align:center;
    margin: 0 auto 40px auto;
    color: #303133;
  }
</style>
创建路由,在router目录下创建一个名为index.js的vue-router路由配置文件
//导入vue
import Vue from 'vue';
import VueRouter from 'vue-router';
//导入组件
import Main from "../views/Main";
import Login from "../views/Login";
//使用
Vue.use(VueRouter);
//导出
export default new VueRouter({
  routes: [
    {
      //登录页
      path: '/main',
      component: Main
    },
    //首页
    {
      path: '/login',
      component: Login
    },
  ]

})
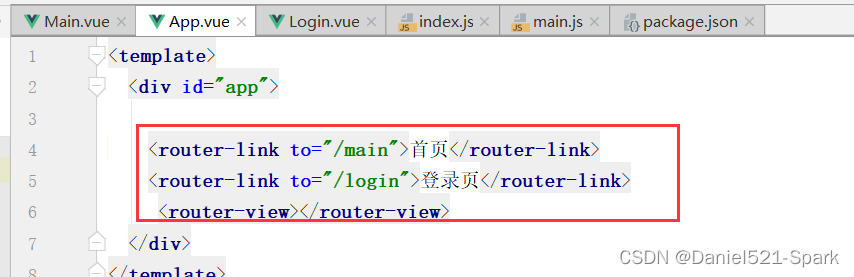
App.vue
<template>
  <div id="app">
    <router-link to="/main">首页</router-link>
    <router-link to="/login">登录页</router-link>
    <router-view></router-view>
  </div>
</template>

<script>


export default {
  name: 'App',

}
</script>

<style>
#app {
  font-family: 'Avenir', Helvetica, Arial, sans-serif;
  -webkit-font-smoothing: antialiased;
  -moz-osx-font-smoothing: grayscale;
  text-align: center;
  color: #2c3e50;
  margin-top: 60px;
}
</style>
main.js 可以参考 ElementUI 中的 快速上手
// The Vue build version to load with the `import` command
// (runtime-only or standalone) has been set in webpack.base.conf with an alias.
import Vue from 'vue'
import App from './App'

import router from "./router"

import ElementUI from 'element-ui'
import 'element-ui/lib/theme-chalk/index.css'


Vue.use(router);
Vue.use(ElementUI);

/* eslint-disable no-new */
new Vue({
  el: '#app',
  router,
  render:h=>h(App)
});
测试:先停止命令窗口的运行,到IDEA开启运行
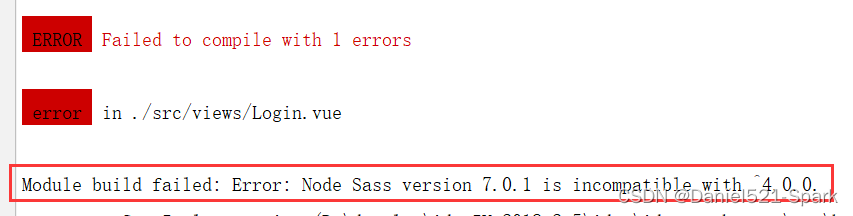
如果出现上面错误: 可能是因为sass-loader的版本过高导致的编译错误,当前最高版本是13.0.2,需要退回到4.0.0;
去package.json文件里面的 "sass-loader"的版本更换成4.0.0,然后重新cnpm install就可以了;
详细解决 👉🏾 五、 Module build failed: Error: Node Sass version 7.0.1 is incompatible with ^4.0.0.
再次运行 npm run dev
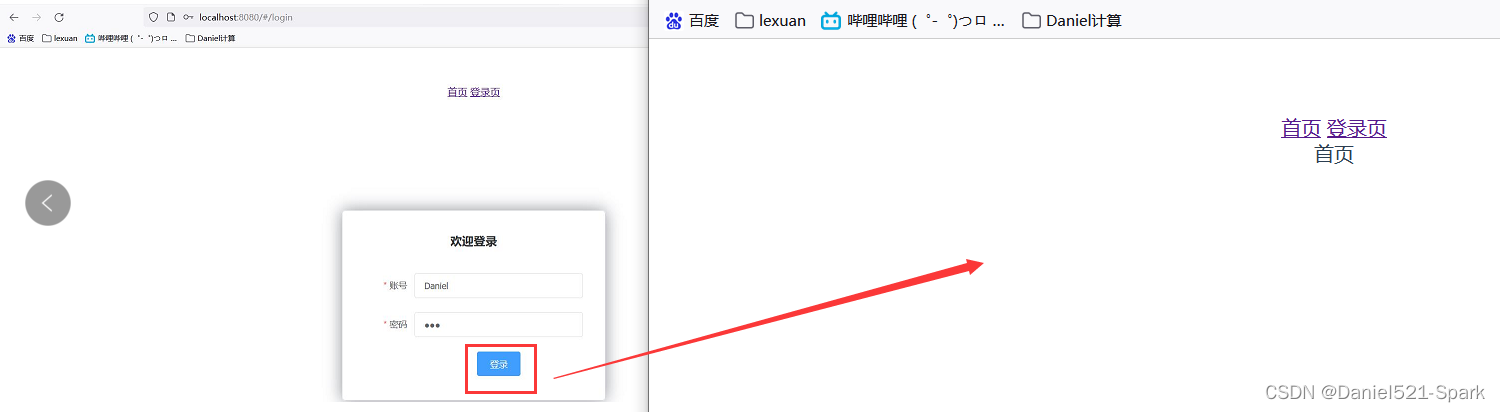
测试:在浏览器打开 http://localhost:8080/#/login


当输入账号和密码(随便输入)即可跳转首页
5.3、路由嵌套
嵌套路由又称子路由,在实际应用中,通常由多层嵌套的组件组合而成。同样地,URL中各段动态路径也按某种结构对应嵌套的各层组件,例如:

1、 创建用户信息组件,在 views/user 目录下创建一个名为 Profile.vue 的视图组件;
Profile.vue
<template>
    <h1>个人信息</h1>
</template>

<script>
    export default {
        name: "Profile.vue"
    }
</script>

<style scoped>

</style>
2、在用户列表组件在 views/user 目录下创建一个名为 List.vue 的视图组件;
List.vue
<template>
    <h1>用户列表</h1>
</template>

<script>
    export default {
        name: "List.vue"
    }
</script>

<style scoped>

</style>
3、 修改首页视图,我们修改 Main.vue 视图组件,此处使用了 ElementUI 布局容器组件,代码如下:
Main.vue
<template>
  <div>
    <el-container style="height: 650px; border: 1px solid #eee">
      <el-aside width="200px" style="background-color: rgb(238, 241, 246)">
        <el-menu :default-openeds="['1']">
          <el-submenu index="1">
            <template slot="title"><i class="el-icon-caret-right"></i>用户管理</template>
            <el-menu-item-group>
              <el-menu-item index="1-1">
                <!--插入的地方-->
                <router-link to="/user/profile">个人信息</router-link>
              </el-menu-item>
              <el-menu-item index="1-2">
                <!--插入的地方-->
                <router-link to="/user/list">用户列表</router-link>
              </el-menu-item>
            </el-menu-item-group>
          </el-submenu>
          <el-submenu index="2">
            <template slot="title"><i class="el-icon-caret-right"></i>内容管理</template>
            <el-menu-item-group>
              <el-menu-item index="2-1">分类管理</el-menu-item>
              <el-menu-item index="2-2">内容列表</el-menu-item>
            </el-menu-item-group>
          </el-submenu>

          <el-submenu index="3">
            <template slot="title"><i class="el-icon-caret-right"></i>财务管理</template>
            <el-menu-item-group>
              <el-menu-item index="3-1">进帐管理</el-menu-item>
              <el-menu-item index="3-2">出账管理</el-menu-item>
            </el-menu-item-group>
          </el-submenu>


          <el-submenu index="4">
            <template slot="title"><i class="el-icon-caret-right"></i>研发管理</template>
            <el-menu-item-group>
              <el-menu-item index="4-1">开发组</el-menu-item>
              <el-menu-item index="4-2">测试组</el-menu-item>
            </el-menu-item-group>
          </el-submenu>

          <el-submenu index="5">
            <template slot="title"><i class="el-icon-caret-right"></i>销售管理</template>
            <el-menu-item-group>
              <el-menu-item index="5-1">销售业务管理</el-menu-item>
              <el-menu-item index="5-2">人员配备管理</el-menu-item>
            </el-menu-item-group>
          </el-submenu>


        </el-menu>
      </el-aside>

      <el-container>
        <el-header style="text-align: right; font-size: 12px">
          <el-dropdown>
            <i class="el-icon-setting" style="margin-right: 15px"></i>
            <el-dropdown-menu slot="dropdown">
              <el-dropdown-item>个人信息</el-dropdown-item>
              <el-dropdown-item>退出登录</el-dropdown-item>
            </el-dropdown-menu>
          </el-dropdown>
        </el-header>
        <el-main>
          <!--在这里展示视图-->
          <router-view />
        </el-main>
      </el-container>
    </el-container>
  </div>
</template>
<script>
  export default {
    name: "Main"
  }
</script>
<style scoped lang="scss">
  .el-header {
    background-color: #1693d1;
    color: #333;
    line-height: 60px;
  }
  .el-aside {
    color: #333;
  }
</style>
4、 配置嵌套路由修改 router 目录下的 index.js 路由配置文件,使用children放入main中写入子模块,代码如下
index.js
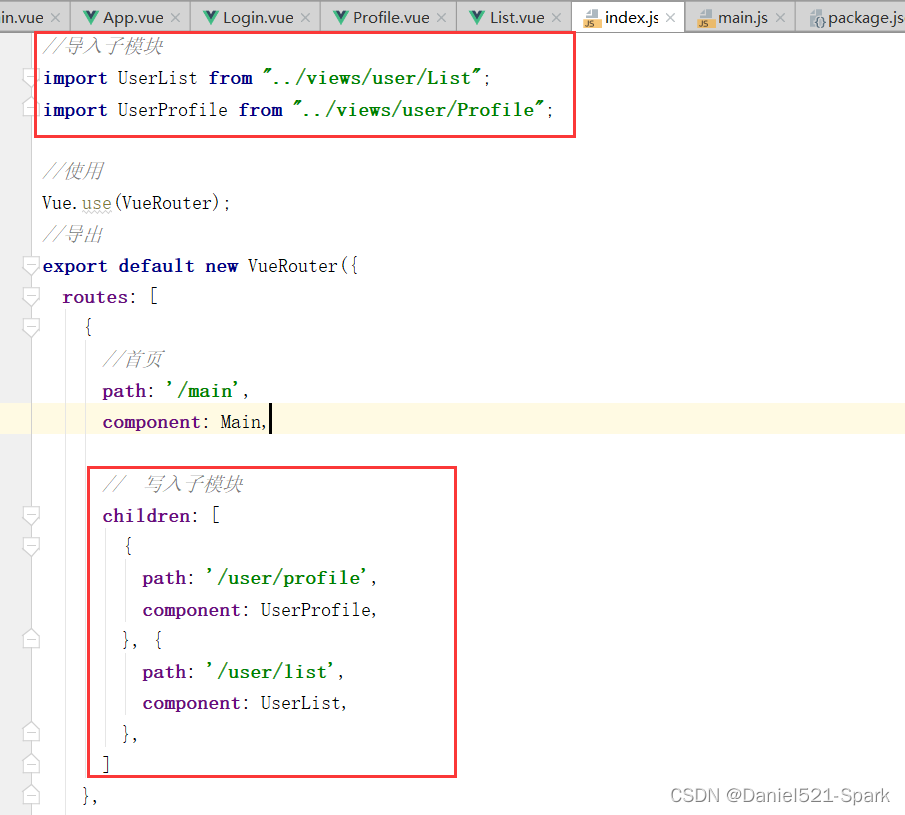
//导入vue
import Vue from 'vue';
import VueRouter from 'vue-router';
//导入组件
import Main from "../views/Main";
import Login from "../views/Login";

//导入子模块
import UserList from "../views/user/List";
import UserProfile from "../views/user/Profile";

//使用
Vue.use(VueRouter);
//导出
export default new VueRouter({
  routes: [
    {
      //首页
      path: '/main',
      component: Main,

      //  写入子模块
      children: [
        {
          path: '/user/profile',
          component: UserProfile,
        }, {
          path: '/user/list',
          component: UserList,
        },
      ]
    },
    {
      //登录页
      path: '/login',
      component: Login
    }
  ]
})
5、 路由嵌套实战效果图 http://localhost:8080/#/user/list

完整源码 👉🏾 hello-vue
5.4、参数传递
这里演示如果请求带有参数该怎么传递
- 用的还是上述例子的代码 修改一些代码 这里不放重复的代码了
第一种取值方式
1、 修改路由配置, 主要是router下的index.js中的 path 属性中增加了 :id 这样的占位符
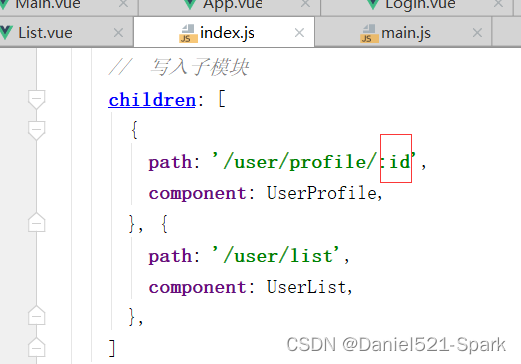
{
    path: '/user/profile/:id',
    component: UserProfile,
}
2、传递参数
此时我们在Main.vue中的route-link位置处
to改为了:to,是为了将这一属性当成对象使用,注意 router-link 中的 name 属性名称 一定要和 路由中的 name 属性名称 匹配,因为这样 Vue 才能找到对应的路由路径;
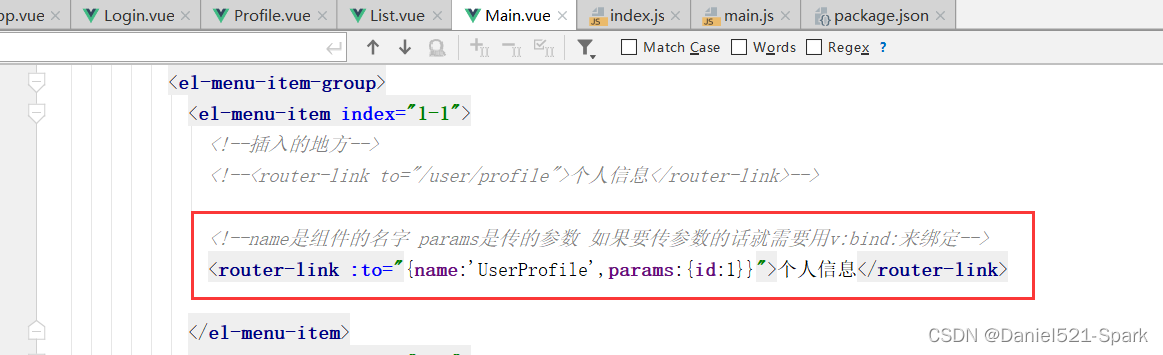
<!--name是组件的名字 params是传的参数 如果要传参数的话就需要用v:bind:来绑定-->
<router-link :to="{name:'UserProfile',params:{id:1}}">个人信息</router-link>
3、在要展示的组件Profile.vue中接收参数 使用 {{$route.params.id}}来接收
Profile.vue 部分代码
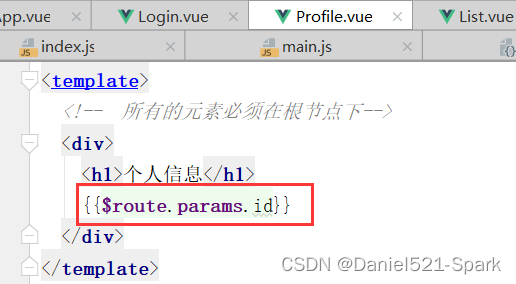
<template>
  <!--  所有的元素必须在根节点下-->
  <div>
    <h1>个人信息</h1>
    {{$route.params.id}}
  </div>
</template>

第二种取值方式 使用props 减少耦合
1、修改路由配置 , 主要在router下的index.js中的路由属性中增加了 props: true 属性

{
   path: '/user/profile/:id',
   component: UserProfile,
   props: true
}
2、传递参数和之前一样 在Main.vue中修改route-link地址
<template>
<!--name是组件的名字 params是传的参数 如果要传参数的话就需要用v:bind:来绑定-->
<router-link :to="{name:'UserProfile',params:{id:1}}">个人信息</router-link>
3、在Profile.vue接收参数为目标组件增加 props 属性
Profile.vue

<template>
  <!--  所有的元素必须在根节点下-->
  <div>
    个人信息
    {{ id }}
  </div>
</template>

<script>
    export default {
      props: ['id'],
      name: "Profile.vue"
    }
</script>
<style scoped>
</style>

5.5、组件重定向
重定向的意思大家都明白,但 Vue 中的重定向是作用在路径不同但组件相同的情况下,比如:
在router下面index.js的配置

{
  path: '/main',
  name: 'Main',
  component: Main
},
{
  path: '/goHome',
  redirect: '/main'
}
说明:这里定义了两个路径,一个是 /main ,一个是 /goHome,其中 /goHome 重定向到了 /main 路径,由此可以看出重定向不需要定义组件;
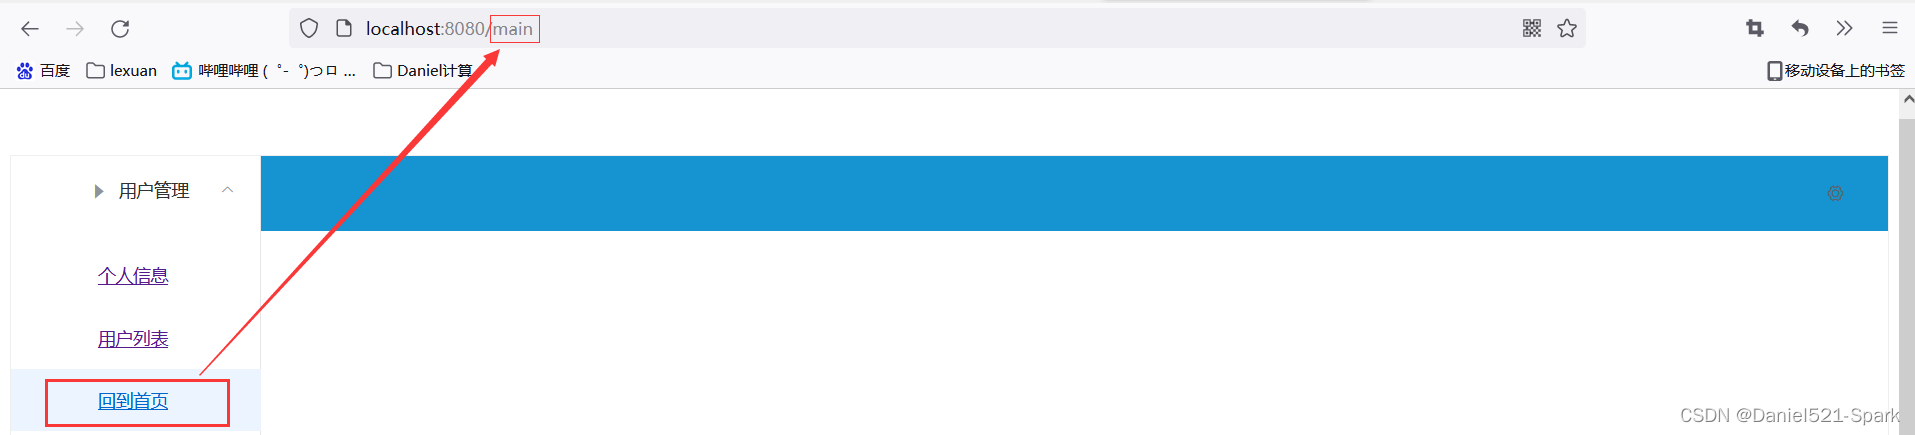
使用的话,只需要在Main.vue设置对应路径即可;

<el-menu-item index="1-3">
    <router-link to="/goHome">回到首页</router-link>
</el-menu-item>
效果显示,点击回到首页,浏览器栏也会变为 main
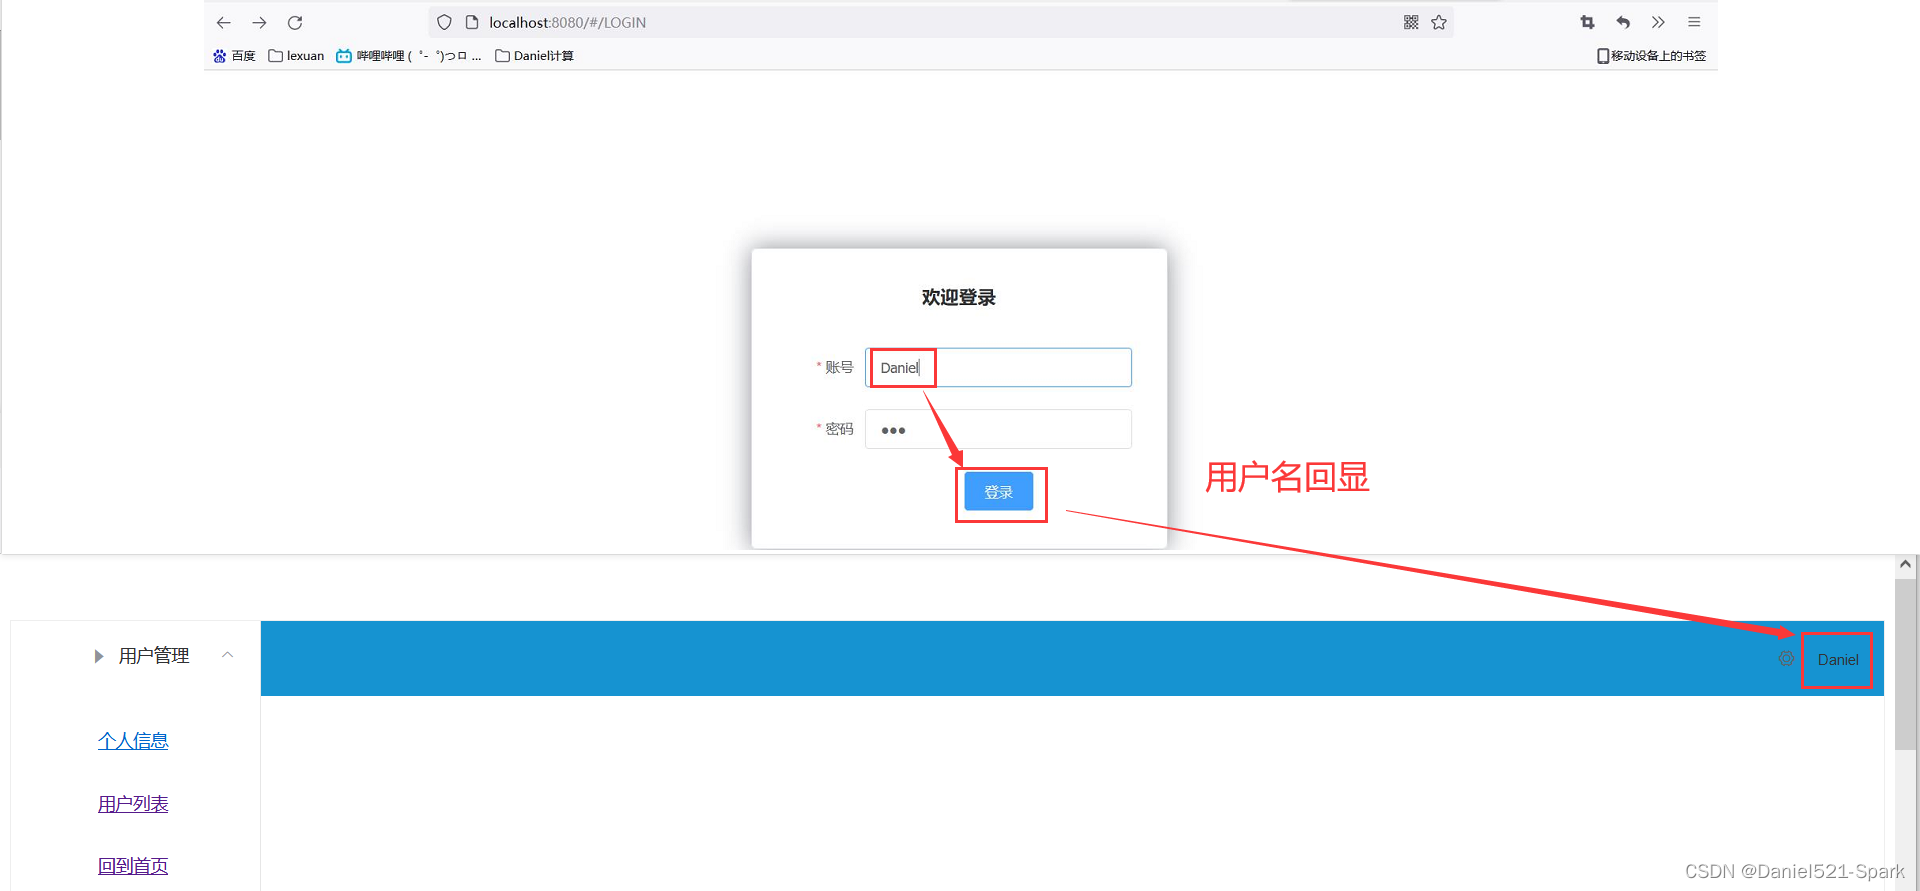
5.6、回显登录名
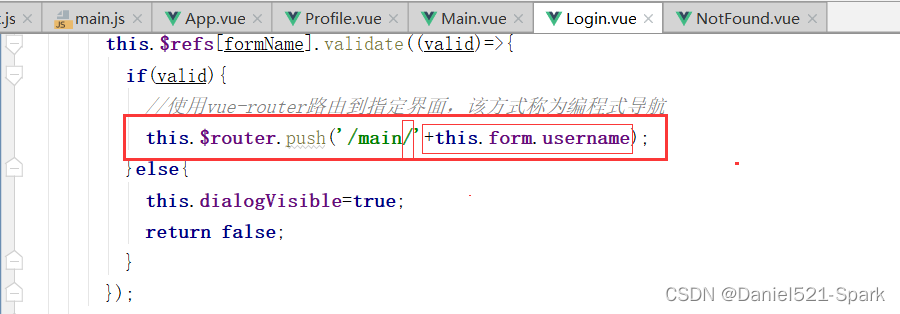
//为表单绑定验证功能
this.$refs[formName].validate((valid)=>{
  if(valid){
    //使用vue-router路由到指定界面,该方式称为编程式导航
    this.$router.push('/main/'+this.form.username);
  }else{
    this.dialogVisible=true;
    return false;
  }
});

 //首页
 path: '/main/:name',
 component: Main,
 props:true,

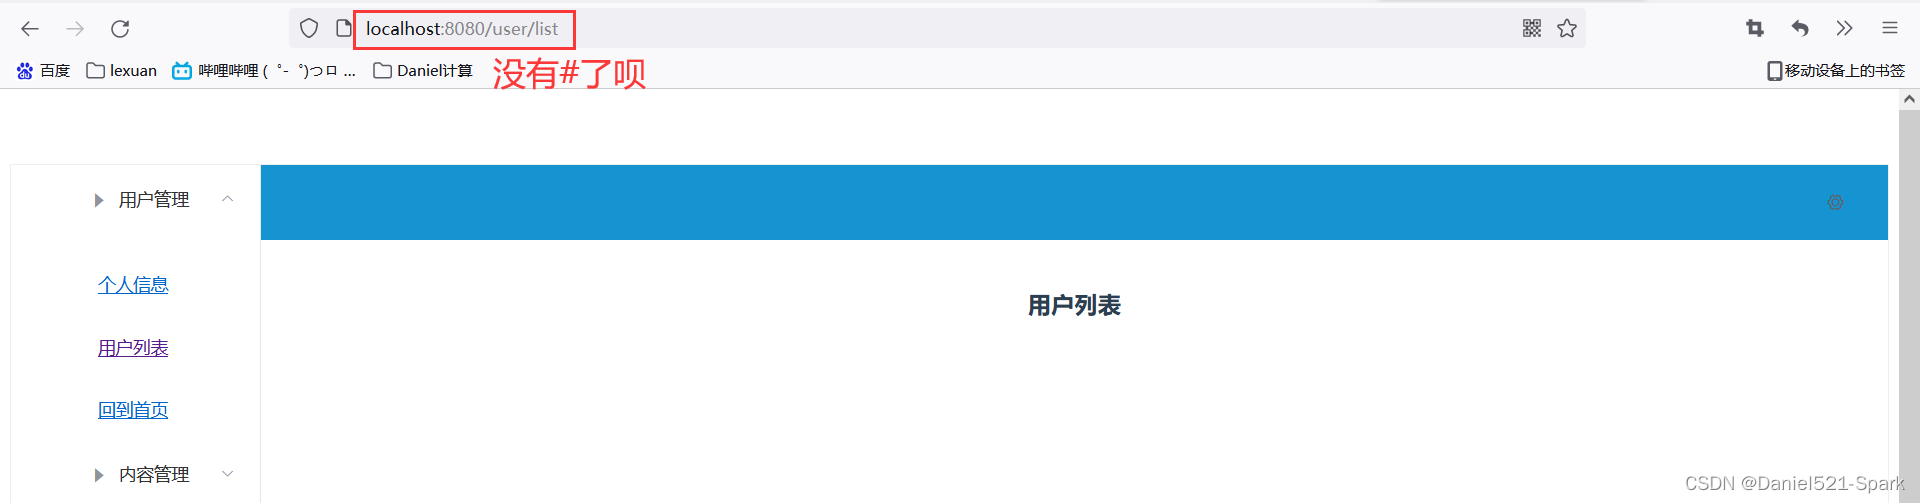
5.7、路由模式与 404
5.7.1 路由模式
路由模式有两种
hash:路径带 # 符号,如 http://localhost/#/loginhistory:路径不带 # 符号,如 http://localhost/login
修改路由 index.js 配置,代码如下:
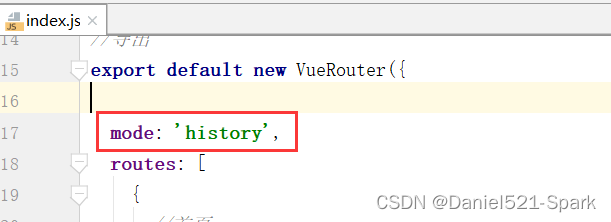
export default new VueRouter({
  mode: 'history',
  routes: [
  ]
});
5.7.2 404
1.在views下面创建一个NotFound.vue视图组件
NotFound.vue
<template>
    <div>
      <h1>404,你的页面走丢了</h1>
    </div>
</template>
<script>
    export default {
        name: "NotFound"
    }
</script>
<style scoped>
</style>
2.修改路由配置index.js
import NotFound from '../views/NotFound'

{
   path: '*',
   component: NotFound
}
3.效果图

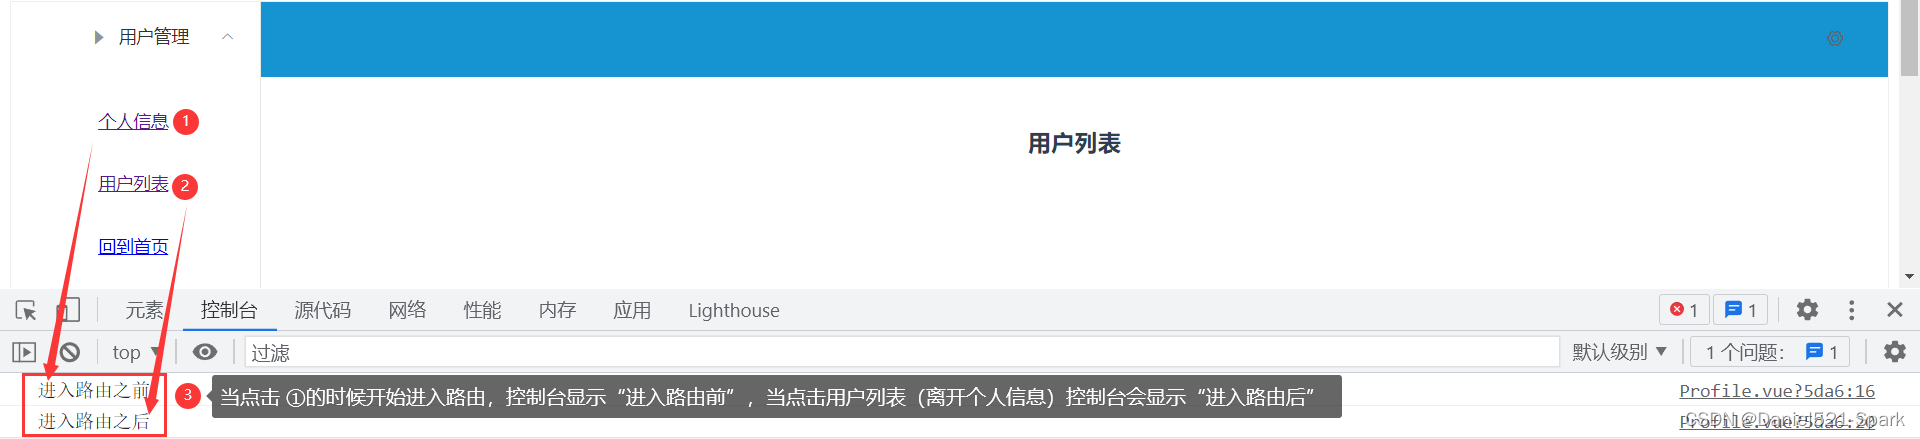
5.7.3 路由钩子
- beforeRouteEnter:在进入路由前执行
- beforeRouteLeave:在离开路由前执行
在Profile.vue中写
export default {
	name: "UserProfile",
        beforeRouteEnter:(to,from,next )=>{
          console.log('进入路由之前');
            next();
        },
        beforeRouteLeave:(to,from,next)=>{
          console.log('进入路由之后');
          next();
        },
}
参数说明:
to:路由将要跳转的路径信息from:路径跳转前的路径信息next:路由的控制参数next()跳入下一个页面next(’/path’)改变路由的跳转方向,使其跳到另一个路由next(false)返回原来的页面next((vm)=>{})仅在 beforeRouteEnter 中可用,vm 是组件实例
在钩子函数中使用异步请求
1、安装 Axios
cnpm install --save vue-axios

2、main.js引用 Axios
官网👉🏾 vue-axios / 安装
import axios from 'axios'
import VueAxios from 'vue-axios'
Vue.use(VueAxios, axios)
3、准备数据 : 只有我们的 static 目录下的文件是可以被访问到的,所以我们就把静态文件放入该目录下。
数据和之前用的json数据一样如下所示 axios例子里
静态数据存放的位置 static/mock/data.json
{
  "name": "爪哇知识库",
  "url": "https://mp.weixin.qq.com/s/i-VHagM1abEDecTF6Wb0NQ",
  "page": 1,
  "isNonProfit": true,
  "address": {
    "street": "泰然科技园",
    "city": "广东深圳市",
    "country": "中国"
  },
  "links": [
    {
      "name": "bilibili",
      "url": "https://space.bilibili.com/535181459?spm_id_from=333.788.0.0"
    },
    {
      "name": "爪哇知识库",
      "url": "https://blog.csdn.net/weixin_42171159?spm=1010.2135.3001.5343"
    },
    {
      "name": "百度",
      "url": "https://www.baidu.com/"
    }
  ]
}
再次运行:npm run dev
报错:

解决:npm install --save axios || cnpm install --save axios
再次运行:npm run dev
浏览器测试:http://localhost:8080/static/mock/data.json

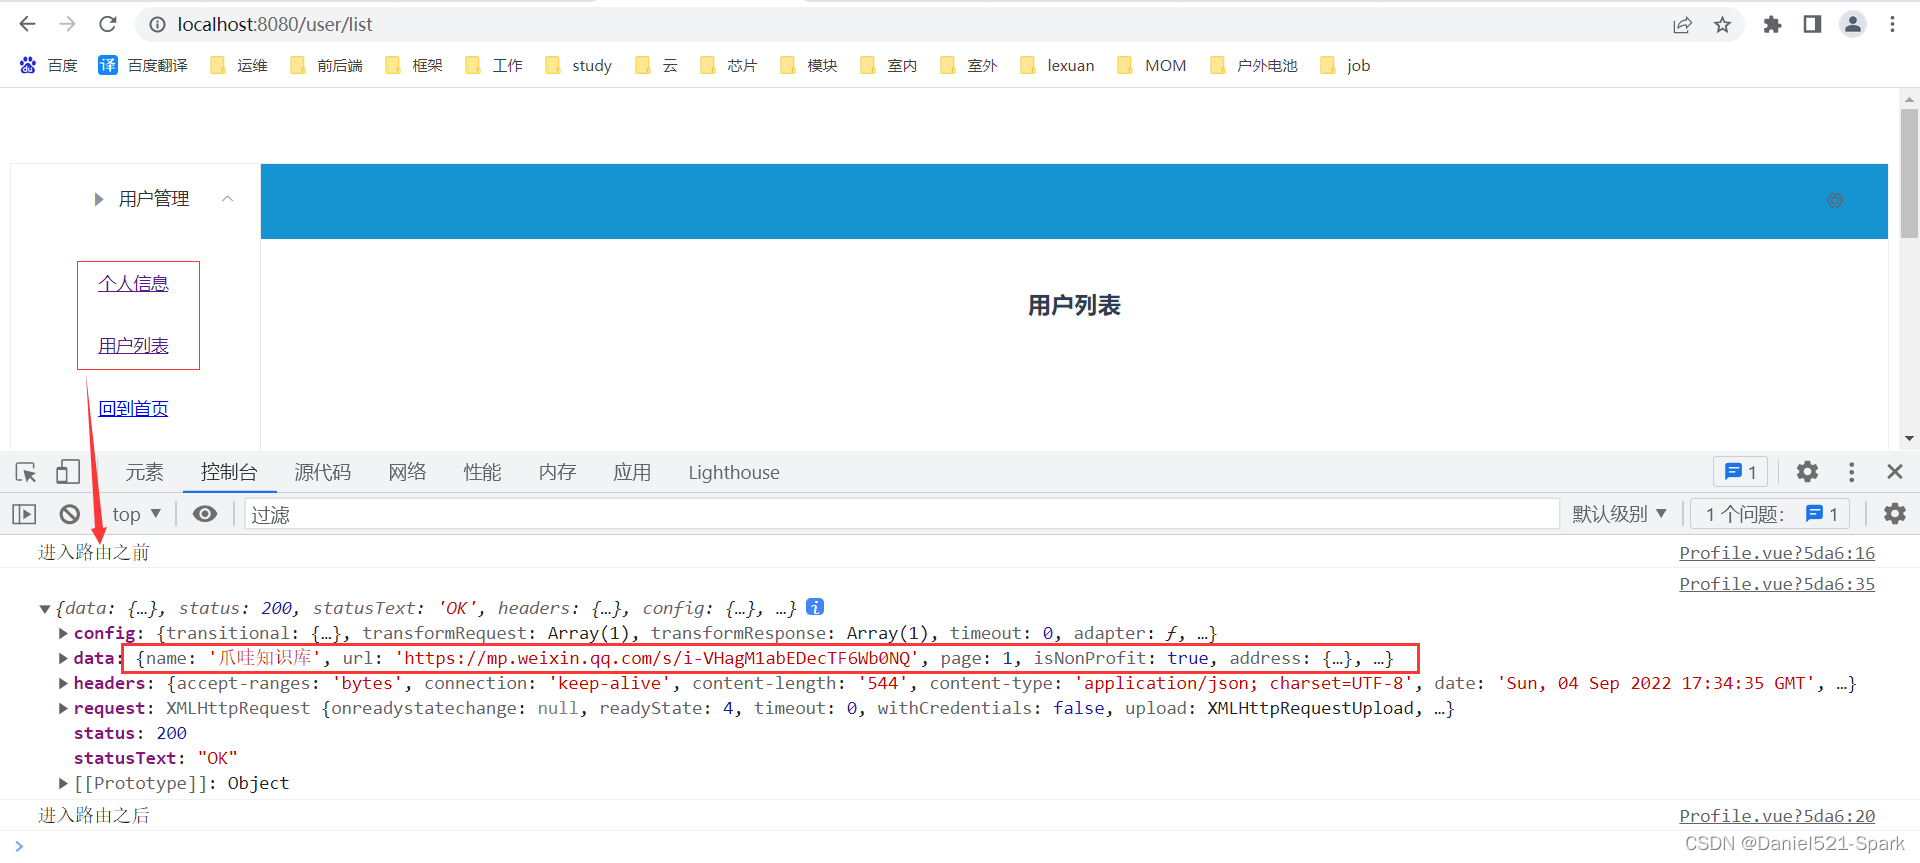
5.7.4 异步请求
4.在 beforeRouteEnter 中进行异步请求
Profile.vue

export default {
  //第二种取值方式
  // props:['id'],
  name: "UserProfile",
  //钩子函数 过滤器
  beforeRouteEnter: (to, from, next) => {
    //加载数据
    console.log("进入路由之前")
    next(vm => {
      //进入路由之前执行getData方法
      vm.getData()
    });
  },
  beforeRouteLeave: (to, from, next) => {
    console.log("离开路由之前")
    next();
  },
  //axios
  methods: {
    getData: function () {
      this.axios({
        method: 'get',
        url: 'http://localhost:8080/static/mock/data.json'
      }).then(function (response) {
        console.log(response)
      })
    }
  }
}
打开 F12 刷新测试 👇🏾👇🏾:(路由钩子和axios结合图)
路由钩子完整源码 👉🏾 hello-vue


 2514
2514


 被折叠的 条评论
为什么被折叠?
被折叠的 条评论
为什么被折叠?
 到【灌水乐园】发言


