


前提,先下载Nacos并启动 Nacos Server。
1. Nacos 融合 Spring Boot 为注册配置中心
实现:
- 通过 Nacos Server 和 nacos-config-spring-boot-starter 实现配置的动态变更;
- 通过 Nacos Server 和 nacos-discovery-spring-boot-starter 实现服务的注册与发现。
1.1 启动配置管理
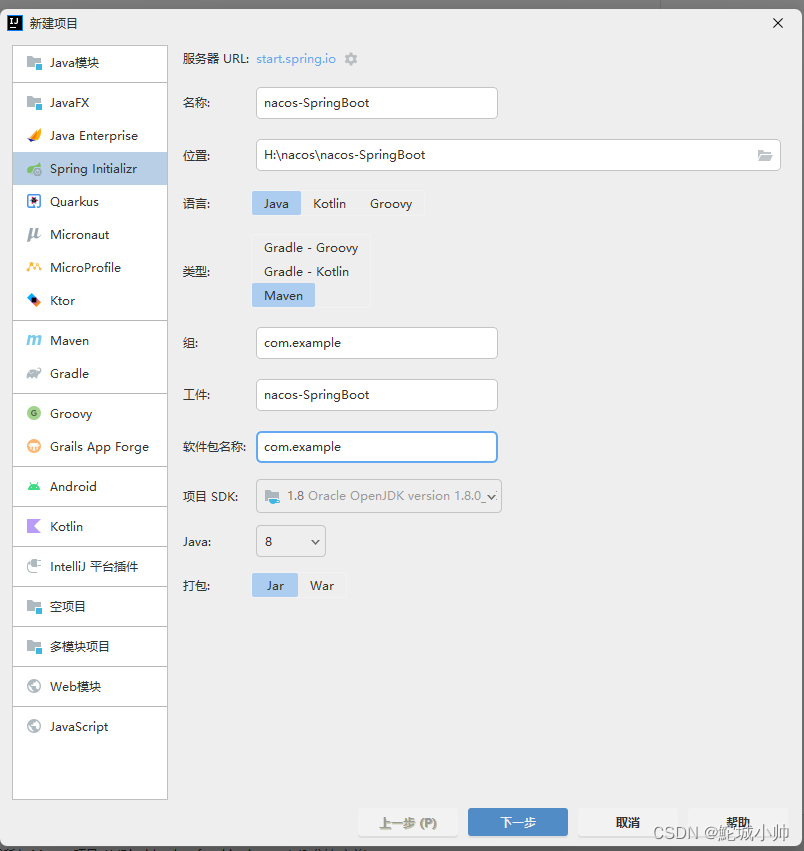
(1)创建SpringBoot项目


(2)添加依赖
 <!-- https://mvnrepository.com/artifact/com.alibaba.boot/nacos-config-spring-boot-starter -->
        <dependency>
            <groupId>com.alibaba.boot</groupId>
            <artifactId>nacos-config-spring-boot-starter</artifactId>
            <version>0.2.10</version>
</dependency>版本说明:SpringBoot的2.x.x 版本对应的是 nacos-config的 0.2.10 版本,低于 0.2.10 版本会启动失败。
(3)在application.properties 中配置 Nacos server 的地址:
nacos.config.server-addr=127.0.0.1:8848(4)使用 @NacosPropertySource 加载 dataId 为 nacos-springboot 的配置源,并开启自动更新:
@SpringBootApplication
@NacosPropertySource(dataId = "nacos-springboot", autoRefreshed = true)
public class NacosSpringBootApplication {

    public static void main(String[] args) {
        SpringApplication.run(NacosSpringBootApplication.class, args);
    }
}
(5)通过 Nacos 的 @NacosValue 注解设置属性值。
package com.example.controller;

import com.alibaba.nacos.api.config.annotation.NacosValue;
import org.springframework.stereotype.Controller;
import org.springframework.web.bind.annotation.RequestMapping;
import org.springframework.web.bind.annotation.ResponseBody;

import static org.springframework.web.bind.annotation.RequestMethod.GET;

/**
 * @author wushaopei
 * @create 2022-12-19 15:34
 */
@RestController
@RequestMapping("/config")
public class ConfigController {

    @NacosValue(value = "${useLocalCache:false}", autoRefreshed = true)
    private boolean useLocalCache;

    @RequestMapping(value = "/get", method = GET)
    @ResponseBody
    public boolean get() {
        return useLocalCache;
    }
}
(6)启动 NacosConfigApplication,调用 curl http://localhost:8080/config/get,返回内容是 false。
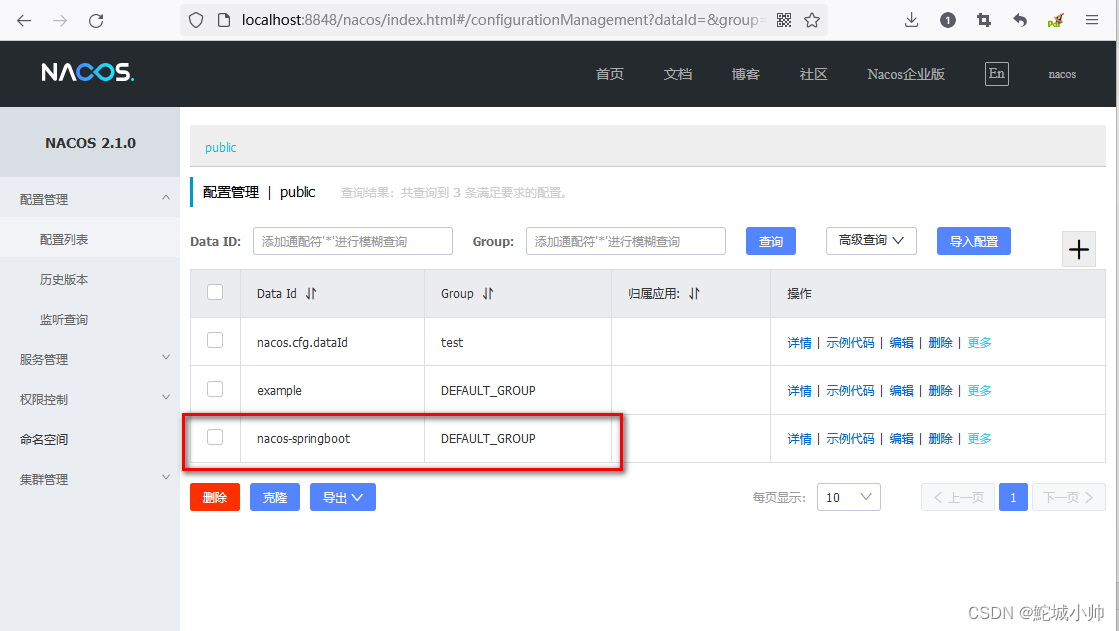
(7)通过调用 Nacos Open API 向 Nacos server 发布配置:dataId 为 nacos-springboot,内容为useLocalCache=true
curl -X POST "http://127.0.0.1:8848/nacos/v1/cs/configs?dataId=nacos-springboot&group=DEFAULT_GROUP&content=useLocalCache=true"(8)次访问 http://localhost:8080/config/get,此时返回内容为true,说明程序中的useLocalCache值已经被动态更新了。

1.2 启动服务发现
(1)添加依赖
        <dependency>
            <groupId>com.alibaba.boot</groupId>
            <artifactId>nacos-discovery-spring-boot-starter</artifactId>
            <version>0.2.7</version>
</dependency>注意:版本 0.2.x.RELEASE 对应的是 Spring Boot 2.x 版本,版本 0.1.x.RELEASE 对应的是 Spring Boot 1.x 版本。
(2)在 application.properties 中配置 Nacos server 的地址:
nacos.discovery.server-addr=127.0.0.1:9898(3)使用 @NacosInjected 注入 Nacos 的 NamingService 实例:
/**
 * @author wushaopei
 * @create 2022-12-16 11:12
 */
@Controller
@RequestMapping("discovery")
public class DiscoveryController {

    @NacosInjected
    private NamingService namingService;

    @RequestMapping(value = "/get", method = GET)
    @ResponseBody
    public List<Instance> get(@RequestParam String serviceName) throws NacosException {
        return namingService.getAllInstances(serviceName);
    }
}

@SpringBootApplication
public class NacosDiscoveryApplication {

    public static void main(String[] args) {
        SpringApplication.run(NacosDiscoveryApplication.class, args);
    }
}
(4)启动 NacosDiscoveryApplication,调用 curl http://localhost:8080/discovery/get?serviceName=example,此时返回为空 JSON 数组[]。
(5)通过调用 Nacos Open API 向 Nacos server 注册一个名称为 example 服务
curl -X POST "http://127.0.0.1:8848/nacos/v1/ns/instance?serviceName=nacos-springboot&ip=127.0.0.1&port=8080"这里的ip、port是注册中心服务所在的服务器ip、port。
(6)再次访问 curl http://localhost:9898/discovery/get?serviceName=example,此时返回内容为:
[
    {
        "instanceId": "127.0.0.1#8080#DEFAULT#DEFAULT_GROUP@@nacos-springboot",
        "ip": "127.0.0.1",
        "port": 8080,
        "weight": 1,
        "healthy": true,
        "enabled": true,
        "ephemeral": true,
        "clusterName": "DEFAULT",
        "serviceName": "DEFAULT_GROUP@@nacos-springboot",
        "metadata": { },
        "instanceHeartBeatInterval": 5000,
        "ipDeleteTimeout": 30000,
        "instanceIdGenerator": "simple",
        "instanceHeartBeatTimeOut": 15000
    }
]
(7)springboot整合nacos的详细配置
nacos:
  config:
    bootstrap:
      # 开启预加载配置
      enable: true
    # nacos的ip地址和端口
    server-addr: 192.168.1.2:8848
    # nacos登录用户名
    username: nacos
    # nacos登录密码
    password: nacos
    # nacos命名空间id为 dev
    namespace: dev
    # 创建的配置的data-id,多个配置使用”,“隔开
    data-ids: maple-admin, maple-admin-mysql
    # 创建的配置的group
    group: DEFAULT_GROUP
    # 配置文件的后缀名
    type: YAML
    # 自动刷新配置
    auto-refresh: true
    # 长轮询的重试次数
    max-retry: 10
    # 重试间隔时间
    config-retry-time: 2000
    # 长轮询的超时时间
    config-long-poll-timeout: 46000


 1327
1327


 被折叠的 条评论
为什么被折叠?
被折叠的 条评论
为什么被折叠?
 到【灌水乐园】发言


