


部署流程
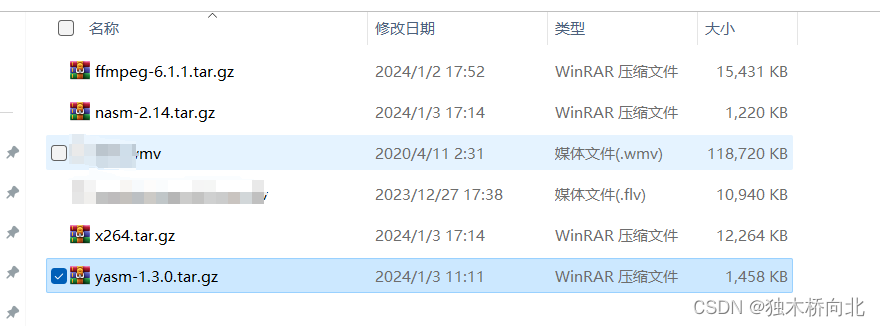
准备安装包
ffmpeg-6.1.1.tar.gz、nasm-2.14.tar.gz、x264.tar.gz、yasm-1.3.0.tar.gz
下载地址:
wget http://www.tortall.net/projects/yasm/releases/yasm-1.3.0.tar.gz
wget http://www.ffmpeg.org/releases/ffmpeg-3.1.tar.gz
wget https://www.nasm.us/pub/nasm/releasebuilds/2.14/nasm-2.14.tar.gz --no-check-certificate
git clone https://code.videolan.org/videolan/x264.git
开始部署
安装 nasm
在编译安装libx264时,报了缺少nasm,需要先安装nasm。
wget https://www.nasm.us/pub/nasm/releasebuilds/2.14/nasm-2.14.tar.gz --no-check-certificate
tar -zxvf  nasm-2.14.tar.gz
./configure
make && make install

#添加PATH  至/etc/profile
export PATH=$PATH:/usr/local/bin
source /etc/profile
安装 x264
在使用–enable-libx264时需要。mp4格式的视频就有3种编码: mpg4(xdiv),mpg4(xvid),avc(h264)
这三种格式虽然在播放器里可以正常播放,但是mpg(xdiv),mpg4(xvid)这两种格式嵌到html5页面里的时候就会出现只有声音不显示图像的情况,转换成H264编码就可以在网页正常播放了。为了兼容浏览器,建议安装x264依赖
git clone https://code.videolan.org/videolan/x264.git
cd x264
./configure --enable-shared
## --enable-shared 参数需要带上,不然只有安装x264命令而没有生成相关lib 库文件
make && make install
安装yasm
wget http://www.tortall.net/projects/yasm/releases/yasm-1.3.0.tar.gz
tar -zxvf yasm-1.3.0.tar.gz
cd yasm-1.3.0
./configure
make && make install
安装ffmpeg
wget http://www.ffmpeg.org/releases/ffmpeg-3.1.tar.gz
tar -zxvf ffmpeg-3.1.tar.gz
cd ffmpeg-3.1
./configure --enable-shared --enable-swscale --enable-gpl --enable-nonfree --enable-pic --prefix=/usr/local/ffmpeg  --enable-postproc --enable-pthreads --enable-static --enable-libx264
make && make install


#配置环境变量
vim /etc/profile
#在最后PATH添加环境变量:
export PATH=$PATH:/usr/local/ffmpeg/bin
#x264的环境变量
export PKG_CONFIG_PATH=/usr/local/lib/pkgconfig

#保存退出
source /ect/profile
#设置生效
验证是否安装完成
[root@node1 ffmpeg-6.1.1]# ffmpeg -version
ffmpeg version 6.1.1 Copyright (c) 2000-2023 the FFmpeg developers
built with gcc 4.8.5 (GCC) 20150623 (Red Hat 4.8.5-44)
configuration: --enable-shared --enable-swscale --enable-gpl --enable-nonfree --enable-pic --prefix=/usr/local/ffmpeg --enable-postproc --enable-pthreads --enable-static --enable-libx264
libavutil      58. 29.100 / 58. 29.100
libavcodec     60. 31.102 / 60. 31.102
libavformat    60. 16.100 / 60. 16.100
libavdevice    60.  3.100 / 60.  3.100
libavfilter     9. 12.100 /  9. 12.100
libswscale      7.  5.100 /  7.  5.100
libswresample   4. 12.100 /  4. 12.100
libpostproc    57.  3.100 / 57.  3.100
踩坑记录!!(先看)
在部署途中遇到的问题记录
1.当只安装ffmpeg服务。查看版本时:
[root@node1 ffmpeg-6.1.1]# ffmpeg -version
ffmpeg: error while loading shared libraries: libavdevice.so.60: cannot open shared object file: No such file or directory
#原因及解决方案:相关库文件没有加载上,编辑/etc/ld.so.conf 添加相关库文件的目录
cat  /etc/ld.so.conf
include ld.so.conf.d/*.conf
/usr/local/ffmpeg/lib/
/usr/local/lib/
#   /usr/local/ffmpeg/lib/ 是 ffmpeg 的编译目录
# /usr/local/lib/ 是x264的编译生成的库文件 ,没有指定的编译目录的生成配置都是系统默认的该目录下
#
ldconfig 加载生效
2.下载ffmpeg后,设置配置错误提示:

增加配置文件
vim /etc/profile
export PKG_CONFIG_PATH=/usr/local/lib/pkgconfig
source /etc/profile
重新配置编译
./configure --enable-shared --enable-swscale --enable-gpl --enable-nonfree --enable-pic --prefix=/usr/local/ffmpeg  --enable-postproc --enable-pthreads --enable-static --enable-libx264
- 缺少yasm报错:
错误提示:
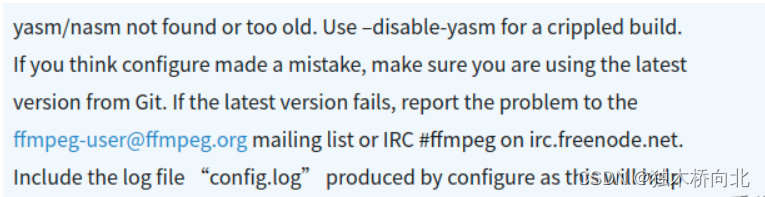
解决方案:安装yasm依赖
测试转换
ffmpeg -i /data/test.wmv -c:v libx264 -c:a aac -strict -2 /data/output.mp4
转换命令
ffmpeg -i input.mp4 output.avi

其中,input.mp4为输入文件名(可以根据需要修改),output.avi为输出文件名。这条命令将会将MP4格式的视频文件转换成AVI格式的视频文件
除了上述最基本的命令外,还有更多高级选项可供配置,比如调整分辨率、设定编码参数等。以下是一些常用的FFmpeg转换命令及相关说明
-s <width>x<height>:指定输出视频的分辨率大小
-b:v <bitrate>:设置视频流的比特率
-r <fps>:设置视频的帧率
-c:a copy:复制音频流而不重新编码
-c:v libx264:使用libx264编码器对视频进行H.264编码
-preset ultrafast:设置编码速度与质量之间的平衡,ultrafast表示非常快速但画面质量也较差
-crf <quality>:控制视频的质量,值越小则质量越好,通常取18到23之间的数字
-threads <num_of_threads>:并发处理线程数。
java集成
import java.io.BufferedReader;
import java.io.IOException;
import java.io.InputStreamReader;

/**
 * @description: ffmpeg文件转码工具类
 * @author: ajiang
 * @create: 2024-01-03 11:35
 **/

public class FFMpegExecutorUtil {

    /**
     * 视频格式转换
     *
     * @param inputPath
     * @param outputPath
     */
    public static void codingConvert(String inputPath, String outputPath) {
        String ffmpegCommand = "ffmpeg -i " + inputPath + " -c:v libx264 -c:a aac -strict -2 " + outputPath; // 这里的命令根据需要自定义
        try {
            // 执行FFmpeg命令
            Process process = Runtime.getRuntime().exec(ffmpegCommand);
            // 等待FFmpeg命令执行完毕
            int exitCode = process.waitFor();
            if (exitCode == 0) {
                System.out.println("FFmpeg命令执行成功!");
            } else {
                System.out.println("FFmpeg命令执行失败!");
            }
        } catch (IOException e) {
            e.printStackTrace();
        } catch (InterruptedException e) {
            e.printStackTrace();
        }
    }
}


 9898
9898


 被折叠的 条评论
为什么被折叠?
被折叠的 条评论
为什么被折叠?
 到【灌水乐园】发言


