


1. 缘由
刚好需要在新系统上重新安装MySQL,便写了一份的下载安装教程,供查阅,以防日后细节有所遗忘。
2. 版本说明
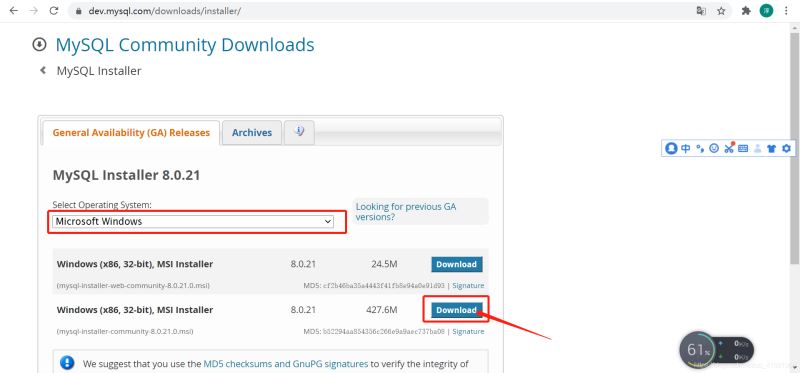
MySQL Installer 8.0.21
3. 下载安装包
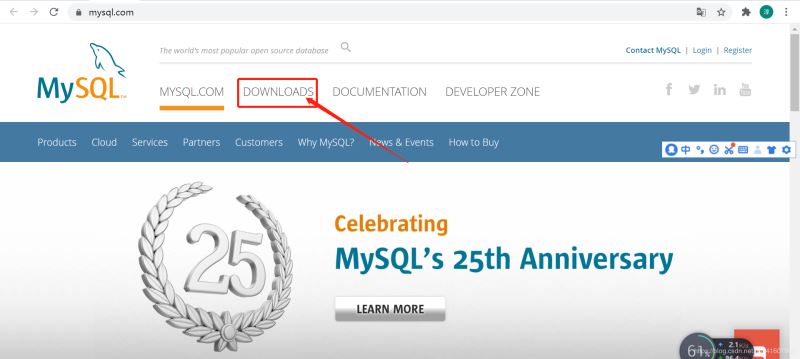
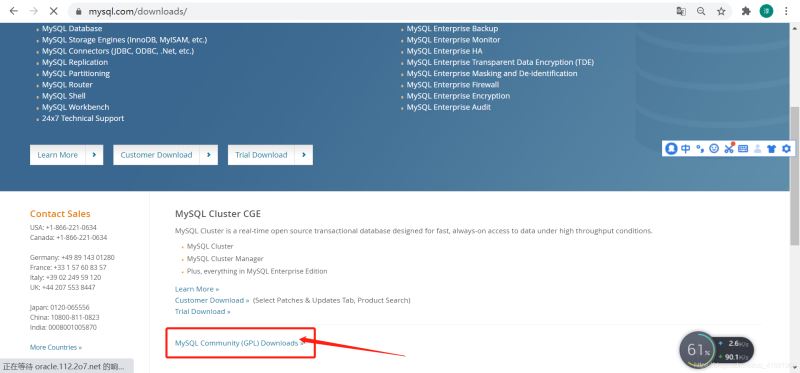
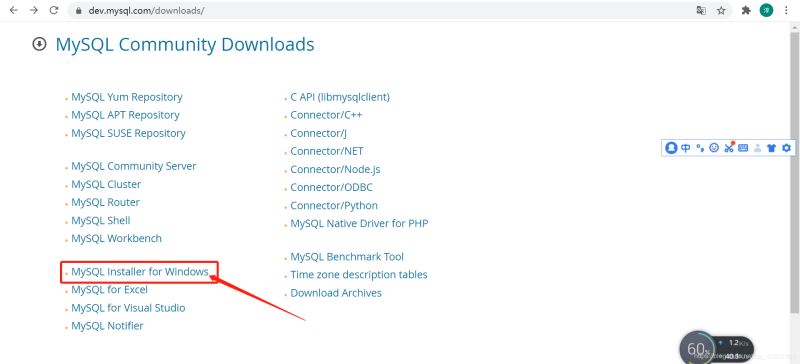
方式一:官网下载
方式二:镜像下载
官网下载的速度实在太慢了,最后搜索到一个北京理工大学的镜像下载:http://mirror.bit.edu.cn/mysql/downloads/MySQLInstaller/

4. 安装步骤
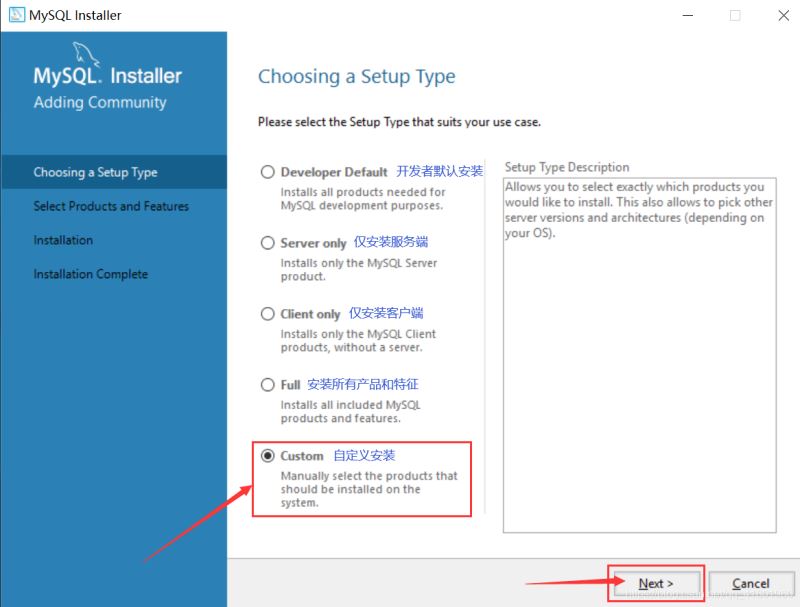
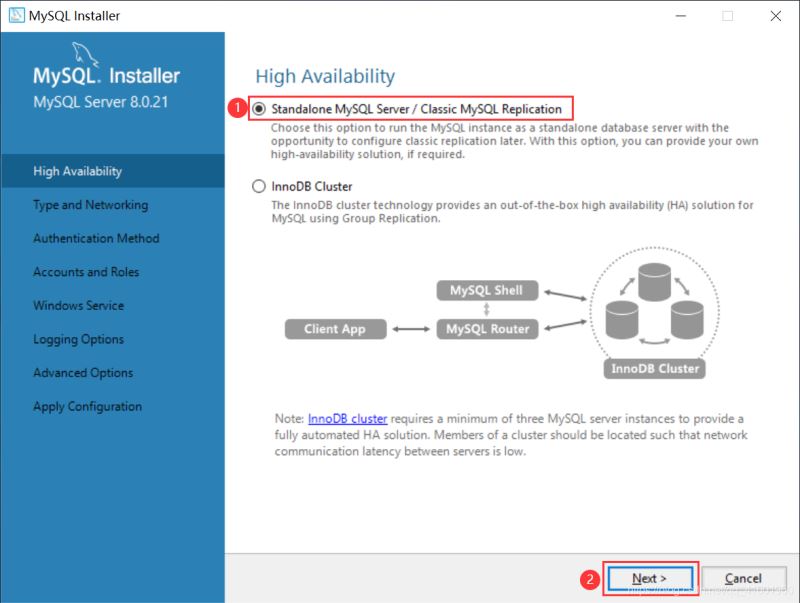
Step1:根据个人需求,选择安装类型
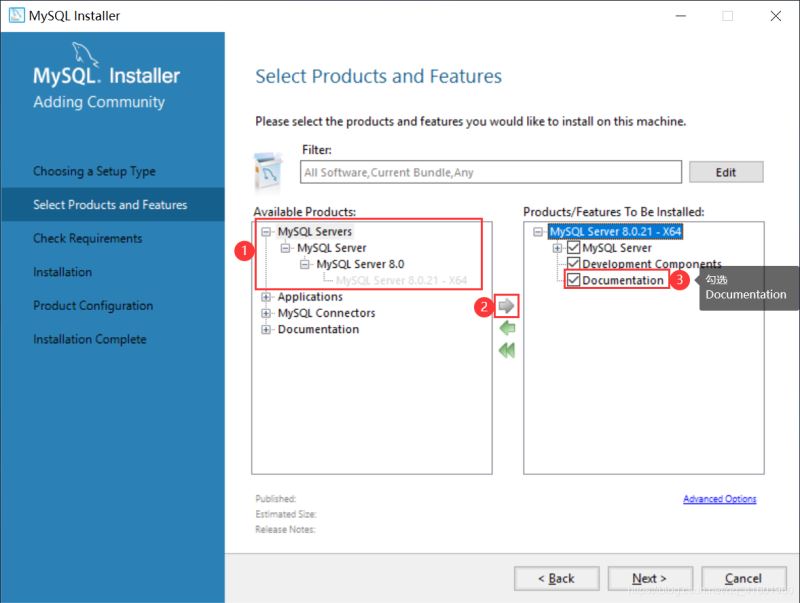
Step2:选择需要安装的内容
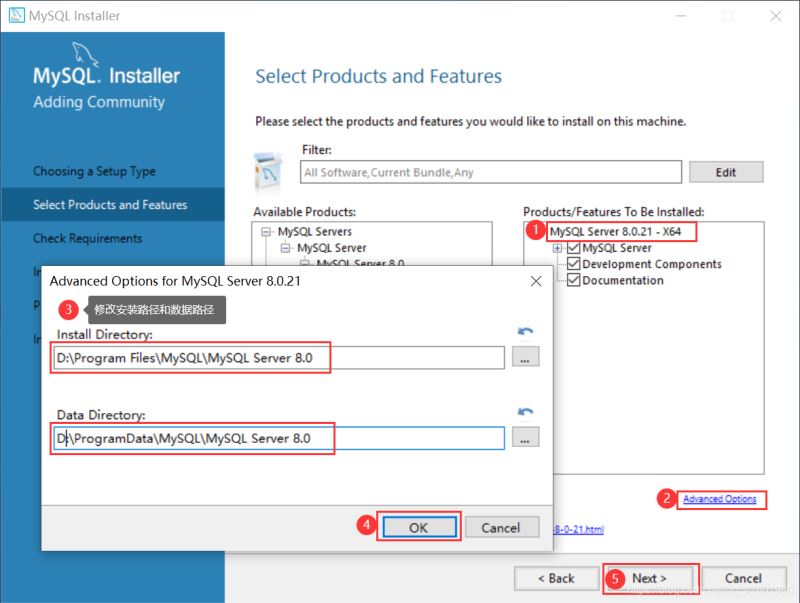
Step3:自定义安装路径
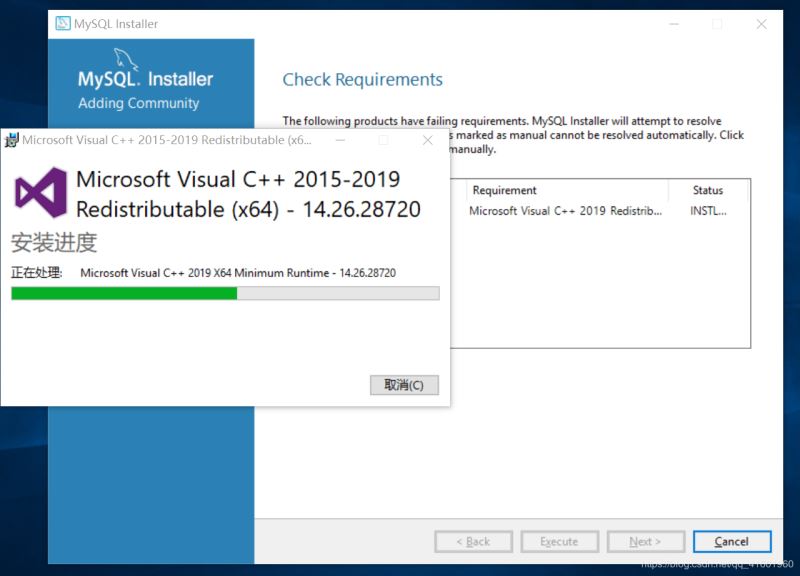
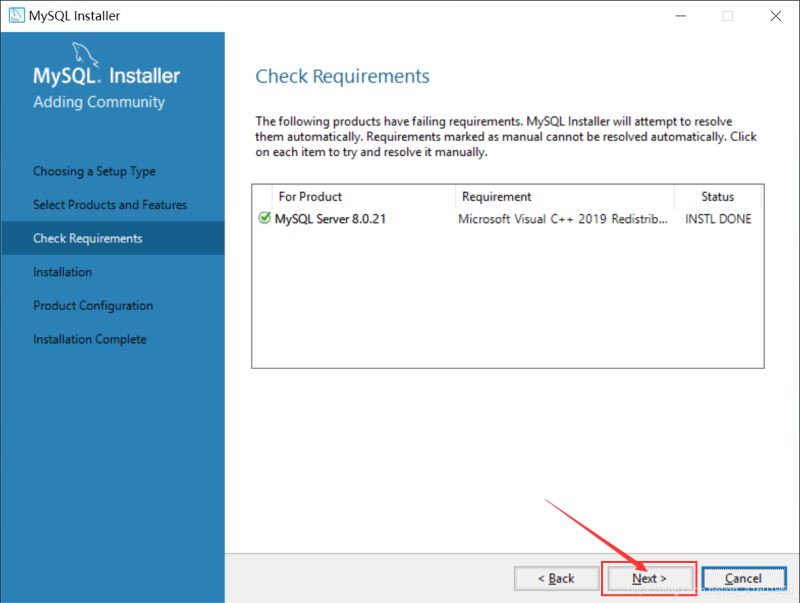
Step4:检验需要,若不存在所需的环境,则予以安装

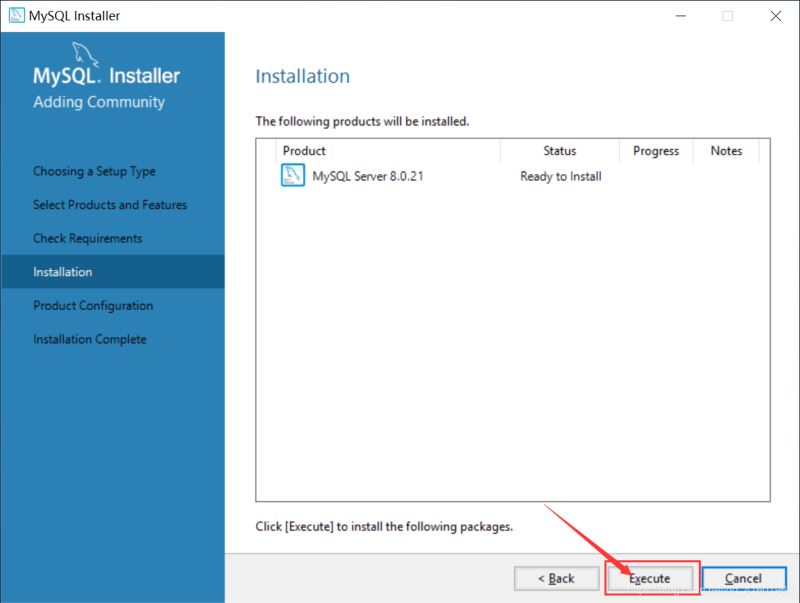
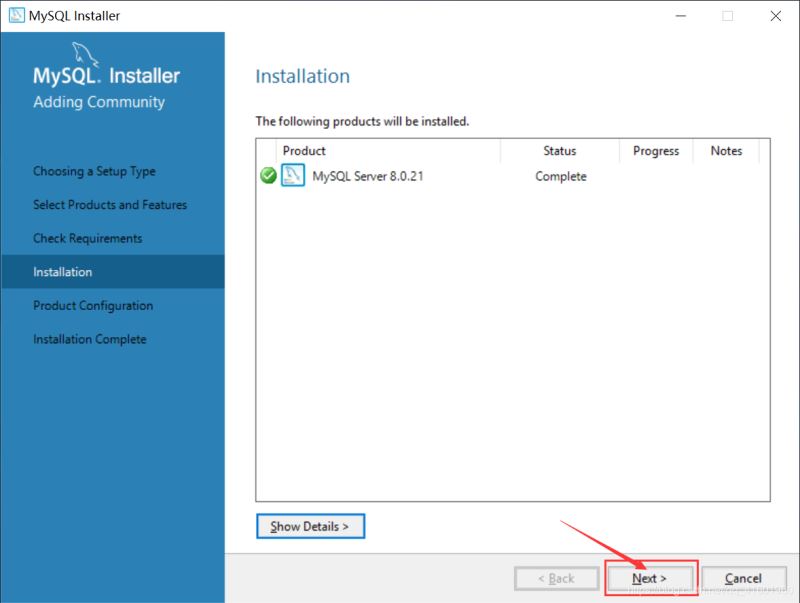
Step5:执行安装
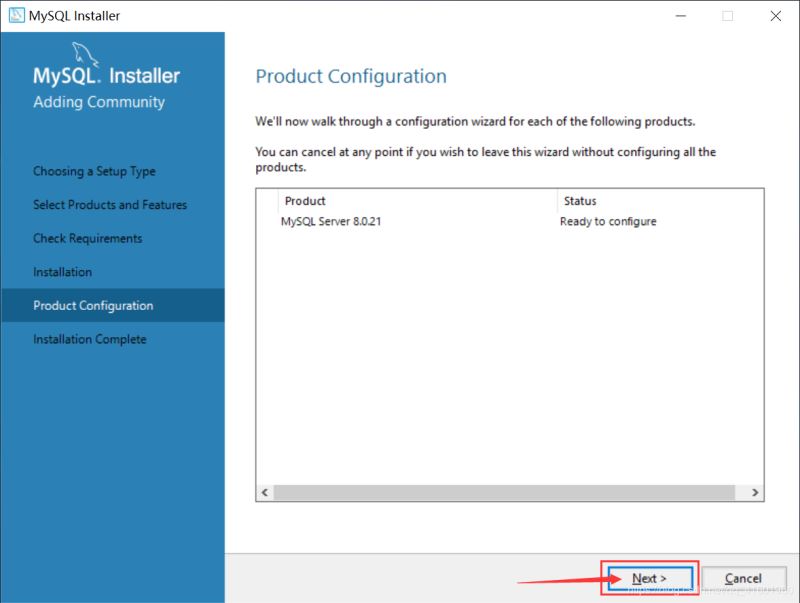
Step6:配置MySQL
① 选择数据存储引擎
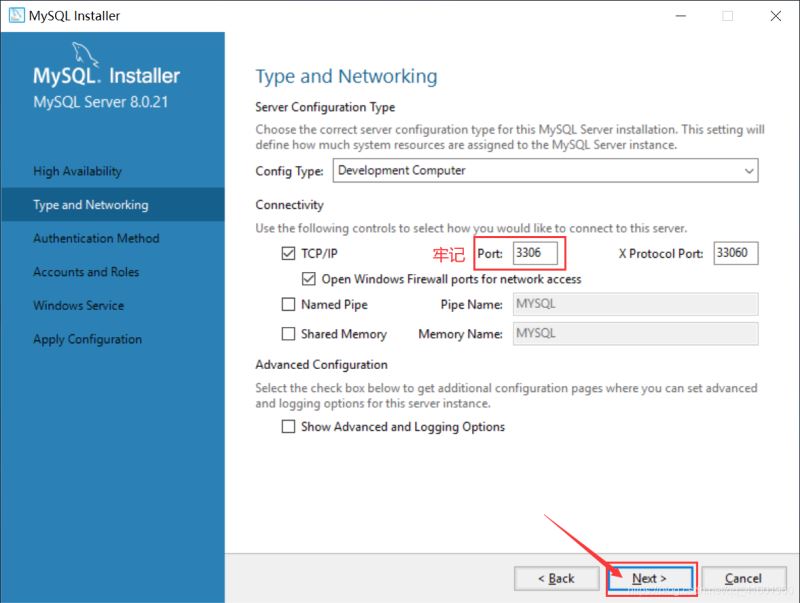
② 选择配置类型和数据库连接方式
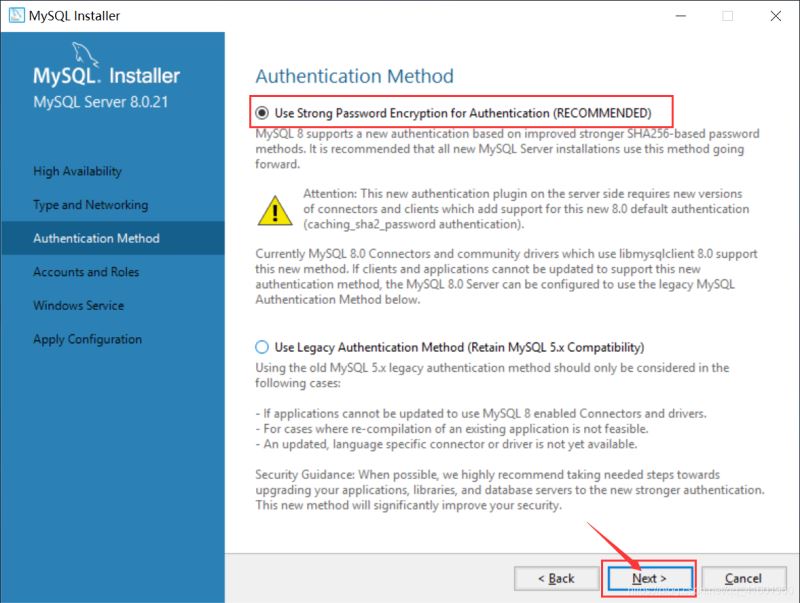
③ 选择身份验证方式
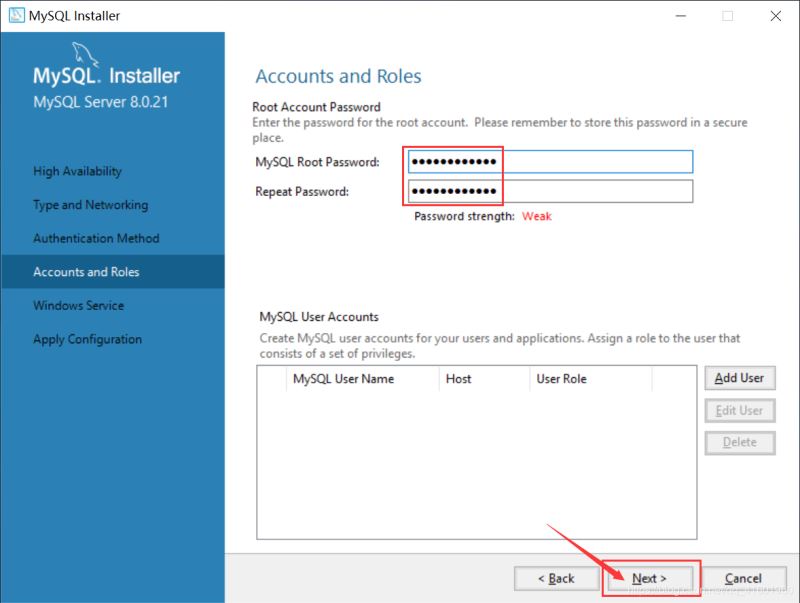
④ 设置账户密码
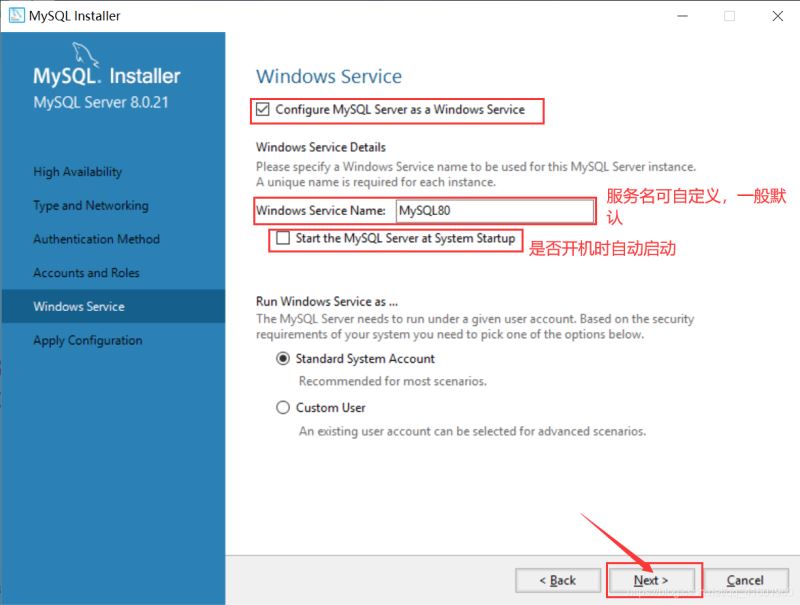
⑤ 配置Windows服务(即:将MySQL Server 配置为Windows Service)
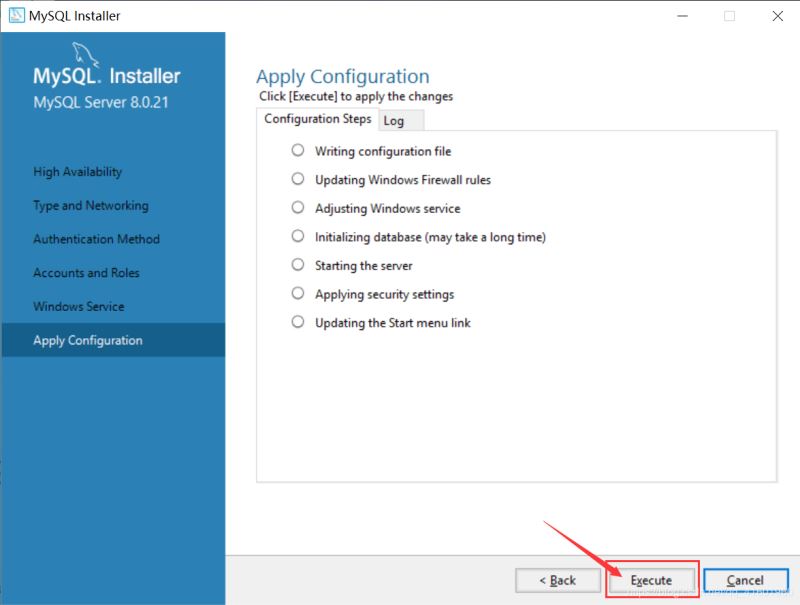
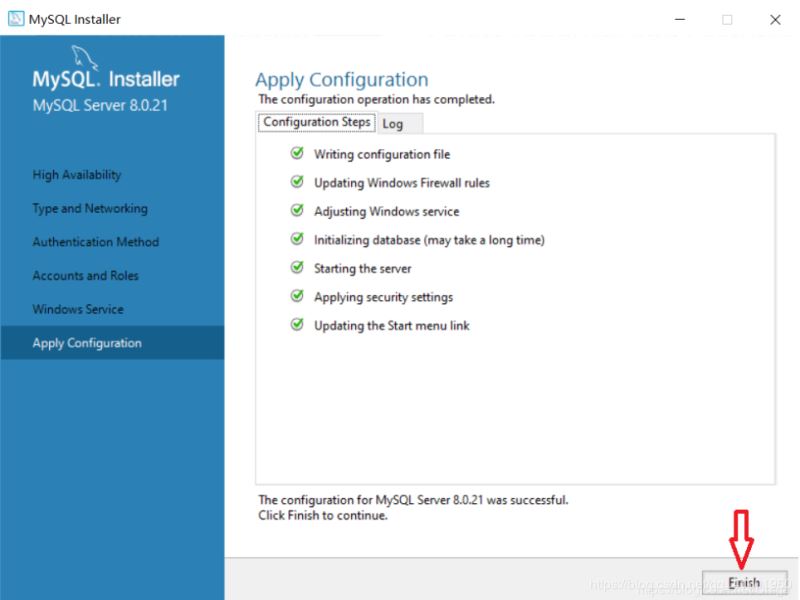
⑥ 应用配置的内容
★配置产生的问题
问题1:如何删除错误产生的Window Service
配置失败,想回到上一步看看是不是因为没有勾选开机自动开启的原因造成的,然后发现回到不到Apply Configuration的页面了,只好将Window Service的名字改成MySQL8021,这就造成了有一个之前失败的Window Service,想要将其删除
解决方式:
Step1: 使用cmd批处理命令卸载( 注意:必须"以管理员身份运行"方式运行cmd,否则会产生"[SC] OpenService 失败 5:拒绝访问" 的错误)
Net Stop ServiceName //若该服务未启动,可以省略该步骤
sc delete ServiceName //卸载服务
Step2:找到系统注册表,删掉服务的注册表信息,在HKEY_LOCAL_MACHINE\SYSTEM\CurrentControlSet\Services 下找到 MySQL80 并 删除该文件
Step3:service列表中还显示MySQL80服务,用管理员权限打开cmd 命令 sc delete serviceName,如果提示 “the specified service is marked as deletion”,关闭Window Service的面板,重新打开后,就会发现MySQL80服务消失了。
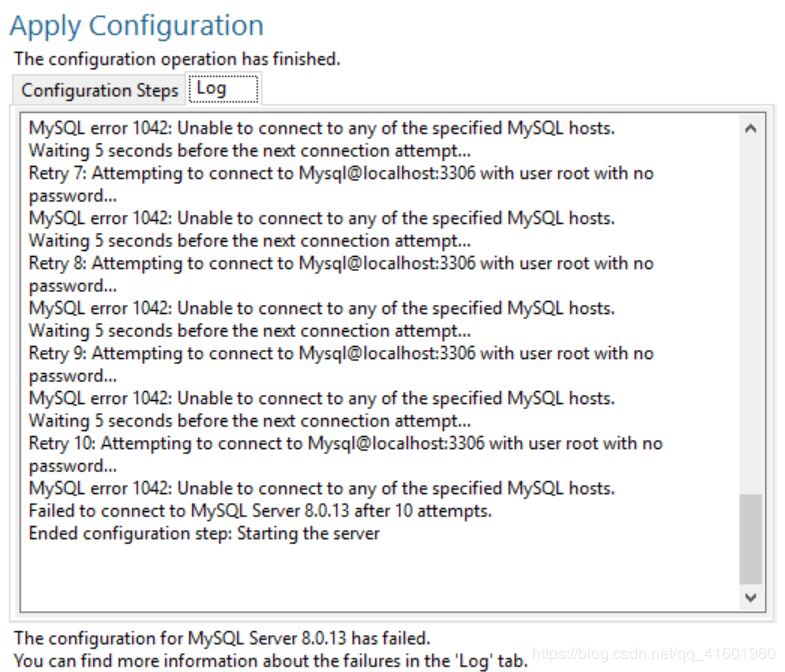
问题2:如何解决Starting the server 发生错误的问题
在将Window Service的名字改成MySQL8021并重新回到Apply Configuration的页面之后,发现仍然在Starting the server这步发生了错误
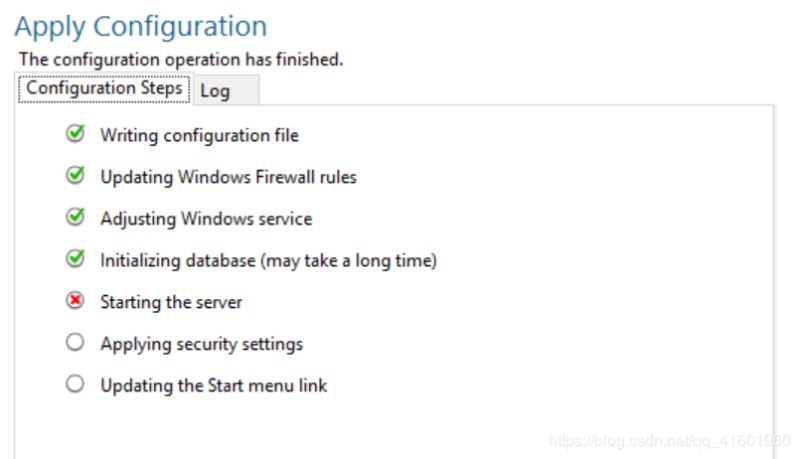
通过查看日志可以发现:
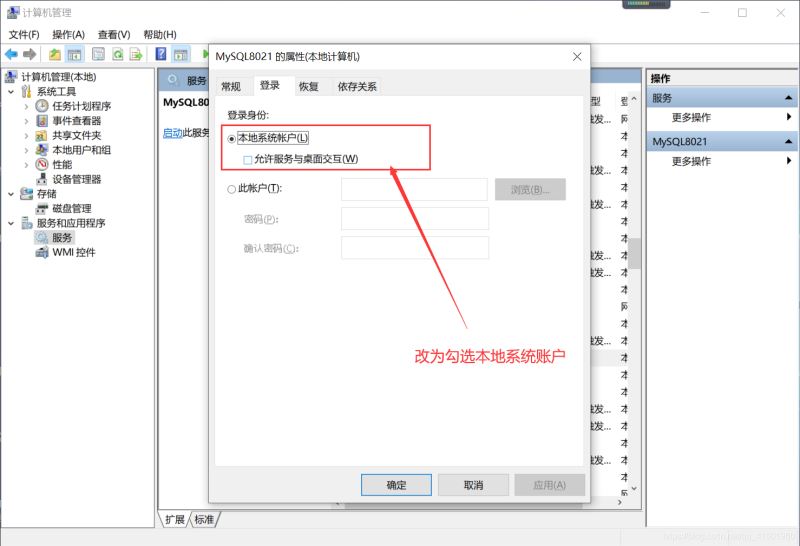
解决方式:寻找到MySQL8021服务,右键点击“属性” → “登录” → 选择“本地系统账户”
回到安装程序,在次点击Execute,会发现已经可以成功到Finish页面。
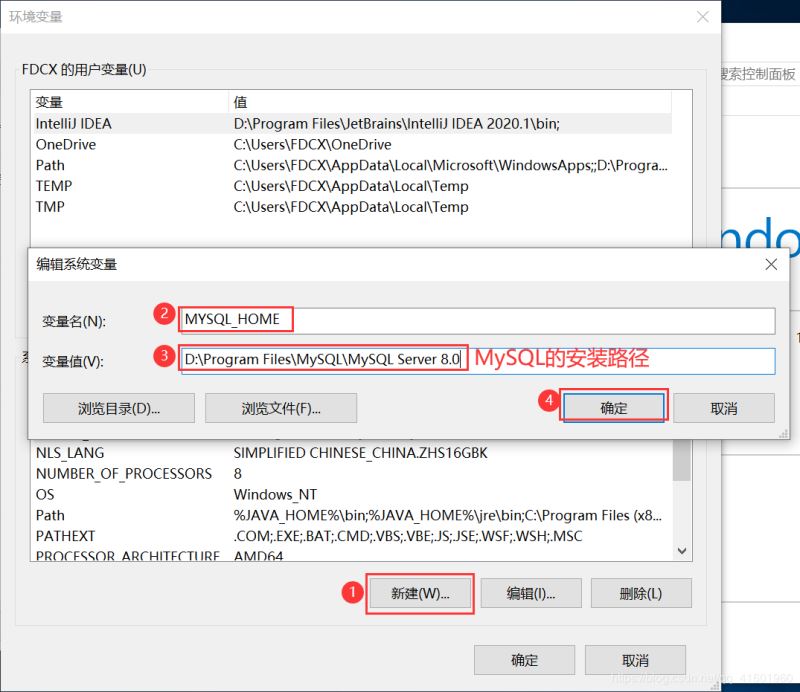
Step7:配置MySQL环境变量① 配置 MYSQL_HOME 变量
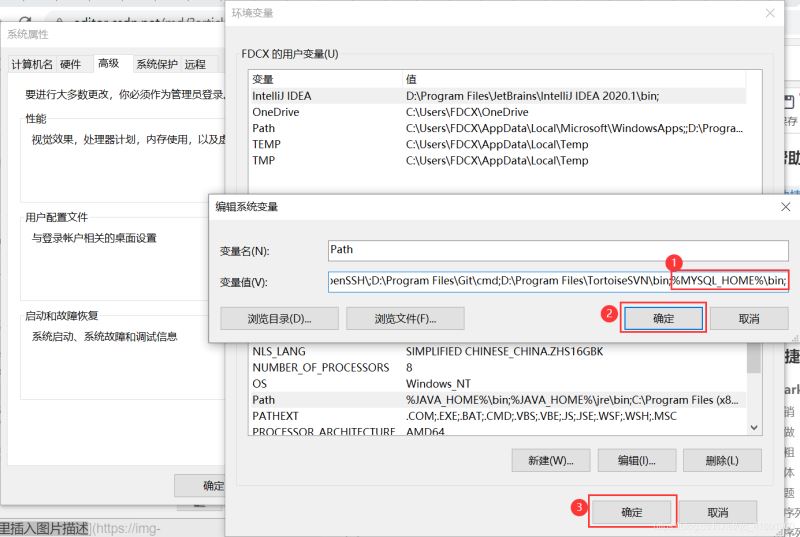
② 配置Path变量
找到path编辑:输入%MYSQL_HOME%\bin
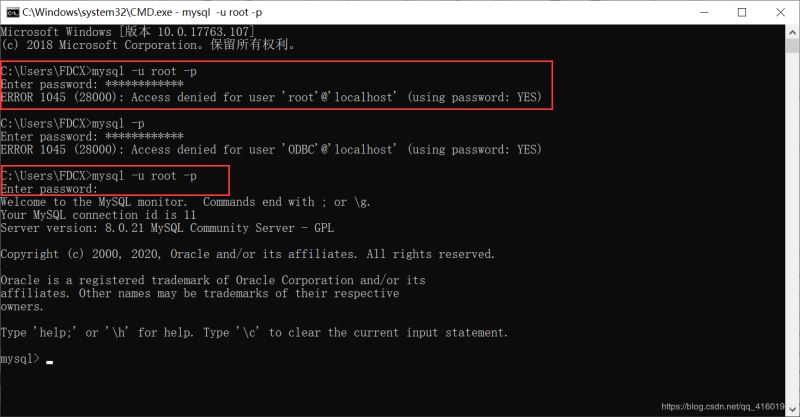
打开cmd输入 mysql –u root –p
输入root的密码,奇怪的是之前在安装时设置的密码似乎失效了,猜测是因为之前在window services里面的登录设置
参考资料:
MySQL8.0.21.0社区版安装教程(图文详解)
Windows 10系统下彻底删除卸载MySQL的方法教程
MySQL8.0.20安装教程及其安装问题详细教程
总结
到此这篇关于MySQL Installer 8.0.21安装教程图文详解的文章就介绍到这了,更多相关MySQL Installer 8.0.21安装内容请搜索脚本之家以前的文章或继续浏览下面的相关文章希望大家以后多多支持脚本之家!


 4659
4659


 被折叠的 条评论
为什么被折叠?
被折叠的 条评论
为什么被折叠?
 到【灌水乐园】发言


