


一、入门
React是一个将数据渲染为HTML视图的开源JavaScript库。
1.1 Hello React
- JS痛点
- 原生JavaScript操作DOM繁琐、效率低(DOM-API操作UI);
- 使用JavaScript直接操作DOM,浏览器会进行大量的重绘重排;
- 原生JavaScript没有组件化编码方案,代码复用率低。
- React特点
- 采用组件化模式、声明式编码,提高开发效率及组件复用率;
- 在React Native中可以使用React语法进行移动端开发;
- 使用虚拟DOM+优秀的Diffing 算法,尽量减少与真实DOM的交互。
- 虚拟DOM
- 本质是Object类型的一般对象;
- 虚拟DOM比较 轻 ,真实DOM比较 重(因为虚拟DOM是React内部在用,无需真实DOM上那么多的属性);
- 虚拟DOM最终会被React转化为真实DOM,呈现在页面上。
- Hello,React
<!DOCTYPE html>
<html>
<head>
	<title>SimWor</title>
</head>
<body>
	<!-- 准备好一个“容器” -->
	<div id="test"></div>

	<!-- 引入react核心库 -->
	<script type="text/javascript" src="js/react.development.js"></script>
	<!-- 引入react-dom,用于支持react操作DOM -->
	<script type="text/javascript" src="js/react-dom.development.js"></script>

	<script type="text/javascript" >
		//1. 创建虚拟DOM
		const vDOM = React.createElement('h1',{id:'title'},React.createElement('span',{},'Hello,React'));

		//2. 渲染虚拟DOM到页面
		ReactDOM.render(vDOM, document.getElementById('test'))
	</script>
</body>
</html>
1.2 JSX
JSX创建虚拟DOM时语法格式更简单,如同在写HTML。
<!DOCTYPE html>
<html>
<head>
	<title>SimWor</title>
</head>
<body>
	<div id="test"></div>

	<script type="text/javascript" src="js/react.development.js"></script>
	<script type="text/javascript" src="js/react-dom.development.js"></script>
	<!-- 引入babel,用于将jsx转为js -->
	<script type="text/javascript" src="js/babel.min.js"></script>

	<!-- 注意这里的类型 -->
	<script type="text/babel">
		const vDOM = (
			<h1 id="title">
				<span>Hello,React</span>
			</h1>
		)

		ReactDOM.render(vDOM, document.getElementById('test'))
	</script>
</body>
</html>
- 语法规则
- 定义虚拟DOM时,不要写引号
- 标签中混入JS表达式时(如引用变量)要用“{}”
- 样式的类名指定不要用“class”,而是要用“className”
- 内联样式要用双花括号的形式去写
- 虚拟DOM只能有一个跟标签(用div包裹)
- 标签必须闭合
<!DOCTYPE html>
<html>
<head>
	<title>SimWor</title>
	<script type="text/javascript" src="js/react.development.js"></script>
	<script type="text/javascript" src="js/react-dom.development.js"></script>
	<script type="text/javascript" src="js/babel.min.js"></script>
	<style type="text/css">
		.title {
			background-color: orange;
			width: 200px;
		}
	</style>
</head>
<body>
	<div id="test"></div>
</body>
<script type="text/babel">
	const myId = 'title'
	const myData = 'Hello,React'

	const vDOM = (
		<div>
			<h1 className="title" id={myId}>
				<span style={{color:'white',fontSize:'29px'}}>{myData}</span>
			</h1>
			<h1 className="title">
				<span style={{color:'white',fontSize:'29px'}}>{myData}</span>
			</h1>
			<input type="text"/>
		</div>
	)

	ReactDOM.render(vDOM, document.getElementById('test'))
</script>
</html>

1.3 vDOM限制
在虚拟DOM中只可以使用JS表达式,不可以使用JS语句。
- 区分JS表达式和语句
- 表达式:一个表达式会产生一个值
1.1 a
1.2 a+b
1.3 func(1)
1.4 arr.map()
1.5 function test() {} - 语句:即代码
2.1 if() {}
2.2 for() {}
2.3 switch() {case: xxx}
- 需要使用循环语句的情况
将循环语句转化为JS函数表达式。
<!DOCTYPE html>
<html>
<head>
	<title>SimWor</title>
	<script type="text/javascript" src="js/react.development.js"></script>
	<script type="text/javascript" src="js/react-dom.development.js"></script>
	<script type="text/javascript" src="js/babel.min.js"></script>
</head>
<body>
	<div id="test"></div>
</body>
<script type="text/babel">
	//模拟数组数据
	const data = ['Angular', 'React', 'Vue']

	//避免使用JS语句
	//每个列表中的项必须要有唯一的key属性值
	const vDOM = (
		<div>
			<h1>前端框架</h1>
			<ul>
				{
					data.map((item,index)=>{
						return <li key={index}>{item}</li>
					})
				}
			</ul>
		</div>
	)

	ReactDOM.render(vDOM, document.getElementById('test'))
</script>
</html>
二、面向组件编程
2.1 组件
2.1.1 模块(化)与组件(化)
- 模块
- 理解:向外提供特定功能的JS程序,一般就是一个JS文件;
- 为什么要拆成模块:随着业务逻辑增加,代码越来越多且复杂;
- 作用:复用JS,简化JS的编写,提高JS运行效率。
当应用的JS都是以模块来编写的,这个应用就是一个模块化的应用。
- 组件
- 理解:用来实现局部功能效果的代码和资源的集合(html/css/js/image等等);
- 为什么:一个界面的功能更复杂;
- 作用:复用编码,简化项目编码,提高运行效率。
当应用是以多组件的方式实现,这个应用就是一个组件化的应用。
- 开发者插件


Components:显示当前页面有多少个组件以及组件拥有的属性;
Profiler:记录网站的性能,渲染耗时、组件加载耗时;

2.1.2 函数式组件
执行ReactDOM.render(<MyComponent> … 之后,发生了什么?
- React解析组件标签,找到了
MyComponent组件; - 发现组件是使用函数定义的,随后调用该函数,将返回的虚拟DOM转为真实DOM,随后呈现在页面中。
<!DOCTYPE html>
<html>
<head>
	<title>SimWor</title>
	<script type="text/javascript" src="js/react.development.js"></script>
	<script type="text/javascript" src="js/react-dom.development.js"></script>
	<script type="text/javascript" src="js/babel.min.js"></script>
</head>
<body>
	<div id="test"></div>
</body>
<script type="text/babel">
	//1.创建函数式组件
	function MyComponent() {
		return <h2>我是用函数定义的组件(适用于【简单组件】的定义)</h2>
	}

	//2.渲染组件到页面
	ReactDOM.render(<MyComponent/>, document.getElementById('test'))
</script>
</html>

2.1.3类式组件
执行ReactDOM.render(<MyComponent> … 之后,发生了什么?
- React解析组件标签,找到了
MyComponent组件; - 发现组件是使用类定义的,随后new出来该类的实例,并通过该实例调用到原型上的render方法;
- 将render返回的虚拟DOM转为真实DOM,随后呈现在页面中。
<!DOCTYPE html>
<html>
<head>
	<title>SimWor</title>
	<script type="text/javascript" src="js/react.development.js"></script>
	<script type="text/javascript" src="js/react-dom.development.js"></script>
	<script type="text/javascript" src="js/babel.min.js"></script>
</head>
<body>
	<div id="test"></div>
</body>
<script type="text/babel">
	//1.创建类式组件
	class MyComponent extends React.Component {
		render() {
			//render方法放在MyComponent的原型对象上,供实例调用
			//render中this是MyComponent组件实例对象
			return <h2>我是用类定义的组件(适用于【复杂组件】的定义)</h2>
		}
	}

	//2.渲染组件到页面
	ReactDOM.render(<MyComponent/>, document.getElementById('test'));
</script>
</html>
2.2 组件实例的三大属性
2.2.1 state
通过点击事件修改对象的属性。
<!DOCTYPE html>
<html>
<head>
	<title>SimWor</title>
	<script type="text/javascript" src="js/react.development.js"></script>
	<script type="text/javascript" src="js/react-dom.development.js"></script>
	<script type="text/javascript" src="js/babel.min.js"></script>
</head>
<body>
	<div id="test"></div>
</body>
<script type="text/babel">
	class Weather extends React.Component {
		constructor(props) {
			super(props)
			this.state = {isHot: true, wind: "微风"}
			//3.解决和解释undefined报错
			//this指的是Weather类的实例对象
			//右侧:this.changeWeather指向原型上的changeWeather方法
			//右侧:this.changeWeather.bind()复制并返回一个新的函数
			//右侧:this.changeWeather.bind(this)修改函数的this指向,指向Weather的实例对象
			//左侧:this.changeWeather为Weather类添加一个函数,且该函数中的this指向Weather的实例对象
			this.changeWeather = this.changeWeather.bind(this)
		}
		render() {
			const {isHot, wind} = this.state
			//1.为组件添加点击事件,报错undefined
			return <h1 onClick={this.changeWeather}>今天天气很{isHot ? '炎热' : '凉爽'}, {wind}</h1>
		}
		changeWeather() {
			//2.解释为什么直接this.changeWeathe会报错undefined
			//changeWeather放在哪里? -- Weather的原型对象上,供实例调用
			//由于changeWeather是作为onClick的回调,所以不是通过实例调用的,是直接调用
			//类中的方法默认开启了局部的严格模式,所以changeWeather中的this为undefined
			//在构造器中添加以下语句可解决this指向问题
			//this.changeWeather = this.changeWeather.bind(this)

			//4.事件的具体处理过程
			//只能通过React.Component上的setState()方法修改对象状态
			//此方法将传入的状态与元对象上的状态进行合并
			const isHot = this.state.isHot
			this.setState({isHot: !isHot})

			//注意:状态(state)不可直接更改,下面这行就是错误的写法!!
			//this.state.isHot = !isHot
		}
	}

	ReactDOM.render(<Weather/>, document.getElementById('test'))
</script>
</html>
- 简单(开发)写法
<!DOCTYPE html>
<html>
<head>
	<title>SimWor</title>
	<script type="text/javascript" src="js/react.development.js"></script>
	<script type="text/javascript" src="js/react-dom.development.js"></script>
	<script type="text/javascript" src="js/babel.min.js"></script>
</head>
<body>
	<div id="test"></div>
</body>
<script type="text/babel">
	class Weather extends React.Component {
		//初始化状态
		state = {isHot: true, wind: "微风"}

		render() {
			const {isHot, wind} = this.state
			return <h1 onClick={this.changeWeather}>今天天气很{isHot ? '炎热' : '凉爽'}, {wind}</h1>
		}

		//自定义方法--要用赋值语句的形式+箭头函数
		changeWeather = ()=>{
			//箭头函数没有this指向,它简单将外部this作为其this
			//这里的外部this指向类的实例对象
			const isHot = this.state.isHot
			this.setState({isHot: !isHot})
		}
	}

	ReactDOM.render(<Weather/>, document.getElementById('test'))
</script>
</html>
- 强烈注意
- 组件中 render 方法中的 this 为组件实例对象
- 组件自定义的方法中 this 为 undefined,如何解决?
2.1 强制绑定 this:通过函数对象的 bind()
2.2 箭头函数 - 状态数据,不能直接修改或更新
2.2.2 props
- 基本传参
<!DOCTYPE html>
<html>
<head>
	<title>SimWor</title>
	<script type="text/javascript" src="js/react.development.js"></script>
	<script type="text/javascript" src="js/react-dom.development.js"></script>
	<script type="text/javascript" src="js/babel.min.js"></script>
</head>
<body>
	<div id="test"></div>
</body>
<script type="text/babel">
	class Person extends React.Component {
		render() {
			const {name, age, sex} = this.props
			return (
				<ul>
					<li>姓名:{name}</li>
					<li>性别:{sex}</li>
					<li>年龄:{age}</li>
				</ul>
			)
		}
	}

	// 基本写法
	// ReactDOM.render(<Person name="Lily" sex="female" age="18"/>, document.getElementById('test'))
	//简单写法
	const p = {name:"Lily", sex:"female", age:"18"}
	ReactDOM.render(<Person {...p}/>, document.getElementById('test'))
</script>
</html>

- 参数规则限制
<!DOCTYPE html>
<html>
<head>
	<title>SimWor</title>
	<script type="text/javascript" src="js/react.development.js"></script>
	<script type="text/javascript" src="js/react-dom.development.js"></script>
	<script type="text/javascript" src="js/babel.min.js"></script>
	<!-- 引入prop-types,用于对组件标签属性进行限制 -->
	<script type="text/javascript" src="js/prop-types.js"></script>
</head>
<body>
	<div id="test"></div>
</body>
<script type="text/babel">
	class Person extends React.Component {
		//对Person对象实例的属性做出限制
		static propTypes = {
			name: PropTypes.string.isRequired,
			sex: PropTypes.string, //避免与类型String冲突
			age: PropTypes.number, //避免与类型Number冲突
			speak: PropTypes.func //避免与关键字function冲突
		}
		//为Person对象实例的属性设置默认值
		static defaultProps = {
			sex: 'secret',
			age: 0
		}

		render() {
			const {name, age, sex} = this.props
			return (
				<ul>
					<li>姓名:{name}</li>
					<li>性别:{sex}</li>
					<li>年龄:{age}</li>
				</ul>
			)
		}
	}

	function speak() {}
	const p = {name:"Lily", sex:"female", age:18, speak:speak}
	ReactDOM.render(<Person {...p}/>, document.getElementById('test'))
	//ReactDOM.render(<Person name="Lily" sex="female" age={18} speak={speak}/>, document.getElementById('test'))
</script>
</html>
- 函数式组件中的 props
<script type="text/babel">
	function Person(props) {
		const {name, age, sex} = props
		return (
			<ul>
				<li>姓名:{name}</li>
				<li>性别:{sex}</li>
				<li>年龄:{age}</li>
			</ul>
		)
	}
	Person.propTypes = {
		name: PropTypes.string.isRequired,
		sex: PropTypes.string,
		age: PropTypes.number
	}
	Person.defaultProps = {
		sex: 'secret',
		age: 0
	}

	ReactDOM.render(<Person name="Lily"/>, document.getElementById('test'))
</script>
2.2.3 refs
组件内的标签可以通过以下三种方式定义ref属性来标识自己。
- 1_字符串型
效率不高,可能会在未来版本中移除。

捕捉DOM:点击按钮触发事件1,右侧输入框失焦触发事件2。
<script type="text/babel">
	class Demo extends React.Component {
		render() {
			return (
				<div>
					<input ref="input1" type="text" placeholder="点击按钮提示数据"/>
					<button onClick={this.showData1}>button</button>
					<input ref="input2" onBlur={this.showData2} type="text" placeholder="失去焦点提示数据"/>
				</div>
			)
		}

		showData1 = ()=>{
			console.log(this)
			const {input1} = this.refs
			console.log(input1.value)
		}
		showData2 = ()=>{
			const {input2} = this.refs
			console.log(input2.value)
		}
	}

	ReactDOM.render(<Demo/>, document.getElementById('test'))
</script>
- 2_回调函数
- 内联式回调函数(推荐使用)
<script type="text/babel">
	class Demo extends React.Component {
		render() {
			return (
				<div>
					{/* 回调函数式的ref
					  * currentNode表示当前的DOM节点,作为参数传入回调函数
					  * 箭头函数this向外找render,指向对象实例
					  * 总结:渲染时自动将当前节点设置为实例属性
					  */}
					<input ref={(currentNode)=>{this.input1 = currentNode}} type="text" placeholder="点击按钮提示数据"/>
					<button onClick={this.showData1}>button</button>
					{//简洁写法}
					<input ref={c => this.input2 = c } onBlur={this.showData2} type="text" placeholder="失去焦点提示数据"/>
				</div>
			)
		}
		showData1 = ()=>{
			const {input1} = this
			console.log(input1.value)
		}
		showData2 = ()=>{
			const {input2} = this
			console.log(input2.value)
		}
	}

	ReactDOM.render(<Demo/>, document.getElementById('test'))
</script>
- 回调函数调用次数问题
如果 ref 回调函数是以内联函数的方式定义的,在更新过程中它会被执行两次,第一次传入参数null,然后在第二次会传入参数DOM元素;
这是因为在每次渲染时会创建一个新的函数实例,所以React清空旧的 ref 并且设置新的;

<script type="text/babel">
	class Demo extends React.Component {
		state = {isHot:true}

		render() {
			const {isHot} = this.state
			return (
				<div>
					<h2 ref={(currentNode)=>{
						this.h2 = currentNode
						console.log(currentNode)
					}}>今天天气很{isHot ? '炎热' : '凉爽'}</h2>
					<button onClick={this.changeWeather}>点我切换天气</button>
				</div>
			)
		}
		changeWeather = ()=>{
			const {isHot} = this.state
			this.setState({isHot:!isHot})
		}
	}

	ReactDOM.render(<Demo/>, document.getElementById('test'))
</script>
- class 绑定函数
通过将 ref 的回调函数定义成 class 绑定函数的方式可以避免上述问题,但是大多数情况下它是无关紧要的。
只在第一次渲染时调用一次。

<script type="text/babel">
	class Demo extends React.Component {
		state = {isHot:true}

		outputInfo = (currentNode)=>{
			this.h2 = currentNode
			console.log(currentNode)
		}
		render() {
			const {isHot} = this.state
			return (
				<div>
					<h2 ref={this.outputInfo}>今天天气很{isHot ? '炎热' : '凉爽'}</h2>
					<button onClick={this.changeWeather}>点我切换天气</button>
				</div>
			)
		}
		changeWeather = ()=>{
			const {isHot} = this.state
			this.setState({isHot:!isHot})
		}
	}

	ReactDOM.render(<Demo/>, document.getElementById('test'))
</script>
- 3_React.createRef()
<script type="text/babel">
	class Demo extends React.Component {
		//创建一个容器,存储被red所标识的节点
		//该容器是“专人专用”的,一个vDOM创建一个
		myRef = React.createRef()

		render() {
			return (
				<div>
					<input ref={this.myRef} type="text"></input>
					<button onClick={this.outputInfo}>点我输出数据</button>
				</div>
			)
		}
		outputInfo = ()=>{
			console.log(this.myRef.current.value)
		}
	}

	ReactDOM.render(<Demo/>, document.getElementById('test'))
</script>

2.2.4 事件

<script type="text/babel">
	class Demo extends React.Component {
		/* 事件处理:
		 *   1.通过onXxx属性指定事件处理函数
		 *      a.React使用的是自定义(合成)事件而不是使用原生DOM事件 -- 为了更好的兼容;
		 *      b.React中的事件是通过事件委托方式处理的(委托给组件最外层的元素) -- 为了更高效
		 *   2.可以通过event.target得到发生事件的DOM元素对象
		 */

		//请勿过度使用ref
		myRef = React.createRef()
		showData = ()=>{
			console.log(this.myRef.current.value)
		}

		//当触发事件的对象和要操作的对象为同一个时,可以通过事件完成
		showData2 = (event)=>{
			console.log(event.target.value)
		}

		render() {
			return (
				<div>
					<input ref={this.myRef} type="text"/>
					<button onClick={this.showData}>点我输出数据</button><br/>
					<input onBlur={this.showData2} type="text" placeholder="失焦输出数据"/>
				</div>
			)
		}
	}

	ReactDOM.render(<Demo/>, document.getElementById('test'))
</script>
2.3 收集表单数据
2.3.1 非受控组件
现用现取,如输入框组件。
<script type="text/babel">
	class Login extends React.Component {
		handleSubmit = (event)=>{
			//阻止默认表单提交动作【阻止页面刷新】
			event.preventDefault()
			//现用现取
			const {username, password} = this
			console.log(`用户名:${username.value},密码:${password.value}`)
		}
		render() {
			return (
				<form onSubmit={this.handleSubmit}>
					用户名:<input ref={c => this.username=c} type="text"/>
					密码:<input ref={c => this.password=c} type="password"/>
					<button>登录</button>
				</form>
			)
		}
	}

	ReactDOM.render(<Login/>, document.getElementById('test'))
</script>

2.3.2 受控组件
将数组变化维护到状态中,用到时直接调用。
<script type="text/babel">
	class Login extends React.Component {
		state = {
			username:'',
			password:''
		}

		//随时更新
		saveUsername = (event)=>{
			this.setState({username:event.target.value})
		}
		savePassword = (event)=>{
			this.setState({password:event.target.value})
		}
		handleSubmit = (event)=>{
			event.preventDefault()
			const {username, password} = this.state
			alert(`用户名:${username},密码:${password}`)
		}

		render() {
			return (
				<form onSubmit={this.handleSubmit}>
					用户名:<input onChange={this.saveUsername} type="text"/>
					密码:<input onChange={this.savePassword} type="password"/>
					<button>登录</button>
				</form>
			)
		}
	}

	ReactDOM.render(<Login/>, document.getElementById('test'))
</script>

2.3.3 高阶函数
若A函数,接收的参数是一个函数,那么A就可以称之为高阶函数;
若A函数,调用的返回值依然是一个函数,那么A也可以称之为高阶函数。
函数的柯里化:通过函数调用继续返回函数的方式,实现多次接收参数最后统一处理的函数编码形式。
- 高阶函数
<script type="text/babel">
	class Login extends React.Component {
		state = {
			username:'',
			password:''
		}
		//函数接函数,多次接收参数统一处理
		saveFormData = (dataType)=>{
			// 返回一个函数供事件调用
			return (event)=>{
				this.setState({[dataType]:event.target.value})
			}
		}
		handleSubmit = (event)=>{
			event.preventDefault()
			const {username, password} = this.state
			alert(`用户名:${username},密码:${password}`)
		}
		render() {
			return (
				<form onSubmit={this.handleSubmit}>
					用户名:<input onChange={this.saveFormData('username')} type="text"/>
					密码:<input onChange={this.saveFormData('password')} type="password"/>
					<button>登录</button>
				</form>
			)
		}
	}

	ReactDOM.render(<Login/>, document.getElementById('test'))
</script>
2.4 组件的生命周期
- 初识组件的生命周期
观察以下组件的创建、变化、消失过程。

<script type="text/babel">
	class Life extends React.Component {
		state = {opacity:1}

		death = ()=>{
			//卸载组件
			ReactDOM.unmountComponentAtNode(document.getElementById('test'))
		}

		/* 以下为:生命周期回调函数 == 生命周期钩子函数 == 生命周期函数 == 生命周期钩子 */

		//初始化渲染(挂载)、状态更新之后调用
		render() {
			return (
				<div>
					<h2 style={{opacity:this.state.opacity}}>React学不会怎么办?</h2>
					<button onClick={this.death}>不活了</button>
				</div>
			)
		}
		//组件挂载完毕调用
		componentDidMount() {
			this.timer = setInterval(()=>{
				let {opacity} = this.state
				opacity -= 0.1
				if(opacity <= 0) opacity = 1
				//值变量名和属性名相同,可以省略
				this.setState({opacity})
			}, 200)
		}
		//组件卸载前调用
		componentWillUnmount() {
			//注意:移除组件前先清除定时器
			clearInterval(this.timer)
		}
	}

	ReactDOM.render(<Life/>, document.getElementById('test'))
</script>
- 理解组件的生命周期
- 组件从创建到死亡它会经历一些特定的阶段;
- React组件中包含一系列钩子函数(生命周期回调函数),会在特定的时刻调用;
- 我们在定义组件时,会在特定的生命周期回调函数中做特定的工作。
2.4.1 生命周期(旧)
- 流程图

- 渲染、更新、强制更新

<script type="text/babel">
	class Count extends React.Component {
		constructor(props) {
			super(props)
			console.log('Count---constructor')
			//初始化状态
			this.state = {count:0}
		}

		//加1按钮回调
		add = ()=>{
			let {count} = this.state
			this.setState({count:++count})
		}
		//卸载组件的按钮回调
		death = ()=>{
			ReactDOM.unmountComponentAtNode(document.getElementById('test'))
		}
		//强制更新组件的按钮回调
		force = ()=>{
			//不更改任何状态中的数据,强制更新一下
			this.forceUpdate()
		}

		//组件将要挂载钩子
		componentWillMount() {
			console.log('Count---componentWillMount')
		}
		//控制组件是否更新的阀门
		shouldComponentUpdate() {
			console.log('Count---shouldComponentUpdate')
			return true
		}
		//组件将要更新的钩子
		componentWillUpdate() {
			console.log('Count---componentWillUpdate')
		}
		//组件挂载
		render() {
			console.log('Count---render')
			const {count} = this.state
			return (
				<div>
					<h2>当前求和值为{count}</h2>
					<button onClick={this.add}>点我+1</button>
					<button onClick={this.death}>卸载</button>
					<button onClick={this.force}>强制更新</button>
				</div>
			)
		}
		//组件挂载完毕钩子
		componentDidMount() {
			console.log('Count---componentDidMount')
		}
		//组件更新完毕的钩子
		componentDidUpdate() {
			console.log('Count---componentDidUpdate')
		}
		//组件将要卸载钩子
		componentWillUnmount() {
			console.log('Count---componentWillUnmount')
		}
	}

	ReactDOM.render(<Count/>, document.getElementById('test'))
</script>
- 父组件render

<script type="text/babel">
	class Father extends React.Component {
		state = {online:true}

		changeState = ()=>{
			const {online} = this.state
			this.setState({online:!online})
		}

		render() {
			return (
				<div>
					<span>Father</span>
					<button onClick={this.changeState}>ChangeState</button>
					<Son online={this.state.online}/>
				</div>
			)
		}
	}

	class Son extends React.Component {
		//父组件挂载时虽接收props但此方法不会被调用
		//当父组件更新时,此方法才会被调用
		componentWillReceiveProps(props) {
			console.log('Son---componentWillReceiveProps', props)
		}
		shouldComponentUpdate() {
			console.log('Count---shouldComponentUpdate')
			return true
		}
		componentWillUpdate() {
			console.log('Count---componentWillUpdate')
		}
		componentDidUpdate() {
			console.log('Count---componentDidUpdate')
		}

		render() {
			let {online} = this.props
			//很奇怪,布尔型输出为空,只能强转String
			let output = online + ''
			return (
				<div>Son, receivedState : {output}</div>
			)
		}
	}

	ReactDOM.render(<Father/>, document.getElementById('test'))
</script>
2.4.2 生命周期(新)
- 流程图
废弃了(即将废弃)了:componentWillMount、componentWillUpdate、componentWillReceiveProps函数钩子;
引入了:getDerivedStateFromProps、getSnapshotBeforeUpdate函数钩子。

- getDerivedStateFromProps
若 state 的值在任何时候都取决于 props,可以使用此方法来完成。

- 传入的 props 为 99;
- 点击按钮,确实会为 state 在原来的基础上+1,但不会生效;
- 因为钩子会拦截本身的 state,永远以传入的 props 为准。
注意这里要引入 React 17 依赖包。
<!DOCTYPE html>
<html>
<head>
	<title>SimWor</title>
	<!-- 引用新版本的依赖包 -->
	<script type="text/javascript" src="js17/react.development.js"></script>
	<script type="text/javascript" src="js17/react-dom.development.js"></script>
	<script type="text/javascript" src="js17/babel.min.js"></script>
</head>
<body>
	<div id="test"></div>
</body>
<script type="text/babel">
	class Count extends React.Component {
		constructor(props) {
			super(props)
			console.log('Count---constructor')
			this.state = {count:10}
		}

		add = ()=>{
			let {count} = this.state
			this.setState({count:++count})
		}

		//拦截本身的state,永远以传入的props为准
		static getDerivedStateFromProps(props, state) {
			console.log('Count---getDerivedStateFromProps', props, state)
			return props
		}

		shouldComponentUpdate() {
			console.log('Count---shouldComponentUpdate')
			return true
		}
		render() {
			console.log('Count---render')
			const {count} = this.state
			return (
				<div>
					<h2>当前求和值为{count}</h2>
					<button onClick={this.add}>点我也不会+1</button>
				</div>
			)
		}
		componentDidMount() {
			console.log('Count---componentDidMount')
		}
		componentDidUpdate() {
			console.log('Count---componentDidUpdate')
		}
	}

	ReactDOM.render(<Count count={99}/>, document.getElementById('test'))
</script>
</html>
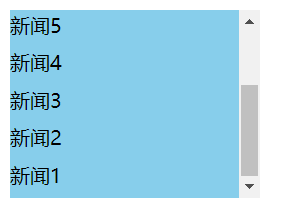
- getSnapshotBeforeUpdate
在更新前捕捉组件信息,传入
componentDidMount钩子供其参考使用。
getSnapshotBeforeUpdate(prevProps, prevState) {return snapshot}
componentDidMount(prevProps, prevState, snapshot)
该钩子函数被使用到的场景经常是:锁定内容区的视图,即内容区的信息不断生成、滚轮不断调整滑动,但视图保持不动方便阅读。
<!DOCTYPE html>
<html>
<head>
	<title>SimWor</title>
	<script type="text/javascript" src="js17/react.development.js"></script>
	<script type="text/javascript" src="js17/react-dom.development.js"></script>
	<script type="text/javascript" src="js17/babel.min.js"></script>
	<style type="text/css">
		.list {
			width: 200px;
			height: 150px;
			background-color: skyblue;
			overflow: auto;
		}
		.news {
			height: 30px;
		}
	</style>
</head>
<body>
	<div id="test"></div>
</body>
<script type="text/babel">
	class NewsList extends React.Component {
		state = {newsArr:[]}

		componentDidMount() {
			setInterval(()=>{
				const {newsArr} = this.state
				const news = '新闻' + (newsArr.length+1)
				this.setState({newsArr:[news, ...newsArr]})
			}, 1000)
		}
		//返回更新前的滚动条高度
		getSnapshotBeforeUpdate() {
			return this.refs.list.scrollHeight
		}
		//this.refs.list.scrollHeight : 更新后的滚动条高度
		//this.refs.list.scrollHeight - snapshotHeight : 新增内容的高度
		//this.refs.list.scrollTop += 新增内容的高度 : 锁定当前内容区视图
		componentDidUpdate(prevProps, prevState, snapshotHeight) {
			this.refs.list.scrollTop += this.refs.list.scrollHeight - snapshotHeight
		}

		render() {
			return (
				<div className="list" ref="list">
					{
						this.state.newsArr.map((value, index)=>{
							return <div className="news" key={index}>{value}</div>
						})
					}
				</div>
			)
		}
	}

	ReactDOM.render(<NewsList/>, document.getElementById('test'))
</script>
</html>
2.5 Diffing算法
- 算法的体现
可以观察到,只有变化的内容被更新了。

<script type="text/babel">
	class Time extends React.Component {
		state = {date: new Date()}

		componentDidMount() {
			setInterval(()=>{
				this.setState({date: new Date()})
			}, 1000)
		}

		render() {
			return (
				<div>
					<h1>hello</h1>
					<input type="text"/>
					<span>现在是:{this.state.date.toTimeString()}</span>
				</div>
			)
		}
	}

	ReactDOM.render(<Time/>, document.getElementById('test'))
</script>
- 算法的解释
Diffing算法会对比变化前后虚拟DOM,只更新变化的部分。
问:react/vue中的key有什么作用?(key的内部原理是什么?)
问:为什么遍历列表时,key最好不要用index?

1. 虚拟DOM中key的作用:
	1). 简单的说: key是虚拟DOM对象的标识, 在更新显示时key起着极其重要的作用。
	2). 详细的说: 当状态中的数据发生变化时,react会根据【新数据】生成【新的虚拟DOM】,
	随后React进行【新虚拟DOM】与【旧虚拟DOM】的diff比较,比较规则如下:
		a. 旧虚拟DOM中找到了与新虚拟DOM相同的key:
			(1).若虚拟DOM中内容没变, 直接使用之前的真实DOM
			(2).若虚拟DOM中内容变了, 则生成新的真实DOM,随后替换掉页面中之前的真实DOM
		b. 旧虚拟DOM中未找到与新虚拟DOM相同的key,根据数据创建新的真实DOM,随后渲染到到页面
2. 用index作为key可能会引发的问题:
	1). 若对数据进行:逆序添加、逆序删除等破坏顺序操作:会产生没有必要的真实DOM更新 ==> 界面效果没问题, 但效率低。
	2). 如果结构中还包含输入类的DOM:会产生错误DOM更新 ==> 界面有问题。
	3). 注意!如果不存在对数据的逆序添加、逆序删除等破坏顺序操作,仅用于渲染列表用于展示,使用index作为key是没有问题的。
3. 开发中如何选择key?:
	1).最好使用每条数据的唯一标识作为key, 比如id、手机号、身份证号、学号等唯一值。
	2).如果确定只是简单的展示数据,用index也是可以的。
三、React 脚手架
3.1 入门
- 什么是react脚手架
- xxx脚手架: 用来帮助程序员快速创建一个基于xxx库的模板项目
- 包含了所有需要的配置(语法检查、jsx编译、devServer…)
- 下载好了所有相关的依赖
- 可以直接运行一个简单效果
- react提供了一个用于创建react项目的脚手架库: create-react-app
- 项目的整体技术架构为: react + webpack + es6 + eslint
- 使用脚手架开发的项目的特点: 模块化, 组件化, 工程化
- 创建脚手架应用
- 获取NPM命令
npm是Node.js的包管理工具(package manager),通过安装node.js获取。
下载链接:https://nodejs.org/en/

- 创建脚手架应用
2.1 安装yarn(react官方包管理工具)
2.2 安装react脚手架创建工具
2.3 创建脚手架应用react_staging
2.4 启动脚手架应用
C:\Users\m1553>npm install yarn -g
C:\Users\m1553>npm install create-react-app -g
E:\BUFFER>create-react-app react_staging
E:\BUFFER\react_staging>yarn start

- 分析脚手架应用
E:\BUFFER\react_staging>dir
2020/12/27  14:59               280 .eslintcache
2020/12/27  14:57               310 .gitignore
2020/12/27  14:59    <DIR>          node_modules
2020/12/27  14:58               817 package.json
2020/12/27  14:57    <DIR>          public
2020/12/27  14:57             3,362 README.md
2020/12/27  14:57    <DIR>          src
2020/12/27  14:58           503,731 yarn.lock
E:\BUFFER\react_staging\src>dir
2020/12/27  14:57               564 App.css
2020/12/27  14:57               528 App.js
2020/12/27  14:57               246 App.test.js
2020/12/27  14:57               366 index.css
2020/12/27  14:57               500 index.js
2020/12/27  14:57             2,632 logo.svg
2020/12/27  14:57               362 reportWebVitals.js
2020/12/27  14:57               241 setupTests.js
E:\BUFFER\react_staging\public>dir
2020/12/27  14:57             3,870 favicon.ico
2020/12/27  15:17             2,150 index.html
2020/12/27  14:57             5,347 logo192.png
2020/12/27  14:57             9,664 logo512.png
2020/12/27  14:57               492 manifest.json
2020/12/27  14:57                67 robots.txt
E:\BUFFER\react_staging\public>

- index.html
<!DOCTYPE html>
<html lang="en">
  <head>
    <meta charset="utf-8" />
    <!-- %PUBLIC_URL% 代表public文件夹的路径 -->
    <link rel="icon" href="%PUBLIC_URL%/favicon.ico" />
    <!-- 开启理想视口,用于做移动端网页的适配 -->
    <meta name="viewport" content="width=device-width, initial-scale=1" />
    <!-- 用于配置浏览器页签+地址栏的颜色(仅支持安卓手机浏览器) -->
    <meta name="theme-color" content="#000000" />
    <meta
      name="description"
      content="Web site created using create-react-app"
    />
    <!-- 用于指定网页添加到苹果手机主屏幕后的图标 -->
    <link rel="apple-touch-icon" href="%PUBLIC_URL%/logo192.png" />
    <!--
      manifest.json provides metadata used when your web app is installed on a
      user's mobile device or desktop. See https://developers.google.com/web/fundamentals/web-app-manifest/
    -->
    <!-- 应用加壳时的配置文件 -->
    <link rel="manifest" href="%PUBLIC_URL%/manifest.json" />
    <!--
      Notice the use of %PUBLIC_URL% in the tags above.
      It will be replaced with the URL of the `public` folder during the build.
      Only files inside the `public` folder can be referenced from the HTML.

      Unlike "/favicon.ico" or "favicon.ico", "%PUBLIC_URL%/favicon.ico" will
      work correctly both with client-side routing and a non-root public URL.
      Learn how to configure a non-root public URL by running `npm run build`.
    -->
    <title>React App</title>
  </head>
  <body>
    <!-- 当浏览器不支持JS时,展示该内容 -->
    <noscript>You need to enable JavaScript to run this app.</noscript>
    <!-- 组件的根容器 -->
    <div id="root"></div>
    <!--
      This HTML file is a template.
      If you open it directly in the browser, you will see an empty page.

      You can add webfonts, meta tags, or analytics to this file.
      The build step will place the bundled scripts into the <body> tag.

      To begin the development, run `npm start` or `yarn start`.
      To create a production bundle, use `npm run build` or `yarn build`.
    -->
  </body>
</html>
3.2 手写脚手架应用
百度网盘链接【src_hello_react】,提取码:rays

E:\BUFFER\react_staging\public>dir
2020/12/27  14:57             3,870 favicon.ico
2020/12/27  15:58               187 index.html
E:\BUFFER\react_staging\src>dir
2020/12/27  16:27               316 App.js
2020/12/27  16:22    <DIR>          components
2020/12/27  16:01               234 index.js
E:\BUFFER\react_staging\src\components>dir
2020/12/27  16:27    <DIR>          Hello
2020/12/27  16:27    <DIR>          Welcome
E:\BUFFER\react_staging\src\components\Hello>dir
2020/12/27  16:21                40 index.css
2020/12/27  16:27               179 index.jsx
E:\BUFFER\react_staging\src\components\Welcome>dir
2020/12/27  16:23                41 index.css
2020/12/27  16:28               185 index.jsx
E:\BUFFER\react_staging\src\components\Welcome>
- public / index.html
应用的入口页面,每个应用只有一个html文件。
<!DOCTYPE html>
<html>
<head>
  <title>SimWor</title>
  <meta charset="utf-8">
  <link rel="icon" href="%PUBLIC_URL%/favicon.ico" />
</head>
<body>
  <div id="root"></div>
</body>
</html>
- src / App.js
应用的根组件,其它所有组件嵌在该组件里面。
//创建“外壳”组件App
import React,{Component} from 'react'
import Hello from './components/Hello'
import Welcome from './components/Welcome'

//创建并暴露App组件
export default class App extends Component {
	render() {
		return (
			<div>
				<Hello/>
				<Welcome/>
			</div>
		)
	}
}
- src / index.js
应用在这里将根组件渲染到页面中(
index.html)。
//引入react核心库
import React from 'react'
//引入react-dom
import ReactDOM from 'react-dom'
//引入App组件
import App from './App'

//渲染App组件到页面
ReactDOM.render(<App/>, document.getElementById('root'))
- src \ components \ Hello \ index.jsx
子组件Hello。
import React,{Component} from 'react'
import './index.css'

export default class Hello extends Component {
	render() {
		return <h2 className="title">Hello,React!</h2>
	}
}
- src \ components \ Hello \ index.css
子组件Hello。
.title {
	background-color: skyblue;
}
- src \ components \ Welcome \ index.css
子组件Welcome。
import React,{Component} from 'react'
import './index.css'

export default class Welcome extends Component {
	render() {
		return <h2 className="welcome">Welcome,React!</h2>
	}
}
- src \ components \ Welcome \ index.css
子组件Welcome。
.welcome {
	background-color: orange;
}
3.3 组件化编码
- 流程
- 拆分组件: 拆分界面,抽取组件
- 实现静态组件: 使用组件实现静态页面效果
- 实现动态组件
3.1 动态显示初始化数据(数据类型、数据名称、保存在哪个组件?)
3.2 交互(从绑定事件监听开始)
- 实战:todoList案例
百度网盘链接【src_todolist】 ,提取码:rays
案例中需安装:
yarn add nanoid(生成唯一字符串id插件)、yarn add prop-types(参数校验库)

- todoList案例相关知识点
- 拆分组件、实现静态组件,注意:className、style的写法
- 动态初始化列表,如何确定将数据放在哪个组件的state中?
2.1 某个组件使用:放在其自身的state中
2.2 某些组件使用:放在他们共同父组件的state中(官方:状态提升) - 关于父子之间通信:
3.1 父组件给子组件传递数据:通过props传递
3.2 子组件给父组件传递数据:通过props传递,要求父提前给子传递一个函数 - 注意defaultChecked(首次生效)和check的区别,类似的还有:defaultValue和value
- 状态在哪里,操作状态的方法就在哪里
四、React Ajax
- 前置说明
- React本身只关注于界面,并不包含发送ajax请求的代码
- 前端应用需要通过ajax请求与后台进行交互(json数据)
- react应用中需要集成第三方ajax库(或自己封装)
- 常用的ajax请求库
- jQuery:比较重,如果需要另外引入,不建议使用
- axios:轻量级,建议使用
2.1 封装XmlHttpRequest对象的ajax
2.2 promise风格
2.3 可以用在浏览器端和node服务器端
4.1 AXIOS
4.1.1 环境准备
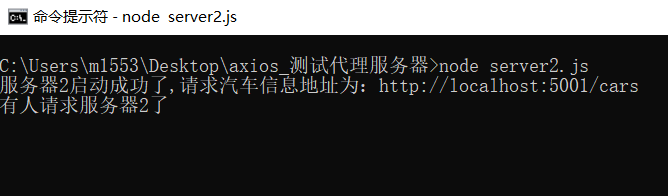
- 启动本地测试代理服务器
百度网盘链接【axios_测试代理服务器.zip】 提取码:rays

- 安装前端助手(可选)
用来格式化请求返回的数据。

- 测试发送请求
在浏览器中输入
http://localhost:5000/students。

4.1.2 发送请求
使用 axios 前需安装:
yarn add axios
- 配置文件
解决ajax跨域问题:在
src目录下新建setupProxy.js文件。
const proxy = require('http-proxy-middleware')

module.exports = function(app) {
  app.use(
    proxy('/api1', {  //api1是需要转发的请求(所有带有/api1前缀的请求都会转发给5000)
      target: 'http://localhost:5000', //配置转发目标地址(能返回数据的服务器地址)
      changeOrigin: true, //控制服务器接收到的请求头中host字段的值
      /*
       * changeOrigin设置为true时,服务器收到的请求头中的host为:localhost:5000
       * changeOrigin设置为false时,服务器收到的请求头中的host为:localhost:3000
       * changeOrigin默认值为false,但我们一般将changeOrigin值设为true
       */
      pathRewrite: {'^/api1': ''} //去除请求前缀,保证交给后台服务器的是正常请求地址(必须配置)
    }),
    proxy('/api2', {
      target: 'http://localhost:5001',
      changeOrigin: true,
      pathRewrite: {'^/api2': ''}
    })
  )
}
- 书写请求
import React, { Component } from 'react'
import axios from 'axios'

export default class App extends Component {
	getStuData = ()=>{
		axios.get('http://localhost:3000/api1/students').then(
			response =>{console.log('Success', response.data)},
			error =>{console.log('Error', error)}
		)
	}

	getCarData = ()=>{
		axios.get('http://localhost:3000/api2/cars').then(
			response =>{console.log('Success', response.data)},
			error =>{console.log('Error', error)}
		)
	}

	render() {
		return (
			<div>
				<button onClick={this.getStuData}>点我获取学生数据</button>
				<button onClick={this.getCarData}>点我获取汽车数据</button>
			</div>
		)
	}
}

4.2 案例:Github搜索用户
百度网盘链接【search_github_users】 提取码:rays

4.3 消息订阅/发布机制
无论组件位于哪个位置,都可以互相传递消息。(使用前需安装:
yarn add pubsub-js)
Github:案例分享
- 改装 案例:Github搜索用户
百度网盘链接【search_github_users_PubSub】 提取码:rays
组件订阅/取消订阅消息
state = {
    users:[],			//users初始值为数组
    isFirst:true,		//是否为第一次打开页面
    isLoading:false,	//标识是否处在加载中
    err:''				//存储请求相关的错误信息
}

//List挂载后订阅Search消息
componentDidMount() {
    //此处用不到msg参数,下划线占位符
    this.token = PubSub.subscribe('search-users', (_, stateObj)=>{
        this.setState(stateObj)
    })
}

//List卸载前取消订阅Search消息
componentWillUnmount() {
    PubSub.unsubscribe(this.token)
}
组件发布消息
search = ()=>{
    //连续解构赋值,且重命名
    const {keyWordElement:{value:keyWord}} = this
    //发送请求前通知App更新状态
    PubSub.publish('search-users', {isFirst:false, isLoading:true})
    //发送网络请求
    axios.get(`https://api.github.com/search/users?q=${keyWord}`)
         .then(
             //请求成功后通知App更新状态
             response => {PubSub.publish('search-users', {isLoading:false, users:response.data.items})},
             //请求失败后通知App更新状态
             error => {PubSub.publish('search-users', {isLoading:false,err:error.message})}
            )
}
4.4 FETCH
jQuery 和 axios 都是原生 Ajax 的 XHR 请求方式进行封装,而 fetch 则是与 Ajax 同级的异步请求方式。
fetch 先返回服务器是否可达,再确认能否拿到请求的数据(关注分离思想)。
//以下代码与使用axios的代码等价
//使用fetch,离其最近的函数需加async
search = async()=>{
    const {keyWordElement:{value:keyWord}} = this
    PubSub.publish('search-users', {isFirst:false, isLoading:true})
    //Fetch发送网络请求
    try {
    	//确认网络是否可达
        const response = await fetch(`https://api.github.com/search/users?q=${keyWord}`)
        //可达,再取数据
        const data = await response.json()
        PubSub.publish('search-users', {isLoading:false, users:data.items})
    } catch(err) {
        PubSub.publish('search-users', {isLoading:false, err:err.message})
    }
}
五、React 路由
5.1 相关理解
- SPA的理解
- 单页Web应用(single page web application)
- 整个应用只有一个完整的页面
- 点击页面中的链接不会刷新页面,只会做页面的局部更新
- 数据都需要通过ajax请求获取,并在前端异步展现
- 路由的理解
- 一个路由就是一个映射关系(key: value)
- key 为路径,value 可能是 function 或 component
- 后端路由的理解
- 理解:value 和 function,用来处理客户端提交的请求
- 注册路由:
route.get(path, function(req, res)) - 工作过程:当node接收到一个请求时,根据请求路径找到匹配的路由,调用路由中的函数来处理请求,返回响应数据
- 前端路由的理解
- 浏览器端路由,value 是 component,用于展示页面内容
- 注册路由:
<Route path="/test" component={Test}> - 工作过程:当浏览器的 path 变为 /test 时,当前路由组件就会变为 Test 组件
- react-router-dom的理解
- react 的一个插件库
- 专门用来实现一个 SPA 应用
- 基于 react 的项目基本都会用到此库
5.2 react-router-dom
需单独安装:
yarn add react-router-dom
5.2.1 基本路由的使用
百度网盘链接【src_路由的基本使用】 提取码:rays

render() {
	return (
		<div>
			<div className="row">
				<div className="col-xs-offset-2 col-xs-8">
					{/* 一般组件的引用方式 */}
					<Header/>
				</div>
			</div>

			{/* 多个BrowserRouter表示多个路由,编写路由链接和注册路由应该放在同一个中 */}
			<BrowserRouter>
				<div className="row">
					<div className="col-xs-2 col-xs-offset-2">
						<div className="list-group">
							{/* 原生html中,靠<a>跳转不同的页面 */}
							{/* <a className="list-group-item" href="./about.html">About</a>
							<a className="list-group-item active" href="./home.html">Home</a> */}

							{/* 在React中靠路由链接实现切换组件---编写路由链接 */}
							<Link className="list-group-item" to="/about">About</Link>
							<Link className="list-group-item" to="/home">Home</Link>
						</div>
					</div>
					<div className="col-xs-6">
						<div className="panel">
							<div className="panel-body">
								{/* 路由组件的引用方式 */}
								{/* 注册路由 */}
								<Route path="/about" component={About}/>
								<Route path="/home" component={Home}/>
							</div>
						</div>
					</div>
				</div>
			</BrowserRouter>
		</div>
	)
}
- 明确好界面中的导航区、展示区
- 导航区的 a 标签改为 Link 标签
<Link to="/xxx">Demo</Link> - 展示区写 Route 标签进行路径的匹配
<Route path="/xxx" componenet={Demo}/> - Link 和 Route 应该包含在同一个
BrowserRouter/HashRouter标签中,简单的做法就是在 <App> 的最外侧进行包裹
- BrowserRouter 与 HashRouter
| 对比项 | BrowserRouter | HashRouter |
|---|---|---|
| 底层原理 | H5的 history API | URL的哈希值 |
| path表现形式 | localhost:3000/demo/test | localhost:3000/#/demo/test |
| 刷新后对state参数影响 | 保存在history,无影响 | 丢失 |
- 路由组件和一般组件的区别
| 区别点 | 一般组件 | 路由组件 |
|---|---|---|
| 写法 | <Demo/> | <Route path="/demo" component={Demo}/> |
| 存放位置 | src/components | src/pages |
| 接收到的 props | 传什么接什么 | 三个固定的属性 |
//三个固定的属性
history:
	go: ƒ go(n)
	goBack: ƒ goBack()
	goForward: ƒ goForward()
	push: ƒ push(path, state)
	replace: ƒ replace(path, state)
location:
	pathname: "/about"
	search: ""
	state: undefined
match:
	params: {}
	path: "/about"
	url: "/about"
- NavLink
NavLink是Link的升级版,默认添加一个属性activeClassName=“active”,用于指定选中后的样式。
<div className="list-group">
	{/* NavLink是Link的升级版,默认添加一个属性activeClassName="active",用于指定选中后的样式 */}
	<NavLink activeClassName="active" className="list-group-item" to="/about">About</NavLink>
	<NavLink activeClassName="active" className="list-group-item" to="/home">Home</NavLink>
</div>

- 自定义MyNavLink
当导航项变多时,使用 NavLink 会有很多重复的内容。
<div className="list-group">
	{/* 自定义一般组件抽取冗余的内容 */}
	<MyNavLink to="/about">About</MyNavLink>
	<MyNavLink to="/home">Home</MyNavLink>
</div>
import React, { Component } from 'react'
import {NavLink} from 'react-router-dom'

export default class MyNavLink extends Component {
    render() {
        // {...this.props} 包含引用方传过来的所有属性,且包含一个 children 属性记录着标签的value值,可以通过 this.props.children 来获取
        return <NavLink activeClassName="active" className="list-group-item" {...this.props}/>
    }
}
- Switch
匹配即返回。
import {Switch} from 'react-router-dom'

<Switch>
	{/* Swith匹配即返回,提高效率(否则是一直匹配到最后,把匹配到的全返回) */}
	<Route path="/about" component={About}/>
	<Route path="/home" component={Home}/>
</Switch>
- Redirect
一般写在所有路由注册的最下方,当所有路由都无法匹配时,跳转到 Redirect 指定的路由。
import {Redirect} from 'react-router-dom'

<Switch>
	{/* Swith匹配即返回,提高效率(否则是一直匹配到最后,把匹配到的全返回) */}
	<Route path="/about" component={About}/>
	<Route path="/home" component={Home}/>
	<Redirect to="/about"/>
</Switch>
5.2.2 嵌套路由的使用
注册子路由时要写上父路由的path值,路由的匹配是按照注册路由的顺序进行的。

百度网盘链接【src_嵌套路由的使用】 提取码:rays
import {Route,Switch} from 'react-router-dom'
import MyNavLink from '../../components/MyNavLink'
import News from './News'
import Message from './Message'

render() {
    return (
        <div>
            <h3>我是Home的内容</h3>
            <div>
                <ul className="nav nav-tabs">
                    <li> <MyNavLink to="/home/news">News</MyNavLink> </li>
                    <li> <MyNavLink to="/home/message">Message</MyNavLink> </li>
                </ul>
                <Switch>
                    <Route path="/home/news" component={News}/>
                    <Route path="/home/message" component={Message}/>
                </Switch>
            </div>
        </div>
    )
}
5.2.3 向路由组件传递参数
有三种方式:params、search、state。

- params
- 路由链接(携带参数):
<Link to="/demo/test/tom/18">详情</Link> - 注册路由(声明接收):
<Route path="/demo/test/:name/:age" component={Test}> - 接收参数:
const {id,title} = this.props.match.params
百度网盘链接【src_向组件传递params参数】 提取码:rays
//src/pages/Home/Message/index.jsx

import React, { Component } from 'react'
import {Link,Route} from 'react-router-dom'
import Detail from './Detail'

export default class Message extends Component {
    state = {
        messageArr:[
            {id:'01',title:'message001'},
            {id:'02',title:'message002'},
            {id:'03',title:'message003'}
        ]
    }
    render() {
        const {messageArr} = this.state
        return (
            <div>
                <ul>
                    {
                        messageArr.map((msgObj)=>{
                            return (
                                <li key={msgObj.id}>
                                    {/* 1.向路由组件传递params参数 */}
                                    <Link to={`/home/message/detail/${msgObj.id}/${msgObj.title}`}>{msgObj.title}</Link>
                                </li>
                            )
                        })
                    }
                </ul>
                <hr/>
                {/* 2.声明接收params参数 */}
                <Route path="/home/message/detail/:id/:title" component={Detail}/>
            </div>
        )
    }
}
//src/pages/Home/Message/Detail/index.jsx

import React, { Component } from 'react'

const detailData = [
    {id:'01',content:'你好,中国!'},
    {id:'02',content:'你好,太阳!'},
    {id:'03',content:'你好,大山!'}
]

export default class Detail extends Component {
    render() {
        console.log(this.props)
        //3.接收params参数
        const {id,title} = this.props.match.params
        const findResult = detailData.find((detailObj)=>{return detailObj.id === id})
        return (
            <ul>
                <li>ID:{id}</li>
                <li>TITLE:{title}</li>
                <li>CONTENT:{findResult.content}</li>
            </ul>
        )
    }
}

- search
- 路由链接(携带参数):
<Link to="/demo/test?name=tome&age=18">详情</Link> - 注册路由(无需声明,正常注册即可):
<Route path="/demo/test" component={Test}/> - 接收参数:
this.props.location.search - 解析:获取到的 search 是 urllencoded 编码字符串,需要借助 querystring 解析
百度网盘链接【src_向组件传递search参数】 提取码:rays
//src/pages/Home/Message/index.jsx

import React, { Component } from 'react'
import {Link,Route} from 'react-router-dom'
import Detail from './Detail'

export default class Message extends Component {
    state = {
        messageArr:[
            {id:'01',title:'message001'},
            {id:'02',title:'message002'},
            {id:'03',title:'message003'}
        ]
    }
    render() {
        const {messageArr} = this.state
        return (
            <div>
                <ul>
                    {
                        messageArr.map((msgObj)=>{
                            return (
                                <li key={msgObj.id}>
                                    {/* 1.向路由组件传递search(query)参数 */}
                                    <Link to={`/home/message/detail?id=${msgObj.id}&title=${msgObj.title}`}>{msgObj.title}</Link>
                                </li>
                            )
                        })
                    }
                </ul>
                <hr/>
                {/* 2.search(query)参数无需声明接收,正常注册路由即可 */}
                <Route path="/home/message/detail" component={Detail}/>
            </div>
        )
    }
}
//src/pages/Home/Message/Detail/index.jsx

import React, { Component } from 'react'
//格式化和解析query
import qs from 'querystring'

const detailData = [
    {id:'01',content:'你好,中国!'},
    {id:'02',content:'你好,太阳!'},
    {id:'03',content:'你好,大山!'}
]

export default class Detail extends Component {
    render() {
        console.log(this.props)
        //3.接收search(query)参数
        const {search} = this.props.location
        //4.解析
        const {id,title} = qs.parse(search.slice(1))
        const findResult = detailData.find((detailObj)=>{return detailObj.id === id})
        return (
            <ul>
                <li>ID:{id}</li>
                <li>TITLE:{title}</li>
                <li>CONTENT:{findResult.content}</li>
            </ul>
        )
    }
}

- state
- 路由链接(携带参数):
<Link to={{pathname="/demo/test", state:{name:"tom", age:18}}}>详情</Link> - 注册路由(无需声明,正常注册即可):
<Route path="/demo/test" component={Test}/> - 接收参数:
this.props.location.state(页面刷新也可以保留住参数)
百度网盘链接【src_向组件传递search参数】 提取码:rays
//src/pages/Home/Message/index.jsx

import React, { Component } from 'react'
import {Link,Route} from 'react-router-dom'
import Detail from './Detail'

export default class Message extends Component {
    state = {
        messageArr:[
            {id:'01',title:'message001'},
            {id:'02',title:'message002'},
            {id:'03',title:'message003'}
        ]
    }
    render() {
        const {messageArr} = this.state
        return (
            <div>
                <ul>
                {messageArr.map((msgObj)=>{
                    return (
                        <li key={msgObj.id}>
                            {/* 1.向路由组件传递state参数 */}
                            <Link to={{pathname:"/home/message/detail", state:{id:msgObj.id, title:msgObj.title}}}>{msgObj.title}</Link>
                        </li>
                    )})
                }
                </ul>
                <hr/>
                {/* 2.state参数无需声明接收,正常注册路由即可 */}
                <Route path="/home/message/detail" component={Detail}/>
            </div>
        )
    }
}
//src/pages/Home/Message/Detail/index.jsx

import React, { Component } from 'react'

const detailData = [
    {id:'01',content:'你好,中国!'},
    {id:'02',content:'你好,太阳!'},
    {id:'03',content:'你好,大山!'}
]

export default class Detail extends Component {
    render() {
        console.log(this.props)
        //3.接收state参数
        const {id,title} = this.props.location.state || {}
        const findResult = detailData.find((detailObj)=>{return detailObj.id === id}) || {}
        return (
            <ul>
                <li>ID:{id}</li>
                <li>TITLE:{title}</li>
                <li>CONTENT:{findResult.content}</li>
            </ul>
        )
    }
}

5.2.4 编程式路由导航
借助
this.props.history对象上的 API 对操作路由跳转、前进、后退。
this.props.history.push(path, state):跳转,有历史记录this.props.history.replace(path, state):跳转,无历史记录this.props.history.goBack():回退this.props.history.goForward():前进this.props.history.go(n):回退/前进N步
- 点击跳转
pushShow = (id,title)=>{
	this.props.history.push(`/home/message/detail/${id}/${title}`)
}

{/*<Link to={`/home/message/detail/${msgObj.id}/${msgObj.title}`}>{msgObj.title}</Link>*/}
<button onClick={()=>this.pushShow(msgObj.id, msgObj.title)}>push查看</button>
<Route path="/home/message/detail/:id/:title" component={Detail}/>
- 定时跳转
import React, { Component } from 'react'

export default class News extends Component {
    //组件挂载两秒后自动跳转
    componentDidMount() {
        setTimeout(() => {
            this.props.history.push('/home/message')
        }, 2000);
    }

    render() {
        return (
            <ul>
                <li>news001</li>
                <li>news002</li>
                <li>news003</li>
            </ul>
        )
    }
}
5.2.5 withRouter
withRouter 可以加工一般组件,使其具备路由组件所特有的API;
withRouter 的返回值是一个新组件

import React, { Component } from 'react'
import {withRouter} from 'react-router-dom'

class Header extends Component {
    back = ()=>{
        this.props.history.goBack()
    }

    render() {
        return (
            <div className="page-header">
                <h2>React Router Demo</h2>
                <button onClick={this.back}>回退</button>
            </div>
        )
    }
}

//使得 Header 一般组件可以使用路由组件的功能
export default withRouter(Header)
六、UI 组件库
6.1 ANTD
官网:https://ant.design/index-cn
安装:yarn add antd
- 基本使用

import React, { Component } from 'react'
import {Button} from 'antd'
import 'antd/dist/antd.css'

export default class App extends Component {
	render() {
		return (
			<div>
				<Button type="primary">ANTD Primary Button</Button>
			</div>
		)
	}
}

- 高级使用
参考文档:https://3x.ant.design/docs/react/use-with-create-react-app-cn
- 按需引入CSS样式(全部的 antd 组件的样式gzipped 后一共大约 60kb)
- 定制主题颜色(非支付宝蓝)
七、Redux
7.1 概念
- 学习文档
- 英文文档:
https://redux.js.org/ - 中文文档:
http://www.redux.org.cn/ - Github:
https://github.com/reactjs/redux
- redux是什么
- 专门用作状态管理的JS库(不是react插件库)
- 作用:集中式管理应用中多个组件共享的状态
- 使用场景
- 某个组件的状态,需要让其它组件随时可以拿到(共享)
- 一个组件需要改变另一个组件的状态(通信)
- 工作流程

7.2 核心概念
- action
- 动作的对象
- 包含 2 个属性
2.1 type:标识属性,值为字符串,唯一,必要属性
2.2 data:数据属性,值类型任意,可选属性 - 例子:
{type:"ADD_STUDENT", data:{name:"tom", age:18}}
- reducer
- 用于初始化状态、加工状态
- 加工时,根据旧的 state 和 action,产生新的 state 的纯函数
- store
- 将 state、action、reducer 联系在一起的对象
- 如何得到此对象?
2.1import {createStore} from 'redux'
2.2import reducer from './reducers'
2.3const store = createStore(reducer) - 此对象的功能?
3.1getState():得到 state
3.2dispatch(action):分发 action,触发 reducer 调用,产生新的 state
3.3subscribe(listener):注册监听,当产生了新的 state 时,自动调用
7.3 核心API
- createStore()
作用:创建包含指定 reducer 的 store 对象
- store
- 作用:redux 库最核心的管理对象
- 它内部维护者:state、reducer
- 核心方法:getState()、dispatch(action)、subscribe(listener)
- 具体编码
4.1store.getState()
4.2store.dispatch({type:"INCREMENT", number})
4.3store.subscribe(render)
- applyMiddleware()
作用:应用上基于 redux 的中间件(插件库)
- combineReducers()
作用:合并多个 reducer 函数
7.4 redux 编写应用

- React 版
//src/components/Count/index.jsx
import React, { Component } from 'react'
export default class Count extends Component {
state = {count:0}
increment = ()=>{
const {value} = this.selectedNumber
const {count} = this.state
//拿到的value为字符串,*1自动转换为数字
this.setState({count:count + value*1})
}
decrement = ()=>{
const {value} = this.selectedNumber
const {count} = this.state
this.setState({count:count - value*1})
}
incrementIfOdd = ()=>{
const {value} = this.selectedNumber
const {count} = this.state
if(count%2 !== 0)
this.setState({count:count + value*1})
}
incrementAsync = ()=>{
const {value} = this.selectedNumber
const {count} = this.state
setTimeout(()=>{
this.setState({count:count + value*1})
}, 500)
}
render() {
return (
<div>
<h1>当前求和为:{this.state.count}</h1>
<select ref={c => this.selectedNumber = c}>
<option value="1">1</option>
<option value="2">2</option>
<option value="3">3</option>
</select>
<button onClick={this.increment}>+</button>
<button onClick={this.decrement}>-</button>
<button onClick={this.incrementIfOdd}>当前求和为奇数再加</button>
<button onClick={this.incrementAsync}>异步加</button>
</div>
)
}
}
- Redux Mini 版
安装:
yarn add redux
百度网盘链接【src_redux_mini】 提取码:rays
- src/redux/store.js
1). 引入redux中的createStore函数,创建一个store
2). createStore调用时要传入一个为其服务的reducer
3). 记得暴露store对象
/* 该文件专门用于暴露一个store对象,整个应用只有一个store对象 */
//引入createStore,专门用于创建redux中最为核心的store对象
import {createStore} from 'redux'
//引入为Count组件服务的reducer
import countReducer from './count_reducer'

export default createStore(countReducer)
- src/redux/count_reducer.js
1). reducer的本质是一个函数,接收:preState,action,返回加工后的状态
2). reducer有两个作用:初始化状态,加工状态
3). reducer被第一次调用时,是store自动触发的,传递的preState是undefined,传递的action是:{type:’@@REDUX/INIT_a.2.b.4}
/*
  1.该文件是用于创建一个为Count组件服务的reducer,其本质就是一个函数
  2.reducer函数会接到两个参数,分别为之前的状态和动作对象
 */
const initState = 0
export default function countReducer(prevState=initState, action) {
    const {type, data} = action
    switch (type) {
        case 'increment': return prevState + data
        case 'decrement': return prevState - data
        default: return prevState
    }
}
- src/components/Count/index.jsx
import React, { Component } from 'react'
//引入store,用于获取redux中保存的状态
import store from '../../redux/store'
export default class Count extends Component {
increment = ()=>{
const {value} = this.selectedNumber
store.dispatch({type:'increment', data:value*1})
}
decrement = ()=>{
const {value} = this.selectedNumber
store.dispatch({type:'decrement', data:value*1})
}
incrementIfOdd = ()=>{
const {value} = this.selectedNumber
const count = store.getState()
if(count%2 !== 0)
store.dispatch({type:'increment', data:value*1})
}
incrementAsync = ()=>{
const {value} = this.selectedNumber
setTimeout(()=>{
store.dispatch({type:'increment', data:value*1})
}, 500)
}
render() {
return (
<div>
<h1>当前求和为:{store.getState()}</h1>
<select ref={c => this.selectedNumber = c}>
<option value="1">1</option>
<option value="2">2</option>
<option value="3">3</option>
</select>
<button onClick={this.increment}>+</button>
<button onClick={this.decrement}>-</button>
<button onClick={this.incrementIfOdd}>当前求和为奇数再加</button>
<button onClick={this.incrementAsync}>异步加</button>
</div>
)
}
}
- src/index.js
1). 在index.js中监测store中状态的改变,一旦发生改变重新渲染
2). redux只负责管理状态,至于状态的改变驱动着页面的展示,要靠我们自己写。
import ReactDOM from 'react-dom'
import App from './App'
import store from './redux/store'

ReactDOM.render(<App/>, document.getElementById('root'))

//检测redux中状态的变化,只要变化就更新
store.subscribe(()=>{
    ReactDOM.render(<App/>, document.getElementById('root'))
})
- Redux 完整版
百度网盘链接【src_redux_complete】 提取码:rays
- 新增:src/redux/constant.js
/* 该模块是用于定义action对象中type类型的常量值,目的:便于管理同时防止string型的字符串写错 */
export const INCREMENT = 'increment'
export const DECREMENT = 'decrement'
- 新增:src/redux/count_action.js
/* 该文件专门为Count组件生成action对象 */
import {INCREMENT,DECREMENT} from './constant'

export function createIncrementAction(data) {
    return {type:INCREMENT, data}
}
//简洁写法
export const createDecrementAction = data=>({type:DECREMENT, data})
- 修改:src/components/Count/index.jsx
import React, { Component } from 'react'
//引入store,用于获取redux中保存的状态
import store from '../../redux/store'
//引入actionCreator,专门用于创建action对象
import {createIncrementAction, createDecrementAction} from '../../redux/count_action'

export default class Count extends Component {
    increment = ()=>{
        const {value} = this.selectedNumber
        store.dispatch(createIncrementAction(value*1))
    }
    decrement = ()=>{
        const {value} = this.selectedNumber
        store.dispatch(createDecrementAction(value*1))
    }
    incrementIfOdd = ()=>{
        const {value} = this.selectedNumber
        const count = store.getState()
        if(count%2 !== 0)
        store.dispatch(createIncrementAction(value*1))
    }
    incrementAsync = ()=>{
        const {value} = this.selectedNumber
        setTimeout(()=>{
            store.dispatch(createIncrementAction(value*1))
        }, 500)
    }

    render() {
        ...
    }
}
- 异步 action 版
安装插件:
yarn add redux-thunk
使用场景:对组件状态的操作依赖于异步任务,且延迟的动作不想交给组件本身而是由 action 来做
百度网盘链接【src_redux_async_action】 提取码:rays
- src/redux/store.js
import {createStore,applyMiddleware} from 'redux'
import countReducer from './count_reducer'
//引入redux-thunk,用于支持异步action
import thunk from 'redux-thunk'

export default createStore(countReducer,applyMiddleware(thunk))
- src/redux/count_action.js
import {INCREMENT,DECREMENT} from './constant'

//同步action,就是指action的值为Object的一般对象
export function createIncrementAction(data) {
    return {type:INCREMENT, data}
}
export const createDecrementAction = data=>({type:DECREMENT, data})

//异步action,就是指action的值为函数;异步action中一般都会调用同步action
export const createIncrementAsyncAction = (data, time)=>{
    return (dispatch)=>{
        setTimeout(()=>{
            dispatch(createIncrementAction(data))
        }, time)
    }
}
- src/components/Count/index.jsx
import {createIncrementAsyncAction} from '../../redux/count_action'

	...
    incrementAsync = ()=>{
        const {value} = this.selectedNumber
        // setTimeout(()=>{
        //     store.dispatch(createIncrementAction(value*1))
        // }, 500)
        store.dispatch(createIncrementAsyncAction(value*1, 500))
    }
    ...
备注:异步 action 不是必须要写的,完全可以自己等待异步任务的结果后再去分发同步action。
7.5 react-redux 编写应用
redux 是由独立的团队开发的,而 react-redux 是React官方的插件库,专门用来简化 redux 的使用。

- UI组件
- 只负责页面的呈现,不带有任何业务逻辑;
- 通过 props 接收数据(一般数据和函数);
- 不使用任何 Redux 的API;
- 一般保存在 components 文件夹下。
- 容器组件
- 负责管理数据和业务逻辑,不负责UI的呈现;
- 使用 Redux 的API;
- 一般保存在 containers 文件夹下。
- 相关API
- Provider:让所有组件都可以得到 state 数据
<Provider store={store}>
	<App/>
</Provider>
- connect: 用于包装UI组件生成容器组件
import {connect} from 'react-redux'

connect (
	mapStateToProps,
	mapDispatchToProps
)(Counter)
- mapStateToProps: 将外部的数据(即state对象)转换为UI组件的标签属性
const mapStateToprops = function(state) {
	return {value: state}
}
- mapDispatchToProps: 将分布action的函数转换为UI组件的标签属性
- 应用改装:react-redux 版
安装插件:
yarn add react-redux
百度网盘链接【src_react-redux_raw】 提取码:rays
- src/index.js :传入store
import ReactDOM from 'react-dom'
import App from './App'
import store from './redux/store'
import {Provider} from 'react-redux'

// 容器组件的store是靠props传进去的,而不是在容器组件中直接引入
// Provider可以自动查找App中所有的容器组件并为其传入store
ReactDOM.render(
    <Provider store={store}>
        <App/>
    </Provider>,document.getElementById('root'))

//无需再监测redux的状态变化,容器组件默认就拥有检测redux状态变化的能力
// store.subscribe(()=>{
//     ReactDOM.render(<App/>, document.getElementById('root'))
// })
- src/containers/Count/index.jsx: 容器组件
完整写法:按照一般函数的写法逻辑。
//引入Counter的UI组件
import CountUI from '../../components/Count'
//引入connect用于连接UI组件与redux
import {connect} from 'react-redux'
//引入action
import {createIncrementAction,
        createDecrementAction,
        createIncrementAsyncAction} from '../../redux/count_action'

/*
 * 1. mapStateToProps函数返回的是一个对象
 * 2. 返回的对象中的key就作为传递给UI组件props的key,value就作为传递给UI组件props的value
 * 3. mapStateToProps用于传递状态
 */
function mapStateToProps(state) {
    return {count: state}
}
/*
 * 1. mapStateToProps函数返回的是一个对象
 * 2. 返回的对象中的key就作为传递给UI组件props的key,value就作为传递给UI组件props的value
 * 3. mapStateToProps用于传递操作状态的方法
 */
function mapDispatchToProps(dispatch) {
    return {
        jia: number=>dispatch(createIncrementAction(number)),
        jian: number=>dispatch(createDecrementAction(number)),
        jiaAsync: (number,time)=>dispatch(createIncrementAsyncAction(number,time))
    }
}

//创建并暴露一个Count的容器组件
export default connect(mapStateToProps,mapDispatchToProps)(CountUI)
简洁写法:react-redux 在API层面的语法糖,去冗余只表达必要的东西即可。
import CountUI from '../../components/Count'
import {connect} from 'react-redux'
import {createIncrementAction,
        createDecrementAction,
        createIncrementAsyncAction} from '../../redux/count_action'

export default connect(
    //mapStateToProps(传递状态) : 函数返回的是对象,括号包裹
    state=>({count:state}),
    //mapDispatchToProps(传递操作状态的方法) : react-redux在API层面上的优化
    {
        jia:createIncrementAction,
        jian:createDecrementAction,
        jiaAsync:createIncrementAsyncAction
    }
)(CountUI)
- src/components/Count/index.jsx: UI组件
UI组件内的代码很干净,不直接与 redux 做任何交互。
import React, { Component } from 'react'
export default class Count extends Component {
increment = ()=>{
const {value} = this.selectedNumber
this.props.jia(value*1)
}
decrement = ()=>{
const {value} = this.selectedNumber
this.props.jian(value*1)
}
incrementIfOdd = ()=>{
const {value} = this.selectedNumber
if(this.props.count%2 !== 0)
this.props.jia(value*1)
}
incrementAsync = ()=>{
const {value} = this.selectedNumber
this.props.jiaAsync(value*1,500)
}
render() {
return (
<div>
<h1>当前求和为:{this.props.count}</h1>
<select ref={c => this.selectedNumber = c}>
<option value="1">1</option>
<option value="2">2</option>
<option value="3">3</option>
</select>
<button onClick={this.increment}>+</button>
<button onClick={this.decrement}>-</button>
<button onClick={this.incrementIfOdd}>当前求和为奇数再加</button>
<button onClick={this.incrementAsync}>异步加</button>
</div>
)
}
}
- 应用改装:react-redux 优化版
百度网盘链接【src_react-redux_optimized】 提取码:rays
将
src/components/Count/index.jsx合并到src/containers/Count/index.jsx。
import React, { Component } from 'react'
import {connect} from 'react-redux'
import {createIncrementAction,
createDecrementAction,
createIncrementAsyncAction} from '../../redux/count_action'
class Count extends Component {
increment = ()=>{
const {value} = this.selectedNumber
this.props.jia(value*1)
}
decrement = ()=>{
const {value} = this.selectedNumber
this.props.jian(value*1)
}
incrementIfOdd = ()=>{
const {value} = this.selectedNumber
if(this.props.count%2 !== 0)
this.props.jia(value*1)
}
incrementAsync = ()=>{
const {value} = this.selectedNumber
this.props.jiaAsync(value*1,500)
}
render() {
return (
<div>
<h1>当前求和为:{this.props.count}</h1>
<select ref={c => this.selectedNumber = c}>
<option value="1">1</option>
<option value="2">2</option>
<option value="3">3</option>
</select>
<button onClick={this.increment}>+</button>
<button onClick={this.decrement}>-</button>
<button onClick={this.incrementIfOdd}>当前求和为奇数再加</button>
<button onClick={this.incrementAsync}>异步加</button>
</div>
)
}
}
export default connect(
//mapStateToProps(传递状态) : 函数返回的是对象,括号包裹
state=>({count:state}),
//mapDispatchToProps(传递操作状态的方法) : react-redux在API层面上的优化
{
jia:createIncrementAction,
jian:createDecrementAction,
jiaAsync:createIncrementAsyncAction
}
)(Count)
一个组件要和 redux “打交道”要经过哪几步?
- 定义好 UI 组件 – 不暴露
- 引入 connect 生成一个容器组件 – 暴露
- 在 UI 组件中通过
this.props.xxx读取和操作状态
7.6 开发场景:多组件状态交互

- 状态交互:基础版
文件夹结构做如下调整(合并action和reducer到独立的文件夹下):
- src/redux/actions/person.js
import {ADD_PERSON} from '../constant'

//创建增加一个人的action动作对象
export const createAddPersonAction = personObj=>({type:ADD_PERSON,data:personObj})
- src/redux/reducers/person.js
import {ADD_PERSON} from '../constant'

const initState = [{id:'001',name:'tom',age:18}]
export default function personReducer(prevState=initState,action) {
    const {type,data} = action
    switch(type) {
        case ADD_PERSON: return [data,...prevState]
        default: return prevState
    }
}
- src/redux/store.js
//combineReducers : 用于合并reducer
import {createStore,applyMiddleware,combineReducers} from 'redux'
import countReducer from './reducers/count'
import personReducer from './reducers/person'
//redux-thunk : 用于支持异步action
import thunk from 'redux-thunk'

const allReducer = combineReducers({
    he:countReducer,
    rens:personReducer
})
export default createStore(allReducer,applyMiddleware(thunk))
- src/containers/Person/index.jsx
import React, { Component } from 'react'
import {nanoid} from 'nanoid'
import {connect} from 'react-redux'
import {createAddPersonAction} from '../../redux/actions/person'

class Person extends Component {
    addPerson = ()=>{
        const name = this.nameNode.value
        const age = this.ageNode.value
        const personObj = {id:nanoid(),name,age}
        this.props.jiaYiRen(personObj)
        this.nameNode.value = ''
        this.ageNode.value = ''
    }

    render() {
        return (
            <div>
                <h2>我是Person组件,上方组件的求和为:{this.props.sum}</h2>
                <input ref={c=>this.nameNode=c} type="text" placeholder="输入名字"/>
                <input ref={c=>this.ageNode=c} type="text" placeholder="输入年龄"/>
                <button onClick={this.addPerson}>添加</button>
                <ul>
                    {
                        this.props.persons.map(p=>{
                            return <li key={p.id}>{p.name}--{p.age}</li>
                        })
                    }
                </ul>
            </div>
        )
    }
}

export default connect(
    // state=>({count:state}),
    //之前redux的state只存储的是一个数字,现在变成了一个对象
    //该对象存储着所有通过redux管理的组件的信息
    state=>({persons:state.rens, sum:state.he}),
    {jiaYiRen:createAddPersonAction}
)(Person)
- 纯函数
- 一类特别的函数:只要是同样的输入(实参),必定得到同样的输出(返回)
- 必须遵守以下一些约束
2.1 不得改写参数数据
2.2 不会产生任何副作用,例如网络请求,输入输出设备
2.3 不能调用Date.now或Math.random()等不纯的方法 - redux 的 reducer 函数必须是一个纯函数
//src/redux/reducers/person.js
import {ADD_PERSON} from '../constant'

const initState = [{id:'001',name:'tom',age:18}]
export default function personReducer(prevState=initState,action) {
    const {type,data} = action
    switch(type) {
        //此处不可修改原始数组的状态【如 prevState.unshift(data)】,reducer必须为一个纯函数
        //react-redux底层对state只进行浅比较,发现为同一个数组(即地址相同)则认为状态未发生改变
        //只能利用原数组重新构建一个数组并返回
        case ADD_PERSON: return [data,...prevState]
        default: return prevState
    }
}
- Redux开发者工具
-
安装chrome插件

-
安装react插件:
yarn add redux-devtools-extension -
修改
src/redux/store.js
import {createStore,applyMiddleware,combineReducers} from 'redux'
import countReducer from './reducers/count'
import personReducer from './reducers/person'
import thunk from 'redux-thunk'
//引入 redux-devtools-extension
import {composeWithDevTools} from 'redux-devtools-extension'


const allReducer = combineReducers({
    he:countReducer,
    rens:personReducer
})
//第二个参数被占用时,要作为devtools的参数传进去
export default createStore(allReducer,composeWithDevTools(applyMiddleware(thunk)))
redux 开发者工具中可以看到当前进行的 action 动作、存储的 state 状态、及临时的 dispatch 派发操作。

7.7 ReactRedux 应用最终版
百度网盘链接【src_react-redux_final】 提取码:rays
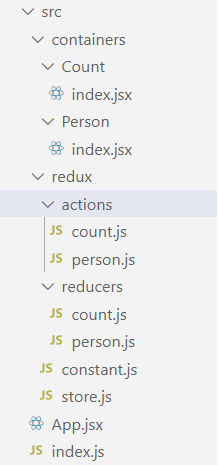
- 源码展示
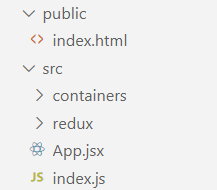
基本结构
- public/index.html
<!DOCTYPE html>
<html lang="en">
<head>
    <meta charset="UTF-8">
    <title>redux</title>
</head>
<body>
    <div id="root"></div>
</body>
</html>
- src/App.jsx
import React, { Component } from 'react'
import Count from "./containers/Count"      //引入Count的容器组件
import Person from "./containers/Person"    //引入Person的容器组件

export default class App extends Component {
    render() {
        return (
            <div>
                <Count/>
                <hr/>
                <Person/>
            </div>
        )
    }
}
- src/index.js
import ReactDOM from 'react-dom'
import App from './App'
import store from './redux/store'
import {Provider} from 'react-redux'

// 此处需要用Provider包裹App,目的是让App所有的后代容器组件都能接收到store
ReactDOM.render(
    <Provider store={store}>
        <App/>
    </Provider>,document.getElementById('root'))
redux
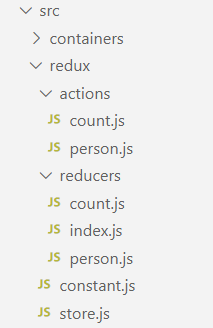
- store.js
//createStore : 专门用于创建redux中最为核心的store对象
//applyMiddleware : 配合redux-thunk用于支持异步action
import {createStore,applyMiddleware} from 'redux'
//引入汇总之后的reducer
import reducer from './reducers'
//配合applyMiddleware用于支持异步action
import thunk from 'redux-thunk'
//composeWithDevTools : 用于支持chrome插件的使用
import {composeWithDevTools} from 'redux-devtools-extension'

//暴露store
//第二个参数被占用时,要作为devtools的参数传进去
export default createStore(reducer,composeWithDevTools(applyMiddleware(thunk)))
- constant.js
/* 该模块是用于定义action对象中type类型的常量值,目的:便于管理同时防止string型的字符串写错 */
export const INCREMENT = 'increment'
export const DECREMENT = 'decrement'
export const ADD_PERSON = 'add_person'
- actions/count.js
import {INCREMENT,DECREMENT} from '../constant'

//同步action,就是指action的值为Object的一般对象
export const increment = data=>({type:INCREMENT, data})
export const decrement = data=>({type:DECREMENT, data})
//异步action,就是指action的值为函数;异步action中一般都会调用同步action
export const incrementAsync = (data, time)=>{
    return (dispatch)=>{
        setTimeout(()=>{
            dispatch(increment(data))
        }, time)
    }
}
- actions/person.js
import {ADD_PERSON} from '../constant'

//创建增加一个人的action动作对象
export const addPerson = personObj=>({type:ADD_PERSON,data:personObj})
- reducers/count.js
/*
  1.该文件是用于创建一个为Count组件服务的reducer,其本质就是一个函数
  2.reducer函数会接到两个参数,分别为之前的状态和动作对象
 */
import {INCREMENT, DECREMENT} from '../constant'

const initState = 0
export default function countReducer(prevState=initState, action) {
    const {type, data} = action
    switch (type) {
        case INCREMENT: return prevState + data
        case DECREMENT: return prevState - data
        default: return prevState
    }
}
- reducers/person.js
import {ADD_PERSON} from '../constant'

const initState = [{id:'001',name:'tom',age:18}]
export default function personReducer(prevState=initState,action) {
    const {type,data} = action
    switch(type) {
        //此处不可修改原始数组的状态【如 prevState.unshift(data)】,reducer必须为一个纯函数
        //react-redux底层对state只进行浅比较,发现为同一个数组(即地址相同)则认为状态未发生改变
        //只能利用原数组重新构建一个数组并返回
        case ADD_PERSON: return [data,...prevState]
        default: return prevState
    }
}
- reducers/index.js
//该文件用于汇总所有的reducer为一个总的reducer

//combineReducers : 用于合并reducer
import {combineReducers} from 'redux'
//为Count组件服务的reducer
import count from './count'
//为Person组件服务的reducer
import persons from './person'

//汇总所有的reducer(值和value变量同名可省略)
export default combineReducers({count, persons})
containers
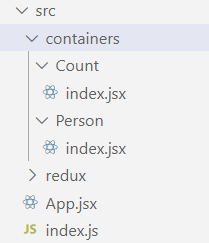
- Count/index.jsx
import React, { Component } from 'react'
import {connect} from 'react-redux'
import {increment,decrement,incrementAsync} from '../../redux/actions/count'
class Count extends Component {
increment = ()=>{
const {value} = this.selectedNumber
this.props.increment(value*1)
}
decrement = ()=>{
const {value} = this.selectedNumber
this.props.decrement(value*1)
}
incrementIfOdd = ()=>{
const {value} = this.selectedNumber
if(this.props.count%2 !== 0)
this.props.increment(value*1)
}
incrementAsync = ()=>{
const {value} = this.selectedNumber
this.props.incrementAsync(value*1,500)
}
render() {
return (
<div>
<h2>我是Count组件</h2>
<h4>当前求和为:{this.props.count},下方组件的总人数为:{this.props.personCount}</h4>
<select ref={c => this.selectedNumber = c}>
<option value="1">1</option>
<option value="2">2</option>
<option value="3">3</option>
</select>
<button onClick={this.increment}>+</button>
<button onClick={this.decrement}>-</button>
<button onClick={this.incrementIfOdd}>当前求和为奇数再加</button>
<button onClick={this.incrementAsync}>异步加</button>
</div>
)
}
}
export default connect(
state=>({count:state.count, personCount:state.persons.length}),
{increment, decrement, incrementAsync}
)(Count)
- Person/index.jsx
import React, { Component } from 'react'
import {nanoid} from 'nanoid'
import {connect} from 'react-redux'
import {addPerson} from '../../redux/actions/person'

class Person extends Component {
    addPerson = ()=>{
        const name = this.nameNode.value
        const age = this.ageNode.value
        const personObj = {id:nanoid(),name,age}
        this.props.addPerson(personObj)
        this.nameNode.value = ''
        this.ageNode.value = ''
    }

    render() {
        return (
            <div>
                <h2>我是Person组件,上方组件的求和为:{this.props.count}</h2>
                <input ref={c=>this.nameNode=c} type="text" placeholder="输入名字"/>
                <input ref={c=>this.ageNode=c} type="text" placeholder="输入年龄"/>
                <button onClick={this.addPerson}>添加</button>
                <ul>
                    {
                        this.props.persons.map(p=>{
                            return <li key={p.id}>{p.name}--{p.age}</li>
                        })
                    }
                </ul>
            </div>
        )
    }
}

export default connect(
    // state=>({count:state}),
    //之前redux的state只存储的是一个数字,现在变成了一个对象
    //该对象存储着所有通过redux管理的组件的信息
    state=>({
        persons:state.persons,
        count:state.count
    }),
    {addPerson}
)(Person)
- 打包部署
- 安装模拟服务器插件:
npm install serve -g - 执行打包命令:
npm run build
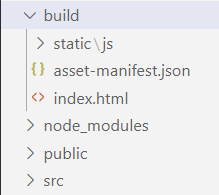
- 部署到模拟服务器

- 查看

八、扩展知识点
百度网盘链接【react_extension_all】 提取码:rays
8.1 setState
import React, { Component } from 'react'

export default class Demo extends Component {
    state = {count:0}

    add = ()=>{
        const {count} = this.state
        //对象式:状态的更新是异步的,若想在状态更新后做点事情,在第二个参数传一个函数
        this.setState({count:count+1}, ()=>console.log("对象式setState:", this.state.count))

        //函数式:自动接收state和props两个参数,无需手工获取
        this.setState((state,props)=>{
            console.log("函数式setState:state=", state," props=",props)
            return {count:state.count+1}
        })
    }

    render() {
        return (
            <div>
                <h1>当前求和为:{this.state.count}</h1>
                <button onClick={this.add}>点我+1</button>
            </div>
        )
    }
}

(1). setState(stateChange, [callback])------对象式的setState
	1.stateChange为状态改变对象(该对象可以体现出状态的更改)
	2.callback是可选的回调函数, 它在状态更新完毕、界面也更新后(render调用后)才被调用
(2). setState(updater, [callback])------函数式的setState
	1.updater为返回stateChange对象的函数。
	2.updater可以接收到state和props。
	3.callback是可选的回调函数, 它在状态更新、界面也更新后(render调用后)才被调用。
总结:
	1.对象式的setState是函数式的setState的简写方式(语法糖)
	2.使用原则:
		(1).如果新状态不依赖于原状态 ===> 使用对象方式
		(2).如果新状态依赖于原状态 ===> 使用函数方式
		(3).如果需要在setState()执行后获取最新的状态数据, 要在第二个callback函数中读取
8.2 lazyLoad
组件用到时才请求其所需的文件。

import React, { Component,lazy,Suspense } from 'react'
import {NavLink,Route} from 'react-router-dom'

// import Home from './Home'
// import About from './About'
import Loading from './Loading'
// 1.懒加载指定方式
const Home = lazy(()=>import('./Home'))
const About = lazy(()=>import('./About'))

export default class Demo2 extends Component {
	render() {
		return (
			<div>
				<div className="row">
					<div className="col-xs-offset-2 col-xs-8">
						<h2>React Router Demo</h2>
					</div>
				</div>
                <div className="row">
                    <div className="col-xs-2 col-xs-offset-2">
                        <div className="list-group">
                            <NavLink className="list-group-item" to="/about">About</NavLink>
                            <NavLink className="list-group-item" to="/home">Home</NavLink>
                        </div>
                    </div>
                    <div className="col-xs-6">
                        <div className="panel">
                            <div className="panel-body">
                                {/* 2. 懒加载时需指定等待时展示内容(组件) */}
                                <Suspense fallback={<Loading/>}>
                                    <Route path="/about" component={About}/>
                                    <Route path="/home" component={Home}/>
                                </Suspense>
                            </div>
                        </div>
                    </div>
                </div>
			</div>
		)
	}
}
8.3 Hooks
- State Hook
import React from 'react'

//类式组件
// export default class Demo extends Component {
//     state = {count:0}

//     //功能:点击按钮+1
//     add = ()=>{
//         this.setState(state=>({count:state.count+1}))
//     }

//     render() {
//         return (
//             <div>
//                 <h1>当前求和为:{this.state.count}</h1>
//                 <button onClick={this.add}>点我+1</button>
//             </div>
//         )
//     }
// }

// (1). State Hook让函数组件也可以有state状态, 并进行状态数据的读写操作
// (2). 语法: const [xxx, setXxx] = React.useState(initValue)
// (3). useState()说明:
//         参数: 第一次初始化指定的值在内部作缓存
//         返回值: 包含2个元素的数组, 第1个为内部当前状态值, 第2个为更新状态值的函数
// (4). setXxx()2种写法:
//         setXxx(newValue): 参数为非函数值, 直接指定新的状态值, 内部用其覆盖原来的状态值
//         setXxx(value => newValue): 参数为函数, 接收原本的状态值, 返回新的状态值, 内部用其覆盖原来的状态值
export default function Demo() {
    const [count,setCount] = React.useState(0)

    function add() {
        // setCount(count+1) 写法一:直接计算
        //写法二:传入函数
        setCount(count=>count+1)
    }

    return (
        <div>
            <h1>当前求和为:{count}</h1>
            <button onClick={add}>点我+1</button>
        </div>
    )
}
- Effect Hook
import React,{Component} from 'react'
import ReactDOM from 'react-dom'

//类式组件
// export default class Demo extends Component {
//     state = {count:0}

//     //功能二:点击按钮卸载组件
//     unmount = ()=>{
//         ReactDOM.unmountComponentAtNode(document.getElementById('root'))
//     }

//     //功能一:每秒自增1
//     componentDidMount() {
//         this.timer = setInterval(()=>{
//             this.setState(state=>({count:state.count+1}))
//         },1000)
//     }
//     componentWillUnmount() {
//         clearInterval(this.timer)
//     }
//     render() {
//         return (
//             <div>
//                 <h1>当前求和为:{this.state.count}</h1>
//                 <button onClick={this.unmount}>卸载组件</button>
//             </div>
//         )
//     }
// }

// (1). Effect Hook 可以让你在函数组件中执行副作用操作(用于模拟类组件中的生命周期钩子)
// (2). React中的副作用操作:
//         发ajax请求数据获取
//         设置订阅 / 启动定时器
//         手动更改真实DOM
// (3). 语法和说明:
//         useEffect(() => {
//           // 在此可以执行任何带副作用操作
//           return () => { // 在组件卸载前执行
//             // 在此做一些收尾工作, 比如清除定时器/取消订阅等
//           }
//         }, [stateValue]) // 如果指定的是[], 回调函数只会在第一次render()后执行

// (4). 可以把 useEffect Hook 看做如下三个函数的组合
//         componentDidMount()
//         componentDidUpdate()
//     	componentWillUnmount()
export default function Demo() {
    const [count,setCount] = React.useState(0)

    React.useEffect(()=>{
        let timer = setInterval(()=>{
            setCount(count=>count+1)
        },1000)

        //返回的函数相当于componentWillUnmount()
        return ()=>{
            clearInterval(timer)
        }
    },[])
    //[]数组中放置着需要被检测的状态
    //不写:检测所有状态,更新一次该函数调用一次,相当于componentDidUpdate()
    //为空:不检测任何状态,只调用一次,相当于componentDidMount()

    function unmount() {
        ReactDOM.unmountComponentAtNode(document.getElementById('root'))
    }

    return (
        <div>
            <h1>当前求和为:{count}</h1>
            <button onClick={unmount}>卸载组件</button>
        </div>
    )
}
- Ref Hook
import React,{Component} from 'react'
import ReactDOM from 'react-dom'

//类式组件
// export default class Demo extends Component {
//     myRef = React.createRef()

//     //功能:点击按钮输出内容
//     show = ()=>{
//         console.log(this.myRef.current.value)
//     }

//     render() {
//         return (
//             <div>
//                 <input ref={this.myRef} type="text"/>
//                 <button onClick={this.show}>展示内容</button>
//             </div>
//         )
//     }
// }

// (1). Ref Hook可以在函数组件中存储/查找组件内的标签或任意其它数据
// (2). 语法: const refContainer = useRef()
// (3). 作用:保存标签对象,功能与React.createRef()一样
export default function Demo() {
    const myRef = React.useRef()

    function show() {
        console.log(myRef.current.value)
    }

    return (
        <div>
            <input ref={myRef} type="text"/>
            <button onClick={show}>展示内容</button>
        </div>
    )
}
8.4 Fragment
可以不用必须有一个真实的DOM根标签了。
import React, { Component,Fragment } from 'react'

export default class Demo extends Component {
    render() {
        return (
            <Fragment>
                <input type="text"/>
                <input type="text"/>
                <>
                    <input type="text"/>
                </>
            </Fragment>
        )
    }
}

8.5 Context
一种组件间通信方式, 常用于【祖组件】与【后代组件】间通信。

import React, { Component } from 'react'
import './index.css'

//1.声明上下文
const MyContext = React.createContext()
const {Provider,Consumer} = MyContext

export default class A extends Component {
    state = {username:'tom', age:18, location:'中国'}
    render() {
        const {username,age,location} = this.state
        return (
            <div className="parent">
                <h3>我是A组件</h3>
                <h4>我的用户名是{username},年龄为{age}</h4>
                {/* 2.向后代传递值(对象) */}
                <Provider value={{age,location}}>
                    <B username={username}/>
                </Provider>
            </div>
        )
    }
}

class B extends Component {
    render() {
        return (
            <div className="child">
                <h3>我是B组件</h3>
                <h4>我从A接到的用户名是{this.props.username}</h4>
                <C username={this.props.username}/>
                <D/>
            </div>
        )
    }
}

//类组件
class C extends Component {
    //3.1 声明接收上下文
    static contextType = MyContext
    render() {
        const {age,location} = this.context
        return (
            <div className="grand">
                <h3>我是C组件</h3>
                {/* 4.1 展示接收的值 */}
                <h4>我从A接到的用户名是{this.props.username},年龄为{age},地区为{location}</h4>
            </div>
        )
    }
}

//函数组件
function D() {
    return (
        <div className="grand">
            <h3>我是D组件</h3>
            <h4>我从A接到的</h4>
            {/* 3.2 声明 */}
            <Consumer>
                {/* 4.2 展示(此处为函数) */}
                {value=>`年龄为${value.age},地区为${value.location}`}
            </Consumer>
        </div>
    )
}
总结:
1) 创建Context容器对象:
	const XxxContext = React.createContext()

2) 渲染子组时,外面包裹xxxContext.Provider, 通过value属性给后代组件传递数据:
	<xxxContext.Provider value={数据}>
		子组件
    </xxxContext.Provider>

3) 后代组件读取数据:

	//第一种方式:仅适用于类组件
	  static contextType = xxxContext  // 声明接收context
	  this.context // 读取context中的value数据

	//第二种方式: 函数组件与类组件都可以
	  <xxxContext.Consumer>
	    {
	      value => ( // value就是context中的value数据
	        要显示的内容
	      )
	    }
	  </xxxContext.Consumer>
8.6 组件优化
### Component的2个问题

> 1. 只要执行setState(),即使不改变状态数据, 组件也会重新render() ==> 效率低
>
> 2. 只当前组件重新render(), 就会自动重新render子组件,纵使子组件没有用到父组件的任何数据 ==> 效率低

### 效率高的做法

>  只有当组件的state或props数据发生改变时才重新render()

### 原因

>  Component中的shouldComponentUpdate()总是返回true

### 解决

	办法1:
		重写shouldComponentUpdate()方法
		比较新旧state或props数据, 如果有变化才返回true, 如果没有返回false
	办法2:
		使用PureComponent
		PureComponent重写了shouldComponentUpdate(), 只有state或props数据有变化才返回true
		注意:
			只是进行state和props数据的浅比较, 如果只是数据对象内部数据变了, 返回false
			不要直接修改state数据, 而是要产生新数据
			项目中一般使用PureComponent来优化
//不要直接修改state数据, 而是要产生新数据
state = {carName:"奔驰", stus:['A','B','C']}

changeCar = ()=>{
    // 不生效
    // const obj = this.state
    // obj.carName = '迈巴赫'
    // this.setState(obj)
    this.setState({carName:"迈巴赫"})
}
addStu = ()=>{
    const {stus} = this.state
    // 不生效
    // stus.unshift('D')
    // this.setState({stus})
    this.setState({stus:['D',...stus]})
}
8.7 render props
向组件内部动态传入带内容的结构(标签)。

import React, { Component } from 'react'
import './index.css'

export default class Parent extends Component {
    render() {
        return (
            <div className="parent">
                <h3>我是Parent组件</h3>
                {/* 此处不一定为B,可以为其它任意组件 */}
                <A render={(name)=><B name={name}/>}/>
            </div>
        )
    }
}

class A extends Component {
    state = {name:'tom'}

    render() {
        return (
            <div className="a">
                <h3>我是A组件</h3>
                {/* 插草技术:在该处放置不固定某组件,且为其传固定值 */}
                {this.props.render(this.state.name)}
            </div>
        )
    }
}

class B extends Component {
    render() {
        return (
            <div className="b">
                <h3>我是B组件,接到的属性为:{this.props.name}</h3>
            </div>
        )
    }
}
### 如何向组件内部动态传入带内容的结构(标签)?

	Vue中:
		使用slot技术, 也就是通过组件标签体传入结构  <A><B/></A>
	React中:
		使用children props: 通过组件标签体传入结构
		使用render props: 通过组件标签属性传入结构,而且可以携带数据,一般用render函数属性

### children props

	<A>
	  <B>xxxx</B>
	</A>
	{this.props.children}
	问题: 如果B组件需要A组件内的数据, ==> 做不到

### render props

	<A render={(data) => <C data={data}></C>}></A>
	A组件: {this.props.render(内部state数据)}
	C组件: 读取A组件传入的数据显示 {this.props.data}
8.7 错误边界
错误边界(Error boundary):用来捕获后代组件错误,渲染出备用页面
只能捕获后代组件生命周期产生的错误,不能捕获自己组件产生的错误和其他组件在合成事件、定时器中产生的错误
import React, { Component } from 'react'
import Child from './Child'

export default class Parent extends Component {
    state = {hasError:''}

    //当子组件出现报错的时候会触发该函数的调用,并携带报错信息
    static getDerivedStateFromError(error) {
        // 在render之前触发,返回新的state
        return {hasError:error}
    }
    //当子组件出现报错的时候会触发该函数的调用
    componentDidCatch() {
        console.log('统计错误次数,反馈给服务器,用于通知编码人员bug解决')
    }

    render() {
        return (
            <div>
                <h2>我是Parent组件</h2>
                {this.state.hasError ? <h2>稍后再试</h2> : <Child/>}
            </div>
        )
    }
}
8.8 组件通信方式总结
#### 组件间的关系:

- 父子组件
- 兄弟组件(非嵌套组件)
- 祖孙组件(跨级组件)

#### 几种通信方式:

		1.props:
			(1).children props
			(2).render props
		2.消息订阅-发布:
			pubs-sub、event等等
		3.集中式管理:
			redux、dva等等
		4.conText:
			生产者-消费者模式

#### 比较好的搭配方式:
		父子组件:props
		兄弟组件:消息订阅-发布、集中式管理
		祖孙组件(跨级组件):消息订阅-发布、集中式管理、conText(开发用的少,封装插件用的多)


 2144
2144


 被折叠的 条评论
为什么被折叠?
被折叠的 条评论
为什么被折叠?
 到【灌水乐园】发言


