


基于超图SuperMap iObjects JAVA的SpringBoot工程搭建与整合(一)—— Nexus搭建与Maven引入
第一章:Nexus搭建与Maven引入
第二章:SuperMap iObjects JAVA 在SpringBoot工程中如何进行参数化配置
第三章:SuperMap iObjects JAVA如何与Spring的IOC结合
第四章:SuperMap iObjects JAVA作为Web后台的二开,在MVC中扮演什么角色,如何优雅的组织代码?
第五章:聊一聊SuperMap iObjects JAVA的奇葩设计,阅读避坑(持续更新~)
文章目录
前言
为什么要使用Maven,这个问题不需要我来解释了。
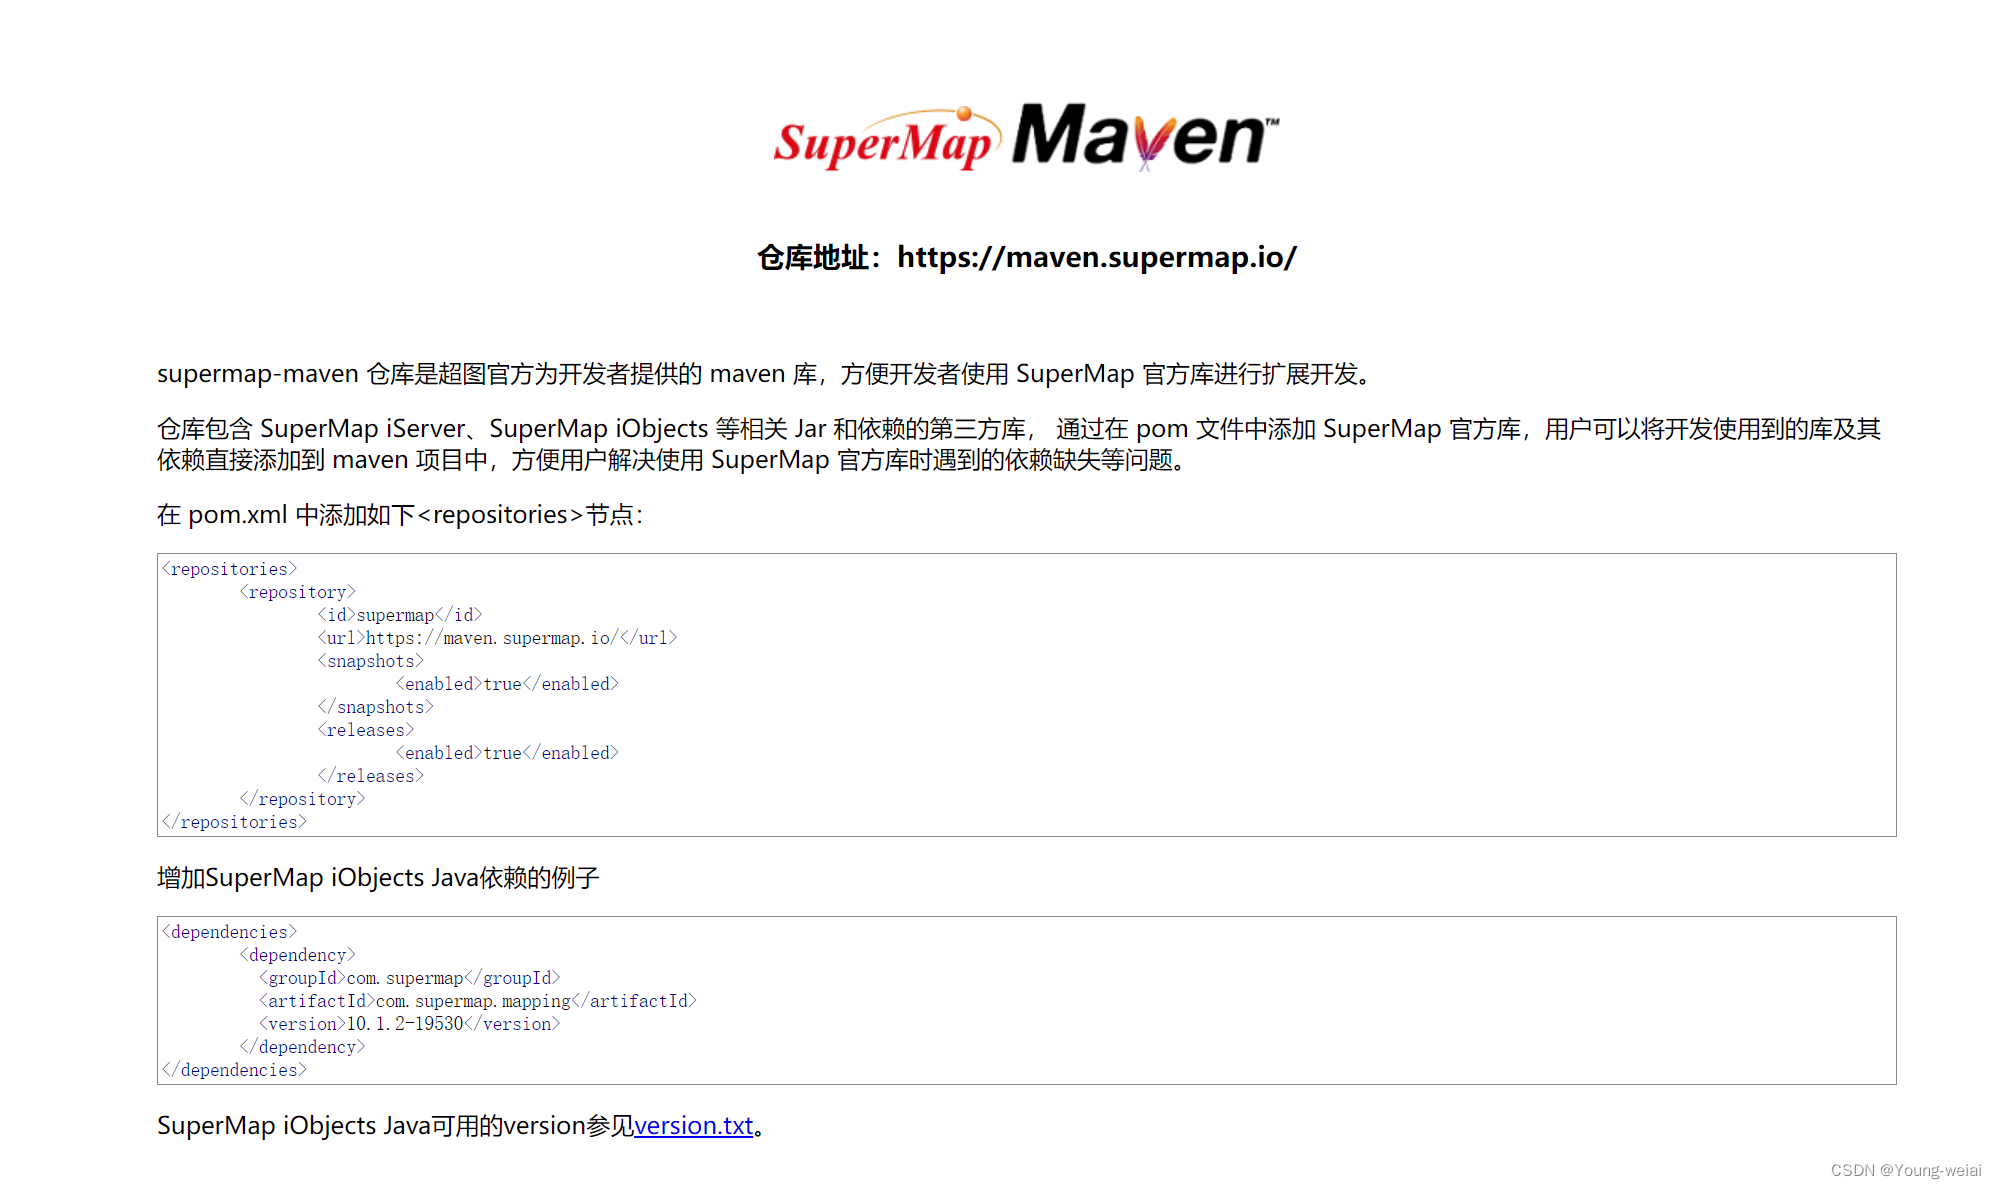
超图SerMap iObjects JAVA这个产品本身也是有公有云镜像库的,地址为:https://maven.supermap.io/,但是超图软件对于这个镜像库的维护更新并不是非常及时。也可能因为SerMap iObjects JAVA的版本发布太过频繁,或者说修复bug的版本太多,导致这个镜像库无法承载所有的版本包。
那么问题就来了,搭建一个协同开发的项目,就必须搭建自己的Maven私服了,这里使用Nexus搭建私服。
当然也有很多公司的小项目对于GIS后台开发只有一个人,这种情况就不必搭建Maven私服了,直接为本地的repository安装即可。
mvn install:install-file -DgroupId=com.supermap.iobjects -DartifactId=iobjects-java -Dversion=10.2.1-20428 -Dpackaging=jar -Dfile=D:\SuperMapSoft\iObjects\supermap-iobjectsjava-10.2.1-20428-92245-win-all\Bin\com.supermap.data.jar
一、下载与安装Nexus
1下载
我使用的windows服务器,下载地址为:https://help.sonatype.com/repomanager3/product-information/download,
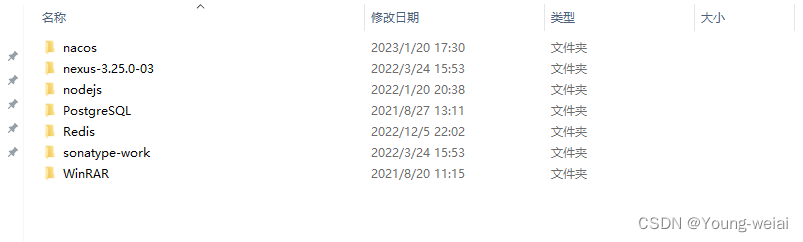
解压后有两个文件夹分别是:sonatype-work、nexus-3.25.0-03。
2安装启动
D:\Program Files\nexus-3.25.0-03\bin目录下执行命令如下,可以启动Nexus。
nexus.exe /install nexus
nexus.exe /start
访问端口即可:http://192.168.1.110:8081/

默认是不登录的,点击右上角的sign in进行登录。点击后,会提示用户名为admin,密码就在提示的文件内
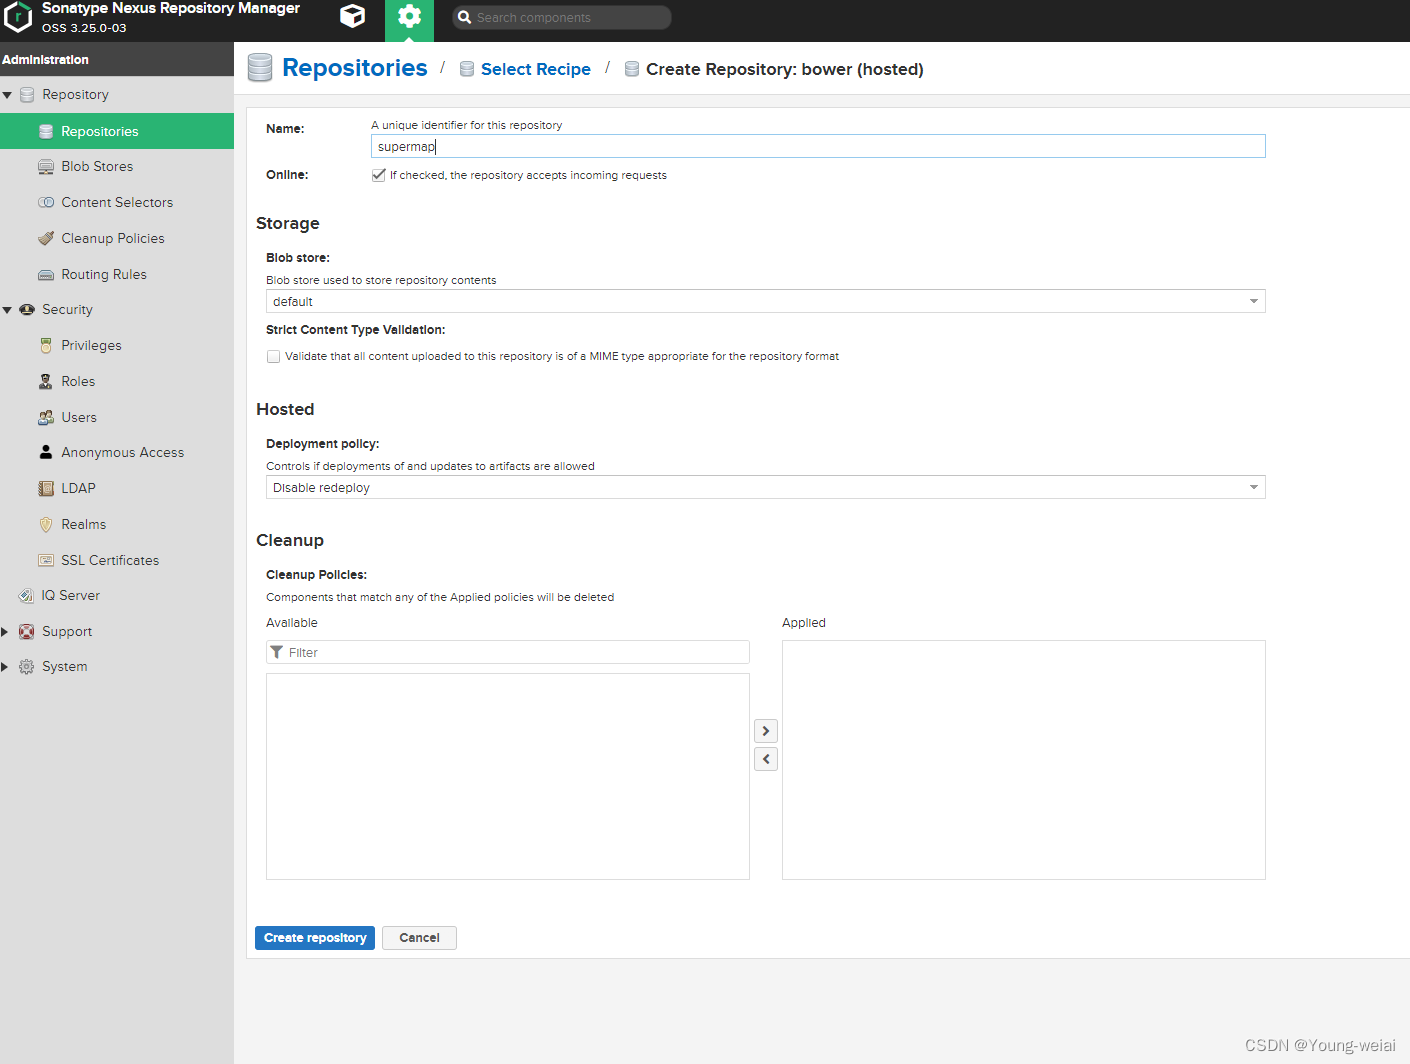
二、Nuxes上传jar文件并使用。
1.创建Repositories
2.上传jar包
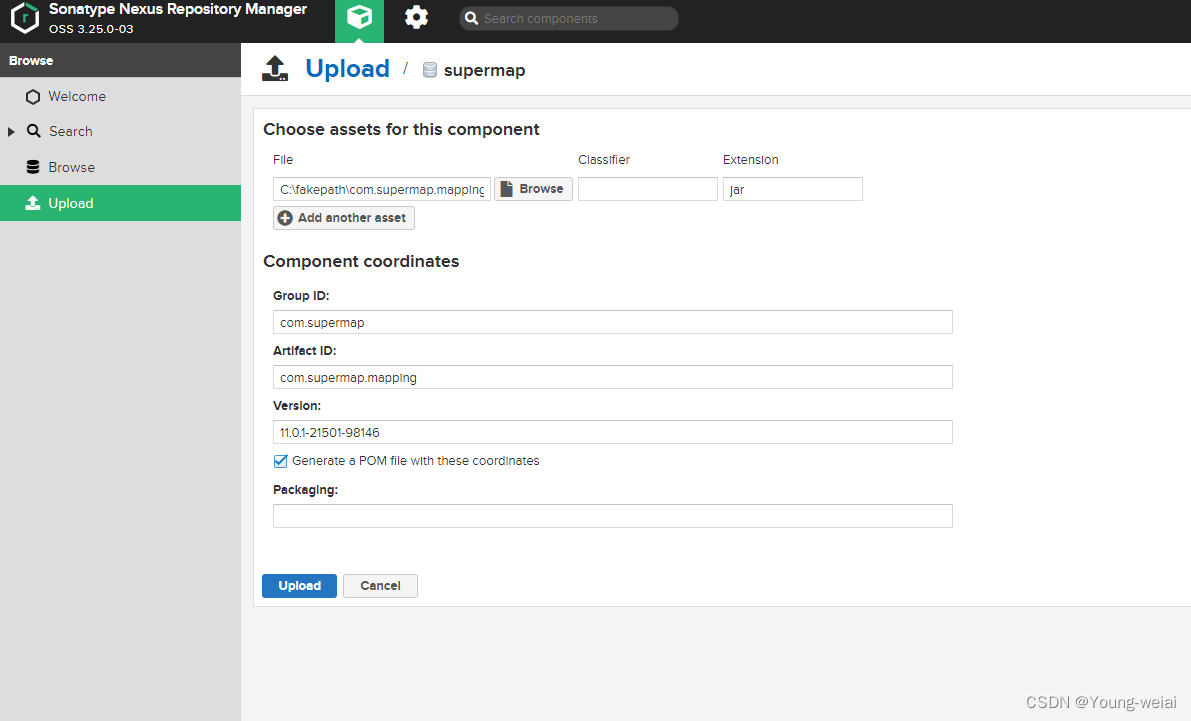
注意:这里使用的版本号以及包名,建议跟超图的发布版本号保持一致,因为超图的小版本比较多,不认真填写会导致后期开发人员混乱版本。
三、POM文件的配置与引用
1. 镜像库的配置
由于我们的SpringBoot工程还要引入很多的第三方工具包,因此我使用了三个镜像库,分别是阿里云、超图公有云、私服。以此保证拉取jar包的速度,优先阿里云。注意我的私服maven-public集成了supermap仓库,所以我使用的地址是http://192.168.1.110:8081/repository/
我的repositories配置如下:
  <repositories>
        <repository>
            <id>public</id>
            <name>aliyun nexus</name>
            <url>http://maven.aliyun.com/nexus/content/groups/public/</url>
            <releases>
                <enabled>true</enabled>
            </releases>
        </repository>

        <repository>
            <id>supermap</id>
            <url>https://maven.supermap.io/</url>
            <snapshots>
                <enabled>true</enabled>
            </snapshots>
            <releases>
                <enabled>true</enabled>
            </releases>
        </repository>

        <repository>
            <id>Nexus</id>
            <name>Nexus</name>
            <url>http://192.168.1.110:8081/repository/maven-public/</url>
            <snapshots>
                <enabled>true</enabled>
            </snapshots>
            <releases>
                <enabled>true</enabled>
            </releases>
        </repository>
    </repositories>
2.dependency使用
经过上面的仓库配置,就可以顺利使用SuperMap iObjects JAVA了。下来来一个最简单的SpringBoot工程配置
<?xml version="1.0" encoding="UTF-8"?>
<project xmlns="http://maven.apache.org/POM/4.0.0"
         xmlns:xsi="http://www.w3.org/2001/XMLSchema-instance"
         xsi:schemaLocation="http://maven.apache.org/POM/4.0.0 http://maven.apache.org/xsd/maven-4.0.0.xsd">
    <modelVersion>4.0.0</modelVersion>

    <groupId>com.young</groupId>
    <artifactId>young-sjjf</artifactId>
    <version>1.0-SNAPSHOT</version>

    <!--    全局属性-->
    <properties>
        <project.build.sourceEncoding>UTF-8</project.build.sourceEncoding>
        <project.reporting.outputEncoding>UTF-8</project.reporting.outputEncoding>
        <java.version>1.8</java.version>
        <supermap.version>10.2.1-20428-92245</supermap.version>
        <!--<supermap.version>9.1.2</supermap.version>-->
    </properties>

    <!--    springframework核心-->
    <parent>
        <groupId>org.springframework.boot</groupId>
        <artifactId>spring-boot-starter-parent</artifactId>
        <version>2.5.7</version>
    </parent>

    <dependencies>
        <!--        web支持-->
        <dependency>
            <groupId>org.springframework.boot</groupId>
            <artifactId>spring-boot-starter-web</artifactId>
        </dependency>
        <dependency>
            <groupId>org.springframework.boot</groupId>
            <artifactId>spring-boot-starter-actuator</artifactId>
        </dependency>
        <!--        test模块-->
        <dependency>
            <groupId>org.springframework.boot</groupId>
            <artifactId>spring-boot-starter-test</artifactId>
            <scope>test</scope>
        </dependency>
        <!--        json支持-->
        <dependency>
            <groupId>com.alibaba</groupId>
            <artifactId>fastjson</artifactId>
            <version>1.2.62</version>
        </dependency>

        <dependency>
            <groupId>cn.hutool</groupId>
            <artifactId>hutool-all</artifactId>
            <version>5.7.4</version>
        </dependency>

        <dependency>
            <groupId>com.fasterxml.jackson.datatype</groupId>
            <artifactId>jackson-datatype-hibernate5</artifactId>
            <version>2.9.8</version>
        </dependency>

        <dependency>
            <groupId>org.postgresql</groupId>
            <artifactId>postgresql</artifactId>
            <version>42.2.16</version>
            <scope>runtime</scope>
        </dependency>

        <dependency>
            <groupId>com.belerweb</groupId>
            <artifactId>pinyin4j</artifactId>
            <version>2.5.1</version>
        </dependency>

        <!--热加载-->
        <dependency>
            <groupId>org.springframework.boot</groupId>
            <artifactId>spring-boot-devtools</artifactId>
        </dependency>
        <!--        超图数据转换-->
        <dependency>
            <groupId>com.supermap</groupId>
            <artifactId>com.supermap.data.conversion</artifactId>
            <version>${supermap.version}</version>
        </dependency>
        <dependency>
            <groupId>com.supermap</groupId>
            <artifactId>com.supermap.data</artifactId>
            <version>${supermap.version}</version>
        </dependency>
        <dependency>
            <groupId>com.supermap</groupId>
            <artifactId>com.supermap.realspace</artifactId>
            <version>${supermap.version}</version>
        </dependency>
        <dependency>
            <groupId>com.supermap</groupId>
            <artifactId>com.supermap.data.processing</artifactId>
            <version>${supermap.version}</version>
        </dependency>
        <dependency>
            <groupId>com.supermap</groupId>
            <artifactId>com.supermap.mapping</artifactId>
            <version>${supermap.version}</version>
        </dependency>
        <dependency>
            <groupId>com.supermap</groupId>
            <artifactId>com.supermap.tilestorage</artifactId>
            <version>${supermap.version}</version>
        </dependency>
        <dependency>
            <groupId>com.supermap</groupId>
            <artifactId>com.supermap.realspace.networkanalyst</artifactId>
            <version>${supermap.version}</version>
        </dependency>
        <dependency>
            <groupId>com.supermap</groupId>
            <artifactId>com.supermap.realspace.threeddesigner</artifactId>
            <version>${supermap.version}</version>
        </dependency>
        <dependency>
            <groupId>org.projectlombok</groupId>
            <artifactId>lombok</artifactId>
            <version>RELEASE</version>
            <scope>compile</scope>
        </dependency>


    </dependencies>
    <!--    打包-->
    <build>
        <plugins>
            <plugin>
                <groupId>org.springframework.boot</groupId>
                <artifactId>spring-boot-maven-plugin</artifactId>
            </plugin>
        </plugins>
    </build>


    <!--    超图SDK-镜像库-->
    <repositories>
        <repository>
            <id>public</id>
            <name>aliyun nexus</name>
            <url>http://maven.aliyun.com/nexus/content/groups/public/</url>
            <releases>
                <enabled>true</enabled>
            </releases>
        </repository>

        <repository>
            <id>supermap</id>
            <url>https://maven.supermap.io/</url>
            <snapshots>
                <enabled>true</enabled>
            </snapshots>
            <releases>
                <enabled>true</enabled>
            </releases>
        </repository>

        <repository>
            <id>Nexus</id>
            <name>Nexus</name>
            <url>http://192.168.1.110:8081/repository/maven-public/</url>
            <snapshots>
                <enabled>true</enabled>
            </snapshots>
            <releases>
                <enabled>true</enabled>
            </releases>
        </repository>
    </repositories>
    <pluginRepositories>
        <pluginRepository>
            <id>public</id>
            <name>aliyun nexus</name>
            <url>http://maven.aliyun.com/nexus/content/groups/public/</url>
            <releases>
                <enabled>true</enabled>
            </releases>
            <snapshots>
                <enabled>false</enabled>
            </snapshots>
        </pluginRepository>
    </pluginRepositories>


</project>
至此,一个SpringBoot工程并融合SuperMap iObjects JAVA组件的工程就搭建完毕了,团队协同开发可以开心的使用Maven私服了。再也不担心超图频繁更新发包组件包带来的烦恼以及版本控制错乱问题了。也不用担心你所需要的版本包在超图Maven仓库找不到了。
总结
这个系列文章所涉及的源代码,会放到资源库中供大家下载
欢迎GIS开发的小伙伴留言交流!
下一章:SuperMap iObjects JAVA 在SpringBoot工程中如何进行参数化配置


 2237
2237

 被折叠的 条评论
为什么被折叠?
被折叠的 条评论
为什么被折叠?
 到【灌水乐园】发言


