【MicroPython ESP32】 esp模块功能函数详解和使用示例
- 本示例基于
Thonny开发平台。
esp功能模块函数以及参数信息
- 在Shell调试窗口获取的信息如下:
>>> import esp
>>> help(esp)
object <module 'esp'> is of type module
  __name__ -- esp
  osdebug -- <function>
  flash_read -- <function>
  flash_write -- <function>
  flash_erase -- <function>
  flash_size -- <function>
  flash_user_start -- <function>
  gpio_matrix_in -- <function>
  gpio_matrix_out -- <function>
  dht_readinto -- <function>
  LOG_NONE -- 0
  LOG_ERROR -- 1
  LOG_WARNING -- 2
  LOG_INFO -- 3
  LOG_DEBUG -- 4
  LOG_VERBOSE -- 5
flash_size():获取flash容量。
>>> esp.flash_size()
16777216
esp.flash_user_start():用户可使用的flash起始地址。
>>> esp.flash_user_start()
2097152
esp.flash_read(byte_offset, buf):从地址为 byte_offset 的 flash 起始点读取 buf.len()个长度的数据并放入 buf 中。
byte_offset:flash偏移地址
buf:接收数据缓冲区,缓冲区的长度为len
- Shell窗口调试示例代码。
前提是前面y引用了
import esp
>>> buf = bytearray(100)
>>> esp.flash_read(2097152, buf)
>>> print(buf)
bytearray(b'\x01\x00\x00\x00\xf0\x0f\xff\xf7littlefs/\xe0\x00\x10\x00\x00\x02\x00\x00\x10\x00\x00\x00\x02\x00\x00\xff\x00\x00\x00\xff\xff\xff\x7f\xfe\x03\x00\x00p\x1f\xfc\x08.\x101\xfc\xff\xff\xff\xff\xff\xff\xff\xff\xff\xff\xff\xff\xff\xff\xff\xff\xff\xff\xff\xff\xff\xff\xff\xff\xff\xff\xff\xff\xff\xff\xff\xff\xff\xff\xff\xff\xff\xff\xff\xff\xff\xff\xff\xff\xff\xff\xff\xff')
esp.flash_write(byte_offset, buf):从地址为 byte_offset 的 flash 起始点写入 buf数据。和前面的读取函数相反。
byte_offset:flash偏移地址
buf:数据缓冲区,缓冲区长度为len
esp.flash_erase(sector_no):擦除flash扇区。
sector_no:要擦除的扇区
esp.flash_erase(512)
osdebug(0/None):
esp.osdebug(None):关闭厂商O/S调试消息.
esp.osdebug(0):将厂商O/S调试消息重定向到UART(0)
from machine import Pin
# import machine #导入machine模块
import time
import esp
esp.osdebug(None)       # turn off vendor O/S debugging messages
esp.osdebug(0)          # redirect vendor O/S debugging messages to UART(0)
led = Pin(2, Pin.OUT) #用machine模块的pin功能设置引脚2为输出。
while True:
    led.value(0) # 将引脚2设置为高电平
    # read and print the pin value
    print(led.value())
    print('From ESP32 MicroPyton')
    time.sleep(3)
    led.value(1) # 将引脚2设置为低电平
    print('Hello world!')
    print(led.value())
    time.sleep(3)
    # low level methods to interact with flash storage
    print(esp.flash_size())
    print(esp.flash_user_start())
    time.sleep(1)
    # esp.flash_erase(sector_no)
    # esp.flash_write(byte_offset, buffer)
    #esp.flash_read(byte_offset, buffer)
-
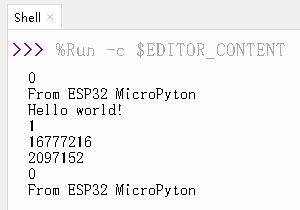
Shell调试输出信息

-
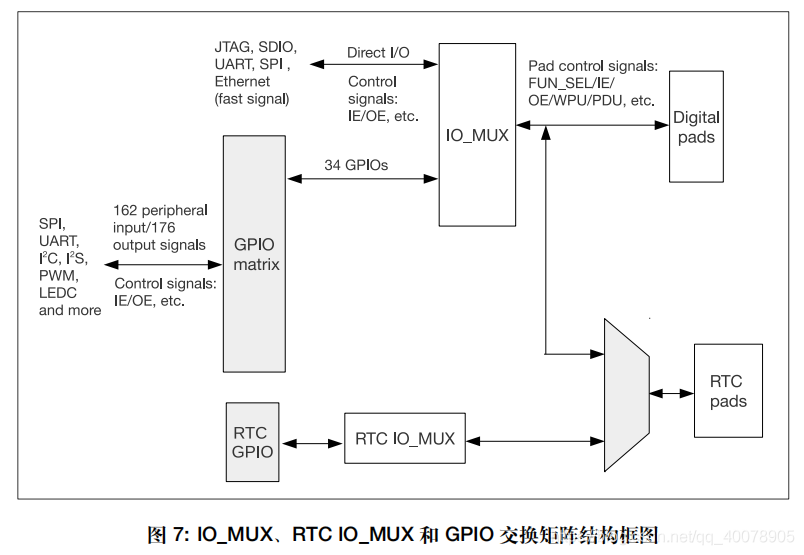
重映射输入输出引脚:只有环回信号224-228可以配置为从一个输入GPIO直接路由到另一个输出GPIO。(暂时没有想到使用方法)
GPIO matrix:即为 GPIO 交换矩阵,是外设输入和输出信号和 pad 之间的全交换矩阵。
-
参考信息:
https://blog.csdn.net/qq_40078905/article/details/107435351 -
esp.gpio_matrix_in(int, int,bool,bool): -
gpio_matrix_out(int, int,bool,bool):
esp.dht_readinto(pin, buf):读dht的值(温湿度传感器),此函数不依赖引入第三方模块来实现。
pin:读取数据的引脚
buf:数据缓冲区
- 实例代码
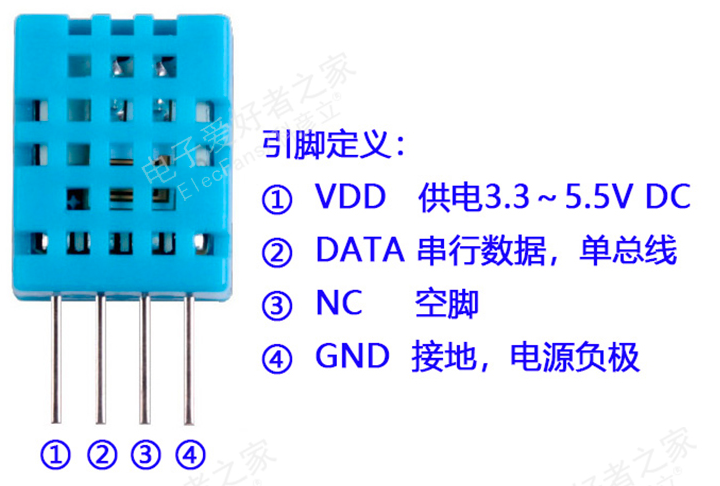
DHT11数据引脚接到22引脚上,3.3V供电
from machine import Pin
import time
import esp
buf = bytearray(5)

def measure(pin):
  global buf
  esp.dht_readinto(pin, buf)
  if(buf[0]+buf[1]+buf[2]+buf[3])&0xff!= buf[4]:
    raise Exception("checksum error")

def dht11_humidity():
  return buf[0]

def dht11_temperature():
  return buf[2]

def dht22_humidity():
  return (buf[0]<<8 | buf[1])*0.1

def dht22_temperature():
  t = ((buf[2] & 0x7f) << 8 |buf[3])*0.1
  if buf[2] & 0x80:
    t = -t
  return t

try:
  while True:
    measure(Pin(22))
    print("dht11 humidity:", dht11_humidity(),end='RH\n')
    print("dht11 temperature:", dht11_temperature(),end='℃\n')
   # print("dht22 humidity:", dht22.humidity())
   # print("dht22 temperature:", dht22.temperature())
    time.sleep(0.5)

except:
  print("Abnormal program!")
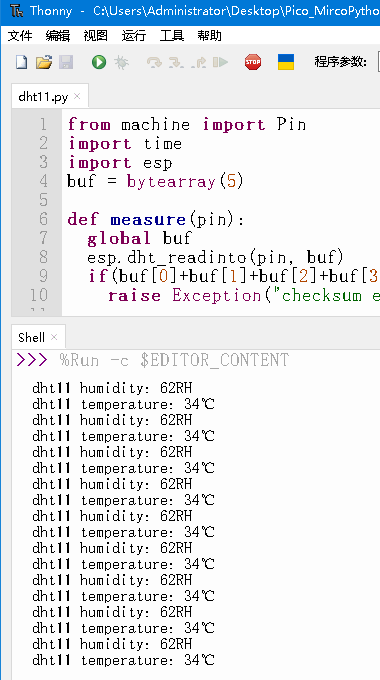
Shell调试信息


 1272
1272


 被折叠的 条评论
为什么被折叠?


