c3p0是什么?
c3p0就是对数据库连接的管理。
c3p0的特点:
1.编码的简单易用
2.连接的复用
3.连接的管理
sringboot项目c3p0+mybatis实现对数据库的查询,如下:

1.创建springboot项目
(1.1)项目目录如下:

2.加入mybatis和c3p0依赖
    <dependency>
        <groupId>org.mybatis.spring.boot</groupId>
        <artifactId>mybatis-spring-boot-starter</artifactId>
        <version>1.1.1</version>
    </dependency>
    <!--c3p0连接池-->
    <dependency>
        <groupId>c3p0</groupId>
        <artifactId>c3p0</artifactId>
        <version>0.9.1.2</version>
    </dependency>
     <!--视图解析-->
    <dependency>
        <groupId>org.springframework.boot</groupId>
        <artifactId>spring-boot-starter-thymeleaf</artifactId>
    </dependency>
3.配置application.properties文件
server.port=8092
c3p0.jdbcUrl=jdbc:mysql://localhost:3306/fbm-exhibition?serverTimezone=GMT%2B8
c3p0.user=root
c3p0.password=123456
c3p0.driverClass=com.mysql.cj.jdbc.Driver
spring.datasource.type=com.mchange.v2.c3p0.ComboPooledDataSource
#配置最小连接池数据
c3p0.minPoolSize=2
#配置最大连接数
c3p0.maxPoolSize=10
#最大空闲时间
c3p0.maxIdleTime=1800000
#当连接池中的连接耗尽的时候c3p0一次同时获取的连接数,每次增加3个连接
c3p0.acquireIncrement=3
#最大sql语句
c3p0.maxStatements=1000
#初始化连接池数
c3p0.initialPoolSize=3
c3p0.idleConnectionTestPeriod=60
c3p0.acquireRetryAttempts=30
c3p0.acquireRetryDelay=1000
c3p0.breakAfterAcquireFailure=false
c3p0.testConnectionOnCheckout=false
4.在config下新建DataSourceConfig配置连接池
@Configuration
public class DataSourceConfig {
    //指定当前对象作为bean
    @Bean(name = "dataSource")
    //指定dataSource来DI
    @Qualifier(value = "dataSource")
    //primary将当前数据库连接池作为默认数据库连接池
    @Primary
    //在application.properties文件中增加前缀c3p0
    @ConfigurationProperties(prefix = "c3p0")
    public DataSource dataSource(){
        return DataSourceBuilder.create().type(com.mchange.v2.c3p0.ComboPooledDataSource.class).build();
    }
    @Bean
    public SqlSessionFactoryBean sqlSessionFactoryBean(){
        SqlSessionFactoryBean sqlSessionFactory = new SqlSessionFactoryBean();
        sqlSessionFactory.setDataSource(dataSource());
        return sqlSessionFactory;
    }
}
5.在bean下创建实体类User(构造方法省略)
 public class User implements Serializable {
        private int uid;//用户id
        private String phone;//用户电话号码
        private String userPassword;//用户密码
        private String username;//用户名称
        private  int role;//用户角色
        private int managerId;//所属经理id
        private int salesmanId;//所属业务员id
        private String idNo;//用户身份证号码
        private String cardNo;//用户银行卡号码
}
6.在dao下创建Userdao

7.在service下创建用户业务逻辑接口IUserService

8.在service层键impl包,并在改包新建用户业务逻辑实现类UserServiceImpl。
@Service
@MapperScan("com.c3p0demo.dao")
public class UserServiceImpl implements IUserService {
    @Resource
    private UserDao userDao;
    @Override
    public User getUser(int uid) {
        User user = userDao.selectUser(uid);
        return user;
    }

    @Override
    public List<User> getAllUser() {
        return userDao.selectAllUser();
    }
}
9.在controller创建UserController类
/**
 * @author ${lcl}
 * @Title: UserController
 * @ProjectName c3p0demo
 * @Description: TODO
 * @date 2019/2/26 002614:20
 */
@Controller
public class UserController {
    @Autowired
    private IUserService userService;

    /**
     * 根据用户uid查询用户
     * @param uid
     * @return
     */
    @RequestMapping(value = "getUsers")
    @ResponseBody
    public User getUser(int uid){
        return userService.getUser(uid);
    }

    /**
     * 查询所有用户
     * @return
     */
    @RequestMapping(value = "getAllUsers")
    @ResponseBody
    public List<User> getAll(){
        return userService.getAllUser();
    }

    /**
     * 默认跳转界面
     * @return
     */
    @RequestMapping(value = "/")
    public String toIndex(){
        return "index";
    }
}
10.在index写简单前台界面(我使用的是bootstrap)
<body>
<div class="container">
    <h3>用户ID</h3>
    <input type="text" id="uid">
    <button id="submitUid">搜索</button>
    <hr>
</div>
<div class="container">
    <table class="table table-hover ">
        <th class="table-cell">用户ID</th>
        <th>用户姓名</th>
        <th>用户电话</th>
        <tbody class="tComment">

        </tbody>
    </table>
</div>
</body>
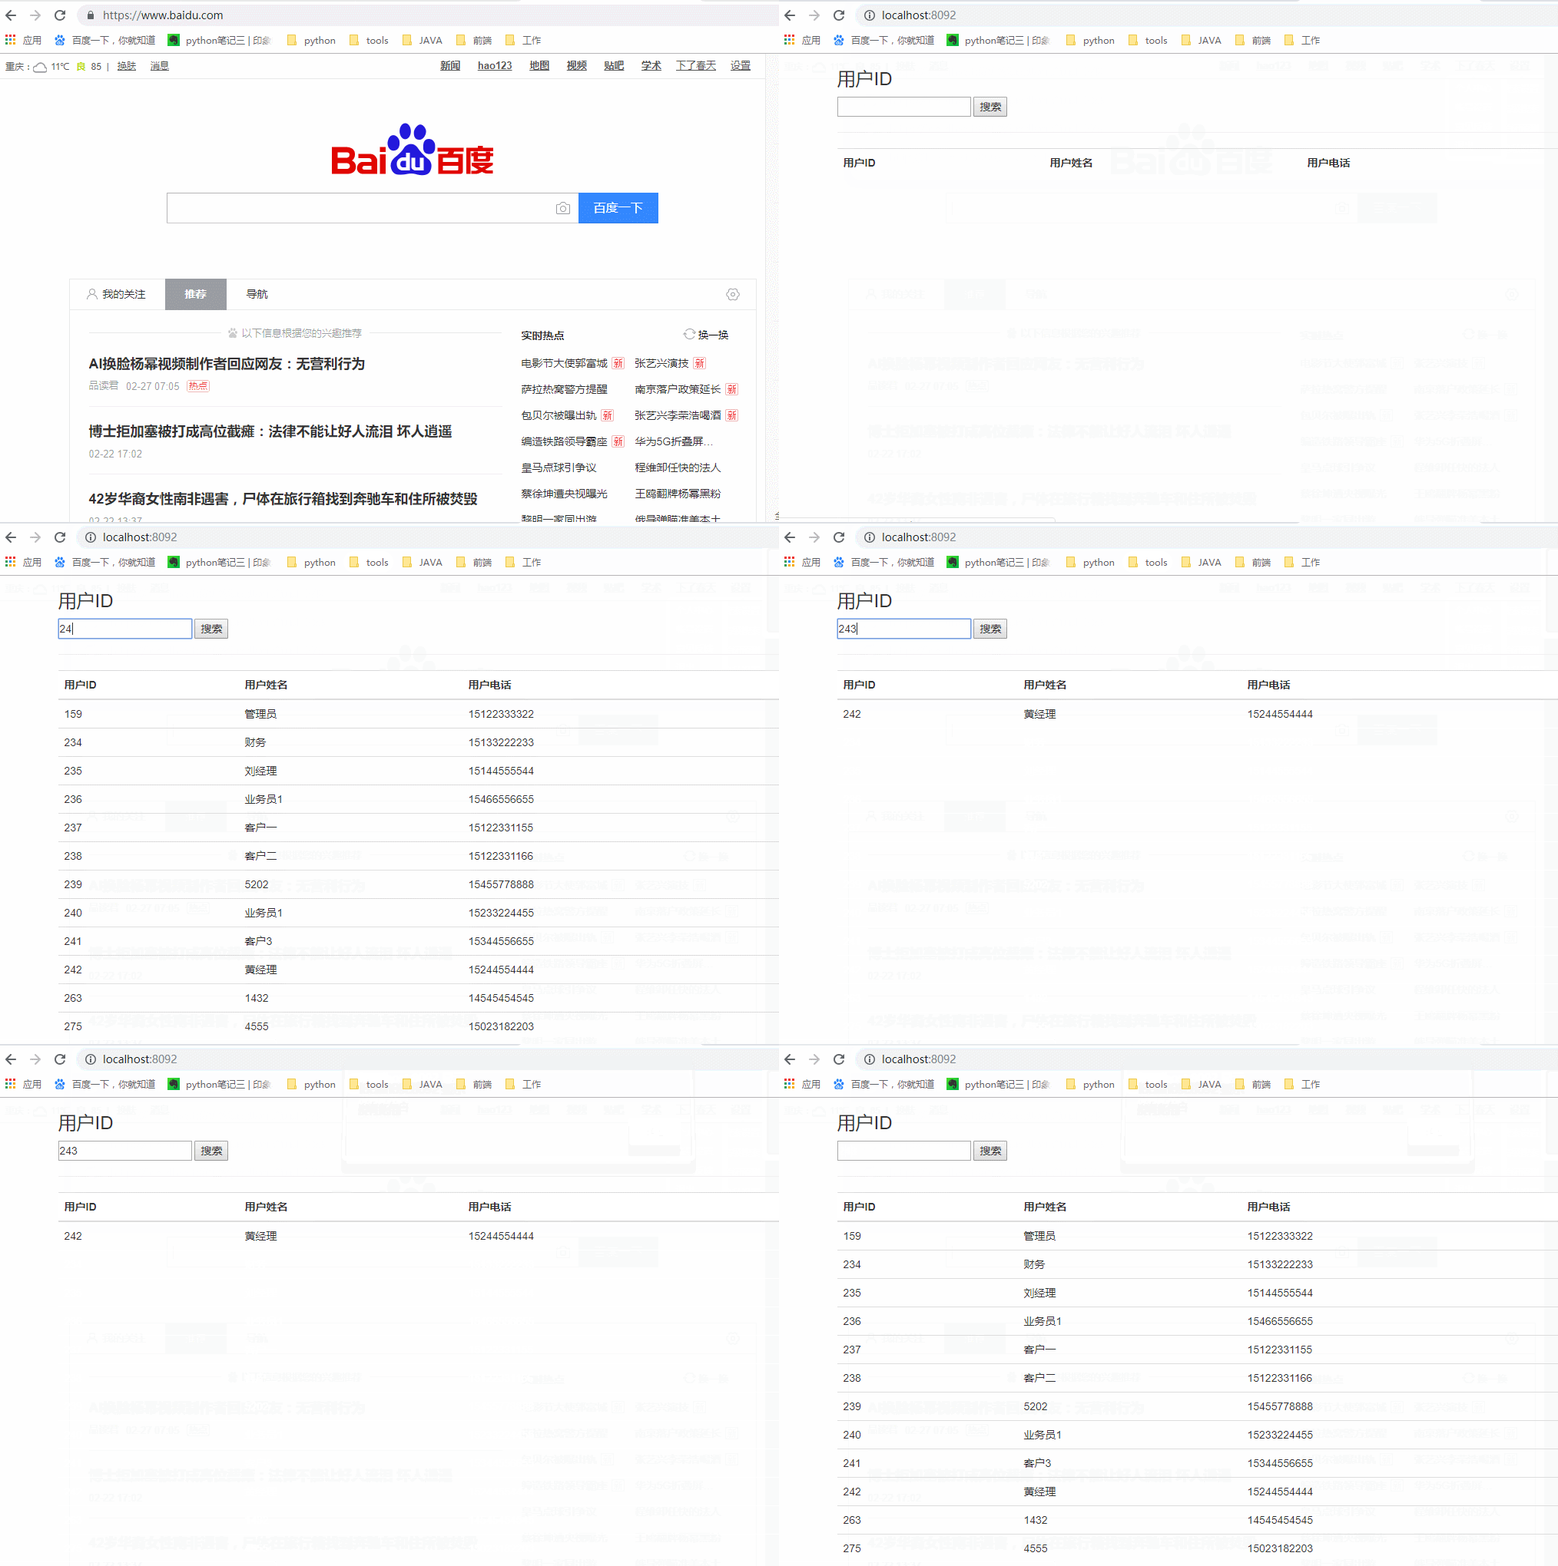
效果:

11.完整的目录结构如下:

12.接下来写ajax请求
(12.1)首先进入index界面后会查询所有用户
  getUser();//查询所有用户
        function getUser() {
            $.ajax({
                url: "getAllUsers",
                type: "POST",
                dataType: "json",
                success: function (res) {
                    var html = "";
                    for (var i = 0; res.length > i; i++) {
                        html += "<tr>";
                        html += "<td>" + res[i].uid + "</td>";
                        html += "<td>" + res[i].username + "</td>";
                        html += "<td>" + res[i].phone + "</td>";
                        html += "</tr>";
                    }
                    $(".tComment").html(html);
                }
            })
        }
(12.2)输入用户ID后搜索对应用户,否则显示没有此用,不输入则查询所有用户。
 $("#submitUid").on("click", function () {
            if ($("#uid").val() == "") {
                getUser();
            } else {
                $.ajax({
                    url: "getUsers",
                    type: "POST",
                    dataType: "json",
                    data: {uid: $("#uid").val()},
                    success: function (res) {
                        var html = "";
                        html += "<tr>";
                        html += "<td>" + res.uid + "</td>";
                        html += "<td>" + res.username + "</td>";
                        html += "<td>" + res.phone + "</td>";
                        html += "</tr>";
                        $(".tComment").html(html);
                    },error:function (res) {
                        alert("没有此用户");
                    }
                })
            }
        })
剧终


 216
216


 被折叠的 条评论
为什么被折叠?


