


Spring容器-生命周期主要知识
读Spring官方文档记录
主要学习Spring官方文档上下图左边的流程及bean的作用域及bean的继承的知识。图片引用地址

1. 概述
Spring容器是Spring的核心,是一个bean工厂,应用中bean的实例化,获取,销毁等都是由这个bean工厂管理的。Spring容器通过读取配置元数据(由XML,注解或者Java代码三种方式表示)获取哪些对象需要被实例化、配置并装配的指令。Spring管理bean的一项重要技术即IoC。
IoC指的是以对象通过构造方法注入/工厂方法注入/属性注入的方式定义他们依赖的其他对象的过程。
bean:被Spring IoC容器实例化、装配、管理的对象叫做bean,bean以及beans之间的相互依赖关系会在容器的配置文件中显示。

2. Bean定义(元数据的配置)
bean定义中的数据会转化为一组属性

(1) 基于XML的配置方式
1) 基本结构
<?xml version="1.0" encoding="UTF-8"?>
<beans xmlns="http://www.springframework.org/schema/beans"
    xmlns:xsi="http://www.w3.org/2001/XMLSchema-instance"
    xsi:schemaLocation="http://www.springframework.org/schema/beans
        https://www.springframework.org/schema/beans/spring-beans.xsd">

    <bean id="..." class="...">
        <!-- collaborators and configuration for this bean go here -->
    </bean>

    <bean id="..." class="...">
        <!-- collaborators and configuration for this bean go here -->
    </bean>

    <!-- more bean definitions go here -->

</beans>
注意:class后面跟完全限定的类名
2) 举例
Java类实现(这里省略)
在xml文件中完成Java类的的bean定义
<!--services.xml -->
<?xml version="1.0" encoding="UTF-8"?>
<beans xmlns="http://www.springframework.org/schema/beans"
    xmlns:xsi="http://www.w3.org/2001/XMLSchema-instance"
    xsi:schemaLocation="http://www.springframework.org/schema/beans
        https://www.springframework.org/schema/beans/spring-beans.xsd">

    <!-- services -->

    <bean id="petStore" class="org.springframework.samples.jpetstore.services.PetStoreServiceImpl">
        <property name="accountDao" ref="accountDao"/>
        <property name="itemDao" ref="itemDao"/>
        <!-- additional collaborators and configuration for this bean go here -->
    </bean>

    <!-- more bean definitions for services go here -->

</beans>
<!--Daos.xml-->
<?xml version="1.0" encoding="UTF-8"?>
<beans xmlns="http://www.springframework.org/schema/beans"
    xmlns:xsi="http://www.w3.org/2001/XMLSchema-instance"
    xsi:schemaLocation="http://www.springframework.org/schema/beans
        https://www.springframework.org/schema/beans/spring-beans.xsd">

    <bean id="accountDao"
        class="org.springframework.samples.jpetstore.dao.jpa.JpaAccountDao">
        <!-- additional collaborators and configuration for this bean go here -->
    </bean>

    <bean id="itemDao" class="org.springframework.samples.jpetstore.dao.jpa.JpaItemDao">
        <!-- additional collaborators and configuration for this bean go here -->
    </bean>

    <!-- more bean definitions for data access objects go here -->

</beans>
上述例子中,服务层由PetStoreServiceImpl类和两个JpaAccountDao和JpaItemDao(基于JPA对象关系映射标准)类型的数据访问对象组成。< property >中的name指向当前bean中对应的类中的属性,ref表示引用其他bean对象,ref后的名即为其他bean中id对应的值。
注意:可以根据自己程序的逻辑结构或者模块将不同的bean定义在不同的xml文件中,然后将xml文件合并即可(使用import resource完成)。
<beans>
    <import resource="services.xml"/> <!--services.xml应该和当前文件在同一个目录下-->
    <import resource="resources/messageSource.xml"/> <!--services.xml应该在当前文件并列的resources的目录下-->
    <import resource="/resources/themeSource.xml"/> <!--services.xml应该在当前文件并列的resources的目录下-->

    <bean id="bean1" class="..."/>
    <bean id="bean2" class="..."/>
</beans>
3) 注意事项
对于一个容器,bean的标识必须唯一,如果对于一个容器需要对于一个bean需要多个标识,可以考虑为bean设置别名。在xml中可以使用id/name或者两者结合去标识一个bean。
- 给bean定义别名的方式
在name属性中将多个别名用逗号或者分号或者空格隔开;或者使用< alias >标签
<alias name="forName" alias="toName"/>
(2) 基于注解的配置方式(后面学习的时候再补上)
(3) 基于Java的配置方式(后面学习的时候再补上)
注意:如果想为静态内部类定义bean则需要使用静态内部类的二进制名称。如:有一个类SomeThing在com.example中,SomeThing有一个静态内部类OtherThing,则bean定义中的class属性需要是com.example.SomeThing$OtherThing。
3. Bean的实例化
(1) Bean的实例化方式
1) 通过构造器来实例化
容器通过反射调用bean的构造器来实例化bean类似于Java代码中的new操作。
<bean id="exampleBean1" class="examples.ExampleBean1"/>
<bean name="exampleBean2" class="examples.ExampleBean2"/>
2) 通过静态工厂方法来实例化
<!--bean定义中的ClientService需要包含静态工厂方法。需要额外多指定factory-method属性,用于指定使用的静态工厂方法-->
<bean id="clientService" class="examples.ClientService" factory-method="createInstance"/>
//类及工厂方法的定义
public class ClientService{
	private static ClientService clientService =new ClientService();
	private ClientService(){}
	public static ClientService createInstance(){
		return clientService;
	}
}
3) 通过实例工厂方法来实例化
该方式是使用容器中已经存在的bean的非静态方法去创建一个新的bean实例。
<!--工厂bean,包含createInstance方法来创建其它bean实例-->
<bean id="serviceLocator" class="examples.DefaultServiceLocator">
	……
</bean>
<!--被bean工厂创建的bean,需要有factory-bean属性和factory-method属性-->
<bean id="clientService" factory-bean="serviceLocator" factory-method="createClientServiceInstance"/>
public class DefaultServiceLocator{
	private static ClientService clientService=new ClientServiceImpl();
	public ClientService createClientServiceInstance(){
		return clientService;
	}
	//一个工厂类可以包含多个工厂方法,按照以上方式再定义即可
}
(2) 延迟实例化及初始化Bean
默认Spring容器会在初始化工作中实例化及初始化所有的单例bean,但也可以延迟Bean的实例化及初始化,到第一次请求Bean的实例时再进行实例化和初始化。注意:若延迟实例化及初始化的Bean被其它非延迟的bean依赖,则该延迟Bean不会有延迟的效果。
<bean id="lazy" class="com.something.ExpensiveToCreateBean" lazy-init="true"/>
<bean name="not.lazy" class="com.something.AnotherBean"/>
<!--或者使用如下方式,批量定义延迟Beans-->
<beans default-lazy-init="true">
    <!-- no beans will be pre-instantiated... -->
</beans>
4. 依赖注入
依赖注入是对象通过构造器注入/工厂方法注入/属性注入(set注入)方式来定义其依赖关系的过程。容器会在创建bean的时候注入这些依赖关系。对象不知道它的依赖关系以及这些依赖的位置以及类,更利于解耦合。
(1) 依赖注入的两种方式:
1) 构造器注入
由容器调用带有许多参数的构造器来完成。
public class SimpleMovieLister {

    //SimpleMovieLister依赖moveFinder
    private MovieFinder movieFinder;

    //容器注入一个moveFinder
    public SimpleMovieLister(MovieFinder movieFinder) {
        this.movieFinder = movieFinder;
    }
    //使用注入的moveFinder的业务逻辑
}
构造函数中的参数解析
如果bean定义中的构造函数参数中不存在潜在的歧义,那么构造函数参数在bean定义中定义的顺序就是实例化bean时将这些参数提供给适当的构造函数的顺序。如:
package x.y
public class ThingOne {
	//ThingTwo以及ThingThree没有继承关系
    public ThingOne(ThingTwo thingTwo, ThingThree thingThree) {
        // ...
    }
}
<beans>
    <bean id="beanOne" class="x.y.ThingOne">
        <constructor-arg ref="beanTwo"/>
        <constructor-arg ref="beanThree"/>
    </bean>

    <bean id="beanTwo" class="x.y.ThingTwo"/>
    <bean id="beanThree" class="x.y.ThingThree"/>
</beans>
如果bean定义的构造函数参数存在潜在的歧义,如基本类型:
package examples;

public class ExampleBean {
    private int years;
    private String ultimateAnswer;

    public ExampleBean(int years, String ultimateAnswer) {
        this.years = years;
        this.ultimateAnswer = ultimateAnswer;
    }
}
可以使用如下几种方案
- 使用type属性显式的指定参数的类型
<bean id="exampleBean" class="examples.ExampleBean">
    <constructor-arg type="int" value="7500000"/>
    <constructor-arg type="java.lang.String" value="42"/>
</bean>
- 使用index属性显式的指定构造函数参数的索引
<bean id="exampleBean" class="examples.ExampleBean">
    <constructor-arg index="0" value="7500000"/>
    <constructor-arg index="1" value="42"/>
</bean>
- 使用name属性来消除构造函数值的模糊(此方式需要开启调试debug标志,是的Spring能够查看构造函数的参数名,或者在Java的构造函数上加上@ConstructorProperties({“years”, “ultimateAnswer”})
<bean id="exampleBean" class="examples.ExampleBean">
    <constructor-arg name="years" value="7500000"/>
    <constructor-arg name="ultimateAnswer" value="42"/>
</bean>
2) Setter注入
setter注入由容器在调用无参构造或者静态工厂方法实例化bean后调用set方法完成的。如:
public class SimpleMovieLister {
    //SimpleMovieLister依赖MovieFinder
    private MovieFinder movieFinder;

    // a setter method so that the Spring container can inject a MovieFinder
    public void setMovieFinder(MovieFinder movieFinder) {
        this.movieFinder = movieFinder;
    }
    // business logic that actually uses the injected MovieFinder is omitted...
}
<bean id="simoleMovieLister" class="examples.SimoleMovieLister">
    <!-- setter injection using the nested ref element -->
    <property name="example">
        <ref bean="movieFinder"/>
    </property>
</bean>

<bean id="movieFinder" class="examples.MovieFinder"/>
ApplicationContext支持构造器注入或者是setter注入,也可以两种方式混合使用,对于强依赖推荐使用构造器注入,对于可选依赖推荐使用setter注入
(2) 依赖解析过程(有点模糊,接着看看再说)
- ApplicationContext被创建和初始化:创建和初始化的过程中使用了描述beans的元数据(XML,注解或Java代码);
- 对于每个bean,它的依赖关系都以属性、构造函数参数或者静态工厂函数参数表示;当bean被实例化时,这些参数将被提供给bean;
- 对于每个属性或者构造函数参数都是要设置值的实际定义或者一个指向容器中的另外一个bean;
- 作为值的每个属性或构造函数参数都从其指定的格式转换为该属性或构造函数参数的实际类型。默认情况下,Spring可以将字符串格式提供的值转换为所有内置类型,比如int、long、string、boolean等等。
在容器创建时,容器会验证每个bean的配置的有效性,但是直到bean真正被创建时,bean的属性才被设置。容器创建时,bean被设置为单例模式且属性设置为默认值。创建一个bean会导致其依赖的bean都会被创建。
循环依赖问题
Bean A在构造器中依赖Bean B,而Bean B又在构造器中依赖Bean A。
解决方案:通过Setter注入,而不是都使用构造器注入。
(3) 依赖配置详解(< property >及< constructor-arg >使用详解)
1) 直接值
- value属性指定
Spring可以将这些值从String转化为正确的类型
<bean id="myDataSource" class="org.apache.commons.dbcp.BasicDataSource" destroy-method="close">
    <!-- results in a setDriverClassName(String) call -->
    <property name="driverClassName" value="com.mysql.jdbc.Driver"/>
    <property name="url" value="jdbc:mysql://localhost:3306/mydb"/>
    <property name="username" value="root"/>
    <property name="password" value="misterkaoli"/>
</bean>
<!--使用p命名空间,更加间接-->
<beans xmlns="http://www.springframework.org/schema/beans"
    xmlns:xsi="http://www.w3.org/2001/XMLSchema-instance"
    xmlns:p="http://www.springframework.org/schema/p"<!--注意添加了这一行-->
    xsi:schemaLocation="http://www.springframework.org/schema/beans
    https://www.springframework.org/schema/beans/spring-beans.xsd">

    <bean id="myDataSource" class="org.apache.commons.dbcp.BasicDataSource"
        destroy-method="close"
        p:driverClassName="com.mysql.jdbc.Driver"
        p:url="jdbc:mysql://localhost:3306/mydb"
        p:username="root"
        p:password="misterkaoli"/>
</beans>
<!--使用java.util.Properties-->
<bean id="mappings"
    class="org.springframework.context.support.PropertySourcesPlaceholderConfigurer">

    <!-- typed as a java.util.Properties -->
    <property name="properties">
        <value>
            jdbc.driver.className=com.mysql.jdbc.Driver
            jdbc.url=jdbc:mysql://localhost:3306/mydb
        </value>
    </property>
</bean>
- idref属性指定
<bean id="theTargetBean" class="..."/>

<bean id="theClientBean" class="...">
    <property name="targetName">
        <idref bean="theTargetBean"/>
    </property>
</bean>
<!--等价于下面的定义-->
<bean id="theTargetBean" class="..." />

<bean id="client" class="...">
    <property name="targetName" value="theTargetBean"/>
</bean>
2) 对其他Beans的引用
<!--在bean标签中使用ref标签引用其他bean是最常用的方式-->
<ref bean="someBean"/>
<!--引用父容器中的Bean,如SpringMVC容器引用父容器Spring中的bean。注意:子容器可以引用父容器中的bean,但是父容器不能引用子容器中的bean-->
<!-- 父容器中 -->
<bean id="accountService" class="com.something.SimpleAccountService">
    <!-- insert dependencies as required as here -->
</bean>
<!-- 子容器中 -->
<bean id="accountService" <!-- bean name is the same as the parent bean -->
    class="org.springframework.aop.framework.ProxyFactoryBean">
    <property name="target">
        <ref parent="accountService"/> <!-- notice how we refer to the parent bean -->
    </property>
    <!-- insert other configuration and dependencies as required here -->
</bean>
3) 内部Beans
在< property >或者< constructor-arg >内部定义bean
<!--内部bean定义不需要使用id或者name属性,内部bean总是和外部bean一起创建的,因此始终是匿名的,其他bean不能使用-->
<bean id="outer" class="...">
    <!-- instead of using a reference to a target bean, simply define the target bean inline -->
    <property name="target">
        <bean class="com.example.Person"> <!-- this is the inner bean -->
            <property name="name" value="Fiona Apple"/>
            <property name="age" value="25"/>
        </bean>
    </property>
</bean>
4) 集合
- 基本配置
< list/>< set/>< map/>< props/>分别对应于Java集合中的List,Set,Map及Properties。使用方式如下,其中map的key、value及set的value,可以是下列元素

<!--有一个ComplexObject类,其中有名字为adminEmails的properties类型的变量……分别进行如下方式的注入-->
<bean id="moreComplexObject" class="example.ComplexObject">
    <!-- results in a setAdminEmails(java.util.Properties) call -->
    <property name="adminEmails">
        <props>
            <prop key="administrator">administrator@example.org</prop>
            <prop key="support">support@example.org</prop>
            <prop key="development">development@example.org</prop>
        </props>
    </property>
    <!-- results in a setSomeList(java.util.List) call -->
    <property name="someList">
        <list>
            <value>a list element followed by a reference</value>
            <ref bean="myDataSource" />
        </list>
    </property>
    <!-- results in a setSomeMap(java.util.Map) call -->
    <property name="someMap">
        <map>
            <entry key="an entry" value="just some string"/>
            <entry key ="a ref" value-ref="myDataSource"/>
        </map>
    </property>
    <!-- results in a setSomeSet(java.util.Set) call -->
    <property name="someSet">
        <set>
            <value>just some string</value>
            <ref bean="myDataSource" />
        </set>
    </property>
</bean>
- 集合合并:即可以定义父< list/>< set/>< map/>< props/>及子< list/>< set/>< map/>< props/>,子集合从父集合继承或者覆盖值,即子集合中的元素继承父集合中的元素或者覆盖父集合中指定的值。由于List集合的有序性,父集合的元素在子集合元素的前面,其它集合不具有有序性,因此无此特性。集合合并不能合并不同类型的集合
<beans>
    <bean id="parent" abstract="true" class="example.ComplexObject">
        <property name="adminEmails">
            <props>
                <prop key="administrator">administrator@example.com</prop>
                <prop key="support">support@example.com</prop>
            </props>
        </property>
    </bean>
    <bean id="child" parent="parent">
        <property name="adminEmails">
            <!-- the merge is specified on the child collection definition -->
            <props merge="true">
                <prop key="sales">sales@example.com</prop>
                <prop key="support">support@example.co.uk</prop>
            </props>
        </property>
    </bean>
<beans>
- 强类型集合(指的是在定义集合类型时,只包含一种类型,相对于泛型而言,如Arraylist< T>可以包含任意类型,而ArrayList< Float>就之只能包含Float,为强烈性集合):Spring在注入强类型集合时会判断元素的类型,将设置值转换为对应的数据类型,如下面的例子,会把String转为Float。
public class SomeClass {
    private Map<String, Float> accounts;
    public void setAccounts(Map<String, Float> accounts) {
        this.accounts = accounts;
    }
}
<beans>
    <bean id="something" class="x.y.SomeClass">
        <property name="accounts">
            <map>
                <entry key="one" value="9.99"/>
                <entry key="two" value="2.75"/>
                <entry key="six" value="3.99"/>
            </map>
        </property>
    </bean>
</beans>
5) Null以及空字符串值
Spring将空参数视作空字符串;使用< null/>赋Null值
<bean class="ExampleBean">
    <property name="email" value=""/> <!--等价于Java代码exampleBean.setEmail("");-->
</bean>

<bean class="ExampleBean">
    <property name="email">
        <null/>  <!--等价于exampleBean.setEmail(null);-->
    </property>
</bean>
6) p命名空间使用(用于setter注入)
<beans xmlns="http://www.springframework.org/schema/beans"
    xmlns:xsi="http://www.w3.org/2001/XMLSchema-instance"
    xmlns:p="http://www.springframework.org/schema/p"
    xsi:schemaLocation="http://www.springframework.org/schema/beans
        https://www.springframework.org/schema/beans/spring-beans.xsd">

    <bean name="john-classic" class="com.example.Person">
        <property name="name" value="John Doe"/>
        <property name="spouse" ref="jane"/>
    </bean>

    <bean name="john-modern"
        class="com.example.Person"
        p:name="John Doe"
        p:spouse-ref="jane"/>

    <bean name="jane" class="com.example.Person">
        <property name="name" value="Jane Doe"/>
    </bean>
</beans>
7) c命名空间使用(用于构造函数注入)
<beans xmlns="http://www.springframework.org/schema/beans"
    xmlns:xsi="http://www.w3.org/2001/XMLSchema-instance"
    xmlns:c="http://www.springframework.org/schema/c"
    xsi:schemaLocation="http://www.springframework.org/schema/beans
        https://www.springframework.org/schema/beans/spring-beans.xsd">

    <bean id="beanTwo" class="x.y.ThingTwo"/>
    <bean id="beanThree" class="x.y.ThingThree"/>

    <!-- traditional declaration with optional argument names -->
    <bean id="beanOne" class="x.y.ThingOne">
        <constructor-arg name="thingTwo" ref="beanTwo"/>
        <constructor-arg name="thingThree" ref="beanThree"/>
        <constructor-arg name="email" value="something@somewhere.com"/>
    </bean>

    <!-- c-namespace declaration with argument names -->
    <bean id="beanOne" class="x.y.ThingOne" c:thingTwo-ref="beanTwo"
        c:thingThree-ref="beanThree" c:email="something@somewhere.com"/>
</beans>

<!--构造函数参数名称不清晰时也可以如下使用,按照构造函数参数顺序依次注入-->
<!-- c-namespace index declaration -->
<bean id="beanOne" class="x.y.ThingOne" c:_0-ref="beanTwo" c:_1-ref="beanThree"
    c:_2="something@somewhere.com"/>
8) 复合属性名称
<!--something有fred属性,fred属性有bob属性,bob属性有sammy属性,sammy属性的值被设置为123,注意fred及bob属性都不能为空,否则会报空指针异常-->
<bean id="something" class="things.ThingOne">
    <property name="fred.bob.sammy" value="123" />
</bean>
9) depends-on
用于依赖关系并不十分明显的情况,如:数据库驱动程序注册时,需要触发类中的静态初始化器时,这是注册程序依赖于初始化器中的bean,使用举例如下:
<bean id="beanOne" class="ExampleBean" depends-on="manager,accountDao"><!--多个依赖,使用逗号/空格或者分号分开都是有效的,manger及accountDao会在beanOne初始化之前被初始化-->
    <property name="manager" ref="manager" />
</bean>

<bean id="manager" class="ManagerBean" />
<bean id="accountDao" class="x.y.jdbc.JdbcAccountDao" />
5. 自动装配(依赖注入的自动方式)
(1) 自动装配的优缺点
1) 优点
- 自动装配可以大大减少属性和构造器参数的指派;
- 自动装配可以在解析对象时更新配置。
2) 缺点
- 自动装配会被显式的property以及constructor-arg的设置覆盖,且自动装配不能装配简单的属性,比如原语,字符串,类以及这些简单类型的数组;
- 自动装配没有显示的注入清晰,对象之间的关系通过自动装配无法明确的被记录;
- 对于容器中有多个bean类型匹配到某个bean的属性时,自动装配就会失效(可以将部分bean的autowire-candidate属性设置为false或者在< bean/>标签中,将被选择的bean的primary属性设置为true或者使用基于注解的配置方式即可解决)。
(2) 四种自动装配模式
| 模式 | 说明 |
|---|---|
| no | 默认,非自动装配模式,bean引用必须要以ref元素 |
| byName | 根据属性的名称自动装配,属性的名称和bean的名称需要一致 |
| byType | 把与bean的属性具有相同属性的bean自动装配到对应的属性中,如果有多个与属性类型相同的bean,则会报错 |
| constructor | 类似于byType,但是适用于构造函数参数,如果容器中没有构造函数参数类型同类型的bean,就会产生错误 |
以下自动装配代码引用自https://www.jianshu.com/p/2f1c9fad1d2d
public class User{
    private Role myRole;
}
public class Role {
    private String id;
    private String name;
}
<!--byName-->
<bean id="myRole" class="com.viewscenes.netsupervisor.entity.Role">
    <property name="id" value="1001"></property>
    <property name="name" value="管理员"></property>
</bean>
<bean id="user" class="com.viewscenes.netsupervisor.entity.User" autowire="byName"></bean>

<!--byType-->
<bean class="com.viewscenes.netsupervisor.entity.Role">
    <property name="id" value="1001"></property>
    <property name="name" value="管理员"></property>
</bean>
<bean id="user" class="com.viewscenes.netsupervisor.entity.User" autowire="byType"></bean>
public class User{
    private Role role;
    public User(Role role) {
        this.role = role;
    }
}
<!--constructor-->
<bean class="com.viewscenes.netsupervisor.entity.Role">
    <property name="id" value="1001"></property>
    <property name="name" value="管理员"></property>
</bean>
<bean id="user" class="com.viewscenes.netsupervisor.entity.User" autowire="constructor"></bean>
(3) 将某个bean排除自动装配模式
<bean class="com.viewscenes.netsupervisor.entity.Role" autowire-candidate="false"/>
注意:autowire-candidate="false"只能影响根据类型匹配的自动装配,根据名字匹配的自动匹配不受影响。
对于名字匹配方式的排除可以使用如下方式进行
<beans xmlns="http://www.springframework.org/schema/beans"
    xmlns:xsi="http://www.w3.org/2001/XMLSchema-instance"
    xmlns:c="http://www.springframework.org/schema/c"
    xsi:schemaLocation="http://www.springframework.org/schema/beans
        https://www.springframework.org/schema/beans/spring-beans.xsd"
	 default-autowire-candidates="*Repository"<!--名字以Repository结尾的bean都会被排除在自动装配模式之外-->
>
<bean id="steelRepository" class="myspring.SteelAxe"></bean>
</beans>
6. 方法注入(上述依赖注入存在的一种问题的解决方案)
public class SingletonA{
	private PrototypeB prototypeB;
	public PrototypeB setPrototypeB(ProtorypeB prototypeB){
		this.prototypeB=prototypeB;
	}
	public PrototypeB getPrototypeB(){
		return prototypeB;
	}
}
public class PrototypeB{……}
```xml
<bean id="A" class="xx.xx.SingletonA" scope="singleton">……</bean>
<bean id="B" class="xx.xx.PrototypeB">……</bean>
如上述代码所示,bean A为单例模式,bean B为原型模式,在bean A中有get方法,返回bean B的实例。由于A是单例模式,所以对于prototypeB的注入只有初始化时的一次,如果想每次调用A的get方法都获得一个新的prototypeB对象,显然是不能实现的,为解决以上问题,引入方法注入。
(1) 查找(Lookup)方法注入
CGLib可以在运行期间动态操作Class字节码,为Bean动态创建子类或者实现类,Spring通过使用CGLib动态的生成覆盖单例Bean A方法的子类来实现方法注入。
注意:Bean A对应类不能为final类,被覆盖方法也不能为final。查找方法不适用于工厂方法,特别是不适用于配置类中的@Bean方法,因为在这种情况下容器不负责创建实例,因此无法在其上创建运行时生成的子类。
public abstract class SingletonA{
	private PrototypeB prototypeB;
	public PrototypeB setPrototypeB(ProtorypeB prototypeB){
		this.prototypeB=prototypeB;
	}
	public abstract PrototypeB getPrototypeB();
}
public class PrototypeB{……}
注意:被注射的方法应该遵循<public|protected> [abstract] < return-type > theMethodName(no-arguments);格式,如果方法是抽象方法,则由动态生成的子类来实现该方法,否则,动态生成的子类覆盖该方法。
<bean id="A" class="xx.xx.SingletonA">
	<lookup-method name="getPrototypeB" bean="B"/>
</bean>
<bean id="B" class="xx.xx.PrototypeB" scope="prototype">……</bean> <!--注意scope是原型,如果是单例,每次获得的还是同样的实例-->
使用@Lookup(“B”)/@Lookup注解也可以,放在被注射的方法声明上面,等价于xml配置,使用注解的方式被注入的方法应该声明为非抽象方法,抽象方法在默认的扫描规则下会被忽略
(2) 方法替换
相对于查找方法注入不常用。使用某个bean的方法去替换另一个bean的方法。如下,computeValue是想被注入的方法。
//computeValue是想被注入的方法
public class MyValueCalculator {
    public String computeValue(String input) {
        // some real code...
    }
    // some other methods...
}
// 通过实现org.springframework.beans.factory.support.MethodReplacer接口提供一个新方法的定义
public class ReplacementComputeValue implements MethodReplacer {
    public Object reimplement(Object o, Method m, Object[] args) throws Throwable {
        // get the input value, work with it, and return a computed result
        String input = (String) args[0];
        ...
        return ...;
    }
}
<bean id="myValueCalculator" class="x.y.z.MyValueCalculator">
    <!-- arbitrary method replacement -->
    <replaced-method name="computeValue" replacer="replacementComputeValue">
        <arg-type>String</arg-type><!--arg-type可以使用多个,如果方法有多个参数就使用多个-->
    </replaced-method>
</bean>

<bean id="replacementComputeValue" class="a.b.c.ReplacementComputeValue"/>
7. 自定义Bean的性质
(1) 生命周期回调
1) 初始化回调
org.springframework.beans.factory.InitializingBean接口在容器设置所有bean的必要属性后,让bean可以进行一些初始化工作。InitializingBean提供了的如下方法:
void afterPropertiesSet() throws Exception;
InitializingBean的使用举例如下:
<bean id="exampleInitBean" class="examples.AnotherExampleBean"/>
public class AnotherExampleBean implements InitializingBean {

    @Override
    public void afterPropertiesSet() {
        // do some initialization work
    }
}
注意:InitializingBean接口不推荐使用,因为会把初始化代码和Spring绑定到一起。建议使用@PostConstruct或者使用一个POJO类中的初始化方法。
- 在xml的配置中可以进行如下配置。init-method后面跟的方法为void init(),没有参数的初始化函数
<bean id="exampleInitBean" class="examples.ExampleBean" init-method="init"/>
public class ExampleBean {
    public void init() {
        // do some initialization work
    }
}
- @PostConstruct方式
public class ExampleBean {
	@PostConstruct
    public void init() {
        // do some initialization work
    }
}
- Java的配置(等学习到此处再添加)
2) 销毁回调
org.springframework.beans.factory.DisposableBean接口在bean所在的容器被销毁之前获得一个回调。该接口主要有一个方法:
void destroy() throws Exception;
使用举例如下:
<bean id="exampleInitBean" class="examples.AnotherExampleBean"/>
public class AnotherExampleBean implements DisposableBean {
    @Override
    public void destroy() {
        // do some destruction work (like releasing pooled connections)
    }
}
同样DisposableBean接口也不推荐使用,也会将销毁代码绑定到Spring,推荐使用@PreDestory注解或者bean定义支持的通用方法
- xml配置
<bean id="exampleInitBean" class="examples.ExampleBean" destroy-method="cleanup"/>
public class ExampleBean {

    public void cleanup() {
        // do some destruction work (like releasing pooled connections)
    }
}
- @PreDestory注解
public class ExampleBean {
	@PreDestory
    public void cleanup() {
        // do some destruction work (like releasing pooled connections)
    }
}
- Java配置后面学习补上
4) 默认初始化回调及销毁回调
<!--使用了我下面的方式之后如果想使用init-method还是可以的-->
<beans default-init-method="init"><!--defaule-destory-method-->
	<bean ……>
	……
	</bean>
</beans>
这样定义后也可以在< bean>标签中使用init-method来指定覆盖该init的方法。
目标bean和代理AOP分开定义这里没看懂,继续看后面是否能懂
5) 多种生命周期机制被定义到同一个bean的选择
有三种方式控制bean的生命周期
- InitializingBean/DisposableBean调用接口
- 自定义的init()/destory()方法
- @PostConstruct/@PreDestroy注解
如果三种方式被以不同的名字定义到同一bean中,按照如下顺序依次执行,如果是相同名字如init(),该方法只执行一次
a. 注解方式优先
b. 其次是调用接口
c. 最后是自定义的init/destory方法
6) 启动和关闭回调
当ApplicationContext(容器)接收到开始/结束信号时,容器会委托LifecycleProcessor将容器内所有的调用级联到Lifecyle中。任何Spring管理的对象都可以实现Lifecyle接口。Lifecyle接口定义了启动和关闭回调的方法。
public interface Lifecycle {
    void start();
    void stop();//不能保证在destory回调之前完成,正常情况下可以在回调之前完成,但是在上下文生命周期热刷新或停止刷新尝试时,只会进行destory会回调。
    boolean isRunning();
}
public interface LifecycleProcessor extends Lifecycle {
	//刷新上下文和关闭上下文
    void onRefresh();//刷新,则回调过程被调用,这时,DefulatLifecylePrcessor会检查每个SmartLifecycle对象的isAutoStartup()方法返回的布尔值,如果为true,该对象在此时启动,而不是等待上下文或其自己的start()方法的显式调用。
    void onClose();//驱动关闭过程,就好像是显式地调用了stop(),但是它发生在上下文关闭时。
}
注意:这里的Lifecyle接口的启动和关闭需要显示启动,不能自动启动,如果要实现自动启动可考虑SmartLifecyle
public interface SmartLifecycle extends Lifecycle, Phased {
    boolean isAutoStartup();
    void stop(Runnable callback);//接收一个回调,在关闭进程完成后,需要调用该回调的run方法,这样可以在需要的时候实现异步关闭,LifecylePrcessor的默认实现DefulatLifecylePrcessor等待处于不同phase的对象组达到其超时值,以便能够调用该回调。默认超时值为30s。
}
public interface Phased {
    int getPhase();
}
对于对象之间的级联顺序按照如下方式:
假设对象A依赖对象B,那么对象B应该在对象A开始之前开始,结束之后结束,但是有时候不能直接理清对象间的依赖关系,这种情况下可以使用SmartLifecyle接口,在其父接口Phased中有getPhase()方法。启动时,低phase的对象先启动,结束时,低phase的对象后结束。任何未执行的对象的phase为0。
<!--修改默认超时值-->
<bean id="lifecycleProcessor" class="org.springframework.context.support.DefaultLifecycleProcessor">
    <!-- timeout value in milliseconds -->
    <property name="timeoutPerShutdownPhase" value="10000"/>
</bean>
7) 关闭非Web应用的IoC容器
向JVM注册一个关机钩子,上面的destory回调的步骤必不可少。
import org.springframework.context.ConfigurableApplicationContext;
import org.springframework.context.support.ClassPathXmlApplicationContext;

public final class Boot {
    public static void main(final String[] args) throws Exception {
        ConfigurableApplicationContext ctx = new ClassPathXmlApplicationContext("beans.xml");
        // add a shutdown hook for the above context...
        ctx.registerShutdownHook();
        // app runs here...
        // main method exits, hook is called prior to the app shutting down...
    }
}
(2) ApplicationContextAware及BeanNameAware
容器创建一个实现ApplicationContextAware接口的对象实例时,实例会有一个指向容器的引用。因此,bean可以通过ApplicationContext接口或通过将引用转换为该接口的已知子类(比如ConfigurableApplicationContext),操纵容器。第一种用途即是直接获取spring 配置文件中 所有引用(注入)到的bean对象,但是一般不推荐,会把代码和Spring容器绑定。另一种用途为提供了对文件资源,发布应用程序事件,获取MessageSource。
public interface ApplicationContextAware {
    void setApplicationContext(ApplicationContext applicationContext) throws BeansException;
}
容器创建一个实现了BeanNameAware接口的类时,该类拥有一个自身在spring容器中的名称(id/name)的引用。在填充普通bean属性之后,但在初始化回调(如InitializingBean、afterPropertiesSet或自定义初始化方法)之前调用回调。
public interface BeanNameAware {
    void setBeanName(String name) throws BeansException;
}
生命周期ware相关接口用处理解
这两个接口的使用理解:接口中只有set方法,set方法中的属性可通过setter属性注入由容器来注入,在拿到容器的实例/名称等,就可以拿来使用。使用示例
(3) 其它Aware接口
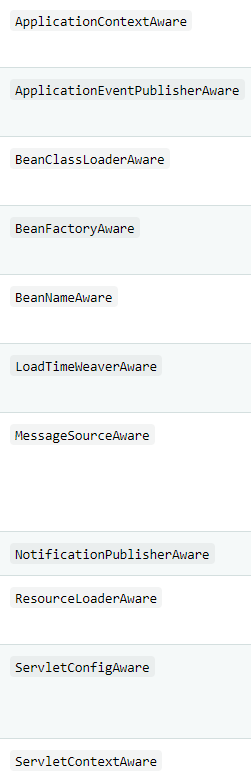
这里学到相关的接口再补充
8. 容器扩展点
在bean生命周期的不同阶段,Spring提供了不同的扩展点来修改原有生命周期的操作或增加额外的操作,如修改实例化逻辑,依赖解析逻辑等。
(1) BeanPostProcessor扩展点(对bean进行自定义)
BeanPostProcessor接口定义了一些回调方法,通过实现这些回调方法,我们可以实现自己的bean实例化逻辑、依赖解析逻辑等。或者如果想在容器完成bean的实例化、配置以及初始化后,可以插入自定义的逻辑,可以插入BeanPosetProcessor来实现。
- 多个BeanPostProcessor实例之间的执行顺序指定可以通过设置order属性实现,实现Ordered接口即可设置order属性。
- BeanPostProcessor实例作用在bean实例上,即容器实例化bean实例后BeanPostProcessor实例才工作。
- BeanPostProcessor是针对某一个容器的,在一个容器上定义的BeanPostProcessor不会作用在其它容器上。
- 当BeanPostProcessor被注册为容器中每个bean的后处理程序(post-processor),后处理程序在容器初始化方法(InitializingBean.afterPropertiesSet()/初始化init方法)之前以及bean初始化回调之后获得回调,后处理程序能够对bean实例进行任何操作。

- 容器会自动检测定义在配置元数据(xml等方式)中的实现了BeanPostProcessor接口的bean。容器将这些beans作为后处理器以便后面调用,后处理器beans和其它beans以同样的方式在容器中部署。
- 在配置类上使用@Bean工厂方法(在1.2基于Java的容器配置中)来声明BeanPostProcessor时,工厂方法的返回类必须是部署类本身或者是BeanPostProcessor接口,暗示bean是一个后处理器,否则容器在创建bean之前不能自动检测,由于后处理器需要尽早实例化用于其它bean的实例化,因此提前自动检测是很重要的。
- 除了通过容器自动检测BeanPostProcessor来注册后处理器,通过ConfigurableBeanFactory中的addBeanPostProcessor的方法来注册也可以。当在注册前需要评估条件逻辑时或者在跨层次结构中复制bean的后处理器时,这种方式很有用。使用这种方式不遵循Ordered接口,注册顺序决定了执行顺序,且在自动检测的后处理器顺序之前。
BeanPostPRocessor使用举例
在容器创建每个bean时调用该bean的toString()方法,并将结果字符串打印到系统控制台。
package scripting;

import org.springframework.beans.factory.config.BeanPostProcessor;

public class InstantiationTracingBeanPostProcessor implements BeanPostProcessor {

    // simply return the instantiated bean as-is
    public Object postProcessBeforeInitialization(Object bean, String beanName) {
        return bean; // we could potentially return any object reference here...
    }

    public Object postProcessAfterInitialization(Object bean, String beanName) {
        System.out.println("Bean '" + beanName + "' created : " + bean.toString());
        return bean;
    }
}
<?xml version="1.0" encoding="UTF-8"?>
<beans xmlns="http://www.springframework.org/schema/beans"
    xmlns:xsi="http://www.w3.org/2001/XMLSchema-instance"
    xmlns:lang="http://www.springframework.org/schema/lang"
    xsi:schemaLocation="http://www.springframework.org/schema/beans
        https://www.springframework.org/schema/beans/spring-beans.xsd
        http://www.springframework.org/schema/lang
        https://www.springframework.org/schema/lang/spring-lang.xsd">

    <lang:groovy id="messenger"
            script-source="classpath:org/springframework/scripting/groovy/Messenger.groovy">
        <lang:property name="message" value="Fiona Apple Is Just So Dreamy."/>
    </lang:groovy>

    <!--
    when the above bean (messenger) is instantiated, this custom
    BeanPostProcessor implementation will output the fact to the system console
    -->
    <bean class="scripting.InstantiationTracingBeanPostProcessor"/>
</beans>
Java代码中使用
import org.springframework.context.ApplicationContext;
import org.springframework.context.support.ClassPathXmlApplicationContext;
import org.springframework.scripting.Messenger;

public final class Boot {

    public static void main(final String[] args) throws Exception {
        ApplicationContext ctx = new ClassPathXmlApplicationContext("scripting/beans.xml");
        Messenger messenger = ctx.getBean("messenger", Messenger.class);
        System.out.println(messenger);
    }
}
(2) BeanFactoryPostProcessor扩展点(对配置元数据进行自定义)
在容器实例化beans(除了BeanFactoryPostProcessor实例)之前,BeanFactoryPostProcessor能够读取配置元数据并且并做修改。
- 多个BeanFactoryPostProcessor实例可以通过设置order属性来控制顺序,通过实现Ordered接口即可设置order属性。
- BeanFactoryPostProcessor是针对某一个容器的,在一个容器上定义的BeanFactoryPostProcessor不会作用在其它容器上。
- Bean工厂后处理器(factory post-processor)如果声明在容器中就会自动运行,以便对配置元数据进行修改。容器会自动检测任何实现了BeanFactoryPostPrecessor接口的Beans,这些beans被视作bean工厂后处理器。在适当的时候,可以向部署其它bean一样部署这些bean。
BeanFactoryPostProcessor使用举例-使用PropertySourcesPlaceholderConfigurer读取外部配置属性及类名替换 - 外部配置属性获取
可以使用PropertySourcesPlaceholderConfigure将bean的属性值外部化到单独的文件中,以便应用部署人员可以自定义特定于环境的属性,比如数据库url和密码,而无需修改主XML定义文件或容器文件。
<bean class="org.springframework.context.support.PropertySourcesPlaceholderConfigurer">
    <property name="locations" value="classpath:com/something/jdbc.properties"/><!--加载外部配置文件-->
</bean>

<bean id="dataSource" destroy-method="close"
        class="org.apache.commons.dbcp.BasicDataSource">
    <property name="driverClassName" value="${jdbc.driverClassName}"/>
    <property name="url" value="${jdbc.url}"/>
    <property name="username" value="${jdbc.username}"/>
    <property name="password" value="${jdbc.password}"/>
</bean>
等价于Java代码中的如下形式:
@Value("${username}")
private String username;
在Spring2.5之后,可以使用如下方式用于指定配置文件,多个文件可用逗号隔开
<context:property-placeholder location="classpath:com/something/jdbc.properties"/> <!--优先级更高-->
注意:PropertySourcePlaceholderConfigurer不仅查找指定的配置文件中的属性,如果在配置文件中找不到属性,他会在Spring环境属性以及Java系统属性中寻找。
- 类名替换
常用于在运行时决定一个具体的实现类的情况
<bean class="org.springframework.beans.factory.config.PropertySourcesPlaceholderConfigurer">
    <property name="locations">
        <value>classpath:com/something/strategy.properties</value>
    </property>
    <property name="properties">
        <value>custom.strategy.class=com.something.DefaultStrategy</value>
    </property>
</bean>

<bean id="serviceStrategy" class="${custom.strategy.class}"/>
PropertyOverrideConfigurer
从配置文件中读取值并覆盖原有值,与PropertySourcesPlaceholderConfigurer不同的是,对于bean属性其可以有默认值或者空值。
<beans>
    <bean id="configBean"
  class="org.springframework.beans.factory.config.PropertyOverrideConfigurer">
        <property name="location">
            <value>hello.properties</value>
        </property>
    </bean>

    <bean id="helloBean" class="onlyfun.caterpillar.HelloBean">
        <property name="helloWord">
            <value>Hello!</value>
        </property>
    </bean>
</beans>
配置文件中内容
helloBean.helloWord=Welcome
在Spring2.5后面也可以使用如下方式
<context:property-override location="classpath:override.properties"/>
(3) FactoryBean扩展点
当初始化代码过多,在xml中进行配置不如使用Java代码进行配置时,则可以创建FactoryBean,FactoryBean接口用于工厂Bean,将复杂的配置代码写入类中,然后将FactroyBean插入容器中。
FactoryBean主要提供以下三个方法:
- Object getObject():返回工厂创建的对象实例,该实例的作用域可能是单例也可能是原型,取决于工厂的类型。
- boolean isSingleton():如果工厂返回的是单例作用域的对象实例,返回true,否则返回false。
- Class getObjectType():返回getObject()方法返回的对象类型,如果类型体检不可知则返回null。
9. 使用容器并获取对象(bean的使用)
// 创建和配置beans
// 第一种方式
ApplicationContext context = new ClassPathXmlApplicationContext("services.xml", "daos.xml");
//第二种方式
GenericApplicationContext context = new GenericApplicationContext();
new XmlBeanDefinitionReader(context).loadBeanDefinitions("services.xml", "daos.xml");
context.refresh();

// 检索配置的实例
PetStoreService service = context.getBean("petStore", PetStoreService.class);

// 使用已经配置的实例
List<String> userList = service.getUsernameList();
10. Bean的作用域
支持的作用域种类如下表所示:
| 作用域类型 | 说明 |
|---|---|
| 单例(singleton) | 默认的类型,在每个IoC容器,为每一个bean定义创建单个对象实例 |
| 原型(prototype) | 在每个IoC容器,每一个bean定义创建任意数量的对象实例 |
| request | 针对单个HTTP request的生命周期创建一个bean定义的实例对象,仅在涉及到Web的容器中有效 |
| session | 针对HTTP session的生命周期创建一个bean定义的实例对象,仅在涉及到Web的容器中有效 |
| application | 针对ServletContext(可参考此链接第5点https://blog.csdn.net/weixin_43106572/article/details/109386350)的生命周期创建一个bean定义的实例对象,仅在涉及到Web的容器中有效 |
| websocket | 针对WebSocket的生命周期创建一个bean定义的实例对象,仅在涉及到Web的容器中有效 |
(1) 单例作用域
IoC容器将为定义为单例的bean创建一个实例,存储在单例bean实例的缓存中,后续所有对这个bean的请求及引用都会返回该实例。
在大学时代v但是发射点
xml中的配置如下所示:
<bean id="accountService" class="com.something.DefaultAccountService"/>
<!--等价于-->
<bean id="accountService" class="com.something.DefaultAccountService" scope="singleton"/>
(2) 原型作用域
每次对特定的bean发出引用及请求时(bean注入或者getBean())都会创建一个新的bean实例。应该对所有有状态的bean使用原型作用域,无状态的bean使用单例作用域,如DAO类一般使用单例作用域。

xml中的配置如下:
<bean id="accountService" class="com.something.DefaultAccountService" scope="prototype"/>
注意:相比较于单例作用域,Spring不管理原型作用域bean的完整的生命周期。容器实例化、配置并装配原型对象并将其交给使用者,但是不记录实例。因此实例的销毁生命周期不会被调用。使用者必须清理原型对象并释放原型bean所持有的昂贵资源。要让Spring容器释放原型作用域bean所持有的资源,请尝试使用自定义bean后处理程序,它持有对需要清理的bean的引用。
(3) 有原型bean依赖的单例bean
依赖项是在实例化时解析的,因此在实例化单例bean时也会实例化一个原型bean注入到单例bean中,这个原型bean的实例不会变化,因为单例bean只实例化一次。如果想每次调用单例bean的方法获取不同的原型bean实例,可以使用方法注入。
(4) Request、Session、Application、WebSocket作用域
只在使用Web容器的时候有效,如XmlWebApplicationContext。
1) 初始化网络配置
- Spring Web MVC:由DispatcherServlet完成所有的初始化配置
- Servlet 2.5 Web容器(JSF以及Structs等):注册org.springframework.web.context.request.RequestContextListener 及ServletRequestListener
<web-app>
    ...
    <listener>
        <listener-class>
            org.springframework.web.context.request.RequestContextListener
        </listener-class>
    </listener>
    ...
</web-app>
如果Listener有问题可以考虑使用RequestContextFilter,过滤器的映射取决于具体的应用配置,下面举一个例子
<web-app>
    ...
    <filter>
        <filter-name>requestContextFilter</filter-name>
        <filter-class>org.springframework.web.filter.RequestContextFilter</filter-class>
    </filter>
    <filter-mapping>
        <filter-name>requestContextFilter</filter-name>
        <url-pattern>/*</url-pattern>
    </filter-mapping>
    ...
</web-app>
- Servlet 3.0+ :使用WebApplicationInitializer接口实现
DispatcherServlet, RequestContextListener及RequestContextFilter会做相同的事,及将HTTP请求对象绑定到服务该请求的线程,使得请求或者会话作用域能够被调用。
2) Request作用域
<bean id="loginAction" class="com.something.LoginAction" scope="request"/>
或者可以使用注解@RequestScope来实现
@RequestScope
@Component
public class LoginAction {
    // ...
}
针对每一个Request请求创建一个bean实例,当Request请求处理完成,bean实例被丢弃。
3) Seesion作用域
<bean id="userPreferences" class="com.something.UserPreferences" scope="session"/>
或者可以使用注解@SessionScope来实现
@SessionScope
@Component
public class UserPreferences {
    // ...
}
针对每一个Session会话创建一个bean实例,当Session会话处理完成,bean实例被丢弃。
4) Application作用域
<bean id="appPreferences" class="com.something.AppPreferences" scope="application"/>
或者可以使用注解@ApplicationScope
@ApplicationScope
@Component
public class AppPreferences {
    // ...
}
bean的作用域被设置在ServletContext级别并被存储为ServletContext的属性,每一个ServletContext创建一个bean实例
5) 依赖Web容器作用域bean
如果想把Web容器作用域bean注入到其它生存期更长的作用域中,需要使用注入一个AOP代理来代替Web容器作用域bean。
将Web容器作用域bean注入到单例或者原型bean中,希望针对每个会话或者Request能调用不同的实例,如果不使用代理,则每次调用的实例则不是针对每个会话或者Request的对应实例。
<bean id="userPreferences" class="com.something.UserPreferences" scope="session">
    <aop:scoped-proxy/><!--默认使用CGlib方式生成动态代理类,也可配置JDK接口,使用JDK方式生成动态代理类-->
</bean>
<bean id="userManager" class="com.something.UserManager">
    <property name="userPreferences" ref="userPreferences"/>
</bean>

<!--基于JDK方式生成,必须要有接口-->
<bean id="userPreferences" class="com.stuff.DefaultUserPreferences" scope="session">
    <aop:scoped-proxy proxy-target-class="false"/>
</bean>

<bean id="userManager" class="com.stuff.UserManager">
    <property name="userPreferences" ref="userPreferences"/>
</bean>
(5) 自定义作用域
1) 创建作用域
需要实现org.springframework.beans.factory.config.Scope接口,该接口有四个函数分别如下:
//返回bean实例
Object get(String name, ObjectFactory<?> objectFactory)
//删除bean实例
Object remove(String name)
//注册一个回调,当销毁自定义作用域或者从自定义作用域中销毁bean实例时需要使用
void registerDestructionCallback(String name, Runnable destructionCallback)
//获取自定义作用域的会话标识符
String getConversationId()
2) 使用作用域
创建一个自定义作用域后需要让容器知道该作用域的存在
//该方法在ConfigureableBeanFactory该方法在大多数ApplicationContext的实现中的BeanFactory属性中可获得
void registerScope(String scopeName, Scope scope); //第一个参数是定义的作用域的名称(不重复),第二个参数就是创建的作用域的引用
下面是SimpleThreadScope的使用举例
Scope threadScope=new SimpleThreadScope();
beanFactory.registerScope("thread",threadScope);
在xml中使用
<bean id="..." class="..." scope="thread">
也可以通过CustomScopeConfigurer类进行注册
<?xml version="1.0" encoding="UTF-8"?>
<beans xmlns="http://www.springframework.org/schema/beans"
    xmlns:xsi="http://www.w3.org/2001/XMLSchema-instance"
    xmlns:aop="http://www.springframework.org/schema/aop"
    xsi:schemaLocation="http://www.springframework.org/schema/beans
        https://www.springframework.org/schema/beans/spring-beans.xsd
        http://www.springframework.org/schema/aop
        https://www.springframework.org/schema/aop/spring-aop.xsd">

    <bean class="org.springframework.beans.factory.config.CustomScopeConfigurer">
        <property name="scopes">
            <map>
                <entry key="thread">
                    <bean class="org.springframework.context.support.SimpleThreadScope"/>
                </entry>
            </map>
        </property>
    </bean>

    <bean id="thing2" class="x.y.Thing2" scope="thread">
        <property name="name" value="Rick"/>
        <aop:scoped-proxy/><!--使用此语句会使得factory本身是作用域,而不是getObject()获得的对象是作用域-->
    </bean>

    <bean id="thing1" class="x.y.Thing1">
        <property name="thing2" ref="thing2"/>
    </bean>
</beans>
11. bean定义的继承
bean定义包含很多的配置信息,包括构造器参数、性质值以及特定容器的信息。子bean定义可以继承父bean定义的配置数据,可以覆盖某些值或者是增加一些值。
在使用基于xml的配置时可以使用parent属性,如下所示:
<bean id="inheritedTestBean" abstract="true"
        class="org.springframework.beans.TestBean">
    <property name="name" value="parent"/>
    <property name="age" value="1"/>
</bean>

<bean id="inheritsWithDifferentClass"
        class="org.springframework.beans.DerivedTestBean"
        parent="inheritedTestBean" init-method="initialize">
    <property name="name" value="override"/>
    <!-- the age property value of 1 will be inherited from parent -->
</bean>
注意:子bean定义包含继承作用域,构造函数参数,属性值,方法覆盖以及新添加的值。如果父bean定义没有指定类,则abstract必须等于true,此时父bean定义被作为一个模板使用,无法被实例化,容器内部的preInstantiateSingletons()将会忽略abstract的bean定义。如果父bean定义指定了类,则子类的bean类必须要接受父类的属性值。父bean定义指定的类和子bean定义指定的类在Java中不存在继承关系。


 1086
1086


 被折叠的 条评论
为什么被折叠?
被折叠的 条评论
为什么被折叠?
 到【灌水乐园】发言


