


为了用注解实现spring对容器的管理,在各实现类上加上相应注解:
业务层:
package com.ethan.service.impl;

import com.ethan.dao.AccountDAO;
import com.ethan.service.AccountService;
import com.ethan.domain.Account;
import org.springframework.beans.factory.annotation.Autowired;
import org.springframework.stereotype.Service;

import java.util.List;

/**
 * @author Ethan
 * @date 2020/1/24 - 10:02
 */
@Service("accountService")
public class AccountServiceImpl implements AccountService {

    @Autowired
    private AccountDAO accountDAO;

    public List<Account> findAllAccount() {
        return accountDAO.findAllAccount();
    }

    public Account findAccountById(Integer accountId) {
        return accountDAO.findAccountById(accountId);
    }

    public void saveAccount(Account account) {
        accountDAO.saveAccount(account);
    }

    public void updateAccount(Account account) {
        accountDAO.updateAccount(account);
    }

    public void deleteAccount(Integer accountId) {
        accountDAO.deleteAccount(accountId);
    }
}
持久层:
package com.ethan.dao.impl;

import com.ethan.dao.AccountDAO;
import com.ethan.domain.Account;
import org.apache.commons.dbutils.QueryRunner;
import org.apache.commons.dbutils.handlers.BeanHandler;
import org.apache.commons.dbutils.handlers.BeanListHandler;
import org.springframework.beans.factory.annotation.Autowired;
import org.springframework.stereotype.Repository;

import java.sql.SQLException;
import java.util.List;

/**
 * @author Ethan
 * @date 2020/1/24 - 10:08
 */
@Repository("accountDAO")
public class AccountDAOImpl implements AccountDAO {

    @Autowired
    private QueryRunner runner;

    public void setRunner(QueryRunner runner) {
        this.runner = runner;
    }

    public List<Account> findAllAccount() {
        try {
            return runner.query("select * from account", new BeanListHandler<Account>(Account.class));
        } catch (SQLException e) {
            throw new RuntimeException(e);
        }
    }

    public Account findAccountById(Integer accountId) {
        try {
            return runner.query("select * from account where id = ?", new BeanHandler<Account>(Account.class), accountId);
        } catch (SQLException e) {
            throw new RuntimeException(e);
        }
    }

    public void saveAccount(Account account) {
        try {
            runner.update("insert into account(name, money)values(? ,?)", account.getName(), account.getMoney());
        } catch (SQLException e) {
            throw new RuntimeException(e);
        }
    }

    public void updateAccount(Account account) {
        try {
            runner.update("update account set name=?, money=? where id=?", account.getName(), account.getMoney(), account.getId());
        } catch (SQLException e) {
            throw new RuntimeException(e);
        }
    }

    public void deleteAccount(Integer accountId) {
        try {
            runner.update("delete from account where id=?", accountId);
        } catch (SQLException e) {
            throw new RuntimeException(e);
        }
    }
}
定义一个配置类:

package config;

import com.mchange.v2.c3p0.ComboPooledDataSource;
import org.apache.commons.dbutils.QueryRunner;
import org.springframework.context.annotation.*;

import javax.sql.DataSource;
import java.beans.PropertyVetoException;

/**
 * @author Ethan
 * @date 2020/1/24 - 17:16
 * 该类是一个配置类,它的作用和bean.xml作用是一样的
 * spring中的新注解
 * @Configuration
 * 作用:指定当前类是一个配置类
 * 细节:当配置类作为AnnotationConfigApplicationContext对象创建时该注解可以不写。
 * @ComponentScan
 * 作用:用于通过注解指定spring在创建容器时要扫描的包
 * 属性:value和basePackages的作用是一样的,都是用于指定创建容器时要扫描的包
 * 我们使用此注解就等同于在xml中配置:
 *    <context:component-scan base-package="com.ethan"></context:component-scan>
 * @Bean
 * 作用:用于把当前方法的返回值作为bean对象存入spring的ioc容器中
 * 属性:name用于指定bean的id,默认值为当前方法的名称
 * @Import
 * 作用:用于导入其他的配置类
 * 属性:value用于指定其他配置类的字节码,当我们使用Import的注解之后,有Import注解的类是父配置类,而导入的都是子配置类
 */
//@Configuration
@ComponentScan(basePackages = {"com.ethan"})
public class SpringConfiguration {
    @Bean(name="runner")
    @Scope("prototype")
    public QueryRunner createQueryRunner(DataSource dataSource) {
        return new QueryRunner(dataSource);
    }

    @Bean(name="dataSource")
    public DataSource createDateSource() {
        try {
            ComboPooledDataSource ds = new ComboPooledDataSource();
            ds.setDriverClass("com.mysql.jdbc.Driver");
            ds.setJdbcUrl("jdbc:mysql://localhost:3306/eesy?serverTimezone=GMT%2b8");
            ds.setUser("root");
            ds.setPassword("0000");
            return ds;
        } catch (PropertyVetoException e) {
            e.printStackTrace();
        }
        return null;
    }
}
测试方法:
package com.ethan.test;

import com.ethan.service.AccountService;
import com.ethan.domain.Account;
import config.JdbcConfig;
import config.SpringConfiguration;
import org.junit.Test;
import org.springframework.context.ApplicationContext;
import org.springframework.context.annotation.AnnotationConfigApplicationContext;
import org.springframework.context.support.ClassPathXmlApplicationContext;

import java.util.List;

/**
 * @author Ethan
 * @date 2020/1/24 - 10:37
 * 使用Junit单元测试:测试我们的配置
 */
public class AccountServiceTest {
    @Test
    public void testFindAll() {
        //1.获取容器
        ApplicationContext ac = new AnnotationConfigApplicationContext(SpringConfiguration.class);
        //2.得到业务层对象
        AccountService as = ac.getBean("accountService", AccountService.class);
        //3.执行方法
        List<Account> accounts = as.findAllAccount();
        for (Account account : accounts) {
            System.out.println(account);
        }
    }

    @Test
    public void testFindOne() {
        ApplicationContext ac = new AnnotationConfigApplicationContext(SpringConfiguration.class);
        AccountService as = ac.getBean("accountService", AccountService.class);
        Account account = as.findAccountById(1);
        System.out.println(account);
    }

    @Test
    public void testSave() {
        Account account = new Account();
        account.setMoney(9999f);
        account.setName("Bob");
        ApplicationContext ac = new AnnotationConfigApplicationContext(SpringConfiguration.class);
        AccountService as = ac.getBean("accountService", AccountService.class);
        as.saveAccount(account);
    }

    @Test
    public void testUpdate() {
        ApplicationContext ac = new AnnotationConfigApplicationContext(SpringConfiguration.class);
        AccountService as = ac.getBean("accountService", AccountService.class);
        Account account = as.findAccountById(3);
        account.setMoney(7000f);
        as.updateAccount(account);
    }

    @Test
    public void testDelete() {
        ApplicationContext ac = new AnnotationConfigApplicationContext(SpringConfiguration.class);
        AccountService as = ac.getBean("accountService", AccountService.class);
        as.deleteAccount(4);
    }
}
为了分清配置的父子关系,单独创建一个配置spring连接数据库的配置类:
package config;
import org.springframework.context.annotation.*;
@ComponentScan(basePackages = {"com.ethan"})
@Import(JdbcConfig.class)	//导入指定配置类
public class SpringConfiguration {

}
jdbc配置类:
package config;

import com.mchange.v2.c3p0.ComboPooledDataSource;
import org.apache.commons.dbutils.QueryRunner;
import org.springframework.beans.factory.annotation.Value;
import org.springframework.context.annotation.Bean;
import org.springframework.context.annotation.Scope;

import javax.sql.DataSource;
import java.beans.PropertyVetoException;

/**
 * @author Ethan
 * @date 2020/1/24 - 17:59
 * 和spring连接数据库相关的配置类
 */

public class JdbcConfig {
    @Bean(name="runner")
    @Scope("prototype")
    public QueryRunner createQueryRunner(DataSource dataSource) {
        return new QueryRunner(dataSource);
    }

    @Bean(name="dataSource")
    public DataSource createDateSource() {
        try {
            ComboPooledDataSource ds = new ComboPooledDataSource();
            ds.setDriverClass("com.mysql.jdbc.Driver");
            ds.setJdbcUrl("jdbc:mysql://localhost:3306/eesy?serverTimezone=GMT%2b8");
            ds.setUser("root");
            ds.setPassword("0000");
            return ds;
        } catch (PropertyVetoException e) {
            e.printStackTrace();
        }
        return null;
    }
}
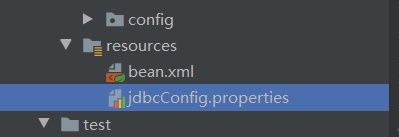
进一步改进该类,在resources下创建jdbcConfig.properties文件:
配置如下:
jdbc.driver=com.mysql.jdbc.Driver
jdbc.url=jdbc:mysql://localhost:3306/eesy?serverTimezone=GMT%2b8
jdbc.username=root
jdbc.password=0000
jdbcConfig类改写如下:
package config;

import com.mchange.v2.c3p0.ComboPooledDataSource;
import org.apache.commons.dbutils.QueryRunner;
import org.springframework.beans.factory.annotation.Value;
import org.springframework.context.annotation.Bean;
import org.springframework.context.annotation.Scope;

import javax.sql.DataSource;
import java.beans.PropertyVetoException;

/**
 * @author Ethan
 * @date 2020/1/24 - 17:59
 * 和spring连接数据库相关的配置类
 */

public class JdbcConfig {
    @Value("${jdbc.driver}")
    private String driver;

    @Value("${jdbc.url}")
    private String url;

    @Value("${jdbc.username}")
    private String username;

    @Value("${jdbc.password}")
    private String password;

    @Bean(name="runner")
    @Scope("prototype")
    public QueryRunner createQueryRunner(DataSource dataSource) {
        return new QueryRunner(dataSource);
    }

    @Bean(name="dataSource")
    public DataSource createDateSource() {
        try {
            ComboPooledDataSource ds = new ComboPooledDataSource();
            ds.setDriverClass(driver);
            ds.setJdbcUrl(url);
            ds.setUser(username);
            ds.setPassword(password);
            return ds;
        } catch (PropertyVetoException e) {
            e.printStackTrace();
        }
        return null;
    }
}
为了让该类找到配置文件,在SpringConfiguration中添加如下注解:
package config;
import org.springframework.context.annotation.*;

/**
 * @PropertySource
 * 作用:指定properties文件的位置
 * 关键字:classpath表示类路径下
 */
@ComponentScan(basePackages = {"com.ethan"})
@Import(JdbcConfig.class)
@PropertySource("classpath:jdbcConfig.properties")  //classpath标明是类路径
public class SpringConfiguration {

}
Junit不会管我们是否采用spring框架,所以也就不会为我们读取配置文件/配置类创建spring核心容器。
当测试方法执行时,没有IOC容器,就算写了Autowired注解,也无法注入。
Spring整合Junit的配置
- 导入spring整合junit的jar(坐标)
- 使用junit提供的一个注解把原有的main方法替换了,替换成spring提供的:@Runwith
- 告知spring的运行器,spring的ioc创建是基于xml还是注解,并且说明位置:@ContextConfiguration
Locations:指定XML文件的位置,加上classpath关键字,表示在类路径下
classes:指定注解类所在位置
导入坐标:
        <dependency>
            <groupId>org.springframework</groupId>
            <artifactId>spring-test</artifactId>
            <version>5.0.2.RELEASE</version>
        </dependency>
添加注解:
package com.ethan.test;

import com.ethan.service.AccountService;
import com.ethan.domain.Account;
import config.SpringConfiguration;
import org.junit.Test;
import org.junit.runner.RunWith;
import org.springframework.beans.factory.annotation.Autowired;
import org.springframework.test.context.ContextConfiguration;
import org.springframework.test.context.junit4.SpringJUnit4ClassRunner;

import java.util.List;

/**
 * @author Ethan
 * @date 2020/1/24 - 10:37
 */
@RunWith(SpringJUnit4ClassRunner.class)
@ContextConfiguration(classes = SpringConfiguration.class)
public class AccountServiceTest {
    @Autowired
    private AccountService as;

    @Test
    public void testFindAll() {
        List<Account> accounts = as.findAllAccount();
        for (Account account : accounts) {
            System.out.println(account);
        }
    }

    @Test
    public void testFindOne() {
        Account account = as.findAccountById(1);
        System.out.println(account);
    }

    @Test
    public void testSave() {
        Account account = new Account();
        account.setMoney(9999f);
        account.setName("Bob");
        as.saveAccount(account);
    }

    @Test
    public void testUpdate() {
        Account account = as.findAccountById(3);
        account.setMoney(7000f);
        as.updateAccount(account);
    }

    @Test
    public void testDelete() {
        as.deleteAccount(4);
    }
}


 793
793


 被折叠的 条评论
为什么被折叠?
被折叠的 条评论
为什么被折叠?
 到【灌水乐园】发言


